

Battlestar Galactica: Scattered Hopes drops you into a roguelite where the Cylons never stop coming and every fight is a race against an FTL clock. Developed by French studio Alt-Shift (the team behind Crying Suns) and released on May 11, 2026, this real-time-with-pause strategy game demands a fundamentally different mindset than most combat games. You are not here to win battles. You are here to survive them long enough to jump away.
What is the core combat objective in Scattered Hopes?
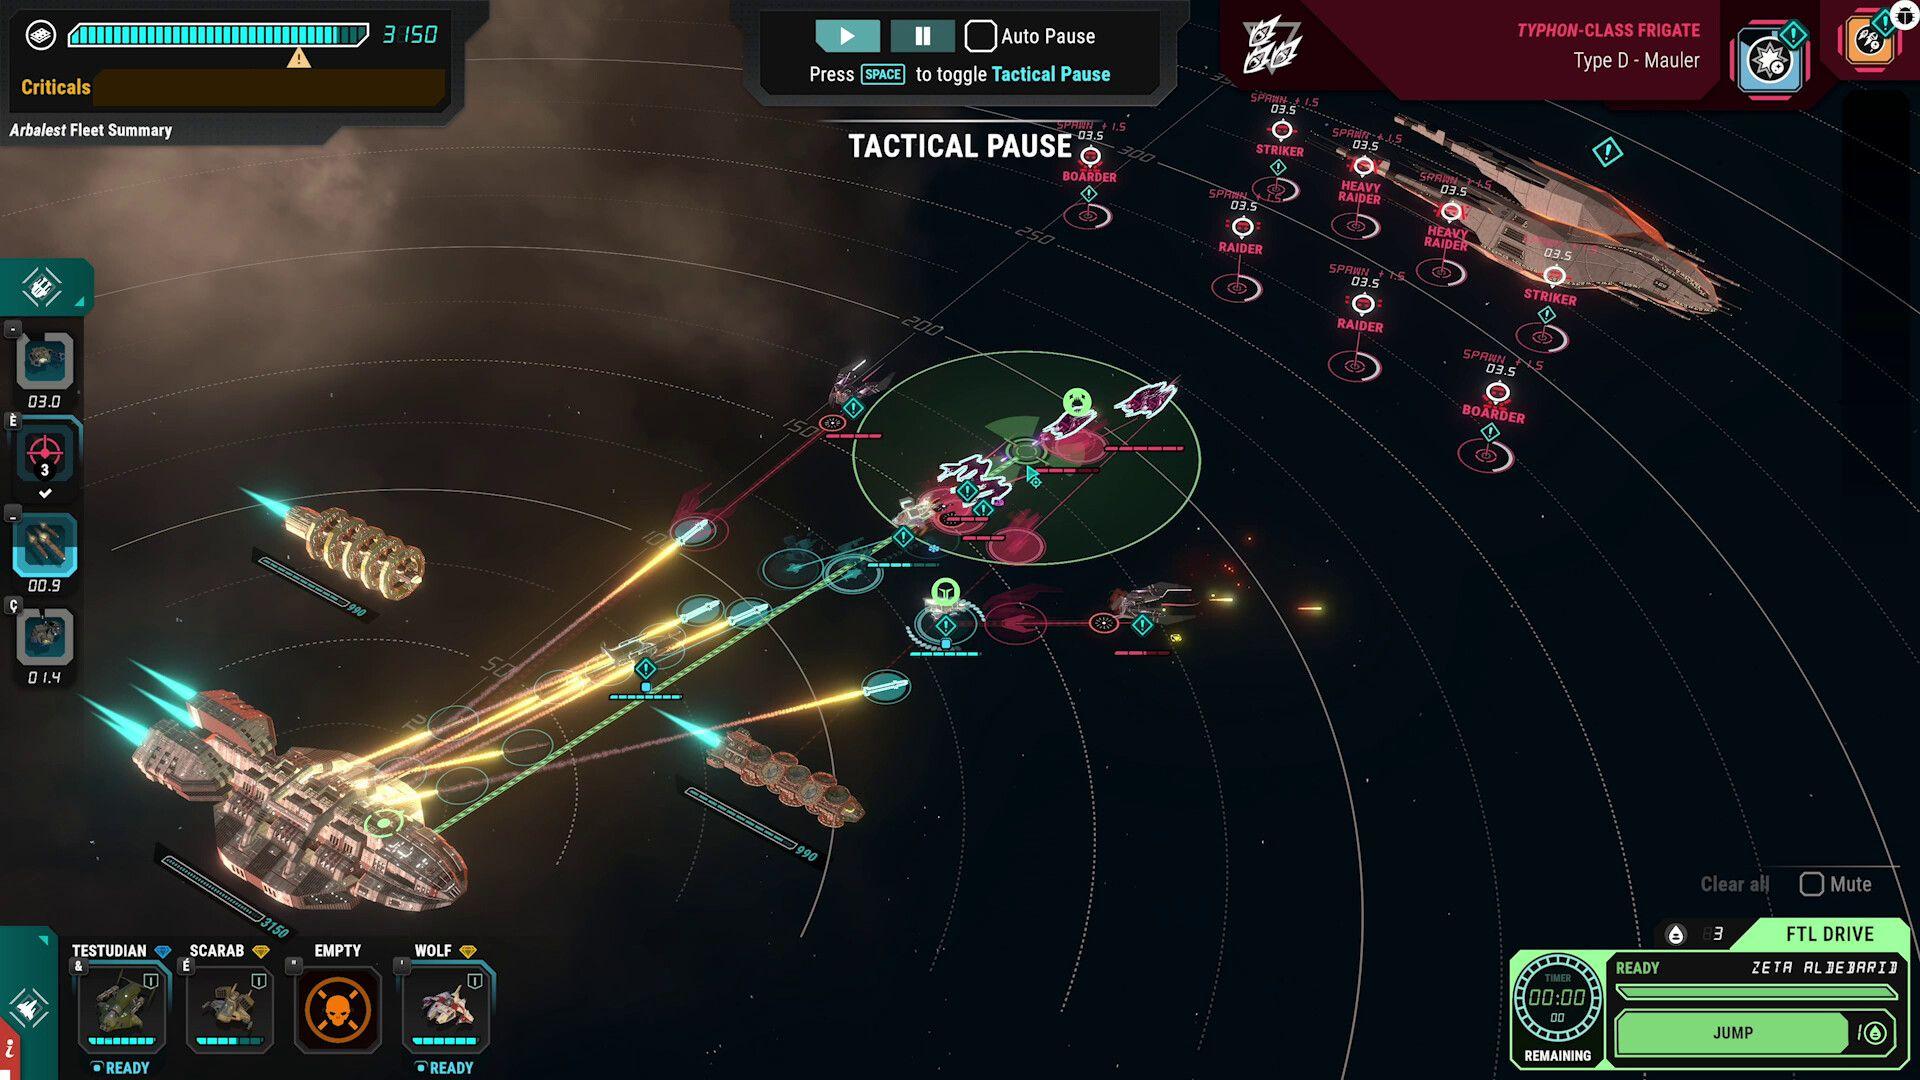
The answer is simpler than it looks: keep the fleet alive until the FTL calculation finishes, then jump. Most standard battles run on roughly a 2-minute timer. The Cylons throw endless waves at your Gunstar and deployed civilian ships, and your job is triage, not annihilation.
The mindset shift that separates surviving players from struggling ones is this: kill only what threatens the fleet, and ignore what does not stop your jump. Chasing enemies to the edge of the map while your civilian ships take boarder hits is the single most common way to lose a run that felt winnable.
Think of each standard battle in three windows:
The last 30 seconds are the most dangerous window, because the temptation to keep fighting is strongest exactly when you should be pulling back.
Tactical pause is not an emergency button. It is the normal way to play. Pause every time a Dradis preview appears, a nuke launches, or a boarder spawns. If you only pause after damage lands, you are already too late.
How do squadron roles work?
Your Gunstar carries up to 9 squadrons, but only 4 can be deployed at once (5 if you are running the Ares class). Each squadron type has a distinct job, and confusing them wastes their value.
Viper: fast interception
The Viper is your answer to anything that moves fast or needs to die quickly. Nukes, snipers, missiles, and raiders trying to flank around your defense are all Viper targets. The Hunter Instinct ability lets Vipers auto-chase nearby targets, which is fine for cleaning up small raider packs. Take manual control the moment a nuke appears, a boarder spawns, or the Viper starts drifting too far from the fleet.
Raptor: long-range coverage
The Raptor is slower and loses most of its value if you drag it around constantly. Place it early, before the wave spawns, at an angle that covers the widest enemy approach path. Let the Viper chase while the Raptor anchors. If your Raptor is always arriving after enemies have already hit your ships, you are using it reactively instead of proactively.
Wolf: tanking and taunt
The Wolf earns its place when enemies are already pressuring civilian ships or when your Viper is too fragile to absorb hits. Its taunt effect redirects enemy attention away from fragile targets. Keep it near the fleet core rather than sending it on long-range pursuits.
What should you target first in combat?
When the battlefield gets chaotic, use this priority order (sourced from the GameStrategyHub combat guide):
The biggest beginner mistake is attacking the Cylon Basestar while nukes and boarders are still active. Basestar damage only matters if your fleet survives the wave.
Boarders look less immediately dangerous than nukes, but the damage they cause carries into the fleet management phase. A boarder that reaches a civilian ship can trigger crises you will be dealing with for multiple sectors.
How do Gunstar weapons work?
Flak is your area-control tool. It performs best against grouped low-hull enemies flying through a predictable path. Wasting flak on a single isolated target is almost always wrong. Nukes are emergency tools, not openers. Use them when a heavy or dense wave would cause critical damage to the fleet, not on waves your Viper and Raptor already have covered.
A normal jump costs 1 Tylium. An Emergency Jump costs 4 Tylium, based on early-run examples documented in the GameStrategyHub combat guide. That cost difference matters a lot when Tylium is tight. Use Emergency Jump only when the Gunstar is about to die, a key civilian ship is seconds from destruction, or your squadrons are too wrecked to hold another wave. Critically, Emergency Jump is not always available. Boss battles and some special encounters disable it entirely, so never build your survival plan around it.
How to beat The Clerk (first Basestar boss)
The Clerk commands the Polyphemus Basestar and is the first major boss wall in most runs. The mistake most players make is treating this fight like an extended escape battle where Emergency Jump is available as a fallback. It probably is not.
The Clerk compresses the fight by throwing nukes, snipers, strikers, and large waves before your normal rhythm settles. The answer is not more damage into the Basestar. It is tighter target priority and fewer leaks into your civilian ships.
The Clerk preparation checklist
Arrive at The Clerk's sector with all of the above in place. If you are low on Tylium, missing squadrons, or have civilian ships near critical health thresholds, the fight may already be decided before the first wave spawns.
The three major Basestar bosses are The Clerk (Polyphemus), The Philosopher (Sphinx), and The Minister (Hyperion). Each one escalates the pressure and punishes builds that only survived earlier sectors by improvising. Preparation matters more with every subsequent boss.
How do later bosses change the fight?
The Philosopher and The Minister introduce fight-specific rules that punish generic survival play. Before spending any nukes or overextending squadrons, check the boss modifier first.
The later the boss, the more the pre-battle preparation phase determines the outcome. This is a strategy game at its core, and the fleet management decisions you make between sectors shape what you can actually do when the Cylons show up in force.
What are the most common combat mistakes?
Squadrons left outside the Gunstar during an FTL jump can be wrecked. They may not be permanently lost, but repairing them costs resources you need for the next sector.
Use this safe FTL exit sequence: pause at 20–30 seconds remaining, kill the closest immediate threat, stop chasing distant enemies, recall damaged or far squadrons, keep one weapon ready for a last-second missile, then jump. Do not wait for a clean battlefield. It almost never arrives.
Recall, jump, repeat
Every run in Scattered Hopes is built on the same loop: manage the fleet between sectors, survive the combat phase long enough to jump, and carry whatever you earned into the next sector. The combat system rewards players who accept that escape is the goal, not victory. Protect your civilian ships, read the Dradis previews, and get your squadrons back inside before the FTL fires.
For deeper coverage of the systems that feed into combat preparation, including Tylium management, faction relations, and the Cylon infiltrator investigation, check the full Battlestar Galactica: Scattered Hopes guides collection.