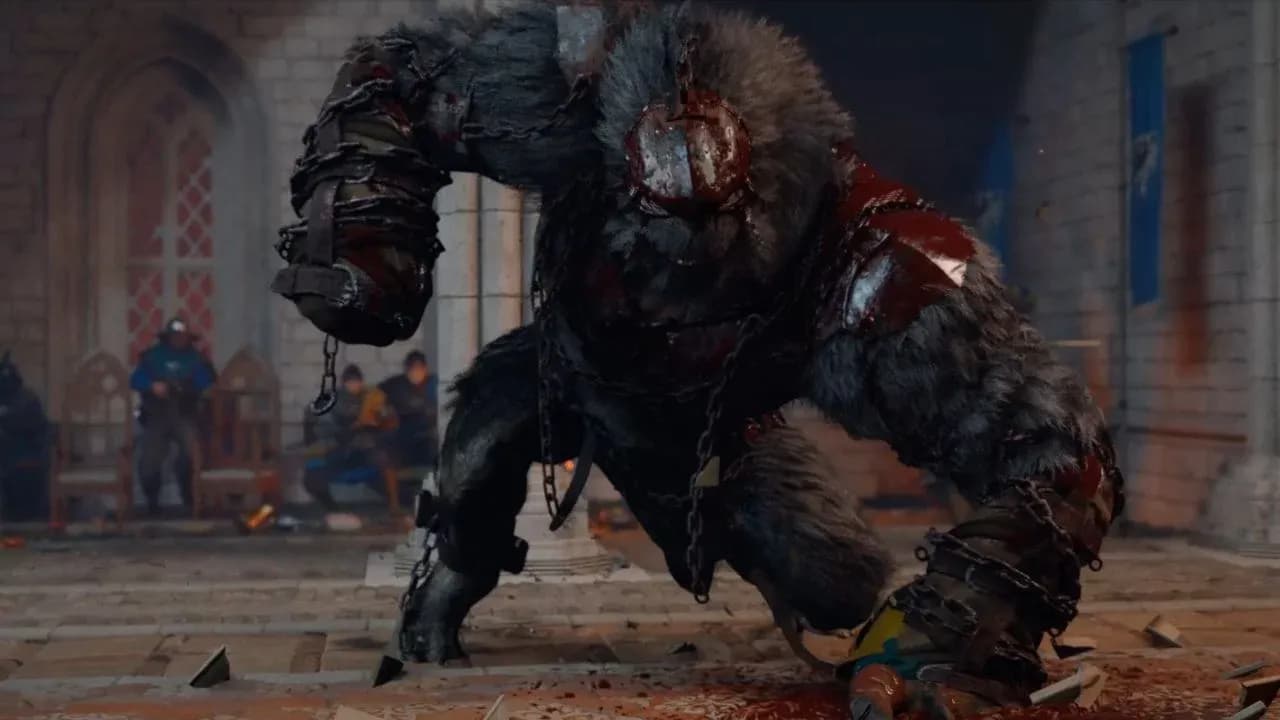

Kearush the Slayer is the Chapter 5 boss that has been stopping players cold since Crimson Desert launched. This massive orc-like brawler crashes a royal banquet at Hernand Castle, and his three health bars, relentless combo chains, and grab attacks make him one of the hardest walls you will hit in the early game. The good news: there are clear, repeatable strategies that work. Here is everything you need to know to put him down.
What to Bring Before Fighting Kearush?
Preparation matters more here than in most early-game fights. Going in underprepared means burning through your healing items before phase 2 even starts.
- Upgrade your weapons and armor to at least Level 4 at the Blacksmith. Higher damage shortens the fight, and better armor reduces the chance that one combo deletes your health bar.
- Stock healing items. Soups cooked from ingredients at a cooking pot are the most accessible option. Bring more than you think you need.
- Fire weapons or fire spears are the single best tool in this fight. Kearush has a fire weakness, and hitting him with flame damage causes him to roll around, creating a long opening. Fire spears can be found as drops from enemies in a nearby quarry, though supply is limited since enemies there do not respawn indefinitely. Getting your hands on even one or two can dramatically change the fight.
- Avoid relying on parries. Kearush is a brawler, and his attack timing does not reward parry attempts. Evasive dodge rolls are far more reliable throughout all three phases.
Crimson Desert Boss Guide: How to Beat Kearush the Slayer
How to Use Back Hang
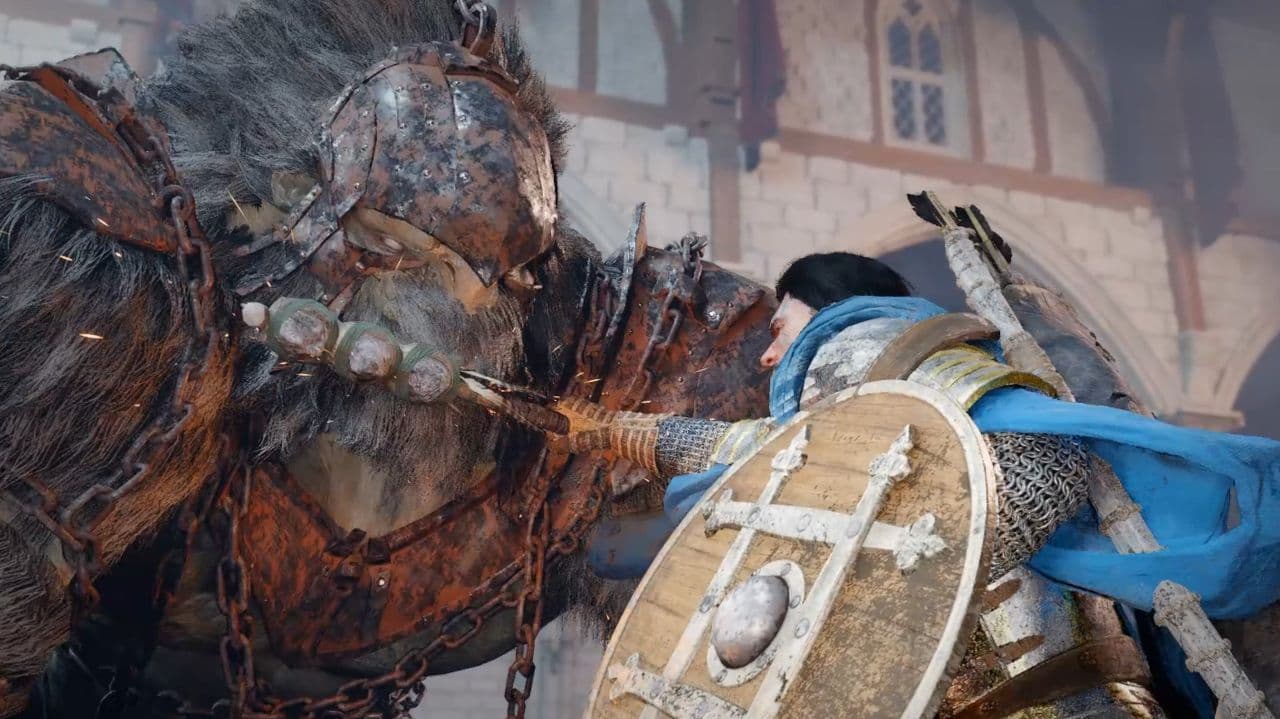
The single most effective skill in this fight is Back Hang, which sits at the final tier of the Grappling skill tree. If you have not unlocked it yet, do so before attempting this boss. Back Hang lets you mount certain large enemies from the side or rear and deliver repeated stab damage while staying out of reach of most of his attacks.
The skill has one key restriction: it only activates after an enemy attack, not on demand. You need to position yourself at Kearush's side or back before triggering it. Trying to use it from the front will not work. Once you are in position post-attack, the damage per stab is substantial and lets you chip his health without standing in front of his fists.
How to Beat Kearush
Phase 1: Blue health bar
This phase is the most forgiving. Kearush's move set is limited to ground slams and charge attacks, typically in patterns of 3 to 4 hits. The rhythm here is simple: dodge backward through his combo, then step in for a few strikes once he pauses.
- After a three-fist charge slam, Kearush holds still briefly. That pause is your main damage window.
- He will occasionally step backward in what looks like an intimidation stance. Follow him and land hits during that movement.
- Stay patient. Trying to trade hits mid-combo will get you killed.
Crimson Desert Boss Guide: How to Beat Kearush the Slayer
Phase 2: Green health bar
Phase 2 introduces two new attacks that change the fight significantly.
Body Slam (wall jump): Kearush leaps to a wall, clings momentarily, then crashes down toward your position. The dodge timing is generous. Roll in any direction once he launches off the wall, not when he is in the air. Landing this dodge gives you a clean window to use Back Hang for a large chunk of damage.
Immunity flurry: Kearush smacks his chest and enters a brief immunity phase, then unleashes a rapid punch flurry capped with a slam. Trying to attack through this is not worth it. Spam dodge rolls away from him until the sequence ends. Attempting to jump onto his back during this window is possible but risky. Testing shows the evasion route is more consistent than trying to mount him mid-flurry.
Kearush can also lunge forward to grab you and throw you across the arena. If you see him lunge, dodge left or right immediately.
Phase 3: Red health bar
Phase 3 is where most players lose. Kearush runs through everything from phases 1 and 2 but faster, with longer combo strings replacing the standard 3-hit patterns. He grabs more frequently, throws you more aggressively, and enters immunity phases more often.
The only reliable approach here is strict patience. Attack only after he completes a combo, not during it. Save your remaining healing items for this phase specifically, since the damage output is high enough that a single misread can take you from full health to near-dead.
The flying body slam from phase 2 remains your best damage window. The dodge timing does not change, and the Back Hang follow-up still connects cleanly.
What does Kearush drop?
Defeating Kearush rewards three items:
- The Grove's Thorn (One-Handed Weapon)
- Gale I (Abyss Core)
- Howling of Chaos (Abyss Core)
The two Abyss Cores are particularly valuable for character progression, making this fight worth the effort beyond just story advancement.
For more Crimson Desert boss guides and tips, browse the latest gaming guides at GAMES.GG to keep your playthrough moving forward.