
The Abyss Without Balance quest is one of the trickiest early roadblocks in Crimson Desert, and the final activation step catches nearly every player off guard. You've punched the Abyss Cell into the wall, the big wheel is glowing, and then... nothing obvious happens. This guide walks you through every step of this first Abyss puzzle from the skybridge all the way to collecting your Abyss Artifact and unlocking gliding, so you can push straight into Chapter 2 without losing time.
How Does the Abyss Without Balance Quest Begin?
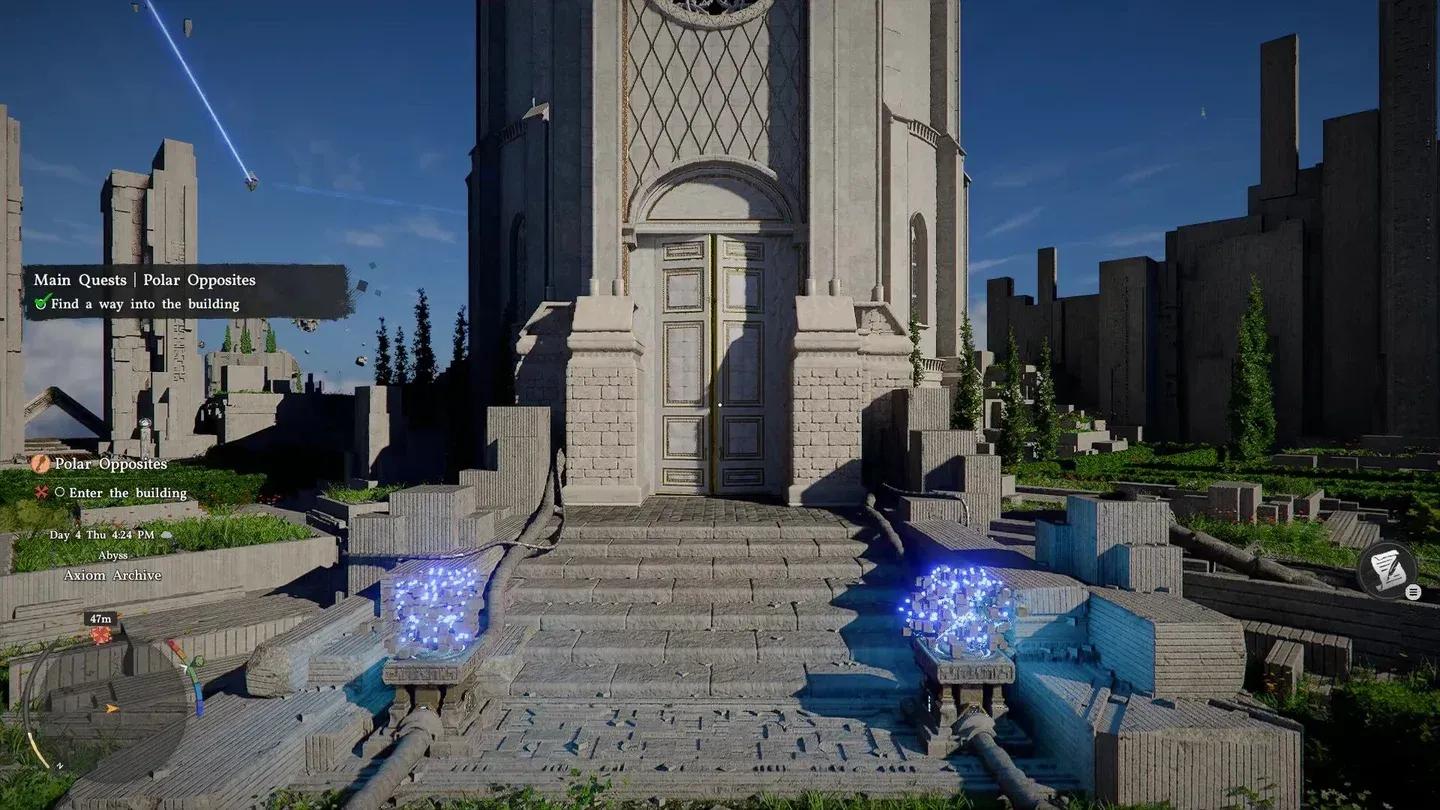
Abyss Without Balance is the 12th main mission in Crimson Desert and triggers automatically once you complete Polar Opposites. You'll spawn outside the Axiom Archive building in the Hernand region. Head through the triangular gate directly ahead and you'll immediately spot an alignment device on a pillar at the edge of the path.
Grab the glowing dial using Axiom Force (Tab on PC, L3 on controller) and slowly rotate it with your mouse or the D-Pad. You're listening for a high-pitched click, watching for the glow to shift, or feeling your controller vibrate more intensely. The moment it locks in, a skybridge materializes and gives you a path forward.
Don't spin the dial too fast. Rotate slowly and stop the moment you hear the audio cue or feel the vibration change. Overshooting the sweet spot means rotating all the way back around.
How to Get Through the Platforming Section
Once the skybridge is up, you've got a linear but occasionally tricky platforming stretch before the real puzzle begins. A few things worth knowing:
- Use Precise Jump on narrow platforms by holding LB (controller) to aim your landing before committing. It's far more reliable on smaller floating surfaces.
- Slow-moving platforms look like dead ends but they're actually on their way to you. Some take close to a minute to arrive, so wait before attempting any risky jumps.
- Climb anything that looks out of reach by running at it, jumping, and pressing Space (PC) to grab the wall and pull yourself up. Most surfaces in Crimson Desert are climbable.
Keep moving until you reach a large floating island featuring ancient machinery, trees arranged in a ring, and a central pit. This is the Ethereal Pathway, the actual arena for the Abyss Without Balance puzzle.
Step 1: Activate the Abyss Nexus
The first thing to do when you land on the Ethereal Pathway is find the pedestal on the ground and step on it to register the Abyss Nexus fast travel point. This is critical because it means you can teleport back here without replaying all that platforming if something goes wrong later.
Always activate Abyss Nexus points the moment you see them. Skipping this step and dying later forces a full repeat of the approach.
Step 2: Move the Floating Power Core
Your first objective reads: "Move the floating power core to the deactivated lantern." Spot the floating blue cube hovering in the center of the area. On the right side stands a lantern structure shaped like a cube with square holes on each face.
Use Axiom Force (Tab on PC, L3 on controller) to grab the blue cube and walk it toward the lantern. Precision isn't required here. Once the cube gets close enough, an animation triggers and it snaps into position automatically. The invisible wall blocking the floor below disappears and you drop down into the lower puzzle area.
Moving the power core into place
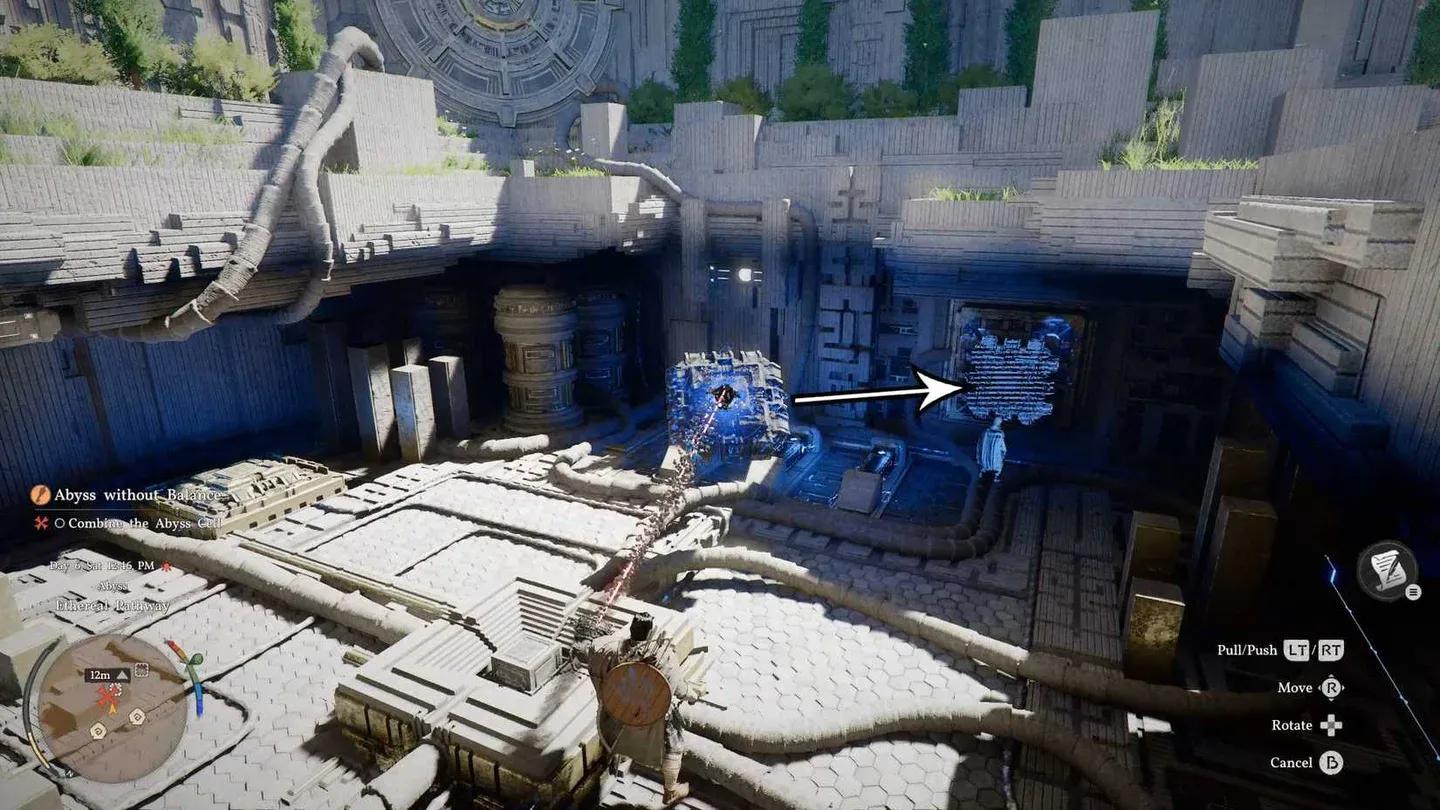
Step 3: Combine the Abyss Cell
Down in the pit, your objective shifts to "Combine the Abyss Cell." Find the second floating blue square in this lower area and grab it with Axiom Force. Carry it toward the matching slot on the wall near the three sparking battery units.
You can rotate the cell using your mouse scroll wheel on PC (hold Ctrl and scroll for finer control) or the D-Pad on controller. Line up the flat face toward you and position it roughly in front of the slot. The alignment doesn't need to be exact because you'll force it in during the next step. Rotation controls are displayed in the bottom-right corner of your screen if you need a reminder.
Before you can lock it in, you need a new skill. Look for a ghost silhouette, a child-like hologram standing near the wall slot. Walk up to it and press Ctrl (PC) or L1/LB (controller) to Observe. You'll see "Learning in Progress" appear in the top-left of your screen.
Do NOT move your camera while the learning animation plays. Panning the camera can interrupt the process and force you to start the observation over. Stand still and watch the ghost complete the skill demonstration.
Once the sequence finishes, you permanently unlock Force Palm, a force push ability used to slam objects into slots and activate mechanisms throughout the game.
Step 4: Punch the Abyss Cell Into the Slot
With Force Palm unlocked, step back from the cell to give yourself a bit of space, then face the flat side of the Abyss Cell. Hold Middle Mouse Button (PC) or R3 (controller) to charge Force Palm, then release to slam it in.
When it connects correctly, Kliff drives the cell into the slot, the wall lights up, and the large circular device above starts glowing. A lot of players assume the puzzle is done at this point. It isn't. There's one final step, and it's where most people get stuck.

Force Palm slam into the slot
How to Activate the Abyss Power Supply
This is the section that trips up the majority of players. Your objective updates to "Activate the Abyss power supply" and points at the big glowing 8-point circular wheel above you. Here's exactly what to do:
The recoil from Force Palm will throw you straight back down into the pit. That's not a failure state. The circular device shifts from a golden glow to blue, the mechanism fully activates, and a cube spawns at the very top of the structure. Climb out one more time and head up to claim your Abyss Artifact.
After grabbing the artifact, a cutscene plays and you respawn at the start of the puzzle area. Turn around immediately. The NPC White Crow is standing right behind you. Talk to her to trigger the final cutscene and complete the Abyss Without Balance quest.
What Are the Abyss Without Balance Quest Rewards?
Finishing this puzzle delivers some of the most important tools you'll use for the rest of Crimson Desert:
- Abyss Artifact: A key item for unlocking new skills. Every Abyss puzzle in the game drops one, so always prioritize finding them.
- Force Palm (permanent): Stays with you forever. Used to activate mechanisms, slam objects, and even gain vertical height when fired mid-jump in later puzzles.
- Gliding / Wings: After speaking with White Crow, you unlock the ability to glide from any height. Press X (PlayStation) or Square (Xbox) mid-air to deploy your wings. This fundamentally changes how you explore the vertical world of Pywel.
- Chapter 2 unlocked: Completing this quest closes out Chapter 1: The First Encounter and opens Chapter 2: Golden Greed, expanding both the story and the explorable world.
For more help across every chapter and system in the game, browse more guides on GAMES.GG to keep your progress moving.