

Final Fantasy XIV patch 7.45 brings back variant dungeons in a big way with The Merchant's Tale, a level 90 duty set inside a magical enchanted book. You play bodyguard to Y'nazqha, one of Y'shtola's sisters, as she steps into the pages of a Corvosi fable in search of treasure of immeasurable worth. With 13 distinct routes, four bosses, and a secret encounter that requires a specific ritual to unlock, this is one of the most replayable pieces of side content in Dawntrail.

Choose your path wisely
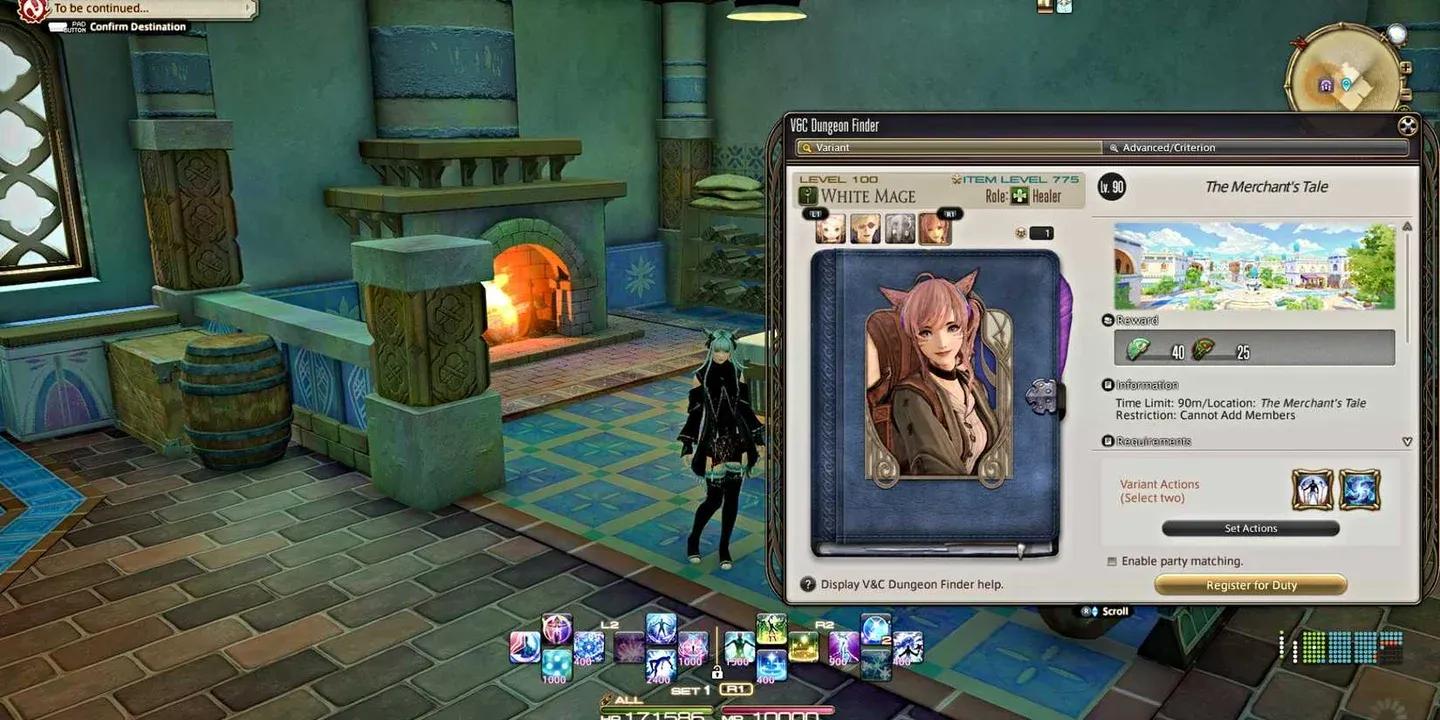
How Do You Unlock The Merchant's Tale in FFXIV?
Before you can step into the storybook, you need to meet a few prerequisites and pick up the right quest.
Prerequisites:
- Complete the main scenario quest "Endwalker"
- Speak with Osmon in Old Sharlayan (X: 11.9, Y: 13.3)
- Have a level 90 combat job equipped
Once those are satisfied, head to Old Sharlayan (X: 12, Y: 13.5) and speak with Shallow Moor to accept the "A Spellbinding Read" sidequest. This quest introduces you to Y'nazqha and walks you through an initial run of the dungeon. After completing that first run, you can re-queue through the V&C Dungeon Finder tab found under the Duty menu.
What Are the Three Primary Routes?
Every run begins at the Font of Paths, where your party votes on which direction to take. There are three primary routes, each containing four distinct paths based on choices and interactions made along the way. A 13th secret path branches off from the Market route.
The choice between the apple path and the other path on the Residential route determines whether you face the Genie of the Lamp or Rukhkh first, but this has no impact on which Corvosi Folklore Record gets completed.
All 13 Corvosi Folklore Records: Step-by-Step
Residential Route: Records 1-4
These four paths all end with the Bewitching Flame: Pari of Plenty as the final boss. The branching happens after the first boss, at the Jealous Slope area.
Record 1: A Land of Abundance
- Take the left path at the Font of Paths.
- Choose either the apple path or the other way (no impact on the Record).
- After defeating the first boss, interact with the damaged fence near the personal spoils coffer.
- Follow the unlocked path to a bird's nest. Wait for the Willful Wind to appear and attack it before it finishes casting Flee, protecting the chicks.
- Complete the dungeon normally.
Record 2: A Carpet Soars
- Take the left path.
- Choose either apple path option.
- After the first boss, interact with the damaged fence and go through.
- This time, do not attack the Willful Wind. Let it steal the apple and fly off.
- Complete the dungeon normally.
Record 3: A Foe of Flame
- Take the left path.
- Choose either apple path option.
- After the first boss, ignore the damaged fence entirely. Follow the main path through the gate.
- Near the palace doors, find the two Airy Wisps. Before killing them, position near the crumbling stone railing on the left side of the doors. Let the Wisps cast Ancient Aero on you so the AoE breaks the railing.
- Take the newly opened path and complete the dungeon.
Record 4: Fragrant Fruits
- Take the left path.
- Choose either apple path option.
- After the first boss, ignore the damaged fence. Take the main path.
- Kill the Airy Wisps normally without breaking the stone railing.
- Complete the dungeon normally.
Market Route: Records 5-8
These paths all end with Shattering Siren: Darya the Sea-maid. After the first boss, Y'nazqha asks whether to follow the seaweed or take a stroll along the beach.
Record 5: The Sunlit Expanse
- Take the right path.
- When Y'nazqha prompts you, choose "The seaweed won't steer us wrong."
- Find the Yawning Maw (a purple goobbue). Position so that its Inhale conal AoE sucks up all four colorful rock piles on the ground before you kill it.
- Complete the dungeon normally.
Record 6: Treasure at the Ocean's Floor
- Take the right path.
- Choose "The seaweed won't steer us wrong."
- Kill the Yawning Maw before it inhales all the rocks. Even one rock pile remaining is enough.
- Complete the dungeon normally.
Record 7: Rule of the Radiant Sea
- Take the right path.
- Choose "I fancy a stroll along the beach."
- In the Seven-shade Sands area, find the Giant Conch Shell on the north side near the two Shell Dwellers and interact with it.
- Complete the dungeon normally.
Record 8: The Ocean's Bounty
- Take the right path.
- Choose "I fancy a stroll along the beach."
- Do not interact with the Giant Conch Shell. Pass it by and head straight to the boss.
- Complete the dungeon normally.
Gate Route: Records 9-12
These paths all end with Fang of the Lion: The Lone Swordmaster. After the first boss, Y'nazqha offers a choice between mushrooms and floating rocks.
Record 9: Valley of Extremes
- Take the middle path.
- When prompted, choose "Let the mushrooms guide us true!"
- Inside the Passage of Earth cavern, the Stone Puppet golem will mark the tank with a purple AoE called Magnetic Rock. Lead it near each of the three spiked rock clusters so the AoE hits them. Each cluster will glow purple when activated.
- After all three clusters are charged, a message reading "The magnetism of the atmosphere shifts..." appears. Proceed to the boss.
Record 10: A Blade Engraven
- Take the middle path.
- Choose "Let the mushrooms guide us true!"
- Kill the Stone Puppet normally without letting its Magnetic Rock AoE hit any of the three rock clusters.
- Complete the dungeon normally.
Record 11: Master of the Unyielding Blade
- Take the middle path.
- Choose "Floating rocks warrant a closer look."
- In the Passage of Sky area, find the three glowing rocks protruding from platforms. As a party, stand near each one until it charges up fully. Note that the upper rock requires taking a path on the west side of the room to reach.
- Once all three glow and "The magnetism of the atmosphere shifts..." appears, proceed to the boss.
Record 12: In a Harsh Nature
- Take the middle path.
- Choose "Floating rocks warrant a closer look."
- Do not charge any of the three large rocks in the Passage of Sky. Kill enemies away from them.
- Complete the dungeon normally.
Secret Route: Record 13 — The Eye of the Beholder
This is the most involved path in the dungeon and the only way to encounter the Midnight Maw: The Deadly Dandan.
- Take the right path at the Font of Paths.
- Choose "The seaweed won't steer us wrong."
- Before reaching the usual boss arena, turn right and enter the Shimmering Stage, a circular platform.
- Perform the /bow emote on the platform. Five colored panels will appear.
- In say chat, type exactly: "I am returned!" The panels will light up with shapes.
- Step on the panels in this specific order: Coral (green) → Conch (purple) → Starfish (pink/magenta) → Pearl (blue).
- A secret bridge will open. Follow it and defeat the Deadly Dandan.
Boss Overview: What Mechanics Change Per Route?
Every boss in The Merchant's Tale shares a core set of mechanics but gains unique additional abilities depending on which specific path you took to reach them. Here is a breakdown of each encounter.
Genie of the Lamp
Encountered as the first boss on all Market routes and on Residential routes where you skipped the apple path. Key mechanics include:
- Fabulous Firecrackers: The glowing arm does a half-room cleave; the non-glowing arm does a 60-degree conal. Stand on the non-glowing side away from center.
- Spectacular Sparks: Two sets of cannons fire alternating line AoEs. Start in front of the second set and rotate into the first after it fires.
- A Sailor's Tale + Chart Course: Three airship lanes appear with glowing paths. The boss tethers a switch on one outer lane, forcing that airship straight. Only one safe spot remains after Chart Course.
- Fanning Flame: Two sets of alternating conal AoEs. Start in the second set and rotate into the first.
The middle phase changes based on your route. On the Residential route, expect Pyromagicks (exaflare-style AoEs combined with a frontal Lamp Lighting cast). On the Market route, the outcome depends on whether the Blue Bomb enemies hit the large rock formation before the boss room.
Rukhkh
Encountered as the first boss on all Gate routes and on Residential routes where you followed the apple path. Core mechanics:
- Sphere of Sand + Sandplume + Sand Burst: Three sand balls spawn in a triangle. Conal AoEs determine which balls become enlarged. All balls then explode, with enlarged ones covering far more area.
- Banishing Mist: Makes the boss or the sand balls invisible. Track positions carefully before they vanish.
- Biting Scratch: Massive frontal conal AoE. Get to the boss's sides or rear.
On the Gate route, the thieves from earlier in the dungeon return during this fight and throw proximity-damage bombs. Arrows on screen warn you of incoming boulders rolling down the cliffs.
Pari of Plenty (Residential Final Boss)
The arena gains a bleeding AoE border shortly after the pull. Key mechanics:
- Fireflight + Sun Circlet: The boss dashes along three telegraphed lines, then immediately casts a room-wide donut AoE. Chase her ending position during the dash to stay safe.
- Left/Right Fireflight: Two/Three/Four Nights: A sweeping half-room cleave that rotates. If the second arrow matches the first, swap sides. If it's the opposite color, stay put.
- Charming Baubles: A plus-shaped AoE from a red gem, often combined with other mechanics.
The route-specific phase varies between a bird ally helping clear adds (Record 1), a bird chasing a spirit across the arena (Record 2), a moving tornado (Record 3), or a shell game with magic carpets hiding gems (Record 4).
Lone Swordmaster (Gate Final Boss)
The arena gains a bleeding AoE border. The defining mechanic of this fight is Malefic Quartering:
- Each player receives a debuff marking one (or later two) quadrants of a fixed directional circle around them as vulnerable. Getting hit by a directional AoE from a red quadrant deals massive damage.
- Will of the Underworld: Half-room directional cleaves. Position so your red quadrant does not face the AoE's origin point.
- Crusher of Lions: Four 90-degree directional AoEs from the center. Same logic as above.
- Unyielding Will: An L-shaped AoE targets each player. If it would hit your vulnerable side, move through the telegraph to flip the L.
Darya the Sea-maid (Market Final Boss)
The arena gains a dropsy-inflicting AoE border. Key mechanics:
- Echoed Serenade: A music score displays the order in which summoned adds fire line AoEs. Memorize the sequence before the score disappears.
- Swimming in the Air: Seven floating crystals mark spots that all explode simultaneously. Two corners remain safe.
- Receding/Encroaching Twin Tides: Either point-blank then donut, or donut then point-blank, with the second hit untelegraphed. Commit to moving in or out based on which version was cast.
Deadly Dandan (Secret Boss, Record 13 Only)
This fight takes place on a transparent circular platform over open water.
- Devour: The boss telegraphs two charge lines, rotates around the arena, then dashes. Anyone caught is swallowed and instantly killed when the boss later casts Spit.
- Stinging Tentacle: Two rotating line AoEs with a countdown. Watch the rotation direction and pre-position for where they will stop.
- Tidal Guillotine: The boss submerges and reappears under the platform, exploding in a massive point-blank AoE. The boss's position under the floor indicates the epicenter.
- Strewn Bubbles: Moving bubbles inflict a bind, then a 6-second Bubble Gaol and 10-second dropsy if touched.
What Rewards Can You Earn?
All loot in The Merchant's Tale is personal, meaning each player loots their own coffers independently. There is no Need/Greed system. If your party chooses the same starting path that Y'nazqha recommends, you receive a bonus personal spoils coffer before the final boss.
Boss Loot
Corvosi Potsherd Exchange
Take your Corvosi Potsherds to Trisassant in Old Sharlayan (X: 12, Y: 13.4) to exchange them for the following items:
Achievement Reward
Completing all 13 Corvosi Folklore Records earns the "A Storied Collection" achievement (10 points), which rewards The Faces We Wear - Comfortable Eye Mask fashion accessory.
Spend Potsherds on glamour gear
Advanced and Criterion Versions
Once you have cleared the base variant dungeon and defeated all three unique final bosses (Pari of Plenty, Lone Swordmaster, and Darya the Sea-maid), you can unlock the higher-difficulty versions.
- The Merchant's Tale (Advanced): Requires level 100 and a minimum item level of 760. Speak to Memolivia at (X: 11.9, Y: 13.3) near Osmon to unlock it. This mode is a boss rush with no trash mobs. You choose which of the three bosses to fight and in what order, and you can leave after defeating one or two if desired. Difficulty is described by producer Yoshida as "slightly above" the standard variant version.
- Another Merchant's Tale (Criterion): Requires completing the Advanced dungeon first. Speak to Osmon to unlock it. This is a linear four-player boss rush requiring exactly 1 Tank, 1 Healer, and 2 DPS (unless entering with a pre-formed party). Resurrection restrictions apply after KOs. Yoshida described this version as "very high difficulty," comparable to previous Savage-tier variant content.
Both higher-difficulty versions are accessed through the Advanced/Criterion tab of the V&C Dungeon Finder.