
The Sleeper Temple is the largest dungeon in Gothic 1 Remake and it earns that title. Chapter 5's "The Dreamer's Nightmare" quest sends you through a sprawling underground complex packed with skeleton waves, Temple Guards, five Orc Shaman bosses, multi-step puzzles, and a Fire Demon standing between you and the legendary sword Uriziel. Stock up on food and potions before you enter, because there are no checkpoints and no fast travel inside.
How do you get into the Sleeper Temple?
The temple sits in the Orc Enclave past the main square, but you can only enter after completing the quest "A Warrior's Honor." Once that's done, speak with the Orc Shaman Ur-Nazkrog and she will follow you to the temple entrance. Alternatively, if you find the NPC Muk on the upper level of the settlement and offer him Meatbug Ragout, he opens a secret passage that skips the standard entry route entirely.
At the entrance, a magical barrier blocks the path. After a brief exchange with the Orc Chiefs, use your Amulet to pass through it and enter the temple proper.
Amulet unlocks the barrier
First room: how do you solve the three statues puzzle?
The first major room greets you with Skeletons, Skeleton Warriors, and a Skeleton Mage. Clear them out, then deal with the locked gate blocking the next area.
To open it, head into the side corridor in the elevated section of the room, past the stone engravings, and descend the stairs. You will find three Orc statues, each with a symbol at its base, and pillars with matching engravings around the room. Each statue must face the pillar that shares its symbol. The statue without an engraving should face the remaining pillar that no other statue points at.
Rotate the statues in this exact order:
- Center Statue: Turn left 4 times
- Right Statue: Turn right 1 time
- Left Statue: Turn right 2 times
Once all three statues face the correct pillars, a central stone pillar rises and displays three symbols. Write these symbols down. You need them for the next puzzle.
Solving the three rotating wheels puzzle
Back in the main hall, three wheel devices on the right side control the symbol engravings on the wall ahead. Set them to match the symbols from the risen pillar:
Align them correctly and the gate to the next area opens.
Second room: finding Orc Shamans 1, 2, and 3
The second main room has four exits. Clear the skeleton enemies first, then orient yourself:
- Cave entrance to the right leads to Orc Shaman 1
- Corridor to the left leads to the jail area and the Orc Lever
- Room straight ahead leads to Orc Shaman 2
- Stone pillars to the right lead to the next main room
Orc Shaman 1: the ring puzzle and Varrag Kasorg
Drop into the caves on the right. You will face Temple Minecrawlers and Temple Guards. These enemies hit hard and have significant HP, so back off between attacks rather than trading blows freely.
Hug the right wall, climb the stairs twice, and reach a circular room with electric crystals on the ceiling and engravings on the floor. Four wheel devices in the upper part of the room rotate the floor engravings. You need to match all the patterns.
Rotate the wheels in this order:
- Central Wheel: Right 2 times
- Right of Central: Left 2 times
- Front of Central: Left 2 times
- Left of Central: Left 1 time
This awakens Varrag Kasorg. He can stun you with his weapon and launches magic waves at range. Stay aggressive in melee to interrupt his casting. Defeat him and loot the Lightbringer gemstone and Ball Lightning rune.
Varrag Kasorg drops Lightbringer
Jail area: getting the Orc Lever
Head into the left corridor to reach the jail area. Drop down and find a stone door with a lever on each side. The left lever opens a jail cell holding a Temple Guard. The right lever opens the door ahead.
Past the door, another Temple Guard waits. Take him out and loot the chests. You will find an Amulet of Enlightenment, Magic Scrolls, a Bow with arrows, and the Orc Lever you need for the platform puzzle.
Orc Shaman 2: the bow puzzle and Varrag Hashor
Back in the main room, a green marker sits above a stone door. Shoot it with an arrow or bolt to open the door. Follow the corridor to awaken Varrag Hashor. Take him down and loot the Worldcleaver gemstone before moving on.
Orc Lever platform puzzle
Three stone pillars in the main room serve as stepping stones to the next area. One pillar has a lever already, and another has an empty slot. Insert the Orc Lever into the empty slot.
Activate the left lever first, then the middle lever. The platforms rise in the correct sequence, letting you jump across to the far side.
Third room: Orc Shaman 3 and the Fire Demon
After crossing the platforms, look immediately to your right for a red marker. Shoot it with a bolt or arrow to open the door to Orc Shaman 3.
Varrag Unhilqt is waiting through the corridor. Defeat him and collect the Timesplinter gemstone. Check the empty room beyond for additional loot.
Back in the main room, descend the stairs to find a large chamber with two Minecrawlers and a door on each side. Both rooms contain puzzles that must be solved to proceed.
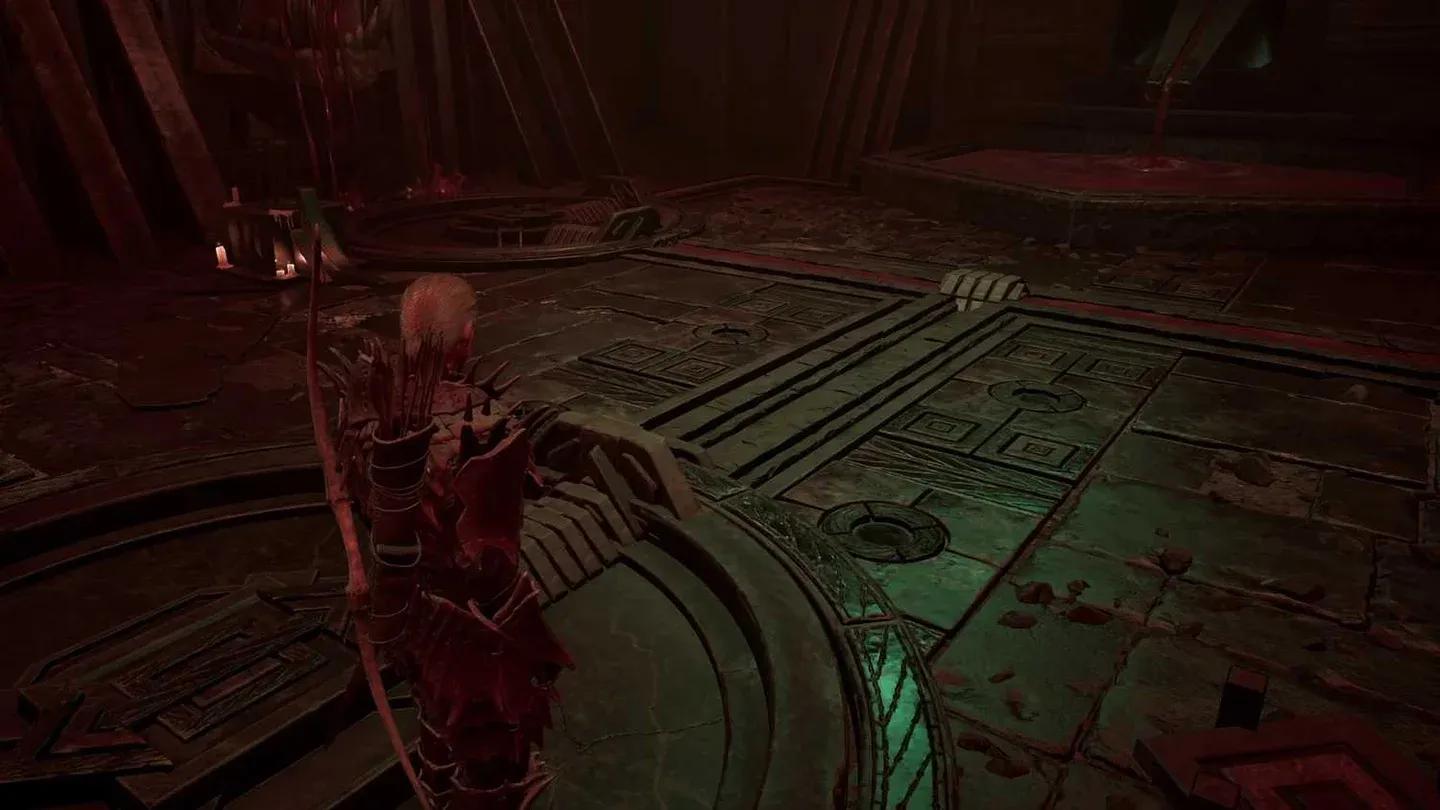
Right room: the blood stream puzzle
- Shoot the red marker above the door to reveal a lever on the left wall. Activate it to fill the blood fountain.
- Use the two mechanisms next to the skulls to position them toward the fountain and the skull respectively.
- Once both skulls are full, a new mechanism appears near the entrance. Rotate it to direct blood flow toward the main room.
- Rotate both side mechanisms to feed the blood into the central stream.
Left room: the spike puzzle
The floor is covered in spikes that kill instantly. Shoot the red marker to briefly deactivate them, then walk forward and shoot the red marker above the door ahead. This reveals a lever to your left. Activate it to send blood from the fountain into the main room.
Fire Demon boss fight
With both puzzles solved, a new mechanism appears in the main room. Activate it to summon the Fire Demon.
The moment it appears, it unleashes a fire-breathing attack that deals heavy damage. Back away immediately and keep your distance until the attack ends, then close in for a burst of melee hits. Repeat this cycle. The Fire Demon has no other tricks beyond its melee swipe and the fire breath, so consistent spacing wins the fight.
Inner temple: Orc Shamans 4 and 5, plus Uriziel
Defeating the Fire Demon unlocks the deeper sections of the temple. This area is less linear than what came before, and it is genuinely easy to get turned around. Three Temple Guards wait in the first room past the corridor, and multiple exits branch off from there.
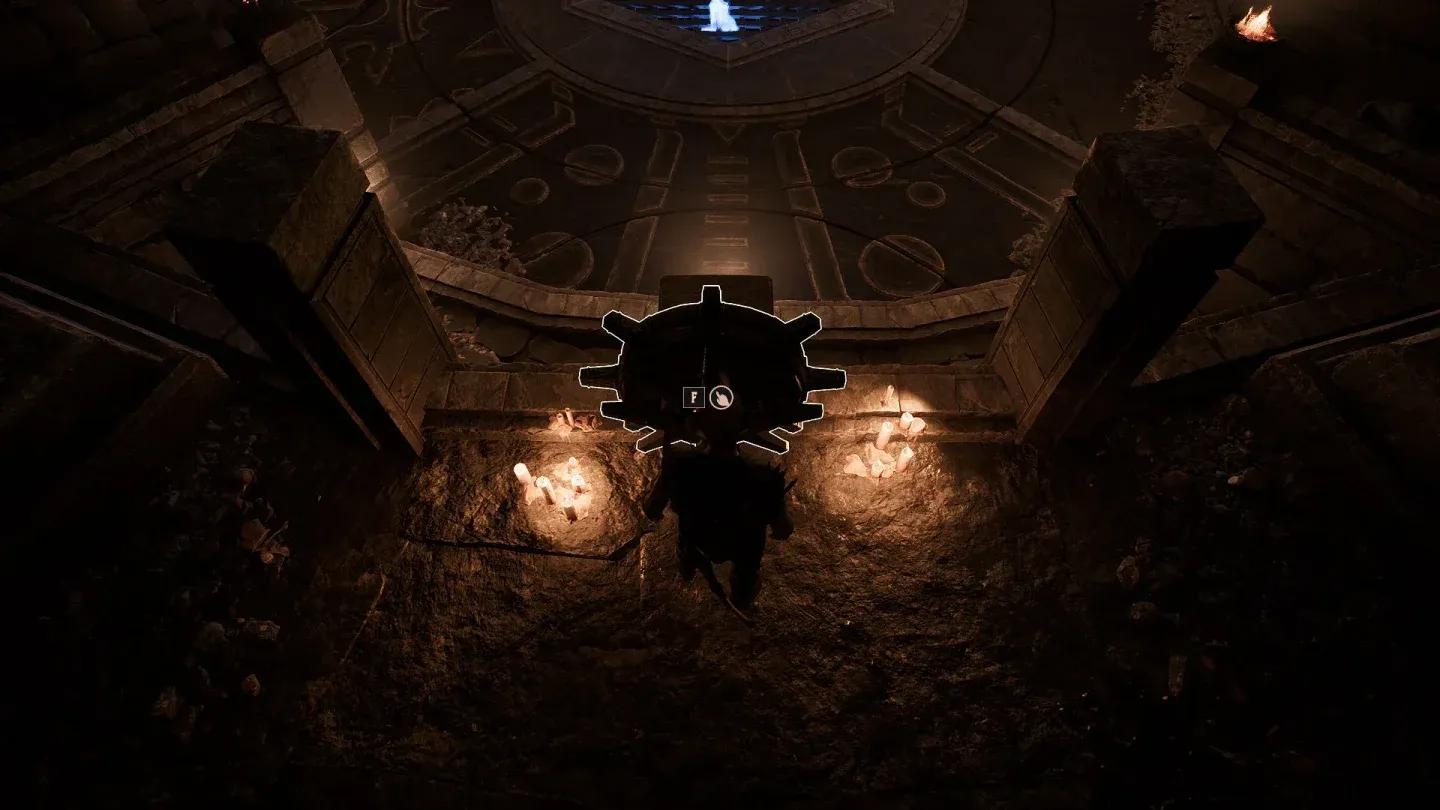
Activating the Lava Lever
From the room past the Fire Demon, take the staircase on the left down into the cave area. Defeat the Temple Guard and follow the path right to reach a room with lava and a giant circular contraption. Push the giant lever until lava flows down the stream and across to the other side of the temple. This powers up contraptions you will need later.
Activating the Gate Lever
In the same lava room, follow the path that circles the contraption to find a small entrance with wind pushing through it. Go up through it to reach a room with a gate. Open the gate using the wheel in the room, then watch out: Temple Guards will rush you the moment the gate lifts.
Climb the stairs in the same room to reach a higher area with another wheel device and another Temple Guard. Defeat the guard and use the wheel to open the gate leading to Orc Shaman 5. Several side rooms in this section hold Magic Scrolls and Potions, so explore before leaving.
Orc Shaman 4, the Demon Lords, and the Uriziel sword
From the initial room past the Fire Demon, go through the large purple gate on the right. You will enter a vast open chamber filled with lava, with a giant stone platform at its center and a rocky path circling the perimeter.
Three Demon Lords guard chambers along the rocky path. These enemies fight similarly to the Fire Demon: block their melee swipe and dodge-roll away from their fire breath. Defeat all three to create the bridge leading to the central platform.
On the platform, Varrag Ruuushk waits. He hits harder than the previous Shamans, but the same patient approach works. Defeat him and loot the Fiendeye gemstone. The sword Uriziel spawns on the platform itself. Pick it up.
Orc Shaman 5 and the Banstone
Head back to the doorway of the red barrier and take the path on the left into a tunnel. Follow it up to the furnace. Interact with the handle and turn it anticlockwise to drain the lava. Circle the furnace to the right, follow the wall path, cross the ledges, climb the stairs, and open the gate with the wheel.
Drop down, cross the bridge, and face Varrag Arushat. He has noticeably more HP than any previous Shaman and hits harder. Take your time, stay defensive, and defeat him to claim the Banstone gemstone. Continue ahead until you hit a magic barrier you cannot pass.
What do you do after collecting all 5 gemstones?
Once you have all five gemstones (Lightbringer, Worldcleaver, Timesplinter, Fiendeye, and Banstone), the sword Uriziel, and have interacted with the final magic barrier, the quest wraps up. Teleport back to Xardas using his teleportation stone or make your way back on foot to complete "The Dreamer's Nightmare."
The Sleeper Temple is a serious test of everything the game has taught you about managing stamina, reading enemy attack windows, and thinking through puzzles under pressure. For more challenges across the colony, the full Gothic 1 Remake guide collection covers quests, faction decisions, and secrets across every chapter. If you want to tackle other tough content while you gear up, the Orc Cemetery quest walkthrough is a solid Chapter 2 checkpoint that rewards 2,000 XP, and the lockpicking guide will help you crack the locked chests scattered throughout the temple itself.