
Gray Zone Warfare does not hand you a simple health bar and a magic medkit. The medical system tracks blood volume, organ integrity, and bone fractures separately, and applying the wrong treatment to the wrong injury is a fast way to bleed out in the jungle. Understanding exactly what your body is telling you and reacting with the right item at the right speed is what separates operators who extract consistently from those who spend most of their time in a coma.
Health tab anatomy overview
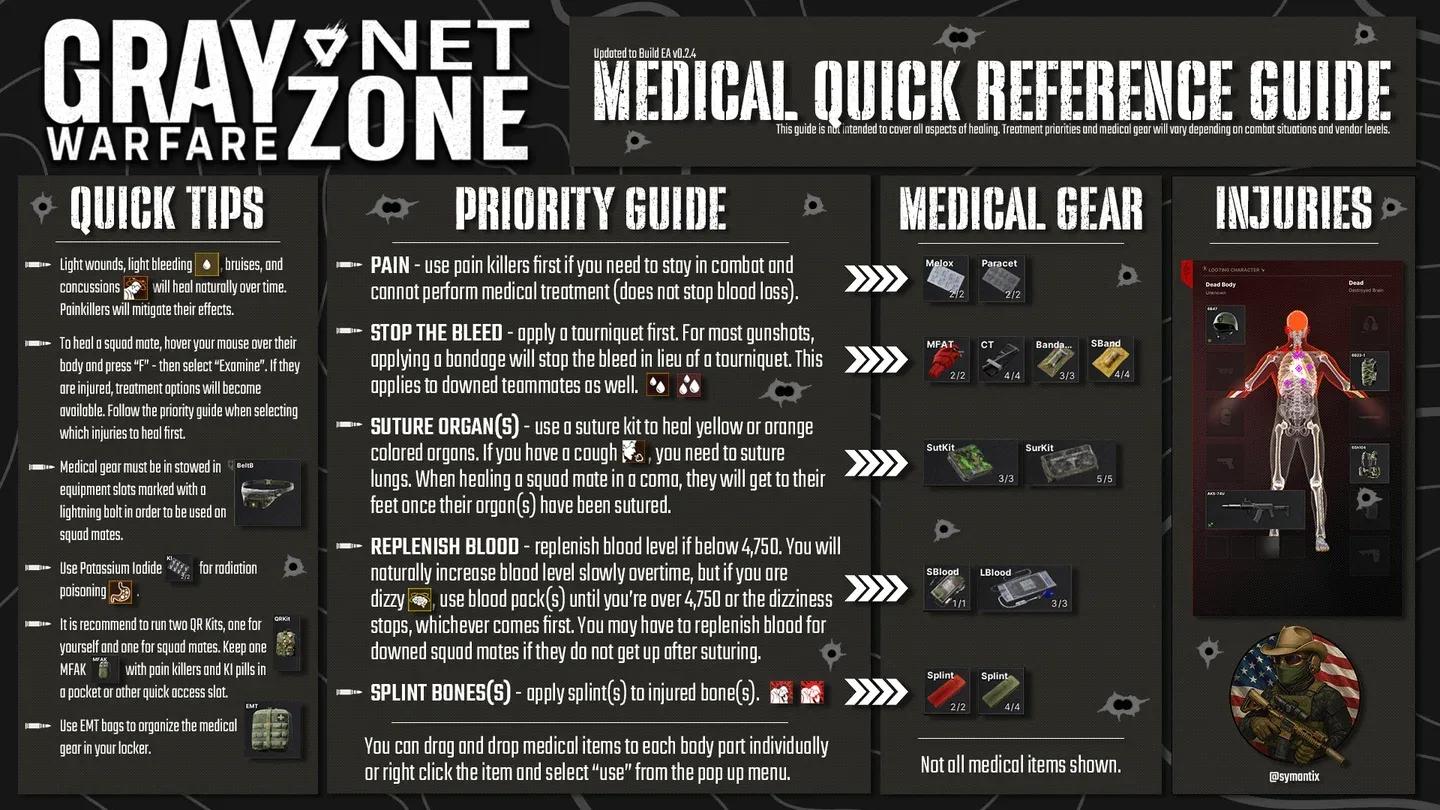
What does the health UI actually show you?
Press Tab and navigate to the health tab to pull up a full anatomical diagram of your operator. Every injury type shows up here as a distinct icon, and reading these icons correctly is the first skill you need to build.
The three core vitals to watch are Blood Volume, Hydration, and Energy. Blood volume is the one that will kill you fastest. A healthy operator sits between 5.0L and 6.0L. Drop below 2.0L and your character goes into a coma. At that point, you are completely helpless and dependent on your squad to drag you to safety.
Hydration and energy matter too. Dehydration causes dizziness and fatigue, which tanks your stamina and makes sprinting to cover feel like wading through concrete. Low energy compounds this. Keep both topped up during long raids.
Which medical items should you always carry?
Items sitting in slots marked with a lightning bolt icon on your rig or pockets are accessible via hotkeys. Holding H by default cycles through these. This matters enormously when you are taking fire and cannot afford to open a menu.
Rig medical slot layout
The Surgery Kit comes in two variants: the Suck Kit with 3 uses and the Sur Kit with 5 uses. The Sur Kit is worth keeping in your Secure Container alongside a large blood bag. Even if you lose your entire rig in a bad engagement, those two items can restore your vision and functionality enough to fight your way to extraction.
How do you treat each injury type?
Multiple injuries hit at once after a firefight. Working through them in the right order is what keeps you alive.
Bleeding
Blood drop icons on your UI signal active bleeds. A single drop is a light bleed, slow enough that you can usually finish a short engagement before treating it. Two or more drops means heavy bleeding, and your blood volume will drop fast enough to cause a coma in seconds. Hit the affected limb with a Tourniquet immediately. Do not reach for a bandage first.
Once the heavy bleed is stopped and you are behind cover, you can swap to bandages for lighter wounds.
Fractures
Yellow bone icons on the health screen indicate fractures. A broken leg kills your movement speed and prevents sprinting entirely. A broken arm introduces severe weapon sway that makes anything beyond close range nearly impossible. A Splint fixes both. Carry at least one at all times.
Organ damage
Yellow or orange icons in the torso area mean organ damage. This triggers persistent coughing, which is not just a cosmetic annoyance. Coughing in a building full of AI is a fast way to give away your position. Only a Surgery Kit clears this.
How do you revive a downed teammate?
The coma mechanic is one of the more distinct systems in Gray Zone Warfare. A teammate whose blood volume crashes below the threshold is not dead, but they cannot act at all. Here is the process for pulling them back.
- Drag them to cover first. Use the interaction prompt to move the body. Healing in the open gets you both killed.
- Read the POV icons. The downed player sees icons indicating what they need. A droplet means active bleeding, a stomach icon means organ damage. They should call this out over VOIP.
- Apply medicals from your rig. Items must be in lightning bolt slots to use on an ally. Backpack items do not work here.
- Stop bleeds before anything else. Stabilize the blood loss with a tourniquet or bandage, then address organ damage with a surgery kit or restore blood volume with a blood bag.
Advanced tips that most players miss
Cancel healing animations when you need to. Right-clicking immediately stops any medical animation and brings your weapon back up. Taking a bit more bleed damage is better than dying with a bandage in your hand.
Pre-medicate before breaches. Popping painkillers before pushing a building means the blur from a non-lethal hit will not affect your aim mid-fight. The effect kicks in before you take damage, so timing it ahead of a known engagement pays off.
Loot AI for medical resupply. Downed scavengers regularly carry basic bandages and food in their pockets. If you are running dry on supplies mid-raid, check every body before heading deeper into the map.
Secure Container priority. Bandages and tourniquets are cheap and replaceable. Keep them in your rig for hotkey access. The Sur Kit and a large blood bag belong in your Secure Container so you never lose them on a bad death.
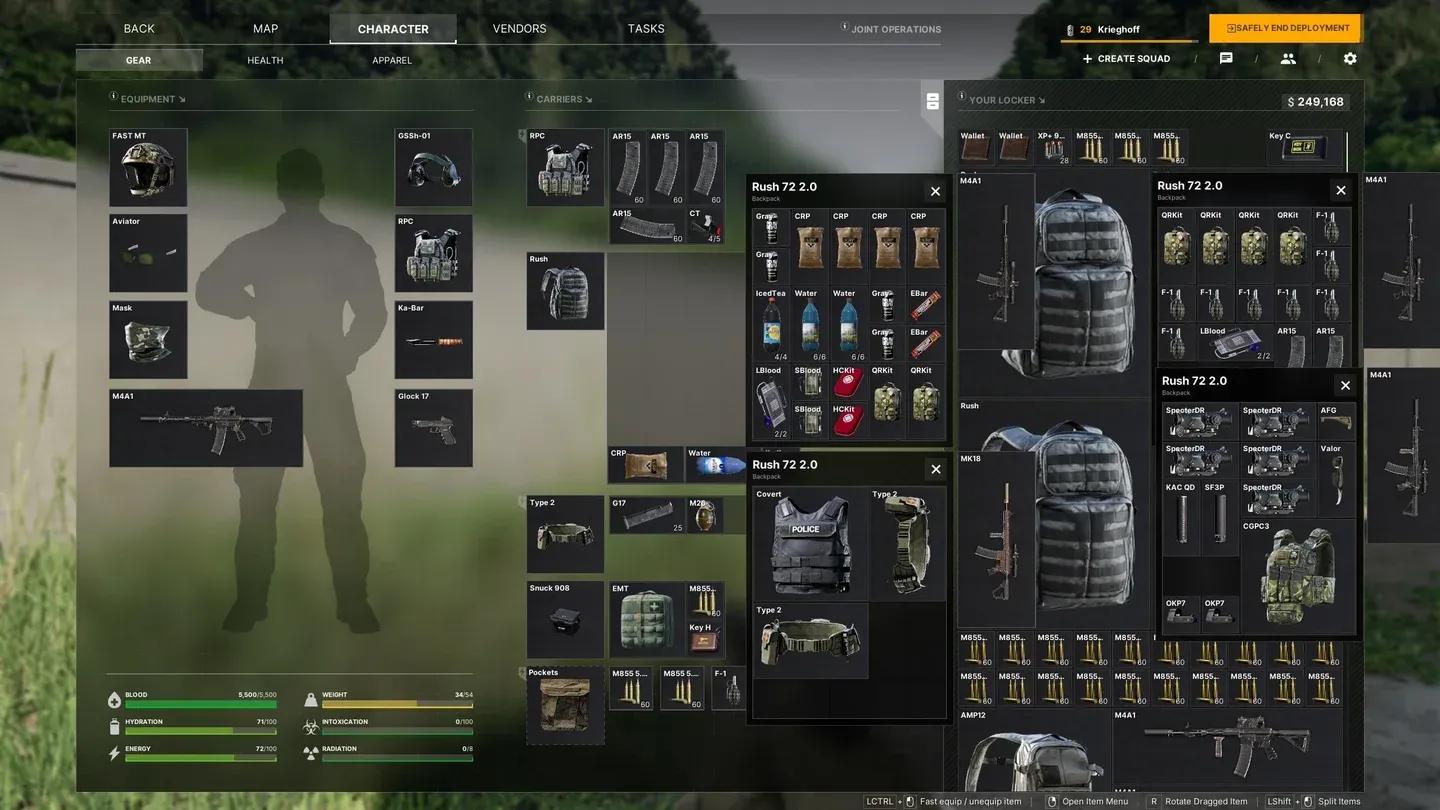
Secure container medical storage
For patch notes tracking any changes to medical item values, the official Gray Zone Warfare Steam page is the authoritative source.
Frequently asked questions
Can you heal while moving? No. Nearly every medical action requires you to stay stationary. Moving cancels most animations. Find hard cover before starting any treatment.
Why is my screen black and white? This is the "Miserable" state caused by critically low blood volume. Use a blood bag to restore volume and clear the visual effect. This is exactly why keeping a blood bag in your Secure Container matters.
Can you fix a destroyed limb? Severe organ damage and multiple fractures cause what players often describe as a "blacked out" limb state. A surgery kit restores organ function and a splint handles bone damage. Limbs do not disappear, but they are functionally useless until treated.
For more tactical guides covering Gray Zone Warfare and other shooters, browse more guides on GAMES.GG.