
Picking armor in Helldivers 2 isn't about finding the highest armor rating number. It's about the passive. The raw stats matter less than you'd think because the gap between light, medium, and heavy is manageable, but the difference between a Democracy Protects passive and Extra Padding can be the difference between completing a Difficulty 9 mission and watching your squad wipe three times in a row.
This guide breaks down every armor passive worth knowing, ranks them honestly, and tells you exactly which armor sets carry each one so you can stop wasting medals on the wrong gear.
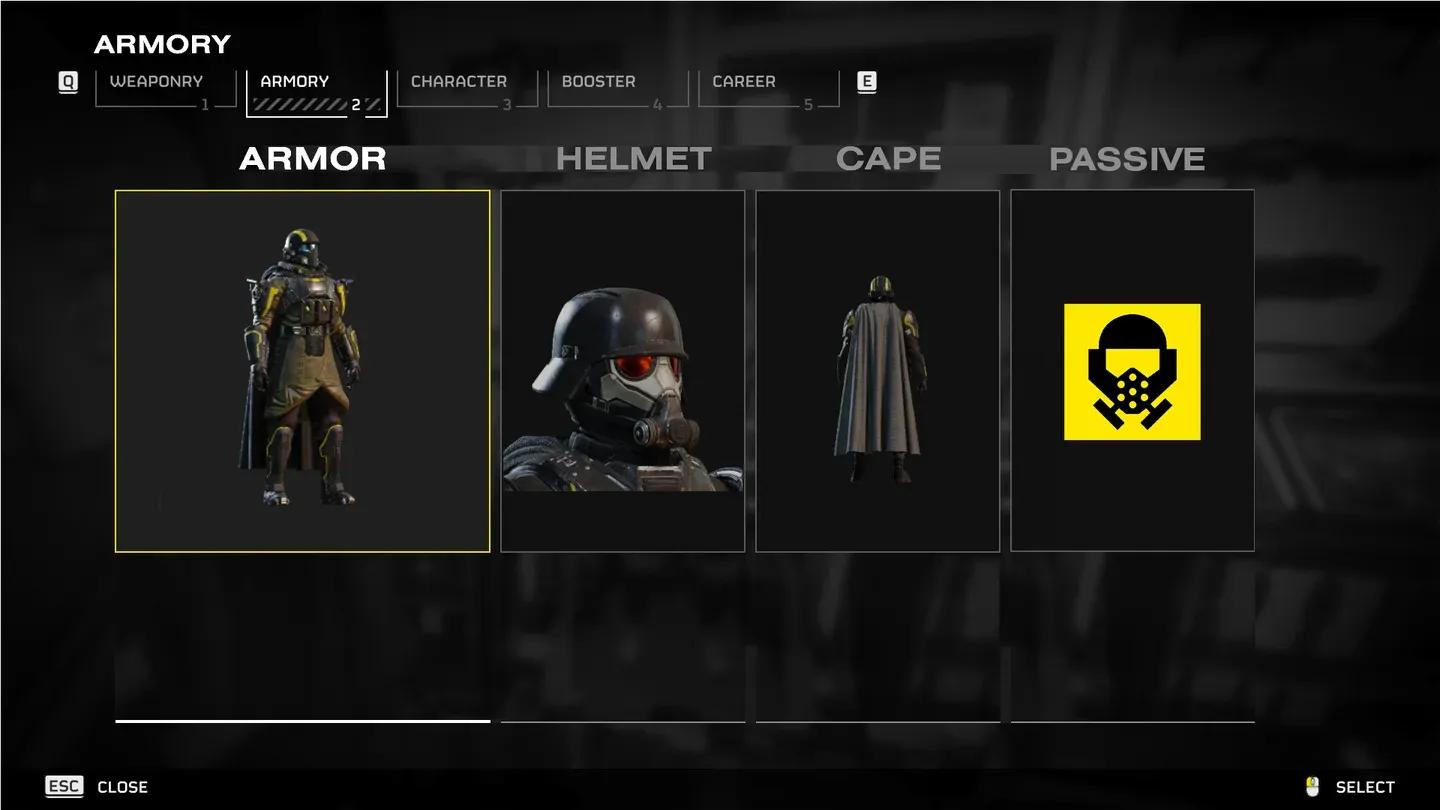
Armory passive selection screen
How do armor stats actually work in Helldivers 2?
Every armor piece carries four values: Armor Rating, Speed, Stamina Regen, and an Armor Passive. Speed derives directly from your armor rating: the formula is Speed = 600 − Armor Rating, which means heavier armor always costs you movement. Stamina Regen follows a similar pattern: if your Armor Rating hits 100 or above, Stamina Regen = 200 − Armor Rating.
The three armor categories break down like this:
- Light armor (rating ~50-79): Maximum mobility, fastest stamina recovery, least damage reduction
- Medium armor (rating ~100-150): Balanced stats across the board, the most common choice at high difficulty
- Heavy armor (rating ~150-200): Significant damage reduction, notably reduced speed (450) and stamina regen (50)
Patch 1.001.104 buffed heavy armor's damage reduction from 20% to 25% and reduced light armor's damage penalty from 33% extra damage taken down to 25%. That change made heavy armor slightly more viable, but the mobility penalty still makes it a niche pick for most missions.
Here's the thing most new players miss: two armors with the same passive are functionally identical in terms of gameplay impact. The DP-40 Hero of the Federation and the DP-11 Champion of the People both carry Democracy Protects. Once you know which passive you want, just find the cheapest or most accessible version.
Helldivers 2 armor passive tier list
Here's how the passives rank based on practical mission performance:
For a deeper breakdown of how these passives perform across all three enemy factions, check the Helldivers 2 armor passive tier list on u.gg, which tracks performance data against Terminids, Automatons, and the Illuminate.
What's the best armor passive in Helldivers 2?
Democracy Protects (S-tier)
Democracy Protects gives you a 50% chance to survive what would otherwise be a killing blow, and it also negates bleeding damage from chest hemorrhages. At higher difficulties, one Charger hit or a single Hulk burst can end you instantly. This passive turns those moments into near-misses roughly half the time.
Armor sets with this passive:
- DP-40 Hero of the Federation (medium, 25 medals, Helldivers Mobilize! Warbond Page 5)
- DP-11 Champion of the People (medium, 100 medals, Helldivers Mobilize! Warbond Page 10)
- TR-9 Cavalier of Democracy (medium, pre-order bonus only)
- DP-53 Savior of the Free (medium, Super Citizen Edition)
The DP-40 is the clear pick here. Same passive as the others, costs 25 medals, available early in the base Warbond.
Med-Kit (S-tier)
Med-Kit adds 2 stims to your starting inventory and extends every stim's active duration by 2 seconds. Since stims restore health over time, that 2-second extension means each one restores meaningfully more HP than normal. Carrying 2 extra stims on missions where resupply is limited is a significant survival advantage.
Armor sets with this passive:
- CM-09 Bonesnapper (medium, 15 medals, Helldivers Mobilize! Warbond Page 4)
- CM-14 Physician (medium, 70 medals, Helldivers Mobilize! Warbond Page 9)
- CM-17 Butcher (heavy, 250 Super Credits, Superstore)
- CM-21 Trench Paramedic (light, 250 Super Credits, Superstore)
The CM-09 Bonesnapper at 15 medals is the most accessible entry point.
A-tier passives: strong but not mandatory
Engineering Kit
Engineering Kit pairs 30% recoil reduction while crouching or prone with 2 additional grenades. The grenade bonus is the real draw. Grenades are useful in almost every situation, and carrying 2 more means more options for clearing bug breaches, finishing off armored targets, or getting your squad out of a tight spot.
Notable sets: CE-35 Trench Engineer (medium, 10 medals), CE-07 Demolition Specialist (light, 45 medals from Democratic Detonation Warbond)
Fortified
Fortified also gives 30% recoil reduction while crouching or prone, but pairs it with 50% explosive damage resistance instead of extra grenades. With full friendly fire active in Helldivers 2, that explosive resistance has real value when squadmates are throwing grenades near your position. It's also useful against Automaton rocket troopers and grenade-throwing enemies.
Notable sets: FS-05 Marksman (heavy, 6 medals), FS-23 Battle Master (heavy, 35 medals), FS-55 Devastator (heavy, 64 medals from Democratic Detonation Warbond)
B-tier passives: situationally useful
Scout
Scout reduces how far enemies detect you by 30% and lets you place radar markers on the map that scan for enemies for 2 seconds. The detection reduction has real value in solo play or when you're trying to sneak past patrols on objectives. In a full squad, though, someone will always trigger detection before the stealth matters, and the radar marker is rarely better than just spotting enemies visually.
Notable sets: SC-34 Infiltrator (light, 3 medals), SC-30 Trailblazer Scout (light, 50 medals)
Servo-Assisted
Servo-Assisted extends your throwing range by 30% and adds 50% limb health. The throwing range bonus helps when deploying stratagems from cover, but it's a passive bonus that only occasionally changes outcomes. The limb health bonus is almost invisible in practice since a stim restores damaged limbs quickly anyway.
Notable sets: SA-25 Steel Trooper (medium, 18 medals from Steeled Veterans Warbond), SA-12 Servo Assisted (medium, 45 medals)
What about Extra Padding?
Extra Padding is the default passive on the starter B-01 Tactical armor. It increases armor rating with no additional gameplay effect beyond what the armor rating already provides. There's no specific number attached to it, no secondary benefit, nothing. Every other passive in the game is a better choice. The only reason to keep it equipped is if you're specifically chasing a higher armor rating on a set that doesn't come with a useful passive.
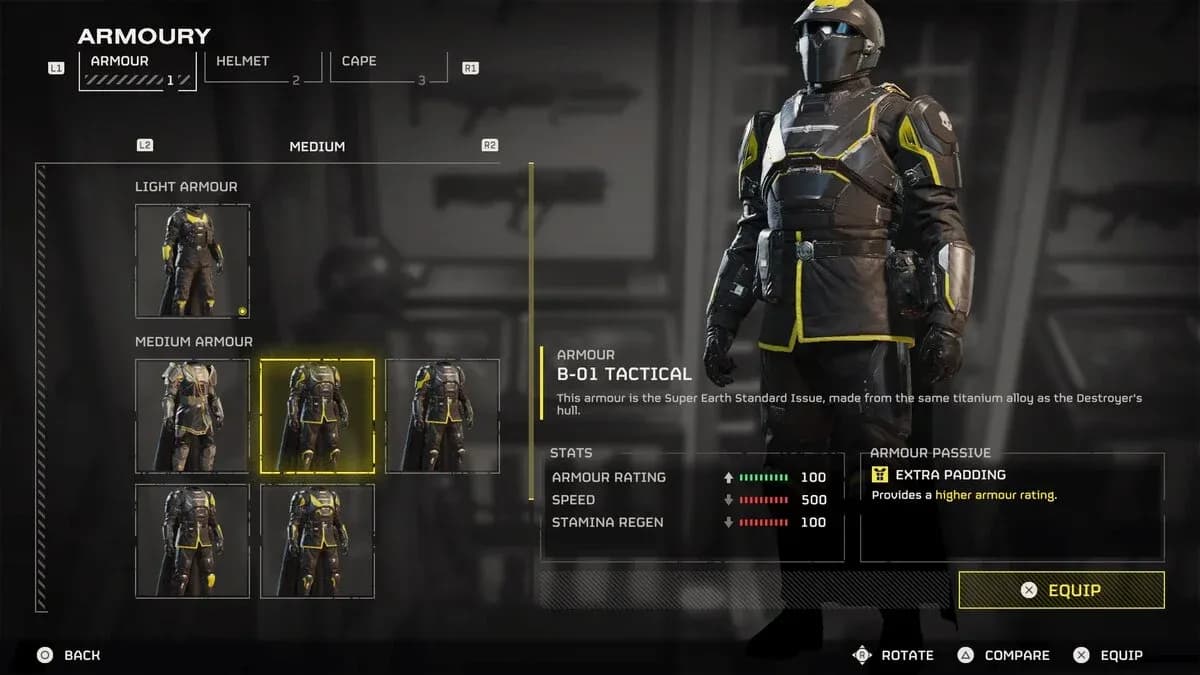
Extra Padding starter armor
How to unlock the best armor passives
Most armor sets are available through two routes:
- Warbonds: Spend Medals earned through gameplay. The base Helldivers Mobilize! Warbond contains the DP-40 (25 medals) and CM-09 Bonesnapper (15 medals), making S-tier passives accessible without spending real money.
- Superstore: Spend Super Credits, which you can earn in-mission or purchase. Superstore sets rotate regularly, so check back if you miss one.
The full list of passives and which armor sets carry them is documented on the Armor Passives page on the Helldivers Wiki, which is worth bookmarking for reference as new Warbonds release.
Which passive should you run?
The honest answer depends on what you're doing:
- High difficulty missions with heavy enemy pressure: Democracy Protects. The survival chance is irreplaceable.
- Medic or support role: Med-Kit. Extra stims keep your squad alive longer than almost anything else.
- Grenade-heavy loadout or engineer playstyle: Engineering Kit. Two extra grenades change how you approach encounters.
- LMG or prone-heavy suppression builds: Fortified. The recoil reduction is most noticeable on weapons with high base recoil.
- Solo stealth runs: Scout. The detection reduction actually works when you're not dragging three squadmates through every patrol.
Avoid Extra Padding unless you have no other option. It's not that it hurts you, it just doesn't help you, and in Helldivers 2 at higher difficulties, every passive slot matters.
For more loadout strategies and gear breakdowns, browse more guides at GAMES.GG to keep your builds sharp across every mission type.