
Picking the wrong four stratagems before a Helldive difficulty mission is one of the fastest ways to watch your squad wipe in under five minutes. With over 78 stratagems now available across support weapons, orbital strikes, eagle strikes, sentries, emplacements, backpacks, and vehicles, the loadout screen can feel genuinely overwhelming. This guide breaks down every major stratagem category, highlights the standout picks, and tells you exactly when and where to deploy them.
How do stratagems work in Helldivers 2?
Every Helldiver can bring up to four stratagems into any mission. You enter each one by inputting a directional code on the left stick or WASD equivalent, then throw the beacon to the target location. Each stratagem has a cooldown timer, a call-in delay (the time between throwing the beacon and the stratagem arriving), and in the case of sentries, a limited operational time of 150 seconds before they automatically stand down.
Ship module upgrades from the Robotics Workshop, Engineering Bay, and Bridge departments directly improve these numbers. For example, the Dynamic Tracking upgrade reduces sentry deployment time by 3 seconds, while Shock Absorbing Gel increases sentry ammunition by 50%. These upgrades compound significantly at higher difficulties where every second of sentry uptime matters.
Some stratagems were previously available only in Stratagem Hero training mode and have since been removed or reclassified through patches. Several mechanics, including exact enemy health pools for units like Bile Titans, are not fully documented in-game. The Helldivers Wiki tracks these obscured details that community testing has uncovered over time.


Support weapons: what's actually worth a loadout slot?
Support weapons occupy one of your four stratagem slots but give you a hand-carried heavy weapon in return. The tradeoff is real: you lose a defensive or orbital option, so the weapon needs to pull its weight.
Top-tier support weapons
GR-8 Recoilless Rifle (6,000 Requisition Slips, unlocks at level 5) remains one of the most consistent anti-armor tools in the game. A crewmate can reload it while you hold it, cutting reload time dramatically in coordinated squads. Against Terminid Bile Titans or Automaton Hulks, it deals enough damage to kill or critically wound in one or two well-placed shots.
LAS-99 Quasar Cannon (7,500 Requisition Slips, unlocks at level 18) trades the reload mechanic for a self-charging system with no ammunition limit. The charge-up time demands patience, but the fact that it frees your backpack slot for a SH-32 Shield Generator Pack makes it a popular choice for solo players who need both survivability and anti-tank capability.
AC-8 Autocannon (7,000 Requisition Slips, unlocks at level 10) is the Swiss Army knife of support weapons. It handles medium-armored enemies, destroys structures, and can even swat Automaton Gunships out of the sky. Testing against Automaton patrols shows the Autocannon consistently outperforms the Heavy Machine Gun for mixed-composition enemy groups because it deals meaningful damage to armored units while still clearing lighter enemies with splash.
MLS-4X Commando (8,000 Requisition Slips, unlocks at level 15) fires four guided rockets in sequence and is one of the few support weapons that can reliably handle multiple priority targets in a single call-in. Player tier lists aggregated from over 164 submissions consistently rank it among the top five support weapons.
Support weapons comparison
| Weapon | Cost (Req. Slips) | Unlock Level | Best Against |
|---|---|---|---|
| GR-8 Recoilless Rifle | 6,000 | 5 | Heavy armor, bosses |
| LAS-99 Quasar Cannon | 7,500 | 18 | Heavy armor, structures |
| AC-8 Autocannon | 7,000 | 10 | Medium armor, gunships |
| MLS-4X Commando | 8,000 | 15 | Multiple armored targets |
| RS-422 Railgun | 10,000 | 20 | Heavy armor (unsafe mode) |
| FLAM-40 Flamethrower | 6,000 | 10 | Terminid swarms |
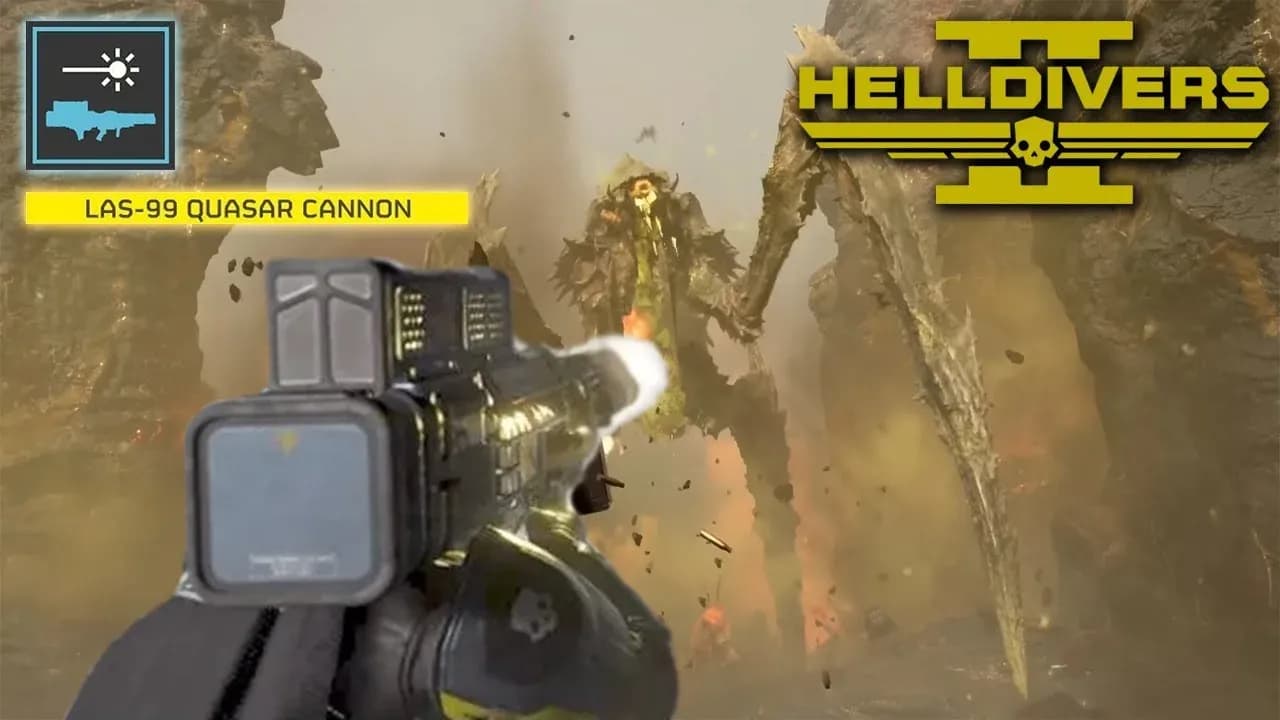
Quasar Cannon frees your backpack slot
Orbital strikes: precision versus saturation
Orbital stratagems all start with a right-directional input and deliver fire from your Super Destroyer above. The key distinction is whether you need a precise single hit or area denial.
Orbital Precision Strike is free and unlocks at level 1. It has a short cooldown and a tight impact radius, making it the default choice for destroying fabricators, bug holes, or finishing off a damaged heavy. Always have this in your loadout unless something specific replaces it.
Orbital Railcannon Strike (10,000 Requisition Slips, level 20) automatically targets the highest-priority enemy in range and punches through heavy armor. It will kill a Bile Titan or a Hulk reliably. The tradeoff is a long cooldown, so save it for when a priority target appears rather than using it on clusters of lighter enemies.
Orbital Napalm Barrage (10,000 Requisition Slips, level 18) covers a wide area with persistent fire. Against Terminid hordes approaching a fixed objective, it buys more time than almost any other orbital. The fire lingers, which means enemies entering the area after the initial barrage continue taking damage.
Eagle strikes: fast cooldowns, high frequency
Eagle stratagems start with an upward input and rearm automatically after a set number of uses. The Eagle Rearm stratagem resets all Eagle charges instantly.
Eagle 500kg Bomb (10,000 Requisition Slips, level 15) is the single most impactful Eagle stratagem for killing heavy enemies. The blast radius is large enough to kill a Bile Titan if the bomb lands close to its body. Player rankings consistently place it in the top tier across all faction matchups.
Eagle Airstrike (4,000 Requisition Slips, level 1) has multiple charges per rearm cycle and a low cost. It covers a linear path with cluster damage, making it excellent for clearing patrol routes or blocking a chokepoint. The fast cooldown means you can use it frequently without burning a precious Orbital slot.
Eagle Cluster Bomb (4,000 Requisition Slips, level 3) scatters submunitions across a wide area and is devastating against grouped light infantry. Against Terminid swarms specifically, it often outperforms more expensive options simply because of how many individual hits it delivers.
Sentries: placement is everything
Sentries are autonomous turrets that deploy via the down-then-up input pattern and engage enemies automatically. They are powerful but come with one universal caveat: they will fire on allies in their line of fire without exception. The Tesla Tower description literally warns you about this.
The fundamental rule for sentry placement is the triangle principle: position the sentry, your team, and the expected enemy approach so that allies are never directly between the sentry and the enemy. Elevated positions help because the sentry's line of fire passes over friendly heads.
Which sentry should you bring?
A/G-16 Gatling Sentry (4,000 Requisition Slips, level 5) fires at 1,560 RPM and will shred light and medium enemies with extreme speed. The downside is ammo consumption: 500 rounds (750 with Shock Absorbing Gel upgrade) disappear faster than you expect. It shares the friendly-fire risk of the Machine Gun Sentry but at a much higher damage rate, so misplacements are more punishing.
A/AC-8 Autocannon Sentry (6,000 Requisition Slips, level 13) fires 40mm armor-piercing rounds in 3-round bursts at a 100m detection range. It has the highest per-shot damage of any sentry and can handle heavy-armored enemies that lighter sentries cannot scratch. The slow turret rotation speed is the main weakness: enemies approaching from a different angle than the sentry faces may reach it before it can respond.
A/M-12 Mortar Sentry (7,500 Requisition Slips, level 8) operates at 125m range and fires in 4-round salvoes. It ignores cover, which makes it uniquely effective for suppressing enemies behind terrain. The same property makes it dangerous in tight engagements where allies and enemies are mixed. It excels in Automaton missions where enemies advance more slowly and predictably than Terminid swarms.
A/M-23 EMS Mortar Sentry (8,000 Requisition Slips, level 20) fires electromagnetic shells that slow and stun enemies without dealing lethal damage to allies. Pairing one EMS Mortar with a standard Mortar Sentry is a legitimate high-difficulty strategy: the EMS slows enemy movement, the mortar kills them while they are slowed, and neither poses significant friendly-fire risk in that configuration.
A/ARC-3 Tesla Tower (8,000 Requisition Slips, level 15) operates at only 20m range but deals 600 damage per arc discharge with chain-jumping capability. It is uniquely safe against Terminids in chokepoints because you can crawl past it without triggering it. Lying prone prevents the tower from targeting you. Against Automatons, the limited range makes it far less useful since bots prefer to shoot from distance.
Mines and emplacements: defensive area control
Mine stratagems deploy a dispersal device that scatters mines across a roughly 24-30m diameter area. All four mine types received a significant buff in Patch 01.002.101, which reduced cooldowns from 180 seconds to 120 seconds and increased explosion damage substantially.
MD-6 Anti-Personnel Minefield (1,500 Requisition Slips, level 1) deploys 48 mines dealing 700 damage each. Against Terminid small and medium units, a single mine is usually lethal. The mines glow red and are visible to players who know to look, but in the chaos of high-difficulty missions, teammates step on them constantly. Always communicate minefield placement.
MD-17 Anti-Tank Mines (7,000 Requisition Slips, level 15) deploy only 18 mines but each deals 2,000 damage with AP5 armor penetration. Critically, following Patch 01.001.104, these mines only trigger against large enemies such as Chargers, Bile Titans, Impalers, and Hulks. Small enemies walk through the field entirely, which eliminates the friendly-fire risk that plagued earlier versions.
MD-8 Gas Mines (12,000 Requisition Slips, level 20) are the most versatile of the mine types. They deploy 48 mines that create 7m radius gas zones on detonation, dealing 25 damage per second for 6 seconds. Unlike the other mines, gas damage stops immediately when enemies leave the zone, and the corrosive effect works on both organic and robotic enemies. They have become a popular substitute for Orbital Gas Strike because a full minefield creates overlapping gas zones that persist much longer than a single orbital call.
FX-12 Shield Generator Relay (9,000 Requisition Slips, level 10) is not a mine but belongs in this section as a fixed defensive emplacement. It generates a 15m radius energy dome with 4,000 shield health that regenerates at 400 HP per second. The shield blocks incoming projectiles from outside but allows outgoing fire. In Automaton missions, a well-placed relay turns a contested objective into a manageable firefight. The 90-second cooldown means you can redeploy it frequently.
Backpacks: the slot multiplier
Backpack stratagems occupy the same slot as support weapon backpacks, so choosing one means your support weapon cannot have a dedicated loader unless a teammate carries it.
SH-32 Shield Generator Pack (10,000 Requisition Slips, level 20) is the most universally useful backpack. It provides a personal energy shield that absorbs damage before your health takes a hit. At higher difficulties where a single Devastator rocket can one-shot you, the extra buffer is often the difference between completing an objective and respawning.
B-1 Supply Pack (4,000 Requisition Slips, level 1) lets you carry extra ammunition and resupply teammates. In squads running multiple ammo-hungry support weapons, one Supply Pack carrier can dramatically extend the team's effective combat time before needing a Resupply call.
LIFT-850 Jump Pack (6,000 Requisition Slips, level 8) trades defensive utility for mobility. It pairs well with sentry-heavy loadouts because you can quickly reach elevated positions that sentries need. It is also the primary tool for escaping Charger charges in Terminid missions.
What's the best loadout for each faction?
There is no single correct answer, but after testing dozens of configurations across all three enemy factions, a few patterns emerge:
Against Terminids: Prioritize area denial and crowd control. A Flamethrower or Grenade Launcher handles medium units, an anti-tank support weapon covers Chargers and Bile Titans, a Gatling or Machine Gun Sentry manages swarms, and an Orbital Railcannon Strike handles boss-tier threats when they appear.
Against Automatons: Precision matters more than area damage. Autocannon or Railgun handles armored units, Orbital Precision Strike destroys fabricators efficiently, a Mortar Sentry suppresses advancing infantry from distance, and a Shield Generator Relay protects the squad during objective completion.
Against Illuminate: Crowd control and anti-armor split evenly. The Quasar Cannon handles Harvesters, an EMS Mortar Sentry slows Voteless hordes, and a Shield Generator Relay blocks plasma fire during objective defense.
How do ship module upgrades change stratagem performance?
Ship modules from the Robotics Workshop, Engineering Bay, and Bridge are the most underappreciated progression system in Helldivers 2. The specific upgrades that affect stratagems include:
- Dynamic Tracking (Robotics Workshop): Reduces sentry call-in time by 3 seconds
- Shock Absorbing Gel (Robotics Workshop): Increases sentry ammo by 50%
- Advanced Lubricant (Robotics Workshop): Increases sentry turret rotation speed by 64°/s
- Advanced Structure (Engineering Bay): Increases sentry health by 50%
- Rapid Launch System (Engineering Bay): Removes deployment time for stationary stratagems
- Morale Boost (Bridge): Reduces cooldown for all stratagems by 5%
- Synthetic Supplement (Engineering Bay): Reduces cooldown for sentry, mounted gun, and resupply stratagems by 10%
The Rapid Launch System is particularly impactful for mine stratagems, since mines are vulnerable to destruction during their deployment animation. Removing that window means your mines reach the ground before enemies can destroy the dispersal device.
For deeper dives into specific stratagem interactions and the lore behind the Galactic War that contextualizes why you are deploying these weapons, St. Augustine's University maintains a detailed breakdown of obscured mechanics including damage modifiers and enemy health pools that Arrowhead has not officially documented.
For more guides covering Helldivers 2 builds, enemy strategies, and the latest Warbond content, browse the latest guides at GAMES.GG.