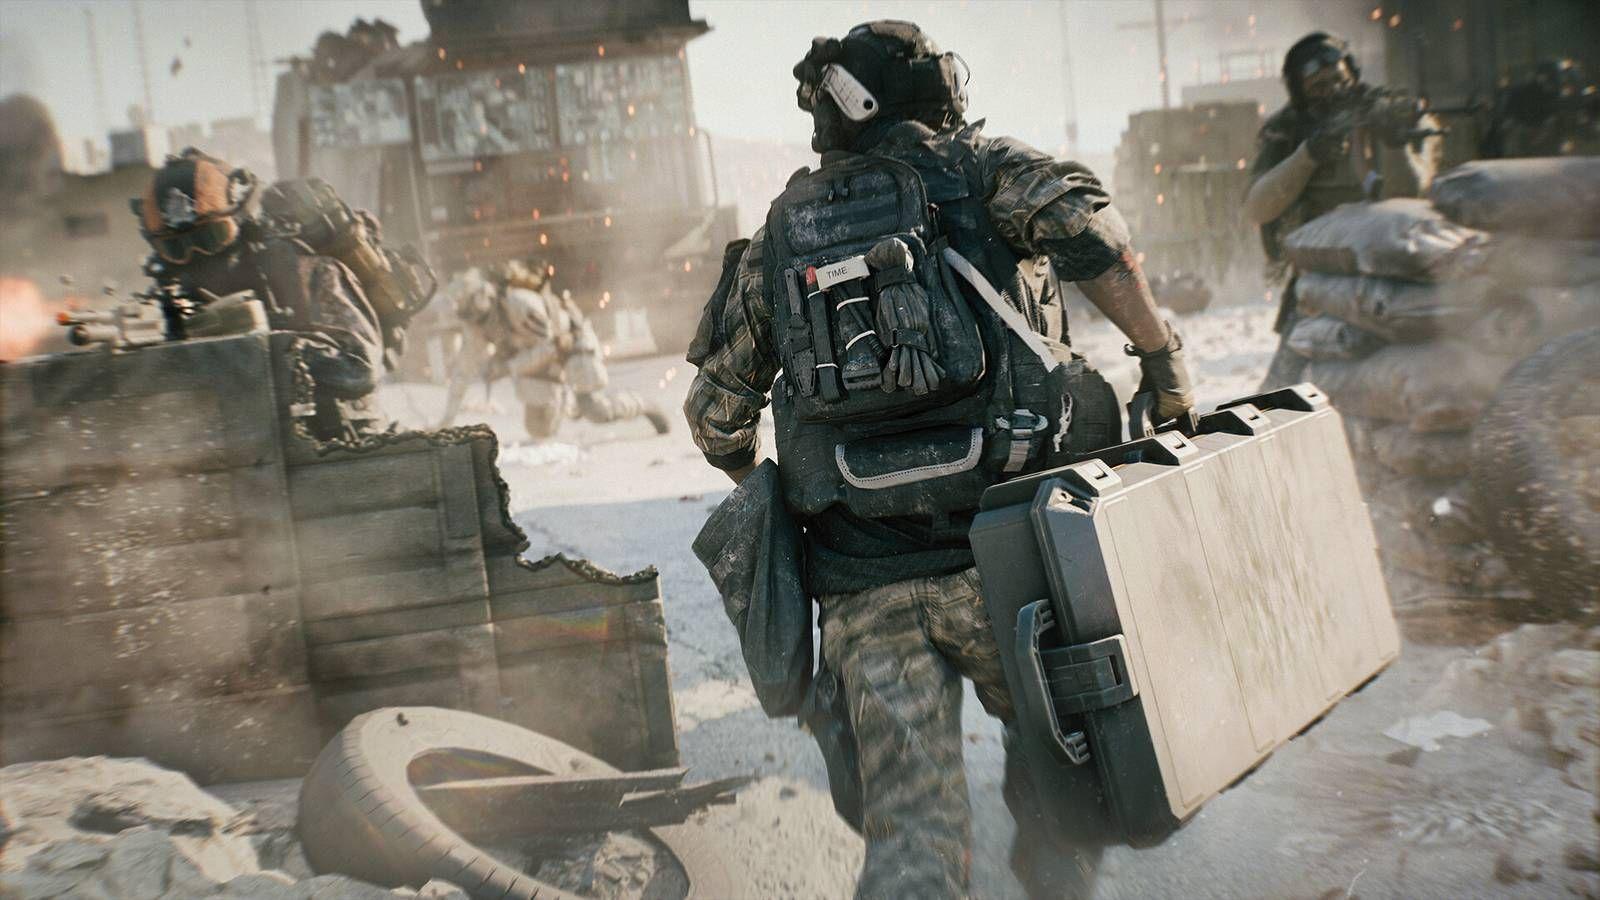

Battlefield REDSEC में जीत हासिल करने के लिए सिर्फ सटीक निशाना काफी नहीं है—आपको ऐसे हथियारों की जरूरत है जो आपके प्लेस्टाइल से मेल खाते हों और Fort Lyndon के बैटलफील्ड पर अपना दबदबा बना सकें। पारंपरिक बैटल रॉयल्स के विपरीत, जहाँ ग्राउंड लूट आपकी किस्मत तय करती है, REDSEC आपको Battlefield 6 के आर्सेनल से कस्टम वेपन बिल्ड्स डिप्लॉय करने की सुविधा देता है। ट्विस्ट क्या है? आपको इन्हें मिशन्स के जरिए कमाना होगा या पब्लिक ड्रॉप्स के लिए लड़ना होगा।
आपका लोडआउट ही तय करता है कि आप एक औसत खिलाड़ी रहेंगे या जीत हासिल करेंगे। चाहे आप क्लोज-क्वार्टर कॉम्बैट में बिल्डिंग्स में घुस रहे हों या खुले मैदान में एंगल्स होल्ड कर रहे हों, सही वेपन कॉन्फ़िगरेशन हर फाइट में आपके खेलने का तरीका बदल देता है। आइए उन बेहतरीन लोडआउट्स पर नजर डालते हैं जो फिलहाल REDSEC मेटा पर राज कर रहे हैं।
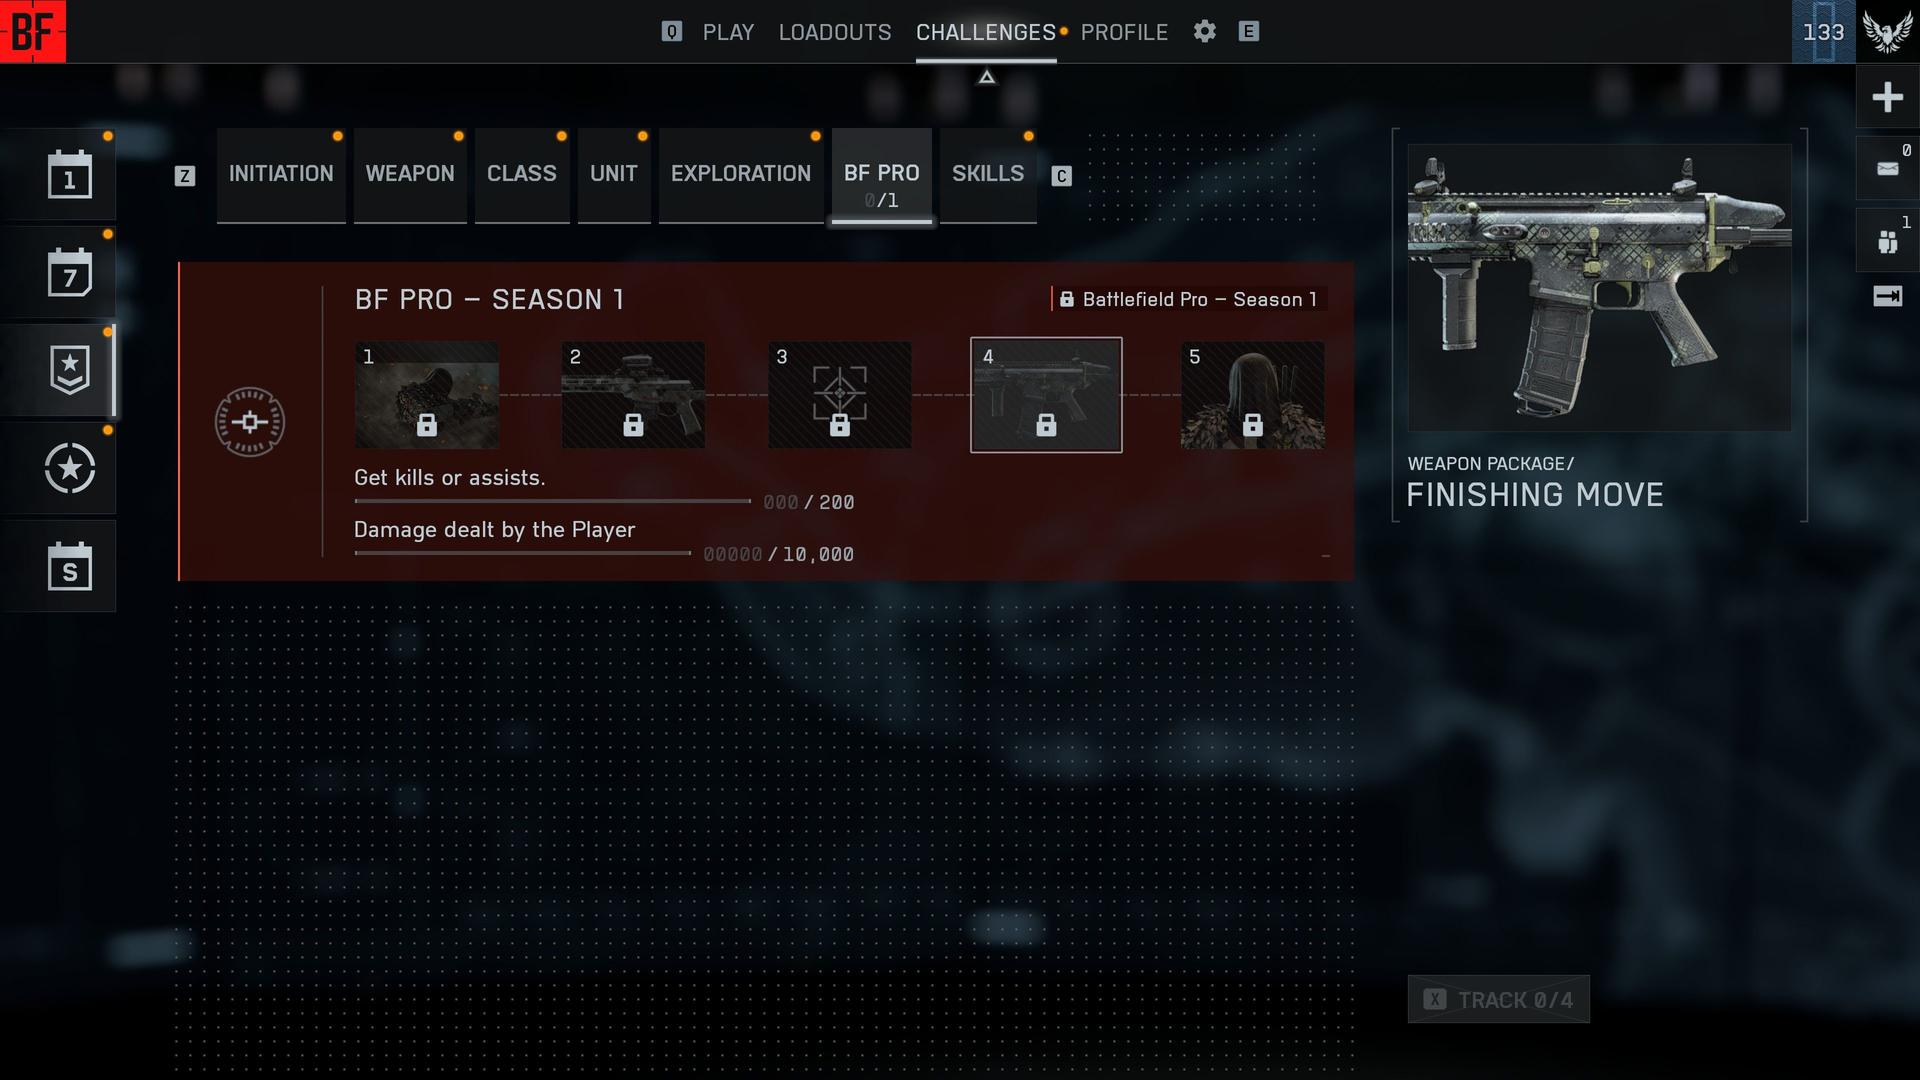
REDSEC में कस्टम लोडआउट्स कैसे काम करते हैं
विशिष्ट बिल्ड्स में जाने से पहले, आपको REDSEC के यूनिक लोडआउट सिस्टम को समझना होगा। आप बस अपने पसंदीदा गन्स के साथ स्पॉन नहीं हो सकते—आपको उन्हें गेमप्ले के जरिए कमाना होगा।
अपने फेवरेट्स सेट करना: Battlefield 6 के वेपन कस्टमाइजेशन मेनू में जाएं और अपने कॉन्फ़िगर किए गए बिल्ड्स पर Triangle/Y दबाएं। वह लाल स्टार बैनर उन्हें 'फेवरेट' के रूप में मार्क कर देता है, जिससे वे REDSEC ड्रॉप्स में उपलब्ध हो जाते हैं। आप आठ कस्टम बिल्ड्स तक सेव कर सकते हैं।
अपने हथियार हासिल करना: मैच के दौरान कस्टम लोडआउट्स पाने के दो तरीके हैं:
- ऐसे मिशन्स पूरे करें जो कस्टम वेपन ड्रॉप्स रिवॉर्ड में देते हैं (सबसे सुरक्षित विकल्प)
- पब्लिक इवेंट ड्रॉप्स के लिए मुकाबला करें जो मैप पर रैंडमली दिखाई देते हैं (हाई रिस्क, हाई रिवॉर्ड)
मैच शुरू होने के कुछ देर बाद आपके मैप के राइट पैनल पर मिशन्स दिखाई देते हैं। उन कॉन्ट्रैक्ट्स को प्राथमिकता दें जो रिवॉर्ड के तौर पर वेपन ड्रॉप्स देते हैं—ये पब्लिक इवेंट्स में कई स्क्वाड्स से लड़ने की तुलना में कहीं ज्यादा सुरक्षित हैं।
टॉप असॉल्ट राइफल लोडआउट्स
SOR-556 MK2: मिड-रेंज मॉन्स्टर
SOR-556 MK2 अपनी जबरदस्त एक्यूरेसी के साथ मीडियम से लॉन्ग-रेंज फाइट्स में हावी रहती है। यह असॉल्ट राइफल हर शॉट पर बेहतरीन डैमेज देती है और साथ ही लेजर जैसी स्टेबिलिटी बनाए रखती है। आप दुश्मन की आर्मर प्लेट्स को इतनी तेजी से तोड़ेंगे कि वे संभल भी नहीं पाएंगे।
ऑप्टिमल कॉन्फ़िगरेशन:
- Muzzle: Standard Suppressor (आपको रडार से दूर रखता है)
- Barrel: 14.5" Factory (संतुलित वेलोसिटी बूस्ट)
- Underbarrel: Ribbed Stubby (रिकॉइल कम करने के लिए)
- Magazine: 30 RND Magazine
- Optic: 3VZR 1.75X (साफ विजन के लिए)
- Right Accessory: 50 MW Blue (टारगेट एक्विजिशन)
इसका रिकॉइल पैटर्न प्रेडिक्टेबल है—हल्का सा नीचे की तरफ प्रेशर बनाए रखने से आप टारगेट पर बने रहेंगे। बहुत दूर के दुश्मनों के लिए बर्स्ट फायर करें, लेकिन 50 मीटर के अंदर यह गन फुल-ऑटो में भी बहुत अच्छा परफॉर्म करती है।
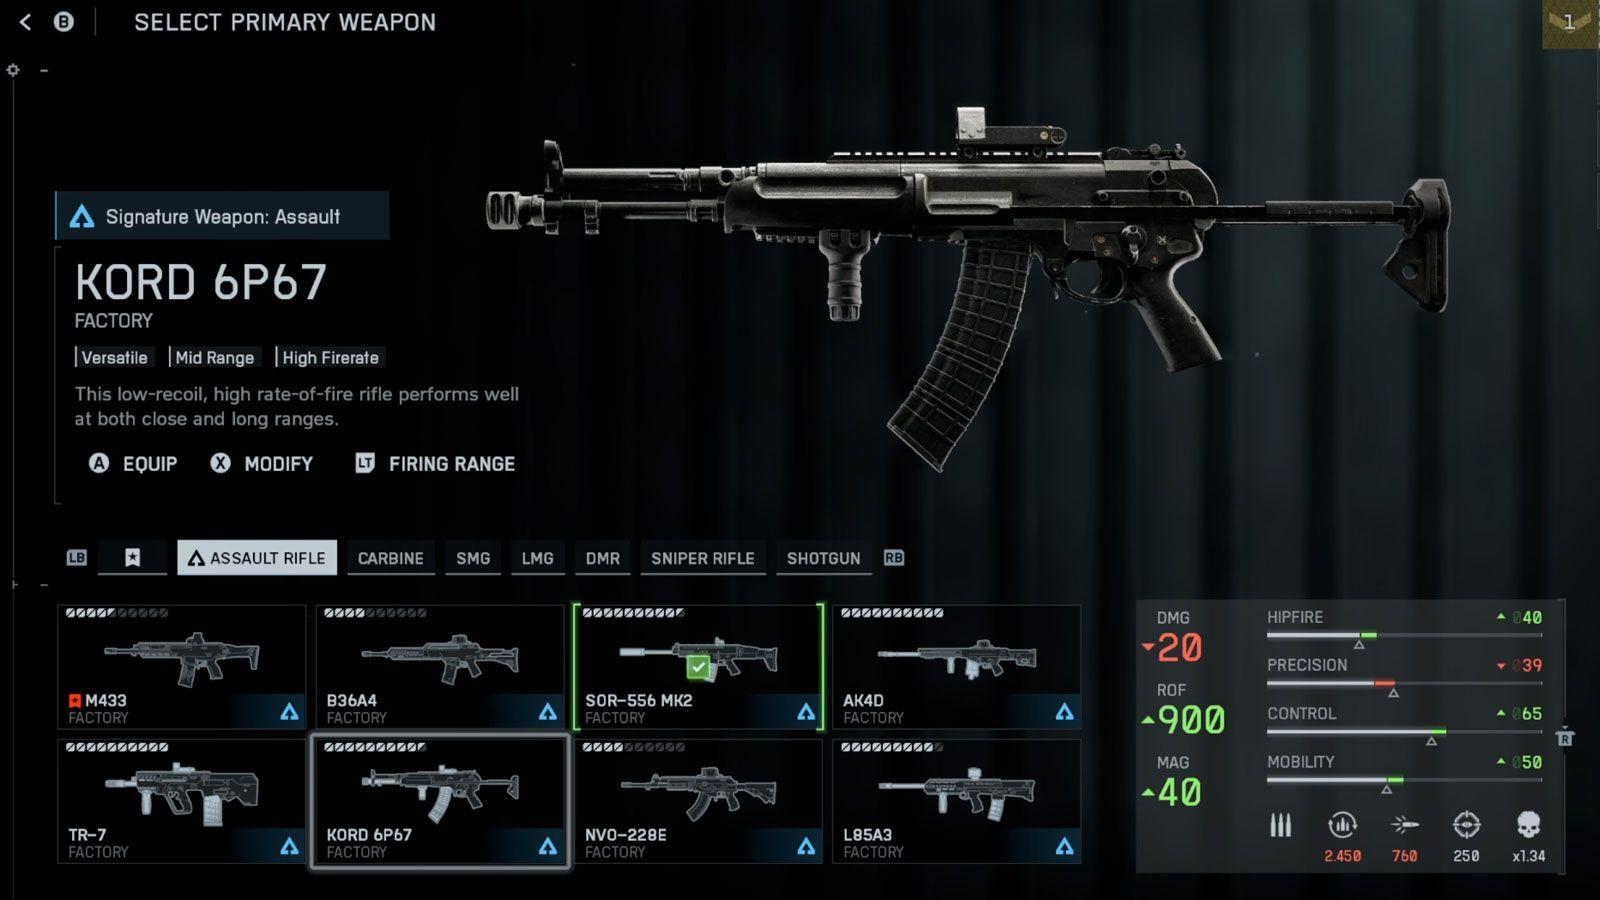
KORD 6P67: क्लोज-क्वार्टर श्रेडर
जब आपको बिल्डिंग-टू-बिल्डिंग कॉम्बैट में जबरदस्त फायरपावर चाहिए, तो KORD 6P67 बेस्ट है। इसका 900 RPM उन विरोधियों को चीर देता है जो आपको घर के अंदर चुनौती देने की हिम्मत करते हैं।
ऑप्टिमल कॉन्फ़िगरेशन:
- Muzzle: Compensated Brake (ब्लूम कंट्रोल)
- Barrel: 415MM (इफेक्टिव रेंज बढ़ाता है)
- Underbarrel: Ribbed Stubby (स्टेबिलिटी बूस्ट)
- Magazine: 40 RND (लंबी फाइट्स के लिए)
- Optic: Baker 3.00X (वर्सटाइल मैग्निफिकेशन)
यहाँ सबसे जरूरी स्किल है: ट्रिगर डिसिप्लिन। मीडियम रेंज पर स्प्रे करने से गोलियां कहीं भी जा सकती हैं। एक्यूरेसी बनाए रखने और आक्रामक TTK को बरकरार रखने के लिए टैप-फायर या छोटे बर्स्ट्स का इस्तेमाल करें।
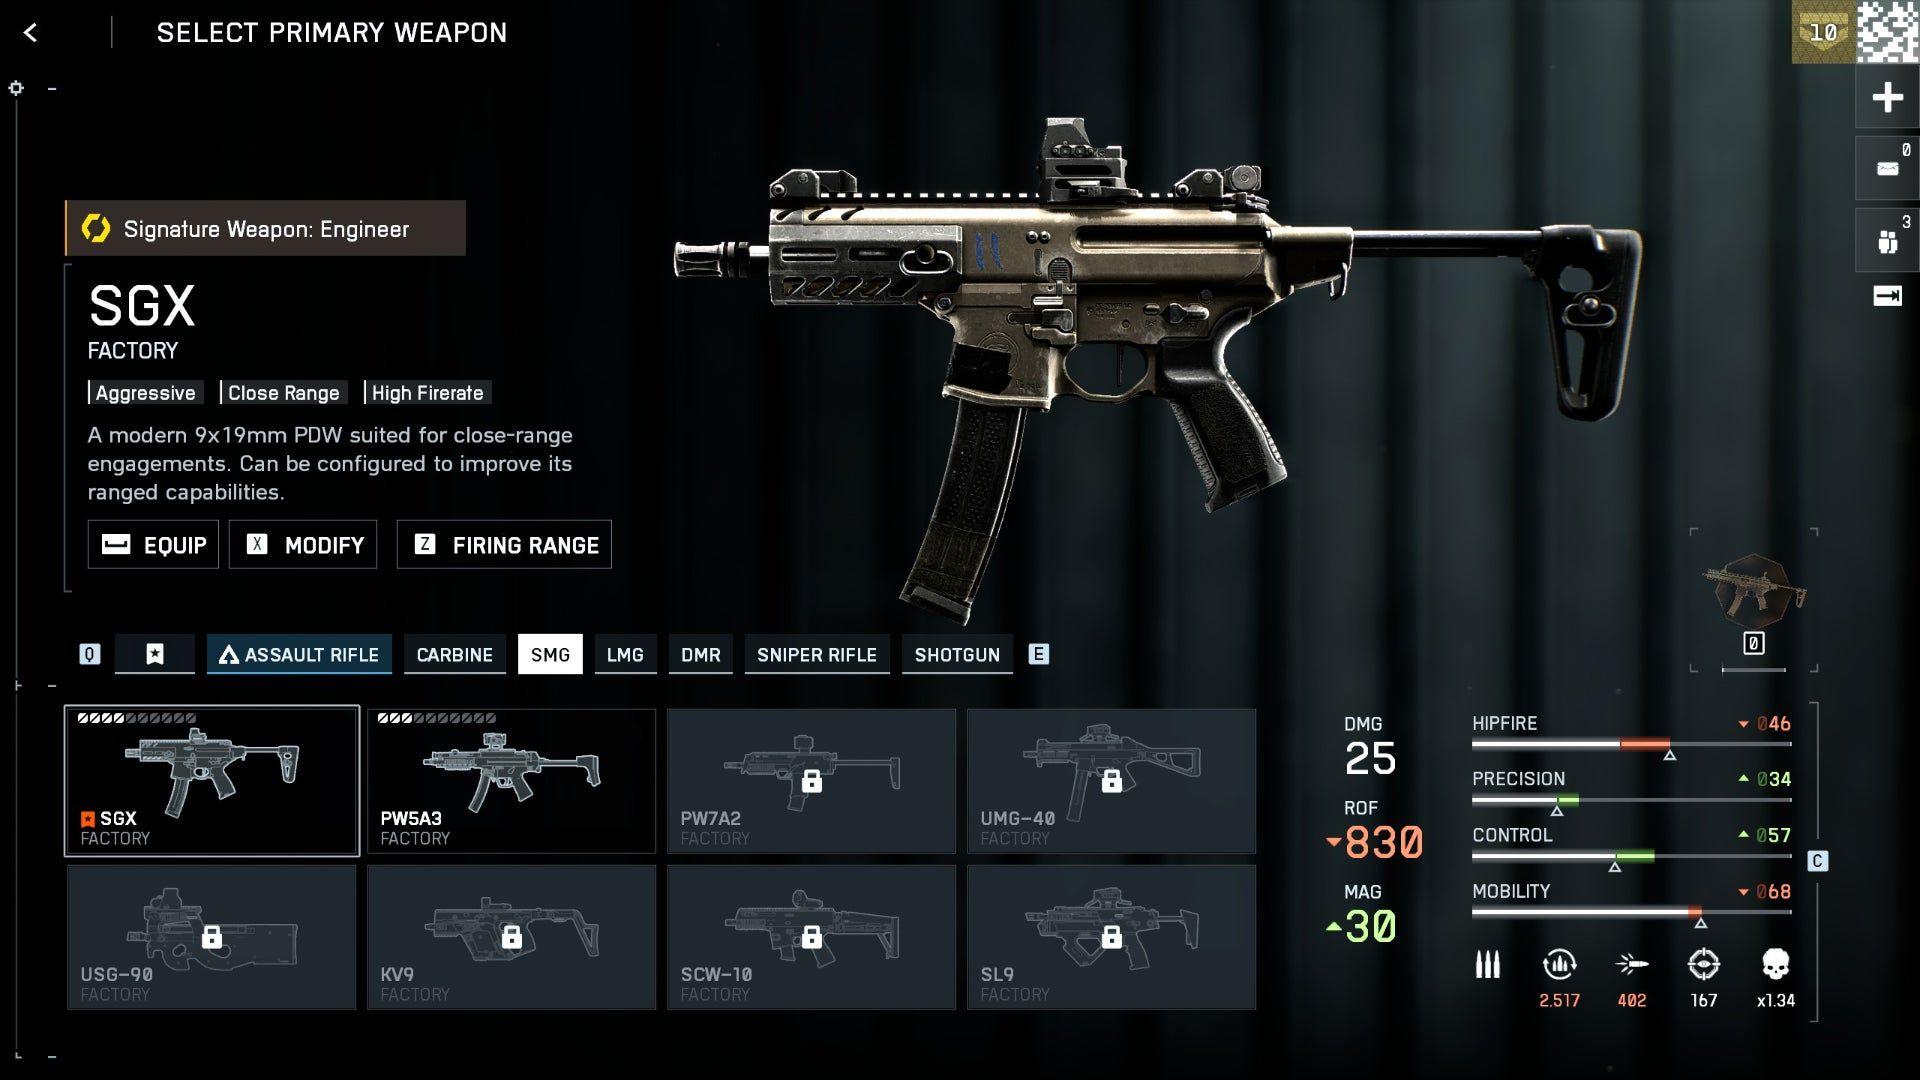
आक्रामक प्लेयर्स के लिए बेस्ट SMG बिल्ड्स
PW5A3: ऑल-राउंड डोमिनेटर
PW5A3 ने अपनी वर्सटैलिटी की वजह से मेटा में अपनी जगह बनाई है। यह SMG चलाने में बहुत स्मूद है और इसकी इफेक्टिव रेंज आम सबमशीन गन्स से कहीं ज्यादा है।
ऑप्टिमल कॉन्फ़िगरेशन:
- Muzzle: Standard Suppressor (स्टेल्थ ऑपरेशन्स के लिए)
- Barrel: 245MM Custom (रेंज एक्सटेंशन)
- Underbarrel: Canted Stubby (रिकॉइल मैनेजमेंट)
- Magazine: 40 RND (जरूरी कैपेसिटी बूस्ट)
- Ammunition: FMJ (प्लेट पेनिट्रेशन)
- Optic: Iron Sights (साफ और बिना रुकावट वाला व्यू)
इन अटैचमेंट्स के साथ रिकॉइल न के बराबर है। आप स्ट्रैफिंग करते हुए लगातार हेडशॉट्स मार पाएंगे, जो इसे बिल्डिंग रोटेशन्स और अचानक होने वाली फाइट्स में घातक बनाता है।
USG-90: बिल्डिंग क्लियरर
स्ट्रक्चर्स को जल्दी साफ करना है? USG-90 बंद जगहों को आपका पर्सनल किल-बॉक्स बना देती है। 900 RPM और 50-राउंड मैगजीन का मतलब है कि मल्टी-एनिमी एनकाउंटर्स के दौरान आपको रिलोड करने की चिंता नहीं होगी।
ऑप्टिमल कॉन्फ़िगरेशन:
- Muzzle: Double-Port Brake (हिप-फायर कंट्रोल)
- Barrel: 264MM Prototype (वेलोसिटी बूस्ट)
- Left Accessory: 5 MW Green (क्लोज-रेंज टारगेटिंग)
- Ergonomics: Mag Catch (तेज रिलोड के लिए)
- Optic: OSA-7 1.00X (क्विक एक्विजिशन)
इसमें हिप-फायर आपका प्राइमरी तरीका होना चाहिए। स्प्रिंट करते समय भी इसकी एक्यूरेसी काफी बनी रहती है। खुले मैदान की लड़ाइयों से बचें—20 मीटर से ज्यादा की दूरी पर कोई भी असॉल्ट राइफल आपको आसानी से हरा देगी।
लाइट मशीन गन पावरहाउस
RPKM: आर्मर ब्रेकर
सपोर्ट प्लेयर्स के लिए खुशखबरी—RPKM पूरी तरह से प्लेटेड दुश्मनों के खिलाफ तीन-शॉट किल की क्षमता रखती है। खुद को सही जगह पोजीशन करें, और आप दुश्मनों को उनके फायरिंग पोजीशन का पता चलने से पहले ही खत्म कर देंगे।
ऑप्टिमल कॉन्फ़िगरेशन:
- Muzzle: Long Suppressor (कंसीलमेंट + वेलोसिटी)
- Barrel: 590MM Factory (डैमेज कंसिस्टेंसी)
- Underbarrel: Alloy Vertical (स्टेबिलिटी)
- Magazine: 40 RND (मैनेजेबल साइज)
- Ammunition: Synthetic Tip (पेनिट्रेशन बूस्ट)
- Optic: RO-M 1.75X (संतुलित जूम)
शुरुआत में रिकॉइल काफी तेज होता है लेकिन बाद में यह एक मैनेजेबल पैटर्न में सेट हो जाता है। कॉमन एंगल्स पर पहले से ऐम रखें और दुश्मनों को अपने क्रॉसहेयर्स में आने दें। मूवमेंट स्पीड काफी कम हो जाती है—फाइट शुरू होने से पहले अपनी पोजीशन चुन लें।
M250: वर्सटाइल सप्रेसर
M250 बिना किसी मूवमेंट पेनल्टी के LMG फायरपावर देती है। आप बेहतर मोबिलिटी बनाए रखेंगे और साथ ही जबरदस्त सस्टेन्ड फायर भी कर पाएंगे।
ऑप्टिमल कॉन्फ़िगरेशन:
- Muzzle: Lightened Suppressor (minimal weight)
- Barrel: 556MM Prototype (extended range)
- Underbarrel: Ribbed Stubby (recoil control)
- Magazine: 50 RND Belt Pouch (capacity boost)
- Ammunition: Hollow Point (soft target damage)
- Optic: RO-M 1.75X (mid-range clarity)
लंबे समय तक स्प्रे (extended sprays) करने पर Bloom काफी महसूस होता है। मीडियम रेंज पर controlled bursts में फायर करें, लेकिन जब दुश्मन करीब आएं तो ट्रिगर दबाए रखने में संकोच न करें।
Sniper Rifle Configurations
M2010 ESR: द लॉन्ग-रेंज ओपनर
REDSEC में स्नाइपर्स को किल के लिए दो हेडशॉट्स की जरूरत होती है, जिससे ये प्राइमरी वेपन्स के बजाय engagement starters के रूप में बेहतर काम करते हैं। M2010 ESR अपनी 1125 m/s बुलेट वेलोसिटी के साथ बेहतरीन है—आपको चलते हुए टारगेट्स को हिट करने के लिए ज्यादा लीड (lead) लेने की जरूरत नहीं पड़ेगी।
Optimal Configuration:
- Muzzle: Lightened Suppressor (stealth + velocity)
- Barrel: 26" Carbon (maximum speed)
- Left Accessory: Range Finder (distance calculation)
- Magazine: 5 RND (standard capacity)
- Ammunition: Long-Range (velocity boost)
- Optic: S-VPS 6.00X (magnification)
- Optic Accessory: Canted Reflex (emergency CQC)
जब दुश्मन करीब आ जाएं, तो वह Canted Reflex आपकी जान बचा सकता है। बिल्डिंग पुश के दौरान प्राइमरी वेपन के साथ उलझने के बजाय तुरंत इस पर स्विच करें।
PSR: द प्रिसिजन इंस्ट्रूमेंट
स्नाइपर चैलेंजेस के जरिए PSR को अनलॉक करें, और आप REDSEC का सबसे घातक मार्क्समैन वेपन चला पाएंगे। अपर-बॉडी शॉट्स हेल्थ बार को काफी तेजी से कम करते हैं।
Optimal Configuration:
- Muzzle: Long Suppressor (concealment)
- Barrel: 27" MK22 (accuracy boost)
- Left Accessory: Range Finder (precise ranging)
- Underbarrel: Full Angled (stability)
- Magazine: 7 RND Magazine (capacity)
- Ammunition: Match Grade (consistency)
- Optic: S-VPS 6.00X (clear glass)
- Optic Accessory: Anti-Glare Coating (stealth)
[IMAGE: sniper rifle scope zeroing distance interface]
बजट-फ्रेंडली अर्ली लोडआउट्स
क्या आप बिना पूरी तरह से लेवल किए गए हथियारों के साथ REDSEC शुरू कर रहे हैं? ये कॉन्फ़िगरेशन शुरुआती-अनलॉक अटैचमेंट्स का उपयोग करते हैं और फिर भी कॉम्पिटिटिव परफॉरमेंस देते हैं।
ये गन्स REDSEC के कॉम्बैट फ्लो को सीखने के लिए बेहतरीन हैंडलिंग देती हैं। M4A1 खास तौर पर एक ऑल-राउंडर के रूप में चमकती है जो हर जगह अच्छा परफॉर्म करती है।
एडवांस्ड प्लेयर्स के लिए स्पेशलाइज्ड बिल्ड्स
AK-205: द हेडशॉट हंटर
सटीक निशाना लगाने वाले प्लेयर्स AK-205 को इसके कम रिकॉइल और बेहतर हेडशॉट मल्टीप्लायर के लिए पसंद करते हैं। अपर-चेस्ट शॉट्स मारें, और आप ज्यादा डैमेज वाले हथियारों को भी मात दे देंगे।
Optimal Configuration:
- Muzzle: Flash Hider (muzzle flash reduction)
- Barrel: 314MM Prototype (handling boost)
- Underbarrel: 6H64 Vertical (precision)
- Magazine: 36 RND (balanced capacity)
- Ammunition: Polymer Case (velocity)
- Ergonomics: Mag Catch (reload speed)
- Optic: RO-M 1.75X (clean reticle)
- Right Accessory: 5 MW Red (target marking)
इसकी लेजर जैसी सटीकता उन धैर्यवान प्लेयर्स को रिवॉर्ड देती है जो स्प्रे करने के बजाय निशाना लगाकर शूट करते हैं। आप बॉडी-शॉट स्पेशलिस्ट्स के खिलाफ DPS रेस हार सकते हैं, लेकिन हेडशॉट्स तुरंत बाजी पलट देते हैं।
KTS100 MK8: द मोबाइल LMG
क्या आप मूवमेंट पेनल्टी के बिना LMG की पावर चाहते हैं? KTS100 MK8 लगभग जीरो रिकॉइल के साथ अच्छी मोबिलिटी बनाए रखती है।
Optimal Configuration:
- Muzzle: Flash Hider (concealment)
- Barrel: 508MM MK8 (factory specification)
- Underbarrel: Alloy Vertical (minimal weight)
- Ammunition: Polymer Case (lightweight rounds)
- Optic: RO-M 1.75X (versatile sight)
इसका मॉडरेट फायर रेट मतलब है कि आप दुश्मनों को तुरंत पिघला नहीं रहे हैं, लेकिन इसकी पिनपॉइंट सटीकता आपको हर एक बुलेट लैंड करने में मदद करती है। कॉमन कोनों पर प्री-फायर करें और दुश्मनों को उनके आपको देखने से पहले ही ढेर होते हुए देखें।
[IMAGE: weapon stat comparison damage range accuracy chart]
अटैचमेंट प्रायोरिटी गाइड
यह समझना कि कौन से अटैचमेंट्स सबसे ज्यादा मायने रखते हैं, आपको सीमित अनलॉक्स के साथ भी प्रभावी लोडआउट बनाने में मदद करेगा:
क्रिटिकल अटैचमेंट्स:
- Suppressors: मिनि-मैप से दूर रहना लड़ाई शुरू होने से पहले ही जीत दिला देता है
- Vertical Grips: रिकॉइल कंट्रोल ही हिट्स और मिस के बीच का अंतर है
- Extended Magazines: एक्स्ट्रा राउंड्स मल्टी-एनिमी एनकाउंटर्स के दौरान आपकी जान बचाते हैं
सेकेंडरी प्रायोरिटीज:
- Barrel Extensions: मिड-डिस्टेंस फाइटिंग के लिए इफेक्टिव रेंज बढ़ाते हैं
- Ammunition Types: सिचुएशनल फायदे (पेनेट्रेशन के लिए FMJ, सॉफ्ट टारगेट्स के लिए Hollow Point)
- Optics: व्यक्तिगत पसंद, लेकिन 1.75X-3.00X ज्यादातर सिनेरियो के लिए सही है
क्लास-स्पेसिफिक लोडआउट स्ट्रेटेजीज
Assault: एग्रेसिव एंट्री
आपका SVK-8.6 गैजेट लॉन्ग-रेंज खतरों को संभालता है जबकि आपका प्राइमरी क्लोज-मीडियम कॉम्बैट में हावी रहता है। M320A1 HE ग्रेनेड लॉन्चर फोर्टिफाइड पोजीशन्स को कमजोर करता है।
अनुशंसित प्राइमरी: KORD 6P67 या SOR-556 MK2
Engineer: व्हीकल काउंटर
लेट-गेम व्हीकल खतरों के लिए आपके RPG-7V2 और AV Mines की जरूरत होती है। आपका प्राइमरी इन्फैंट्री खतरों को प्रभावी ढंग से कवर करना चाहिए।
अनुशंसित प्राइमरी: PW5A3 या M250
Support: टीम सस्टेन
Defibrillators और Supply Pouches आपको अमूल्य बनाते हैं। ऐसे हथियार चुनें जो डिफेंसिव पोजीशन्स में बेहतर हों जहाँ आप डाउन हुए साथियों को प्रोटेक्ट कर रहे हों।
अनुशंसित प्राइमरी: RPKM या M250
Recon: इंटेलिजेंस गैदरिंग
आपका Recon Drone और Proximity Detector दुश्मन की पोजीशन्स को रिवील करते हैं। स्नाइपर राइफल्स इस इंटेलिजेंस-फोक्स्ड रोल के साथ परफेक्ट बैठती हैं।
अनुशंसित प्राइमरी: M2010 ESR या PSR
लोडआउट की सामान्य गलतियां जिनसे बचें
ओवर-स्पेशलाइजेशन: केवल लॉन्ग-रेंज के लिए बिल्ड करना आपको बिल्डिंग्स में असहाय छोड़ देता है। सेकेंडरी या गैजेट चॉइसेस के जरिए क्लोज-क्वार्टर कैपेबिलिटी बनाए रखें।
Suppressors को नजरअंदाज करना: बिना सप्रेसर के फायर करना आपकी पोजीशन को हर नजदीकी स्क्वाड को बता देता है। स्टेल्थ का फायदा मामूली स्टेट पेनल्टी से कहीं ज्यादा है।
गलत ऑप्टिक मैग्निफिकेशन: हाई-जूम स्कोप अचानक होने वाली लड़ाइयों के दौरान टारगेट एक्विजिशन को धीमा कर देते हैं। वर्सटैलिटी के लिए 1.75X-3.00X के साथ बने रहें।
Ammunition टाइप्स को नजरअंदाज करना: स्टैंडर्ड राउंड्स ठीक काम करते हैं, लेकिन स्पेशलाइज्ड एम्युनिशन (पेनेट्रेशन के लिए FMJ, स्नाइपर्स के लिए Long-Range) मापने योग्य फायदे देते हैं।
सर्कल फेजेस के अनुसार लोडआउट को ढालना
अर्ली गेम (लूटिंग फेज):SOR-556 MK2 जैसे वर्सटाइल मिड-रेंज हथियार अलग-अलग एंगेजमेंट्स को संभालते हैं जैसे-जैसे आप रिसोर्सेज इकट्ठा करते हैं।
मिड गेम (रोटेशन फेज): जैसे-जैसे सर्कल टाइट होते हैं और बिल्डिंग फाइट्स बढ़ती हैं, क्लोज-क्वार्टर हथियारों की वैल्यू बढ़ जाती है। PW5A3 या USG-90 बिल्ड्स पर स्विच करें।
एंड गेम (फाइनल सर्कल्स): फायरपावर से ज्यादा पोजीशन मायने रखती है। RPKM जैसी LMGs तब एक्सेल करती हैं जब आपने सीमित रोटेशन ऑप्शंस के साथ मजबूत कवर सुरक्षित कर लिया हो।
निष्कर्ष
आपका वेपन लोडआउट REDSEC में हर एंगेजमेंट को सीधे प्रभावित करता है। SOR-556 MK2 सबसे वर्सटाइल प्राइमरी के रूप में हावी है, लेकिन डिफेंस के लिए RPKM या एग्रेशन के लिए PW5A3 जैसे स्पेशलाइज्ड बिल्ड्स अलग-अलग प्लेस्टाइल्स के लिए सूट करते हैं।
याद रखें: मिशन के जरिए कस्टम वेपन ड्रॉप्स कमाना पब्लिक इवेंट्स में मुकाबला करने से बेहतर है। अपने आठ फेवरेट्स को रणनीतिक रूप से सेट करें—मल्टीपल रेंजेस और सिनेरियो को कवर करें। जैसे-जैसे आप Battlefield 6 प्रोग्रेशन के जरिए और अटैचमेंट्स अनलॉक करते हैं, इन बिल्ड्स को लगातार रिफाइन करते रहें।
अगर आप नए हैं तो बजट लोडआउट्स से शुरुआत करें, और फिर जैसे-जैसे आपके हथियार का लेवल बढ़े, स्पेशलाइज्ड कॉन्फ़िगरेशन की ओर बढ़ें। बैलेंस अपडेट्स के साथ मेटा बदलता रहेगा, लेकिन ये बुनियादी सिद्धांत—सप्रेशन, रिकॉइल कंट्रोल, और वर्सटैलिटी—हमेशा एक जैसे रहेंगे।
अब मैदान में उतरें और जीत हासिल करें। आपके विरोधियों को पता भी नहीं चलेगा कि उन पर हमला कहाँ से हुआ।