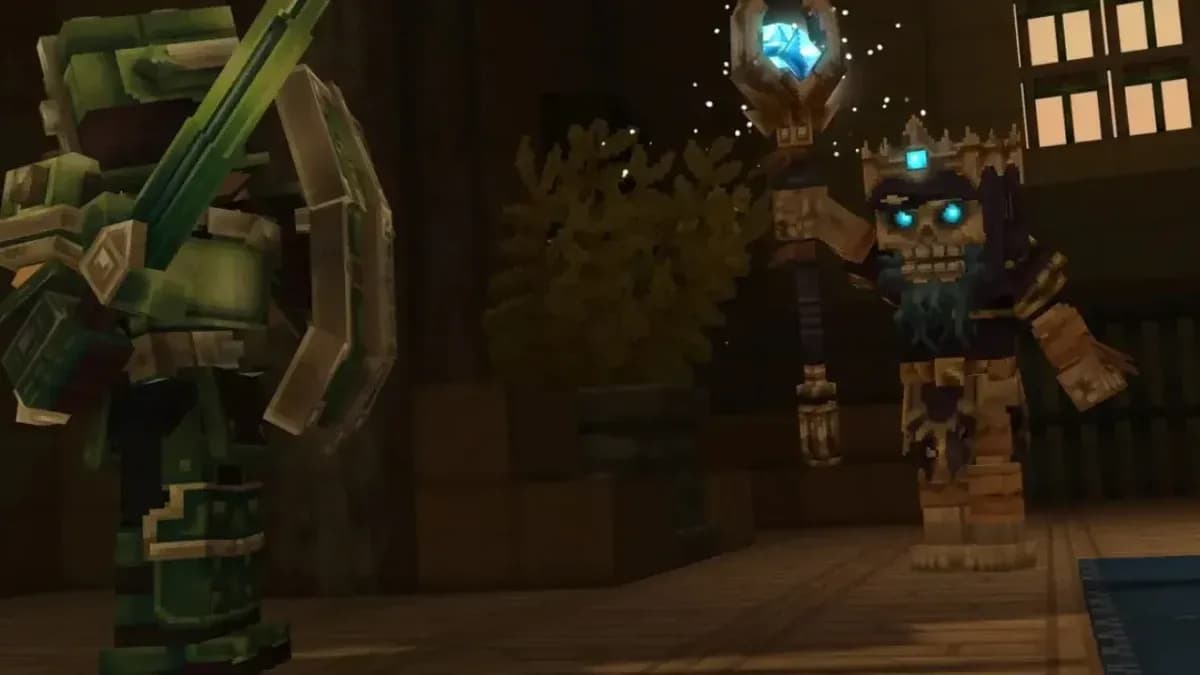

Burnt Skeleton Praetorian, Hytale में आपकी combat mastery का पहला असली test है। यह overworld boss aggressive players को punish करता है जो button mash करके आगे बढ़ना चाहते हैं, आपको attack patterns का respect करने और crowd control manage करने के लिए मजबूर करता है। ज़्यादातर players जो miss करते हैं, वह यह है कि यह fight raw damage output के बारे में नहीं है, यह positioning और prioritization के बारे में है। आपको summoned minions, devastating charge attacks, और एक shield का सामना करना पड़ेगा जो सबसे खराब moments में आपके shots को block करता है।
बात यह है: preparation सब कुछ तय करती है। Basic gear के साथ इस arena में enter करें और आप respawn screen देख रहे होंगे। हालांकि, सही equipment लाएं और mechanics को समझें, और आप valuable crafting materials claim करेंगे जो आपके next tier of progression को unlock करेंगे।
Burnt Skeleton Praetorian को कहाँ find करें
Emerald Wilds Arena Locations
आपको यह boss Emerald Wilds biome में scattered dedicated arena encampments में मिलेगा। ये structures तुरंत stand out करते हैं जब आप जानते हैं कि क्या देखना है, stone walls और metal bars से enclosed और distinctive green-flame braziers perimeter को mark करते हुए। Arenas में spike decorations और एक unmistakably hostile atmosphere है।
Catch क्या है? Spawn locations Emerald Wilds में randomise होते हैं, इसलिए आपको thoroughly explore करना होगा। Region में traverse करते समय अपने map पर brown encampment icons देखें। ये arenas purpose-built combat zones हैं, जो आपको एक clear signal देते हैं कि एक major fight awaits।
Catacombs Beneath Burial Grounds
Praetorian Emerald Wilds में Burial Grounds structures के नीचे catacombs में भी appear होता है। ये underground encounters boss को skeletal remains और undead patrols से भरे rooms के center में रखते हैं। आप entrance को एक circular gate with a central mausoleum structure से recognize करेंगे।
Catacomb variant open arena की तुलना में ज़्यादा claustrophobic fight offer करता है, जिसमें tighter spacing charge attack को dodge करना ज़्यादा challenging बनाता है। दोनों locations identical loot drop करती हैं, इसलिए अपने preferred combat environment के आधार पर चुनें।
Gear Requirements
Armor Progression
Copper armor इस encounter के लिए minimum viable defense है। आप attack patterns सीखते समय mistakes survive करेंगे, लेकिन significant healing resources use करने की उम्मीद करें। Improved defense आपको तुरंत मरे बिना एक या दो hits tank करने देता है, जिससे आपको recover करने के लिए breathing room मिलता है।
Minimum viable armor setup
Iron armor fight को punishing से manageable में transform करता है। Additional defense rating का मतलब है कि आप अपनी पूरी food supply खत्म किए बिना positioning errors afford कर सकते हैं। अगर आपने Iron gear craft करने के लिए पर्याप्त progress किया है, तो इस encounter के लिए इसे prioritize करें।
Weapon Selection
Ranged weapons को आपका primary damage output handle करना चाहिए। Shortbows और crossbows आपको safe distance maintain करने देते हैं जबकि Praetorian की slow movement speed उसके खिलाफ काम करती है। आप उसके devastating melee swings के संपर्क में आए बिना steadily chip away करेंगे।
अपने secondary के रूप में एक solid melee weapon equipped रखें। आपको summoned skeletons को quickly clear करने के लिए इसकी आवश्यकता होगी, क्योंकि वे boss से तेज़ चलते हैं और अगर ignored किया गया तो आपको overwhelm कर देंगे। Daggers multiple targets से deal करने के लिए अपने attack speed के लिए विशेष रूप से अच्छी तरह से काम करते हैं।
Supplies
Raw ingredients के बजाय cooked food से अपना inventory stock करें। Improved healing per item का मतलब है कि sustenance के लिए कम inventory slots समर्पित होंगे और damage trades के बीच तेज़ health recovery होगी। Hytale's farming system crop production establish करने के बाद sustainable food sources provide करता है।
Crossbow का उपयोग करते समय backup ammunition लाएं। Mid-fight dry run आपको unfavorable melee range में मजबूर करता है जहां Praetorian का damage output dramatically spikes करता है।
Combat Strategy
Phase One: Opening Engagement
Maximum bow range पर encounter शुरू करें। Praetorian की slow movement distance close करने से पहले shots land करने के लिए एक comfortable window बनाती है। Here's the key: उसके shield के सीधे सामने खड़े होने से बचें। Boss कुछ angles से incoming projectiles को block करेगा, आपकी ammunition और time बर्बाद करेगा।
Shield block angle coverage
Shield coverage को bypass करने के लिए diagonal angles पर खुद को position करें। Boss आपको face करने के लिए rotate होने पर optimal shooting position maintain करने के लिए firing करते समय circle-strafe करें।
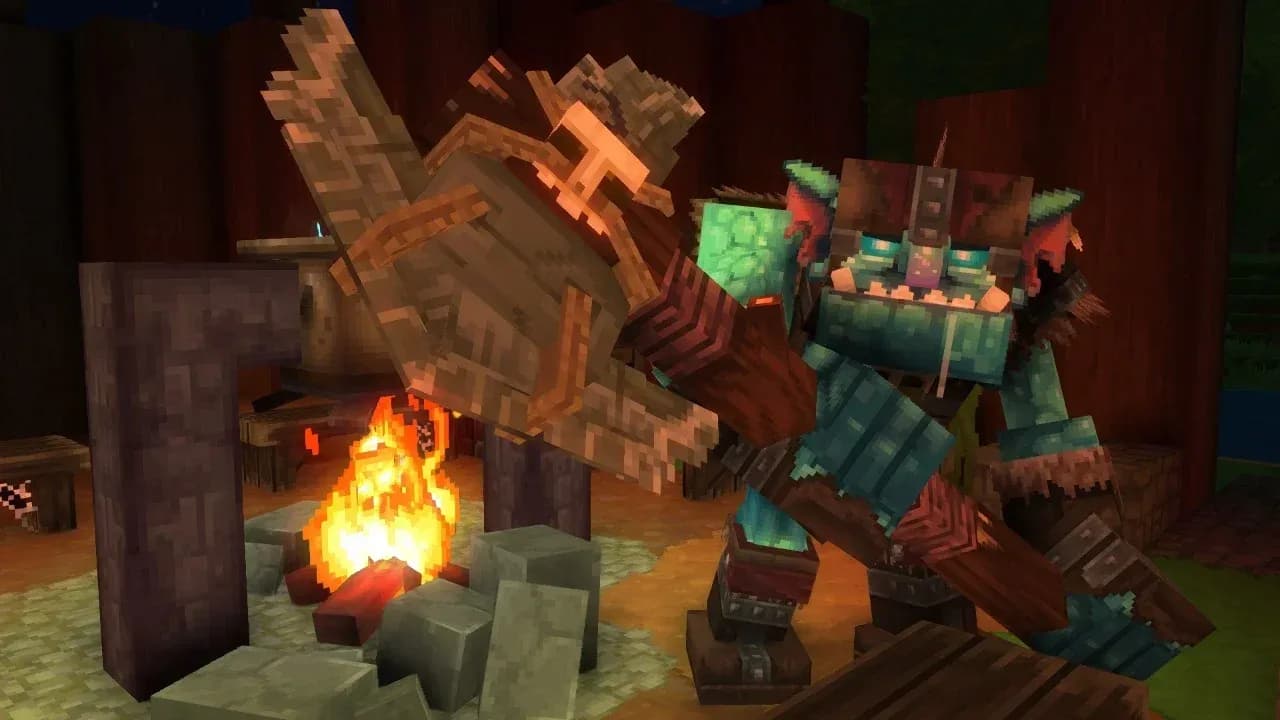
Phase Two: Managing the Charge Attack
Distinctive windup animation के लिए देखें जहां Praetorian अपना shoulder या foot forward commit करता है। यह lunging charge को telegraph करता है जो massive damage deal करता है और distance को instantly close करता है। Pro tip: पीछे हटने के बजाय sideways strafe करें। पीछे हटना अक्सर extended hitbox से clipped होने में परिणामित होता है, जबकि lateral movement clean separation बनाता है।
Charge हमेशा immediate heavy melee swing के साथ follow करता है। Lunge को dodge करने के बाद, follow-up attack land करने से पहले distance बनाएं। Ranged attacks फिर से शुरू करने से पहले आप melee range के बाहर होना चाहेंगे।
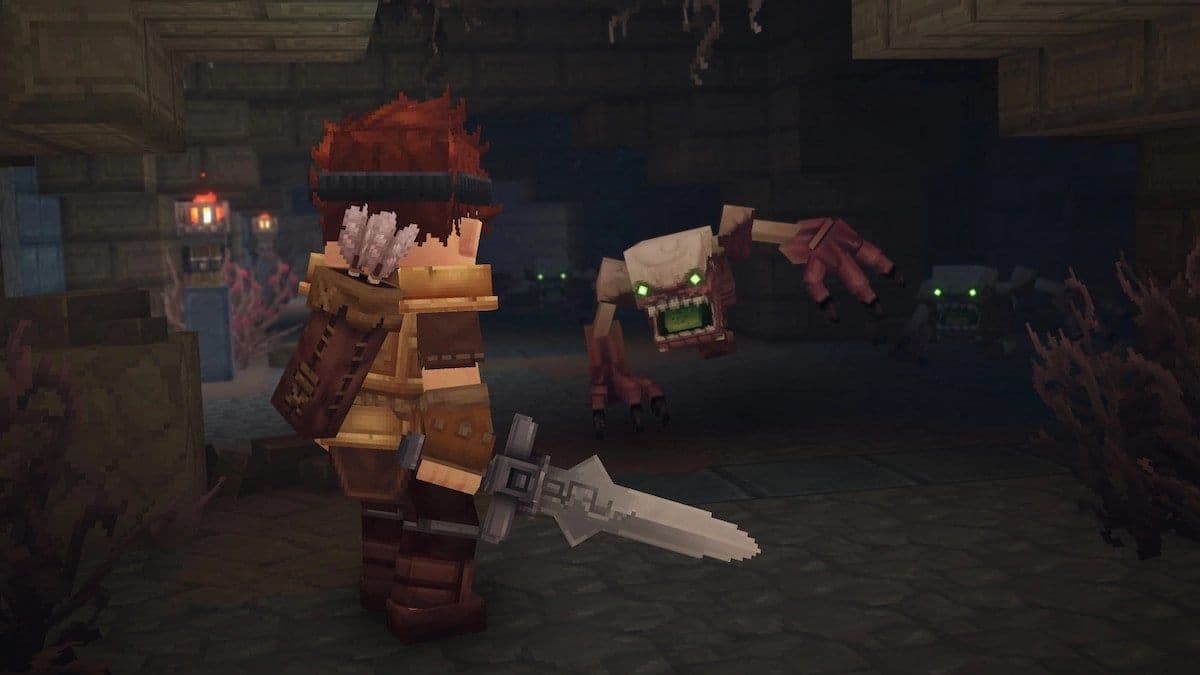
Phase Three: Skeleton Minion Control
Praetorian periodically ground से spawn होने वाले skeleton minions को summon करता है। यह mechanic fight के difficulty curve को define करता है। इन adds को ignore करें और वे आपको surround कर लेंगे, एक crossfire situation बनाएंगे जो आपकी health को rapidly drain करता है।
Minion spawn indicators
Minions appear होने पर तुरंत अपने melee weapon पर स्विच करें। Boss पर focus वापस करने से पहले quick strikes से उन्हें clear करें। Spawned skeletons Praetorian की तुलना में lower health pools रखते हैं, जिससे उन्हें eliminate करना quick हो जाता है अगर आप उन्हें correctly prioritize करते हैं।
Summoning ritual एक brief window बनाता है जहां boss stationary रहता है। Reposition या heal करने की आवश्यकता होने पर इस अवसर का उपयोग करें, लेकिन minions active होने पर boss को damage करने की कोशिश करने में greedy न हों।
Phase Four: Maintaining Pressure
Minion clearing द्वारा punctuated ranged damage के cycle को जारी रखें। Arena के चारों ओर Circular movement boss को walls के खिलाफ corner करने से रोकता है जहां escape options गायब हो जाते हैं। Heal या reload करने की आवश्यकता होने पर line of sight break करने के लिए environmental obstacles का उपयोग करें।
The key here is patience। Boss ने attack animation commit नहीं किया है, तब melee damage के लिए rush करना आपको devastating swing खाने का तरीका है। Clear openings के लिए प्रतीक्षा करें, अपने hits land करें, फिर safety में retreat करें।
जैसे-जैसे Praetorian का health drops होता है, distance close करने और quickly finish करने की urge का विरोध करें। Boss enrage phase में enter नहीं करता है या patterns change नहीं करता है, इसलिए same disciplined approach maintain करें जिसने आपको earlier phases से survive करने में मदद की।
Attack Pattern Reference
Rewards and Progression
Defeating Burnt Skeleton Praetorian दो critical mid-game materials drop करता है:
Thorium Ingot next tier of gear crafting को unlock करता है। आपको Thorium equipment craft करने के लिए multiple ingots की आवश्यकता होगी, जिससे यह boss farming के लायक हो जाता है अगर आप harder content के लिए prepare कर रहे हैं।
Essence of Fire advanced crafting recipes और magical item creation में एक component के रूप में काम करता है। यह material late-game content की ओर progress करते हुए increasingly valuable हो जाता है।
Praetorian boss rewards
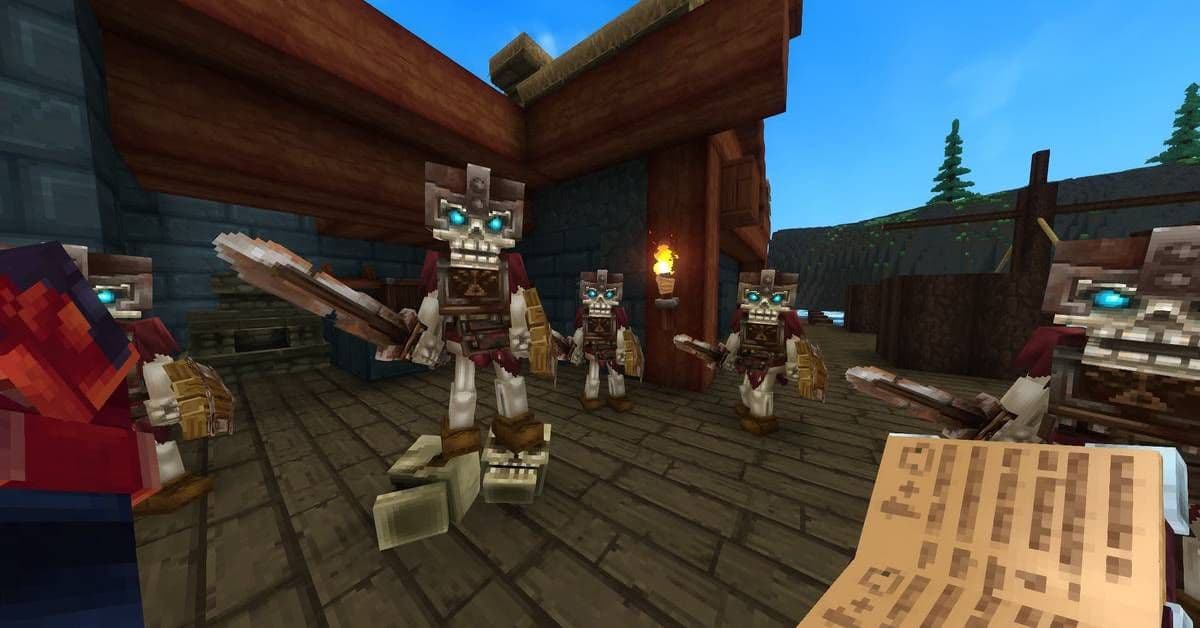
Update 2 Necromancy Addition
Recent content update ने एक unique drop introduce किया है: Grimoire: Rekindle Embers। यह necromancy item आपको dungeons और ruins में scattered bone piles से up to five skeletal minions raise करने देता है। Summoned allies पांच मिनट तक या जब तक आप मर न जाएं, आपके साथ fight करते हैं, जिससे वे dense enemy groups को clear करने के लिए विशेष रूप से valuable हो जाते हैं।
Bone piles undead-themed structures में frequently appear होते हैं, जिससे यह item significant tactical utility देता है। Minions automatically nearby enemies को target करते हैं, प्रभावी ढंग से undead को future encounters में खुद के खिलाफ मोड़ते हैं।
Common Mistakes to Avoid
Engaging without clearing the surrounding area unnecessary complications पैदा करता है। Other hostile mobs fight के बीच में arena में wander कर सकते हैं, पहले से ही challenging encounter में unpredictable variables जोड़ सकते हैं।
Ignoring summoned skeletons failed attempts का number one cause है। Players boss के health bar पर tunnel vision करते हैं जबकि minions पीछे से chip away करते हैं, एक death by a thousand cuts scenario बनाते हैं।
Fighting in melee range by choice बजाय necessity के आपके defensive advantage को waste करता है। Praetorian की slow movement उसके high melee damage को balance करने के लिए मौजूद है। Range में रहना इस weakness का प्रभावी ढंग से फायदा उठाता है।
Preparation Checklist
Burnt Skeleton Praetorian को engage करने से पहले, verify करें कि आपके पास है:
- Copper armor minimum (Iron strongly recommended)
- Loaded ranged weapon with backup ammunition
- Melee weapon for add clearing
- Full stack of cooked food
- Clear arena with no nearby hostile mobs
- Understanding of charge attack telegraph
यह fight आपके ability को multiple threats को simultaneously manage करने का test करता है जबकि disciplined spacing maintain करता है। इस encounter को master करें और आपके पास higher-tier zones में Hytale's more challenging boss encounters के लिए skills और materials होंगे।