

Paradise Killer के फैंस जो open-world investigation games और strong mission structure पसंद करते हैं, उन्हें Killer Bean में काफी कुछ पसंद आएगा, लेकिन दोनों games का gameplay काफी अलग है। Killer Bean आपको एक fast-paced roguelike shooter में डाल देता है जहाँ आप एक rogue assassin coffee bean के तौर पर एक hostile island पर Shadow Bean Agency को खत्म करते हैं। यह game अभी Early Access में है, और इसकी main story 9 missions में फैली है, जो एक plane crash prologue से शुरू होकर multi-phase final boss तक जाती है। यह guide हर objective, हर boss, और उन strategies को cover करती है जो वाकई काम करती हैं।

प्री-ऑर्डर के साथ 1-month GTA+ सब्सक्रिप्शन प्राप्त करें।
GTA 6 अभी प्री-ऑर्डर करें
Prologue कहानी को कैसे set up करता है?
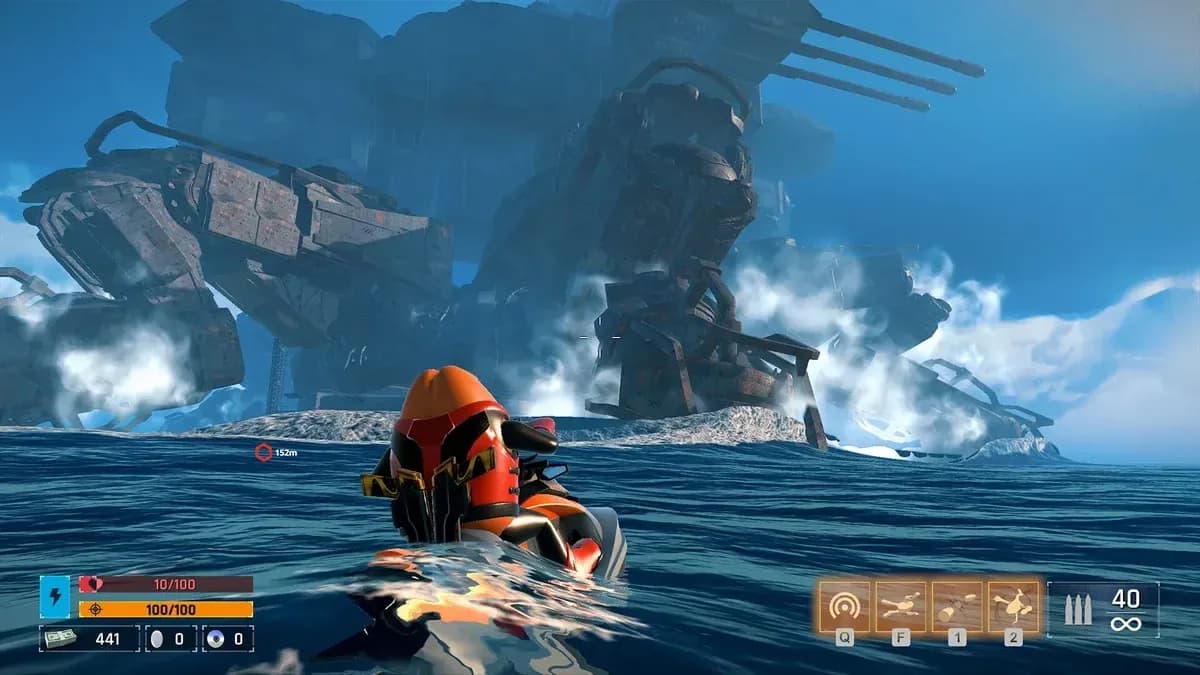
Game की शुरुआत Killer Bean के साथ होती है जो एक plane में एक mysterious island की तरफ जा रहा है। approach के दौरान एक missile plane से टकराती है, जिससे Killer Bean और उसकी car ocean में गिर जाते हैं। एक stranger bean उसे बाहर निकालता है, और एक brief conversation के बाद, Killer Bean अपना mission समझाता है: Shadow Beans को खत्म करना। उसे एक boatman bean की तरफ भेजा जाता है जो बाकी game के लिए आपका mission handler बन जाता है।
Target Super Mech है, जो Shadow Agency का mechanized fortress है। उस तक पहुँचने के लिए आपको intelligence इकट्ठा करने, gear up करने, और उनके operations को piece by piece dismantle करने के लिए कई missions पूरे करने होंगे।

Mission की शुरुआत एक crash के साथ होती है
Mission 1: Smuggler को ढूँढना
आपका पहला objective एक ऐसे smuggler को locate करना है जो Shadow Agency को supply देता है। Landing point से east की तरफ drive करें और neighborhood तक पहुँचें। अपने map पर PC icon ढूँढें, उस building में enter करें, और device को hack करने के लिए second floor पर climb करें।
यह पहला hack neighborhood में मौजूद अन्य hackable devices को reveal करता है। Mission के लिए आपको bottom-right device की जरूरत है, जो आपको smuggler की location देगा। बाकी devices को भी hack करना फायदेमंद है क्योंकि वे आपके map पर weapons, ammunition, और supplies को mark कर देते हैं।
एक बार जब आपको smuggler की location (red zone के रूप में marked) मिल जाए, तो वहाँ जाएँ, उसे kill करें, और उसका phone उठा लें। यह आपको hideout में एक computer की तरफ point करेगा। उसे hack करें और connection establish होने तक position को defend करें। Wave clear करने के बाद, rooftop पर जाएँ, satellite को guard कर रहे armored enemy से निपटें, और फिर mission पूरा करने के लिए उसे hack करें।
Missions के बीच shop पर जाना
Mission 1 के बाद, आप हर अगले mission से पहले city shop visit करने की ability unlock कर लेते हैं। इसे access करने के लिए city के center में drive करें। Shop में नए weapons और upgrades मिलते हैं जिन्हें money या eggs से खरीदा जा सकता है। एक जरूरी rule: shop के अंदर या shopkeeper पर fire न करें। ऐसा करने से security system trigger हो जाता है और दुश्मन आपके पीछे पड़ जाते हैं।
Mission 2: Mech Designer को बचाना
यह mission आपको mercenaries द्वारा कब्जे वाले एक island पर भेजता है जिन्होंने Mech Designer को prisoner बना रखा है। अपने entry point के पास छोटे camp को clear करके शुरुआत करें और उसके computer को hack करें, जो map पर सभी hackable devices को mark कर देगा।
Mission objective के लिए, map के far east side पर मौजूद device को hack करें। इससे confirm हो जाता है कि Mech Designer center में main facility में रखा गया है, लेकिन facility locked है। Access key रखने वाले captain को boatman द्वारा mark किया गया है। उसे kill करें, key लें, और facility की तरफ बढ़ें।
अंदर, तीन flags capture करने होंगे। हर एक के आसपास के दुश्मनों को kill करें और तब तक खड़े रहें जब तक flag red न हो जाए। एक बार तीनों capture हो जाने पर, आप top floor पर cell को access कर सकते हैं। उसे unlock करें और Mech Designer को submarine की तरफ west में escort करें।
निकलने से पहले, north के camp से Mech Designer's hard drive (yellow में marked) उठा लें। फिर helicopters आ जाएंगे। RPGs map पर yellow-marked locations में बिखरे हुए हैं। Fire करने से पहले helicopters के करीब जाना, दूर से shoot करने से ज्यादा reliable है क्योंकि distance पर RPG की accuracy inconsistent होती है।
RPGs helicopter positions को mark करते हैं
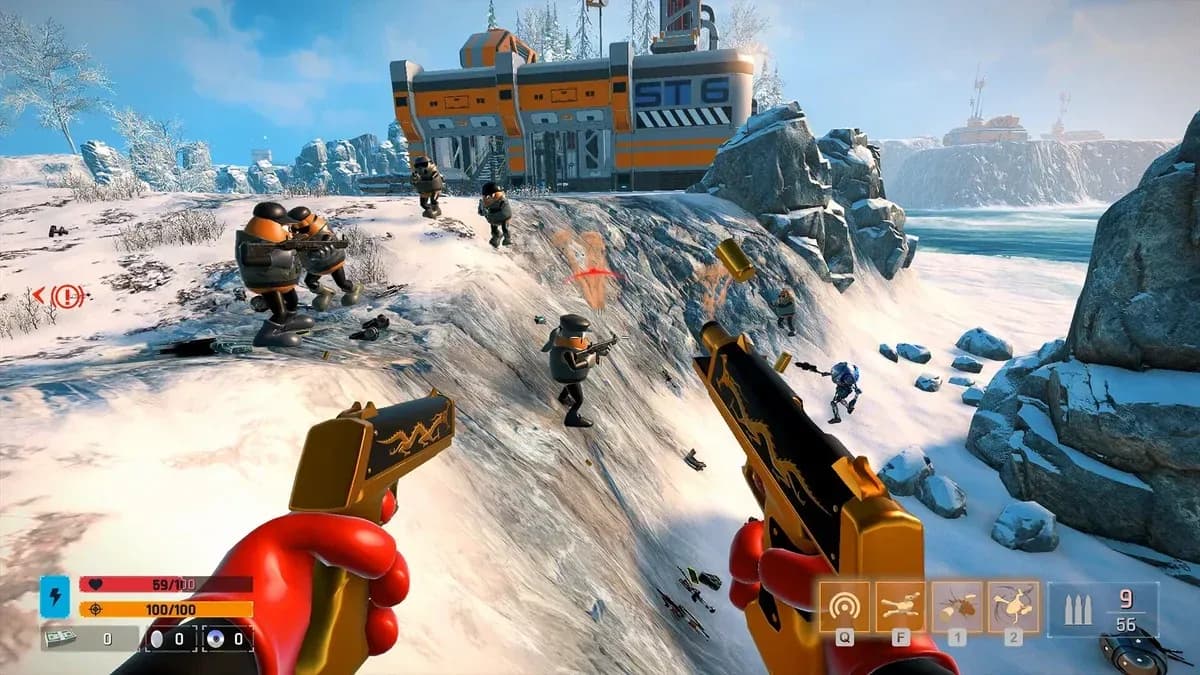
Mission 3: Warlord के खिलाफ Boss fight
Shadow Agency अपना पहला named boss आपके पीछे भेजती है। Warlord एक ऐसे island पर लड़ता है जो wrecked vehicles से भरा है, जिन्हें आप cover के तौर पर इस्तेमाल कर सकते हैं। Ammo crates भी आसपास बिखरे हुए हैं, इसलिए जब आप low हों तो उन पर नज़र रखें।
Warlord missiles fire करता है और समय-समय पर drones deploy करता है जो आपको track करके shoot करते हैं। Drones को spawn होते ही destroy करना जरूरी है ताकि आप main target पर ध्यान दे सकें। Dive ability time को slow कर देती है और Warlord पर clean shots लेने और उसकी missiles से बचने के लिए यह आपका सबसे effective tool है।
Mission 4: Toy Maker को lure करना
इस mission के लिए एक Shadow Bean को बाहर निकालने के लिए island पर काफी chaos फैलाना होगा। आपके पास तीन objective types हैं:
तीनों objective types पूरे करें और island का Shadow Bean, Toy Maker, आपसे खुद निपटने के लिए बाहर आ जाएगा। उसका attack pattern आपकी तरफ explosive cars भेजना है, जिन्हें आपको contact से पहले shoot करना होगा। Warlord की तुलना में यह fight काफी straightforward है।
Toy Maker को हराने के बाद, उसकी body से transponder उठाएं और उसकी jet ski पर escape करें। Transponder आपको बाद के एक mission में detection trigger किए बिना Shadow Agency के base में enter करने देता है।
Mission 5: Plasma fuel drill को destroy करना
Shadow Agency Super Mech के defenses को power देने के लिए एक special island पर plasma fuel के लिए drill करती है। Facility के center में जाएं और main computer terminal तक जाने के लिए stairs चढ़ें। इसे hack करने से पता चलेगा कि fuel supply को कैसे destroy करना है।
Hack के बाद एक mech आपका पीछा करेगा। उसके खिलाफ explosives सबसे अच्छा काम करते हैं, हालांकि अगर आपके पास पर्याप्त ammunition है तो regular weapons भी काम कर सकते हैं। Mech को destroy करने के बाद, असली चुनौती सामने आती है: Overseer, जो ऐसी surge armor पहनता है जिसे कोई भी weapon सीधे penetrate नहीं कर सकता।
Surge armor को disable करने के लिए, Overseer को facility के आसपास के power generators के पास lure करें, फिर generator को shoot करें। यह armor को overload कर देता है और Overseer को vulnerable बना देता है। उसे हराने के बाद, facility के top पर walkway पर चढ़ें, आपको रोकने वाले drones को destroy करें, फिर far side पर control panel तक पहुँचने के लिए lasers के बीच से निकलें। उसके साथ interact करने से drill overheat होकर destroy हो जाएगी।
Armor हटाने के लिए generators को overload करें
Mission 6: B.O.S. के खिलाफ Boss fight
B.O.S. (Bean On A Stick) पिछले bosses की तुलना में difficulty में एक step ऊपर है, इसलिए इस fight में solid gear के साथ आएं। उसका staff कई अलग-अलग attacks करने में सक्षम है:
- Sweeping melee strikes देने के लिए staff को घुमाना
- Projectiles fire करने के लिए staff को लहराना
- Shockwave पैदा करने के लिए staff को ज़मीन पर पटकना
- हवा में कूदना और staff strike के साथ नीचे गिरना
- Staff पर लगा orb समय-समय पर missiles launch करता है
लगातार move करते रहें और shots लेते समय time को slow करने के लिए Dive ability का इस्तेमाल करें। B.O.S. के सामने एक जगह खड़े रहना heavy damage लेने का सबसे तेज़ तरीका है।
Mission 7: Super Mech में board करना
Endgame sequence से पहले shop visit करने का यह आपका आखिरी मौका है। सब कुछ stock कर लें।
Super Mech अपने rear में दो destroyers द्वारा protected है। Killer Bean की jet ski उनसे तेज है, इसलिए destroyers को ignore करें और सीधे Super Mech के bottom की तरफ बढ़ें। पहुँचते ही turrets activate हो जाएंगे, लेकिन आपको उनसे engage करने की जरूरत नहीं है। इसके बजाय, mech के front में जाएं और boarding bridge को नीचे करने के लिए वहाँ मौजूद तीन objects को destroy करें।
Super Mech पर चढ़ने के लिए कुछ navigation की जरूरत होगी। Base से, left जाएं और jump करें, फिर staircase के लिए पीछे देखें। Cannon platform तक चढ़ें, फिर दोबारा jump करें और top तक जाने वाली दूसरी staircase के लिए पीछे देखें।
Top पर, back entrance को guard कर रहे beans और turrets को clear करें। वहाँ पहुँचने से पहले, Bullet Eyes आपका रास्ता रोकता है। यह boss लगातार orbs fire करता है जिन्हें active dodging की जरूरत होती है। Orbs को slow करने और fire वापस करने के लिए clean windows बनाने के लिए यहाँ Dive ability essential है। Bullet Eyes को हराने से Super Mech के interior का back entrance खुल जाता है।
Mission 8: Reactor core को destroy करना
Super Mech के अंदर, goal reactor core को destroy करना है, जो shielded है। Shield को disable करने के लिए चारों cooling towers को overload करना होगा।
East wing के upper floor पर Maintenance Room में एक desk से Override Key लेकर शुरुआत करें। इसे reactor room में चारों cooling towers में से हर एक पर इस्तेमाल करें। फिर remote hacking activate करने के लिए west wing के upper floor पर control room में जाएं। Hack पूरा होने तक position को defend करें, उसके बाद आने वाले mech war machine को destroy करें, फिर tower से power surge activate करें।
यह shield को disable कर देता है और core को reveal करता है, लेकिन emergency defense system को trigger कर देता है। कमरे में मौजूद हर दुश्मन के पास अब एक shield generator है जो core से जुड़ा है। हर एक को kill करने से बाकी दुश्मन और मजबूत हो जाते हैं। Core के vulnerable होने से पहले आपको उन सभी को kill करना होगा।
Core को पूरी तरह destroy करने के लिए पूरी process को तीन बार repeat करें। एक बार जब यह explode होने वाला हो, तो आपको तुरंत escape करना होगा।

Override Key shield को disable करती है
Mission 9: Monitor (final boss) को कैसे हराएं
Monitor Shadow Agency का सबसे शक्तिशाली mech और game का final boss है। इसके तीन distinct phases हैं।
Phase 1: Monitor दो guns का इस्तेमाल करता है, एक standard bullets fire करती है और एक green projectiles। हर attack window के बाद line of sight तोड़ने के लिए arena में cover का इस्तेमाल करें। Monitor एक protective shield भी उठा सकता है और minions को summon कर सकता है। Monitor पर fire वापस करने से पहले minions को priority दें।
Phase 2: Monitor की guns के साथ उसके shoulders पर दो grenade launchers जुड़ जाते हैं। चार simultaneous damage sources का मतलब है कि आप एक जगह नहीं रह सकते। लगातार move करते रहें और cover का इस्तेमाल केवल health recover करने के लिए करें, न कि camp करने के लिए।
Phase 3: Monitor दो tentacles के साथ एक flying form में transform हो जाता है। एक tentacle का अंत mace head पर होता है जो ज़मीन पर पटकता है, दूसरा blue pyramid से laser beams fire करता है। Strategy वही रहती है: move करते रहें, जब मौका मिले shoot करें, और जब overwhelmed महसूस हो तो recover करने के लिए cover का इस्तेमाल करें।
Arena के आसपास Ammo stashes रखे गए हैं। Fight की शुरुआत में ही उनकी locations को track कर लें ताकि आपको पता हो कि जब आप low हों तो कहाँ भागना है।
Monitor के गिरने के बाद, Killer Bean के Early Access content की main story पूरी हो जाती है। Game के current status को देखते हुए भविष्य के updates में और missions आने की संभावना है।
Game के साथ और मदद के लिए, पूरी Paradise Killer guides collection और GAMES.GG पर अन्य strategy resources देखें। यदि आप strong mechanical depth वाले mission-based games पसंद करते हैं, तो puzzle games genre page पर और भी कई titles हैं जिन्हें explore करना फायदेमंद है।