

Soulmask 1.0 version 10 April 2026 ko hit hua, aur full release ke saath naye game modes, ek doosra map, aur ek zyada polished server configuration system aaya. Apne khud ke dedicated server ko run karne se aapko XP rates se lekar invasion frequency tak sab kuch control karne ka pura mauka milta hai, aur setup process is space ke most survival games se zyada straightforward hai. Yeh guide har step mein aapko guide karega, server files download karne se lekar backups ko lock down karne tak.
Start karne se pehle aapko kya chahiye?
SteamCMD ko touch karne se pehle, make sure ki aapki machine requirements ko meet karti hai. Soulmask server process akela 12GB RAM consume karta hai, toh minimum spec 16GB RAM hai. Aapko 64-bit processor (quad-core recommended, dual-core minimum hai), kam se kam 30GB free disk space (agar aap dono maps run karna chahte hain toh zyada), aur ya toh Windows 10 64-bit, Windows Server 2019, ya Linux chahiye.
Networking side par, char ports open hone chahiye:
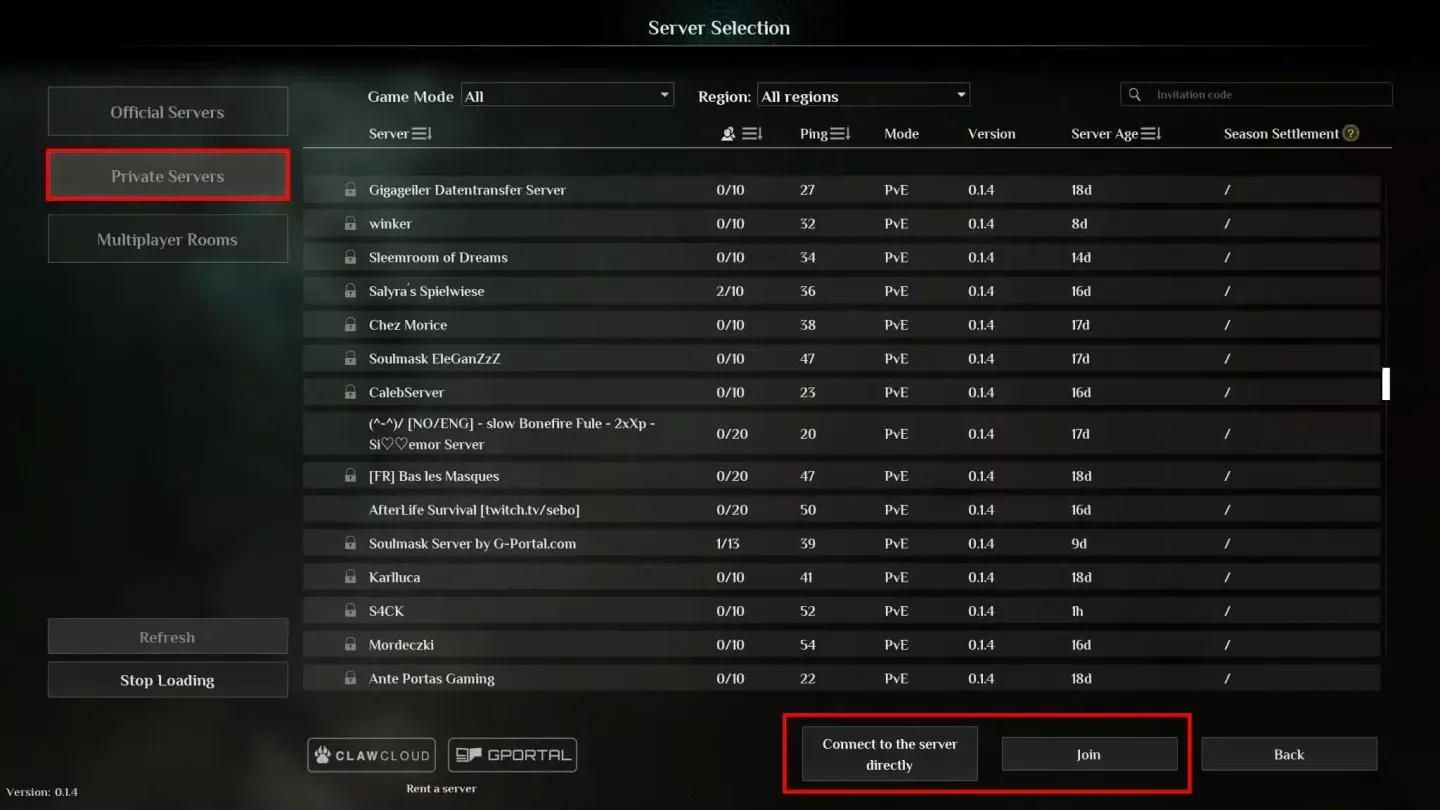
Apne router par sabhi char ports ko forward karein aur make sure karein ki aapka firewall (Windows Firewall ya aapka Linux equivalent) har ek par inbound traffic allow karta hai. Agar aapka server browser mein show nahi hota hai, toh sabse common cause blocked query port (27015 UDP) hai. Aap hamesha apne server ka direct invitation code WS.log file mein find kar sakte hain aur fallback ke taur par players ke saath share kar sakte hain.
Ports 18888 aur 19000 optional hain agar aapko remote admin access nahi chahiye, lekin unhe enable karne se aapko save corruption risk kiye bina safe shutdown path milta hai.
Soulmask server ke liye Port forwarding
Soulmask server files kaise install karein?
Installation mein SteamCMD use hota hai, Valve ka command-line tool jo game ko account par own kiye bina game server files download karne ke liye hai.
- Apne server files ke liye ek folder create karein, for example C:\SoulmaskServer.
- SteamCMD download karein aur use us folder mein extract karein.
- UpdateSoulmask.bat naam ka ek batch file banayein jismein yeh ho:
@echo off
steamcmd.exe +login anonymous +force_install_dir C:\SoulmaskServer +app_update 3017310 validate +quit
- File par right-click karein aur Administrator ke taur par run karein.
- Download finish hone ka wait karein. Sabhi server files aapke install directory mein aa jayenge.
Linux users app ID ko 3017310 ki jagah 3017300 se swap karein. Download stage par platforms ke beech bas yahi ek difference hai.
Files download hone ke baad, StartServer.bat naam ka ek doosra batch file banayein. Ek working example launch command kuch aisa dikhta hai:
WSServer-Win64-Shipping.exe Level01_Main -server -log -UTF8Output -forcepassthrough -MULTIHOME=0.0.0.0 -Port=8777 -QueryPort=27015 -EchoPort=18888 -SteamServerName="My Soulmask Server" -MaxPlayers=60 -PSW="joinpassword" -adminpsw="adminpassword" -pve -saving=300 -backup=900 -online=Steam
Server name aur passwords ko apne values se replace karein. Agar aap ek open server chahte hain toh -PSW ko poori tarah drop kar dein.
Server window ko kabhi bhi directly close na karein. Woh path save corruption ki taraf le jaata hai. Console mein Ctrl+C use karein, port 18888 par telnet ke through connect karein, ya gracefully save aur shut down karne ke liye in-game GM panel use karein.
Soulmask 1.0 mein kaunse game modes available hain?
Soulmask 1.0 mein char distinct modes hain, har ek alag playstyle ko target karta hai. Aap jo launch parameter use karte hain (ya toh -pve ya -pvp) woh base ruleset set karta hai, lekin GameXishu.json file aapko uske upar almost sab kuch customize karne deti hai.
Warrior Mode charon mein sabse distinctive hai. Aap ek blank character (Common quality, no talents) plus ek starter gear kit ke saath start karte hain, aur mode survival friction points mein se kai ko hata deta hai jabki combat ko khud zyada mushkil bana deta hai. Yeh note karna worth hai ki dedicated servers par game mode availability server version par depend kar sakti hai, toh agar koi specific mode appear nahi ho raha hai toh official Steam page check karein.
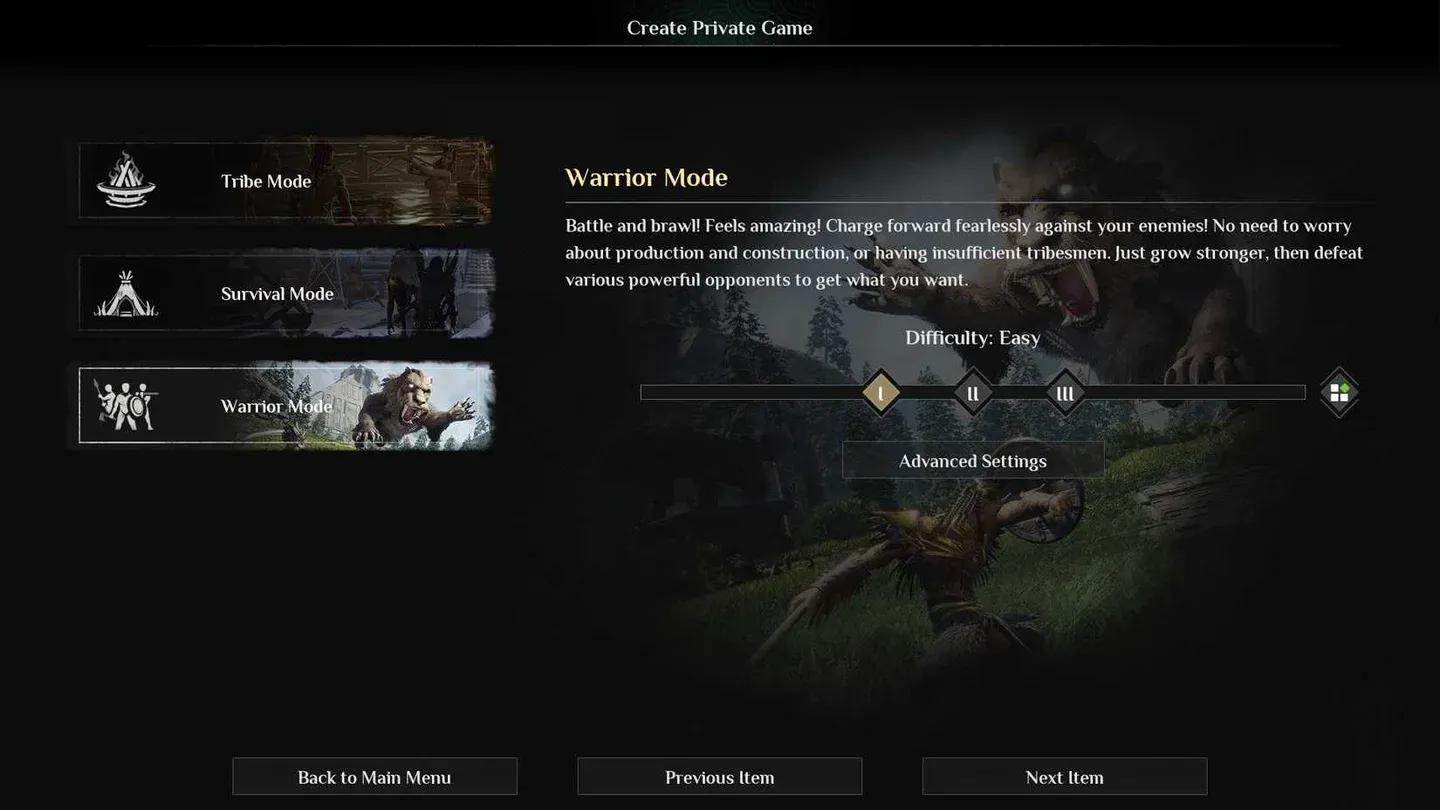
Soulmask 1.0 game mode options
GameXishu.json mein gameplay settings kaise configure karein?
Sabhi deep server tuning GameXishu.json mein rehti hai, jo WS\Saved\GameplaySettings\GameXishu.json par milti hai. Yeh file server ke pehle run ke baad hi banti hai, toh server ko ek baar boot karein, use cleanly shut down karein, phir file open karein.
Settings kai major categories mein divide hain:
- Experience & Progression — Awareness, character, mask, proficiency, gathering, crafting, aur combat ke liye XP multipliers
- Resources & Crafting — Gathering, mining, logging, slaughtering ke liye drop rates, aur crafting speed
- Survival — Food, water, aur durability consumption rates; item decay timers; carry weight; inventory size
- Combat — PvE aur PvP damage ratios, dodge i-frame duration, structure damage
- Tribe & Taming — Recruitment limits, taming speed, animal limits, hibernation settings
- Building — Decay rate, repair speed, construction limits, portal settings, conveyor aur power mine limits
- Invasions — Heat accumulation, invasion scale aur strength, enemy count, cooldown timers, attack windows
- Cluster — Cross-server mode toggle (KaiQiKuaFu), battle mode access
Awareness XP specifically character aur mask XP se alag multiplier rakhta hai, jo matter karta hai agar aap ek aisa server build karna chahte hain jahan progression kuch areas mein doosre se zyada fast feel ho. Alag-alag multiplier combinations test karne ke baad, sabse common community approach awareness aur gathering XP ko pehle raise karna hai, kyunki woh early game mein combat XP ko touch kiye bina sabse bade bottlenecks hain.
Agar aap hosting provider ke through rent kar rahe hain, toh bahut saare is settings ko web control panel ke through expose karte hain "Modify Server Config" jaise button ke niche, toh aapko raw JSON file edit karne ki bilkul bhi zaroorat nahi pad sakti hai.
Key server launch parameters kya hain?
StartServer.bat example mein basics ke alawa, kai parameters janne layak hain:
-initbackup flag underused hai. Isse apne launch command mein add karne ka matlab hai ki har restart load hone se pehle ek clean backup banata hai, jo corruption ko jaldi pakadne ke liye ek simple safety net hai.
Dono Soulmask maps kaise run karein?
Soulmask 1.0 do maps support karta hai. Cloud Mist Forest original map hai, jo Level01_Main ke saath launch hoti hai. Shifting Sands ek Egypt-themed DLC map hai, jo DLC_Level01_Main ke saath launch hoti hai. Shifting Sands DLC 10 April se 10 May 2026 tak claim karne ke liye free tha.
Players ko dono maps mein travel karne dene ke liye, aap do alag server instances ko cluster ke taur par link karke run karte hain. Main server (Cloud Mist Forest) ko -serverid=1 -mainserverport=8781 milta hai, aur child server (Shifting Sands) -serverid=2 -clientserverconnect=MAIN_IP:8781 ke saath connect karta hai. Aapko dono servers par GameXishu.json mein KaiQiKuaFu=1 set karne ki bhi zaroorat hai.
Clusters ke liye dhyan mein rakhne wali kuch cheezein:
- Har server ko ports ka ek unique set chahiye (game, query, echo, RCON)
- Dono servers ko same join password aur game mode share karna chahiye
- Character data (level, mask, tech tree, tribesmen) ek ocean portal ke through transfer hota hai
- Buildings, placed resources, aur local inventory maps ke beech transfer nahi hote hain
- Newly created characters tab tak transfer nahi ho sakte jab tak woh starting state se aage progress na kar lein

Cross-map cluster server setup
Important server files kahan hain?
Jab kuch galat ho jaye toh file locations ko track karne se bahut time bach jaata hai:
world.db file aapki poori world save hai. Kisi bhi major configuration change se pehle, game update se pehle, aur cluster migration attempt karne se pehle ise kahin safe jagah copy karein. Automatic backup system -backup mein set kiye gaye interval par backup\ folder mein likhta hai, lekin manual copy ki koi keemat nahi hai aur isne bahut saare servers ko unrecoverable states se bachaya hai.
Survival games, crafting systems, aur server management ko cover karne wale aur guides ke liye, GAMES.GG par aur guides browse karein.