

LEGO Batman: Legacy of the Dark Knight packs 200 WayneTech Caches across its main story missions and open-world Gotham districts. Each one holds a single WayneTech Chip, the currency you spend on weapon and gadget upgrades at any workbench. Miss them during a mission and you can replay it via the Batcave computer. The open-world puzzle caches are a different story — some of them need specific characters and multi-step solutions that are easy to get stuck on. This guide covers every mission cache and every locked puzzle cache across all districts.
What are WayneTech Caches and why should you collect them?
Every WayneTech Cache contains one WayneTech Chip, which you spend on gadget and weapon upgrades for Batman and his companions at any workbench. With 200 caches total spread across the city and story missions, chips are the backbone of your upgrade progression.
Aside from WayneTech Caches, keep an eye out for blue caches scattered around Gotham. These are not WayneTech Caches, but they contain thousands of Studs and are worth grabbing whenever you spot one.
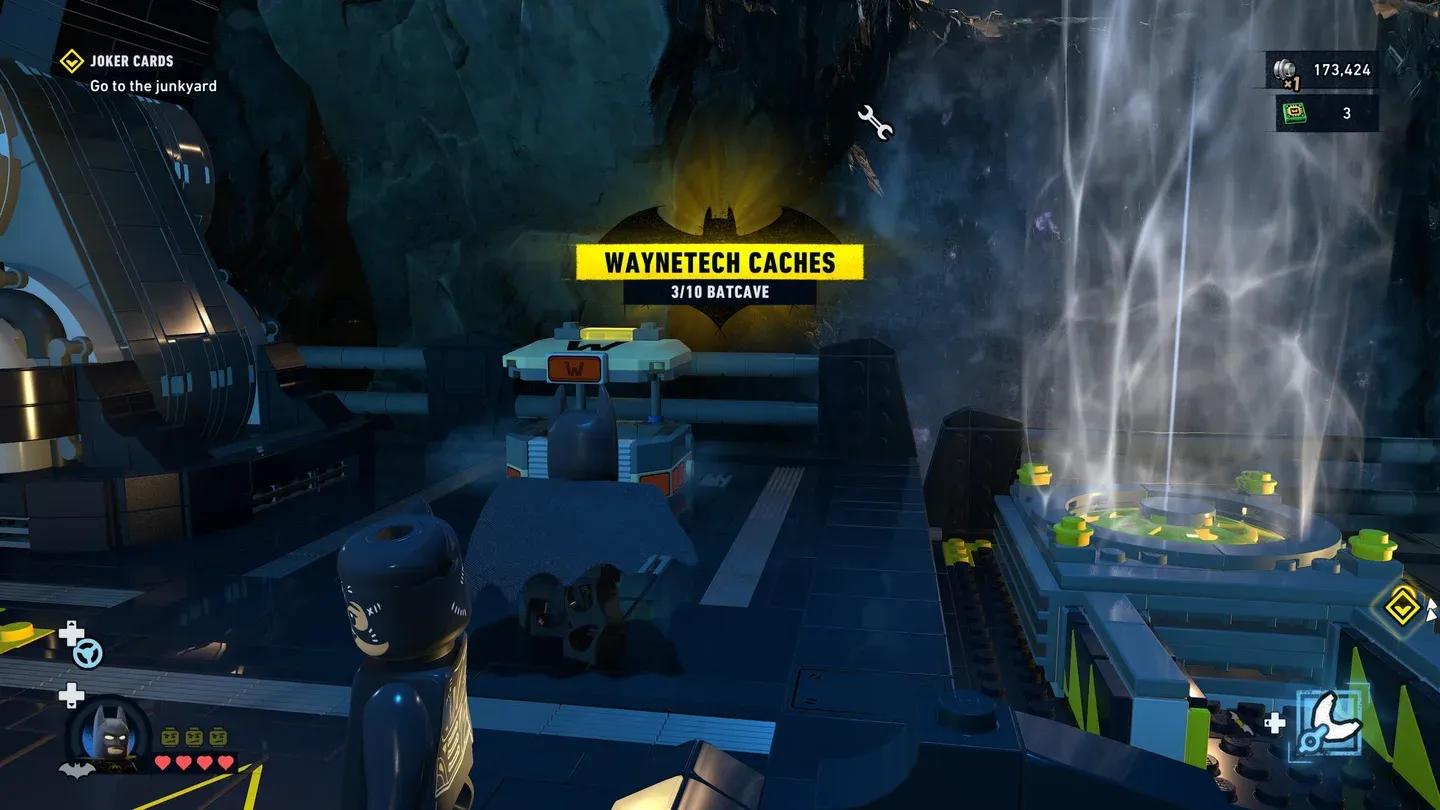
The Batcave also holds WayneTech Caches. These unlock as you expand the Batcave itself. Listen for the tell-tale beep when you're nearby.
How do you use your sense ability to find hidden caches?
Before diving into locations, know this: the sense ability is your best tool for puzzle caches. Many locked caches have cables running from them to a nearby puzzle element. Activating your sense ability reveals those cables and points you toward the solution. If a cache won't open and there's no obvious mechanism, scan the area with sense first.
Mission cache locations
Each main story mission contains exactly 5 WayneTech Caches. The table below maps every mission to its location and cache count for quick reference.
Carmine Falcone mission (Iceberg Lounge)
- Cache 1: In the first office after exiting the vent, to your left in the Security Room.
- Cache 2: At the Sha-Kham Island door, crawl through the vent to the left. Use Jim Gordon's Foam Gun on the gear mechanism, pick up the plug that appears, and insert it into the socket beside the door. Break the foam so the mechanism starts and the door opens.
- Cache 3: After leaving the first ball pit, grapple to the upper level, head right, and pass through the blue foam rollers to reach the cache on the other side.
- Cache 4: In the second ball pit, use pulse scan to find the vent in the floor. Crawl through to collect the cache.
- Cache 5: In the final ball pit room, shoot the padlock above the bouncy castle to open a door, then bounce high enough to enter and grab the cache.
The Red Hood Gang mission (Ace Chemicals)
- Cache 1: After lowering into the factory, turn right and grapple up to a platform, then glide across the gap. The cache is on the other side.
- Cache 2: Past the vat, go right along the pipes. Have Jim Gordon shoot foam at the pipe on the left to create a narrow passage into the next room.
- Cache 3: In the large fan room, glide up and land in the space above. Shoot the button to turn off the fan, then drop to the floor to find the cache.
- Cache 4: After going through the giant fan via the narrow passage, the cache is at the end of the left section.
- Cache 5: Following The Red Hood across the broken bridge pieces, veer left and climb a ladder. Pull away the wall to reveal the cache behind it.
Mimes mission (Shreck's Department Store)
- Cache 1: In the opening office with the round table, use Catwoman's whip on the painting to reveal a hidden safe with the cache inside.
- Cache 2: Find the statue puzzle clue to the left, whip the statues until they face the correct direction, crawl through, destroy everything in the next room to build a passage, then find a key on the left and use it to open the cache door in the previous room.
- Cache 3: Break the shelves on the right to find a crawl passage. Summon Catwoman's Kitty to go through a small doorway and press a button. Push the boxes toward the higher platform to climb up and collect the cache.
- Cache 4: At the Pet Store section, use Catwoman's whip on the roller to open the gate, then have Batman pull the shelving away from the wall to reveal the cache.
- Cache 5: In the Toy Store section after defeating the large mime, press the red button and copy the tune exactly. The solution (numbering left key as 1, right key as 8) is 3-4-5-8-7.
The Penguin mission (Arctic World)
- Cache 1: In the Penguin Exhibit, grapple to the ledge by the window, turn back around, and glide to the cache on the corner ledge.
- Cache 2: Before the Polar Bears room, face the hole in the glass you came through. Pull the penguin cage back and step away as it explodes. Use Catwoman to cut through the revealed glass and grab the cache.
- Cache 3: Also before the Polar Bears, use a Batarang on the snowman in the corner to make it explode and reveal the cache in the wall.
- Cache 4: In the Arctic Explorers room, go right and press the red button to find a wheel. Attach the wheel to the ice device and turn it to the fire side so the device explodes. Use Batman's Explosive Spray on the wall to reveal the cache.
- Cache 5: In the Arctic Explorers room on the left side, stand Batman on the table target and throw a Batarang through the broken glass to shut off the fan. Send Catwoman's Kitty through the vent to grab the key, then use the key to open the grate and collect the cache.
The Joker mission (Gotham Parade)
- Cache 1: Left of the first float, climb the alley wall as Catwoman and pull the lever. Go inside the shop, smash the interior to find a hatch, send Kitty through to pull the lever on the other side, and collect the cache.
- Cache 2: Left of the second float, find the WayneTech delivery person and use UV vision to follow footprints to a shed. Pull the metal sheet aside to find the cache.
- Cache 3: Left of the second float, grapple up to the apartment's climbable bar (pulse scan to reveal it) and use Catwoman to cut the left window.
- Cache 4: At the third float, look right for the Gotham Globe truck and use the Batclaw to pull the back door off.
- Cache 5: Left of the third float, enter Cafe Beans by cutting the glass with Catwoman. Use her whip to disable the three security cameras inside, then collect the cache at the back.
Poison Ivy mission (Botanical Gardens)
- Cache 1: Behind the waterfall on the left. Use the Batclaw to pull down the rock above the waterfall, then follow the path around.
- Cache 2: Near the scared scientist, use Robin's Birdarangs to hit all three flower targets simultaneously. The petals form steps to the cache at the top.
- Cache 3: In the Carnivorous Plants of the Tropics room, face forward then turn back. Use a Batarang to detonate the plant next to the cache safely before grabbing it.
- Cache 4: Under the first slamming spiked vine in the vine room — time your jump to get underneath before it swings down.
- Cache 5: After jumping across the venus fly traps, look up and right for two hook points. Use Robin's cable tether to connect the hooks and pull up the vines, revealing an opening. Zip through and collect the cache.
Firefly mission (Gotham Museum)
- Cache 1: On the left first floor in the underwater exhibit, surrounded by flames. Use the Batclaw to pull the pipe above the cache and douse the fire.
- Cache 2: On the right first floor in the Mammoth Exhibit, behind panels. Interact with the middle panel to move it aside.
- Cache 3: On the second floor, the cache sits above a door. Use Batgirl's Drone to create a grapple point in the air above the door, grapple up, and glide to the cache.
- Cache 4: In the room with citizens hanging from the light near the large ship, the cache is in an archway to the right behind boxes. Smash the boxes.
- Cache 5: At the Ticket Booth before the Space section, create a grapple point with Batgirl's Drone to reach the cache on top of the booth.
The League of Shadows Returns mission
- Cache 1: In the lower section of the first outdoor area, in an alley.
- Cache 2: In the street area, above a shop opposite Cafe Beans.
- Cache 3: At the end of the tracks to the right after going down stone stairs, sitting in water.
- Cache 4: Before the door you open on the left, find a car on the tracks. Use Nightwing's ability to open it and release the cache.
- Cache 5: After crossing Nightwing's tightrope zipline, a Tumbler sits around the corner. Hack the switch to the left of the Tumbler to disarm it, then find the cache to the right.
Spending chips at the workbench
Open-world puzzle cache locations by district
Many open-world caches open without any special requirements — a few are guarded by enemy groups, but most just need you to find them. The puzzle caches are the tricky ones, and they often require specific characters. These are the ones broken down below.
Tricorner district puzzle caches
- Outside a house opposite the diner: Use sense to follow the cable behind a nearby building. Switch to Jim Gordon and use foam to block the pipe and extinguish the fires. Pull the switch to unlock the cache.
- Roof opposite Q Corp: Two moveable objects, one on each platform level. Push them back and forth until the clear brick lines up with the green light.
- Outside Pier A: Find the battery by the building to your left when facing the cache. Place it in the empty slot on the other side of the building, then hit the cable targets in order to route electricity to the cache.
- Rooftop greenhouse (requires Catwoman): Have Catwoman cut the glass to enter, pull the lever inside, then climb the wall to the right of the cache and pull a second lever.
- Under a building guarded by an armored security camera (requires Batgirl): Follow the cable from the camera to the back of the building and hack the panel to shut it off. Use the Drone to scan the blue panel above for the code, then enter it at the terminal.
- Atop a graffiti-covered building (requires Nightwing): Charge the machine on the right, pull the moveable machine toward it and connect the two, then connect the moveable machine to the one under the stairs.
- Under a bridge (requires Talia): Ninja Dash across the pillars to reach the platform, then pull the lever.
- Near the underpass behind the Iceberg Lounge (requires Nightwing): Use Nightwing's gadget to power the switches around the open doorway from left to right.
Old Gotham South puzzle caches
- Roof of the Cozy Corner (requires Talia): Have Batman hit the lock inside the cage and then hit the revealed target to slow the fan. Talia Ninja Dashes into the cage, removes the battery from the fan to stop it completely, then places both batteries at the cache.
- Apartment building (requires Catwoman): Use the whip to unscrew the bolts, then pull the lever.
- Building by the rail tracks (requires Catwoman): Go to the roof above the cache, break the object by the swing stage scaffold, use the whip to power the stage, drop to the lever, and pull it.
Old Gotham West puzzle caches
- Rooftop near the Lacouronne (requires Batgirl): Place two fully charged batteries in the empty spaces. Stand on the red button as Batgirl and throw a gadget at the button ahead to charge the cache.
- Top of a building accessed by flying to the roof (requires Nightwing): Use Nightwing's gadget to fling the small battery near the wall into the slot on the high power bank. Place a 3-charge battery in the leftmost large power bank and remove the battery from the rightmost. Connect the center console to both powered banks (1 charge plus 3 charges equals 4 total). This lights up a wall of targets. Shoot each target until the cables align, then pull the lever.
Old Gotham North puzzle caches
- Wayne Tower: Found during the "A Family Friend" mission when speaking with the gadget guy. Go through the vent in the floor.
- Garage under a building near the Train Station (requires Nightwing): Use Nightwing's gadget to connect the switches so power runs through correctly.
- Rooftop near Wayne Tower (requires Nightwing): Place the empty battery in the charger and use the gadget to charge it. Drop to the platform below and use the gadget to activate the switch, then do the same for the switch on the other side.
The Cauldron South puzzle caches
- Near the Refinery (requires Jim Gordon): Use both of Jim's gadgets to cover and uncover pipes in turn, letting each bucket fill with water.
- Near the Ole Contractor building: Have Batman turn the wheel to hold the door open while the second character brings the power cell from outside. Alternatively, use Jim Gordon to gum up the mechanism inside to keep the door open without holding it.
- Above Wastecorp (requires Nightwing): Charge the machine on the left and connect it to the satellite dish, which will explode. Build with the loose pieces, then connect the powered machine to what you built.
The Cauldron North puzzle caches
- Roof near a helipad: Reach the roof above, smash the lock, and pull the lever. Drop to the roof left of the cache, grapple open a panel, and grapple inside.
- Garage beside a building under the tracks (requires Catwoman): Use the whip to open the door, send a Kitten inside to press the button, then go inside and cut the glass to press the second button.
Nightwing connecting power cables
Newtown puzzle caches
- Above the Aventine building (requires Jim Gordon): Smash the box of tools behind you to find a power cell. Place it in the power bank to the left, then use foam to block each of the pipes.
- Edge of Clarke House Gallery (requires Nightwing): Grapple to the platform above the cache. Use Nightwing's ability to push the switch right. Jump down and use the Birdarang to power each switch from right to left.
Gotham Village / Robinson Park puzzle caches
- By the water (requires Nightwing): Use the Birdarang to zap the switch above the locked cache. On the other side, break the object, rebuild it, then charge it up.
- Upper side of the Gotham Globe (requires Batgirl): Hack the switch to the left above the cache and move the cage. Use the Drone to scan the wall to your lower right and get the code, then enter it to open the cache.
- Rooftop near the clock tower (requires Talia): Ninja Dash through the electricity to pull the lever, then have Batman use spray explosives on the wall to access the cache.
- Under the park via the tunnel to the west: Drive through the tunnel entrance to the west of the area until the cache appears on your right.
East End / Amusement Mile puzzle caches
- Roof with a small water tower (requires Batgirl): Shoot the security camera to access the power cells in the cage. Place one cell in the swing stage power bank and hack it to lower to the first empty wall space. Collect the power cell from the roof fan as well. Periodically lower the platform to fill all wall spaces. Remove the swing stage's own cell last and place it in the final wall space, then grapple back up to the cache.
- By the water towers (requires Nightwing): Break boxes on the floor to find a small power cell. Use the gadget to launch the cell into the wall slot, then connect the cables with the Birdarang from right to left.
- Roof opposite the amusement park (requires Talia): Three levers to pull. The first is just above to the right. The second has a fan that cycles fast then slow — Ninja Dash in when it slows. The third fan runs too fast to enter normally, so go around the back, break the lock, use the lever there, then Ninja Dash inside from the front to pull the final lever.
- Opposite the Chelsea Arms Hotel (requires Jim Gordon and Nightwing): Use Jim Gordon to turn the wheel until the machinery appears in the center, then shoot foam at the cogs to hold it in place. Switch to Nightwing and use his gadget to connect the pieces. Repeat on the left side to power the cache.
- Top of the tall building with ground-floor stores (requires Jim Gordon): Drop to the roof below the cache. Line up the squiggly cable line on each yellow circle so all cables connect. Use foam to stop the cogs in the right position before pulling the lever.
- Small building under metro lines (requires Nightwing): Jump to the platform with the cache and use the gadget to pull the machinery out over the wall. Connect all cables and charge the machine at the bottom.
- By an overpass near the Newtown sign (requires Catwoman and Nightwing): Use Catwoman's whip to open the panel. Have Batman pull the panel off a nearby box to reveal another power cell. Use Batman's X-Ray Vision to find the correct slots for the cells (positions 1 and 4).
- Opposite Gotham Lines East End building: Use Batman's explosive paint to break through the ground-floor brick wall, then use a vehicle to destroy the other two walls around the side. Grapple the switches revealed behind the brick walls from top to bottom.
What's the most efficient order to collect all WayneTech Caches?
The fastest path through all 200 caches follows this sequence:
- Complete the main story to unlock all characters, especially Catwoman, Batgirl, Nightwing, and Talia.
- Unlock all district towers to reveal every cache marker on the map.
- Work through open-world caches district by district, starting with the ones that need no special characters.
- Return to any missed mission caches via the Batcave computer.
- Collect the Batcave caches last, after unlocking every Batcave expansion.
Planning your completion run? The how long to beat guide for LEGO Batman: Legacy of the Dark Knight puts full 100% completion past 50 hours, so pacing yourself through the districts rather than rushing pays off.
For the full picture on everything else the game offers, the LEGO Batman: Legacy of the Dark Knight guide collection covers pre-order bonuses, Twitch Drops, co-op details, and more in one place.