

Sparks are the safety net standing between you and losing every bone you've collected. In Mina the Hollower, dying without a single spark means your bones drop to zero, which stings badly when you're grinding toward a 1,500-bone shop purchase or a blacksmith upgrade. There are three spark container upgrades hidden across Tenebrous Isle, plus a trinket that functions as a fourth. Here's exactly where to find all of them.
What do spark containers actually do?
Mina starts with one spark. Each spark container upgrade adds another slot, so collecting all three upgrades gives you four sparks total. Equip the Spark Catcher trinket on top of that and you're carrying five sparks before you lose your bones. Every spark you hold when you die either lingers in the air or attaches to the enemy that killed you, giving you a chance to recover it. More sparks means more chances to bounce back from a rough encounter without going broke.
Sparks also have a second function: opening spark doors, those silver-gold doors with circular sockets scattered around the world. Several of these lead to valuable loot rooms, shops, and shortcuts, so building up your spark capacity pays off in multiple ways.

Ossex Emporium spark upgrade
All spark container upgrade locations
How to get the Ossex spark container
The fastest upgrade to grab is sold at the Emporium on the east side of Ossex: City Center. The shopkeeper there will occasionally pull you inside, which makes it hard to miss. The spark container costs 1,500 bones, so prioritize farming enemies and clearing rooms before heading here if your wallet is thin.
This is the only spark container you can buy outright, making it the most reliable first upgrade if you want to shore up your death penalty early.
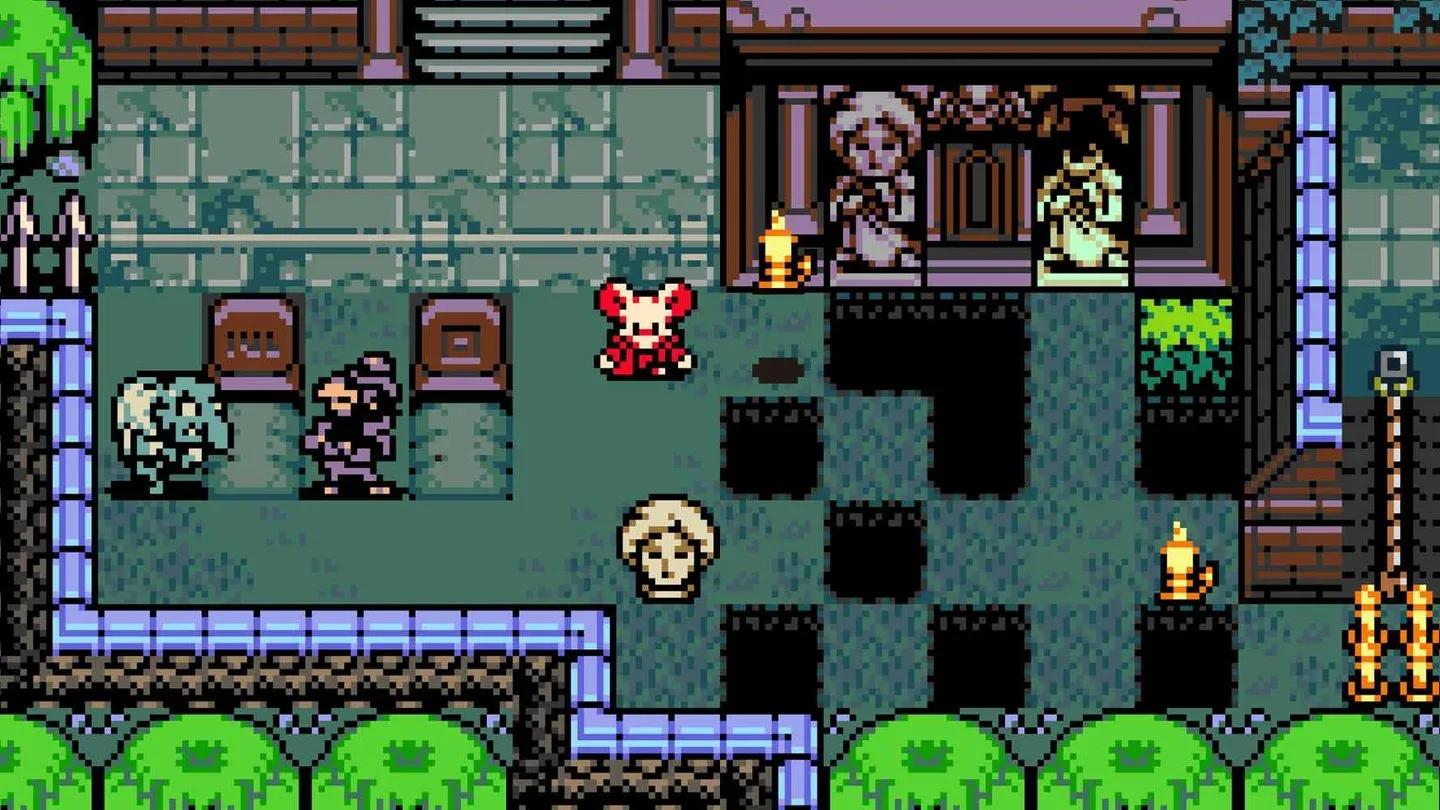
How to get the Mourner's Mile spark container
This one takes more legwork. You need to have already cleared Queensbury Crypt and defeated the Duchess boss, then restored the spark generator inside and exited through the south shortcut. Once you're back in Mourner's Mile: Knight's Rest, step on the pressure plate and burrow through the tunnel beside the nearby doorway.
Head northwest, spending two kears to unlock the gates along the path. Climb the rope and burrow to pick up the missing statue head. A ghostly apparition will chase you the entire time you're carrying it, so move with purpose. Use the ledges to drop south, dodge or clear the enemies in your way, and make your way to the southwest exit where the crow and hunchback stand near two gravestones.
Throw the statue head onto the headless statue. The gate to the west will open, letting you reach a treasure chest containing the spark container.
If you run short on kears, you can buy more at the Kear Institute back in Ossex. Don't start this run without two kears in hand or you'll have to backtrack mid-carry.
Statue restore in Knight's Rest
How to get the Septemburg spark container
This upgrade is the most involved of the three, gated behind a secret boss encounter. Start by restoring the Septemburg spark generator. Directly south of the generator, next to the Underlab entrance, a new path opens into the Wastewater Canal.
Finding the spark door
In the room with the large boar enemy, look for a cracked wall in the northeast corner. Hit it to reveal a spark door that requires two sparks to enter. This is why building up your spark capacity first matters here.
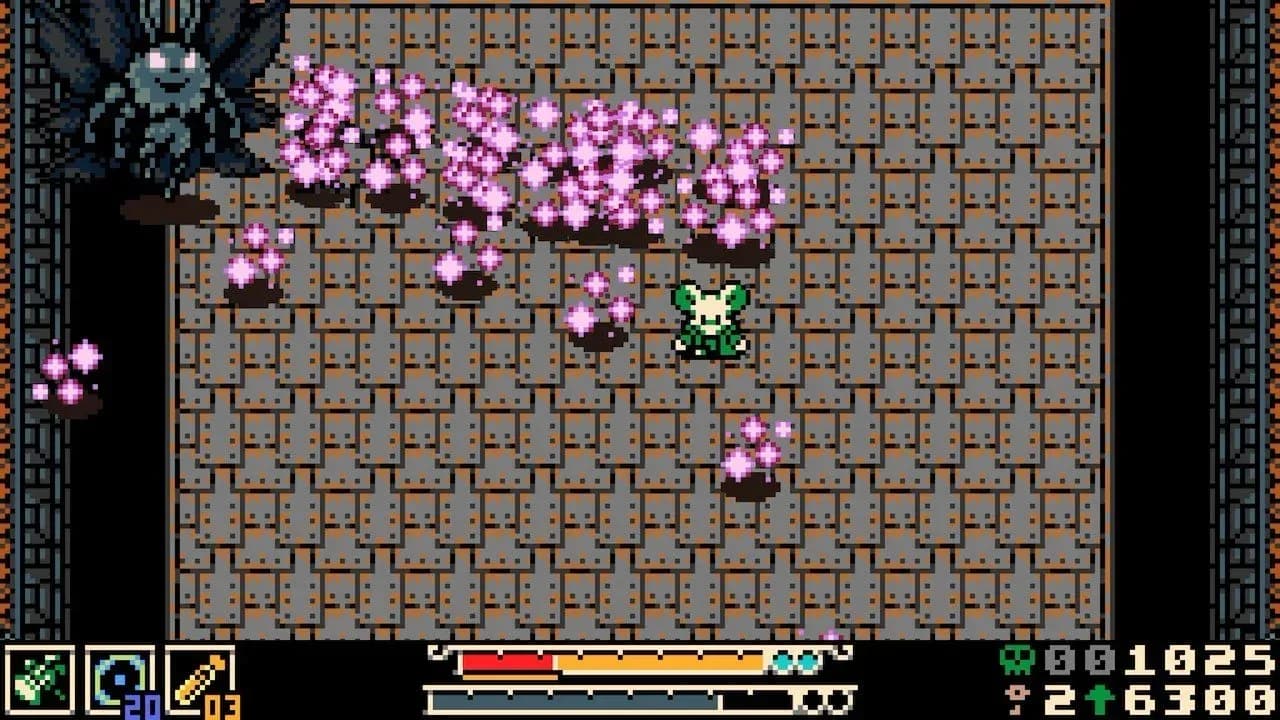
Escorting Luxy through the sewers
Beyond the door, you'll meet Luxy, a moth who wants to find the nearby spark generator. She'll light up dark sections of the sewer periodically, but her light also produces a shockwave that knocks you sideways into pits. The trick is to use her light bursts to see the platforms, then move quickly before she fires again.
Use the pipe on the right to reach her, then head left. At each dark gap, wait for Luxy's light, memorize the platform layout, and move. The Pit Preserver trinket is genuinely useful here since falling in is the main way this escort goes wrong.
Luxy's shockwave hits you even when you're standing close to her. Keep moving and avoid lingering near her between light bursts or you'll get knocked off a ledge you just worked hard to reach.
Exit through the northwest sewer door and head north back to the spark generator.
Defeating Dark Deluxy
The generator corrupts Luxy, transforming her into the secret boss Dark Deluxy. She's fast and scatters lingering pollen attacks around the arena. Keep moving, avoid the pollen clouds, and chip her down.
After the fight, a Plasma Vial drops. Stand next to Dark Deluxy and use the vial to heal her. She reverts to Luxy, thanks you, and leaves behind the spark container.
Dark Deluxy boss in Wastewater Canal
How to get the Spark Catcher trinket
The Spark Catcher isn't a spark container upgrade in the traditional sense, but it adds one extra spark slot when equipped, bringing your total to five if you have all three upgrades. It costs 500 bones at Pinky's Parlor in Backwaters: Shanty Swamp.
To reach Pinky's Parlor from the Swamp Station (Nox's Bayou train stop), exit the large Shanty Swamp lake to the north, then turn right on the next screen. It costs one kear to open the path to the shop. If you're coming from Ossex instead, leave through the south gate, head west into the Western Wilds, then go south until you find Buffo the frog. Pinky's Parlor is east of Buffo's location.
At 500 bones, the Spark Catcher is the cheapest spark-related upgrade in the game. If you're playing through Backwaters anyway, grabbing it early saves you a dedicated trip later.
What spark doors are worth opening?
With a full spark capacity, you can access every spark door in the game. A few highlights from what's behind them:
- Ossex: High Street (1 spark) leads to the Strategy Center, which contains up to two Boneshard Crystals.
- Ossex: City Center (2 sparks) opens the path to the Iron Steed and an obstacle course tunnel.
- Ossex: High Street (2 sparks) at the southern end leads to the Atelier's shop, where one of the cloaks is sold. Check the full cloak locations guide for details on what cloaks do for your build.
- Mourner's Mile: Knight's Rest (3 sparks) transports you to the Desolate Ruins. This area can kill you instantly if you're unprepared, so make sure your bones are spent down before attempting it.
For everything else you'll want to collect on Tenebrous Isle, the full Mina the Hollower strategy guides collection covers trinkets, weapon upgrades, and more.