

The Duchess is one of the mandatory bosses standing between you and the Spark Generator inside the Queensbury Crypt. She looks like a towering stone statue and starts out manageable enough, but the second phase is a genuinely different fight that catches a lot of players off guard. This guide breaks down every attack pattern, the safest positions in the arena, and what to grab before you even walk through that door. Check out Mina the Hollower on GAMES.GG for more on the game.
What to do before the fight
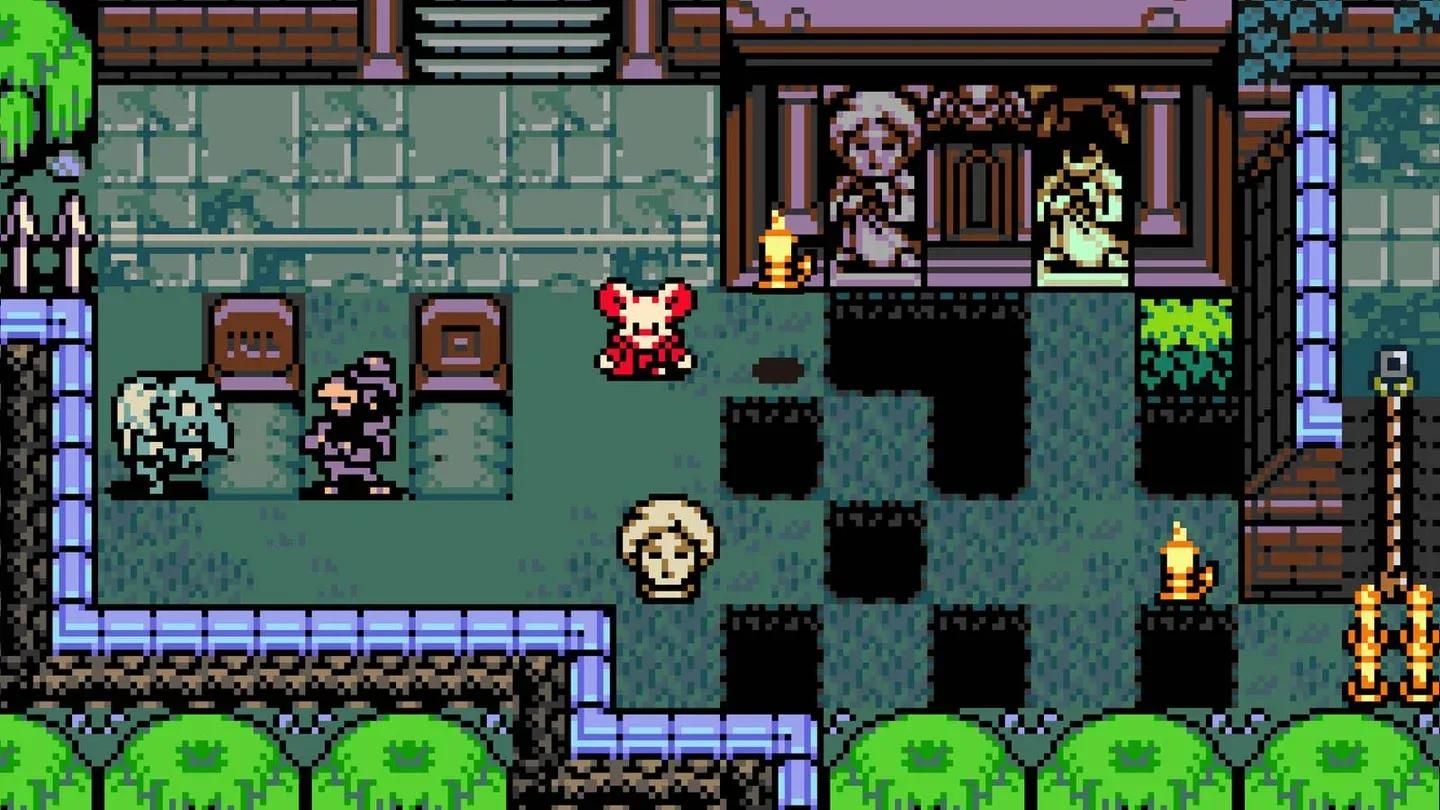
Before heading into the Duchess arena, there is one prep step worth knowing. A tombstone in the top left of the area just outside the boss room can be broken to unlock a range of Side Arm options. If you are running into this fight without a ranged weapon, smash that tombstone first. Side Arms become especially important in the second phase when getting close is genuinely dangerous.
How to beat the Duchess (phase 1)
The first phase is straightforward once you understand the two main threats: the wide swing and the floor arrow traps.
The Duchess has a slow, telegraphed swing that covers a lot of horizontal ground. Watch for the wind-up animation and burrow underground to avoid it entirely. Burrowing is your best defensive tool in this room, so use it freely.
Watch the swing wind-up
The Duchess will also jump around the arena, landing on pressure plates that fire arrows across the floor. Here is the key detail most players miss: those arrows do not damage the Duchess herself, but they do break on contact with her. If you position yourself on the far side of the Duchess from where the arrows are coming, she effectively blocks them for you. Use her as a shield.
Keep your distance, watch the swing wind-up, and resist the urge to get greedy with hits. The health bar goes down steadily if you stay patient. Once it hits zero, the real fight begins.
How to beat the Duchess (phase 2)
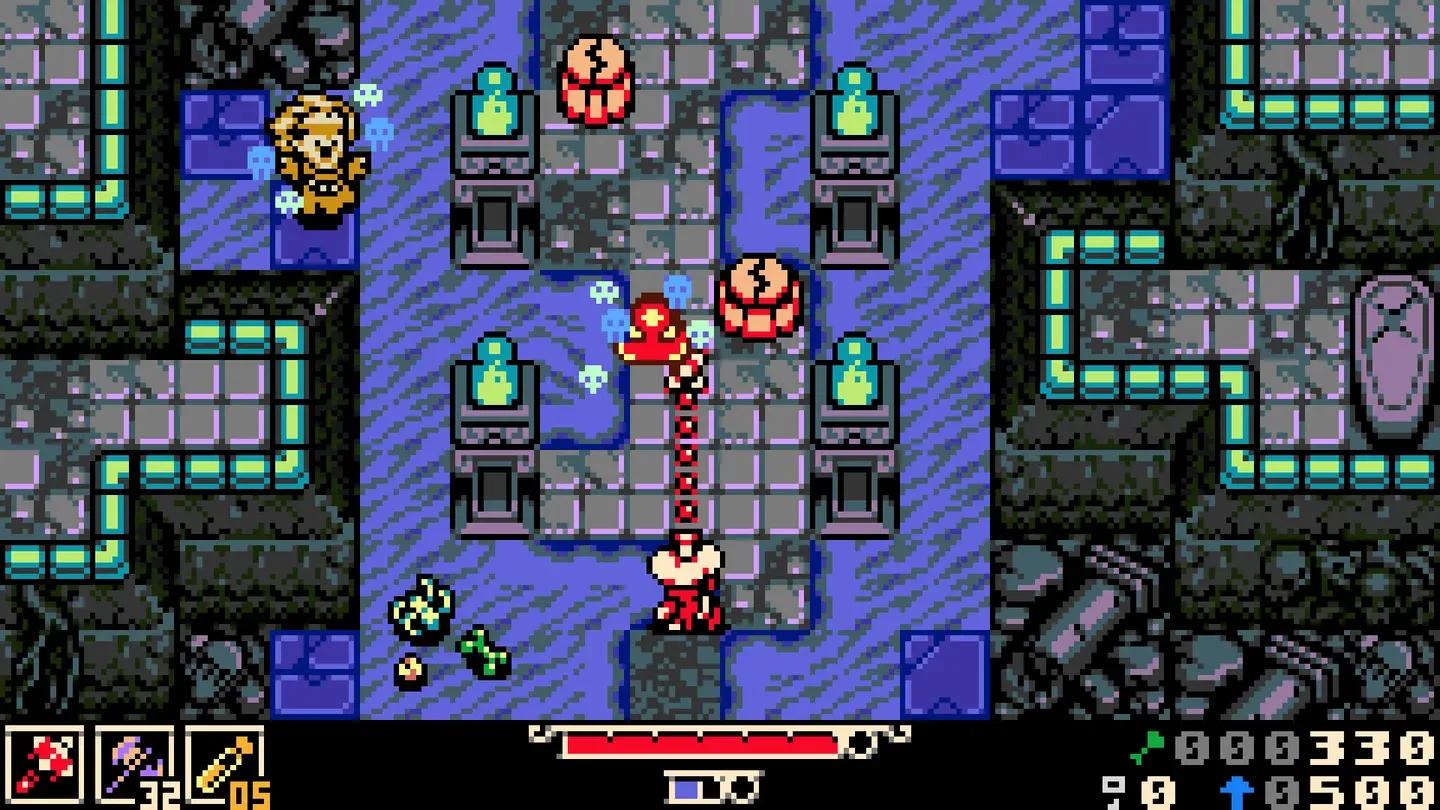
When the Duchess's health bar empties, she does not simply die. After a short pause, the statue removes its own head, revealing a mass of tentacles that was controlling the stone body the entire time. The detached head then bounces around the arena independently, pressing floor buttons and generating a near-constant stream of arrows for the rest of the fight.
This is where the fight gets genuinely difficult.
Phase 2 tentacle eruptions
The Duchess now has three distinct attacks to track:
- Swing into lunge: The same wide swing from phase 1, but noticeably faster, followed immediately by a lunge directly toward you.
- Tentacle flare: The Duchess shouts and extends tentacles out from the sides of the armor. This is a warning animation more than a direct hit, but it signals that a more dangerous attack is coming.
- Ground slam: The Duchess slams its tentacles into the floor, which then burst upward at your current position in a sequence of 3 to 6 eruptions.
The most important positional tip for this phase: none of the Duchess's attacks are vertical. The lunge after the swing is the only exception, but even that travels horizontally. Positioning yourself directly above or below the boss puts you in the safest zone in the arena. Use ranged Side Arms to deal damage from those positions when closing in is not safe.
The bouncing head will keep activating floor traps, so arrows will be a constant nuisance. Burrow often to pass through them and stay mobile at all times.
What do you get for defeating the Duchess?
Beating the Duchess rewards you with a bundle of Bones and a health upgrade, both useful for the fights ahead. There is also a conditional reward worth planning around: if you are escorting The Duke during this run and seal him up after the fight, you receive what the game considers the best Trinket available. If you are going for a complete playthrough or optimizing your build, keeping The Duke alive through this encounter is worth the extra effort.

Side Arms are essential in phase 2
For more strategies on every boss and system in the game, the Mina the Hollower strategy guides collection on GAMES.GG has you covered. If you are still getting oriented with the game, check out the Mina the Hollower release date and exact start times guide for regional launch details and what to expect from Yacht Club Games' latest entry in the adventure games genre.