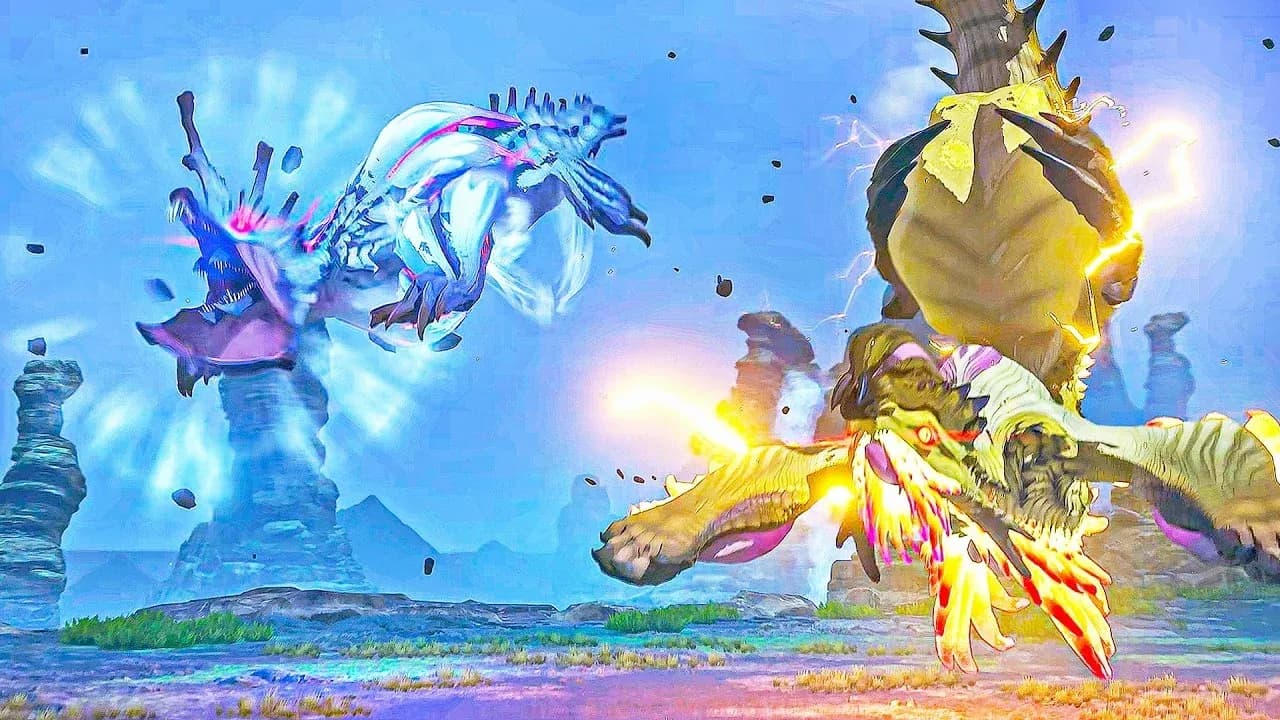

Wind Serpent Ibushi and Thunder Serpent Narwa are the definitive endgame wall in Monster Hunter Stories 3: Twisted Reflection. Most encounters up to this point can be steamrolled with a decent Monstie lineup, but these two Calamitous Elder Dragons fight together, share mechanics, and scale into a second empowered phase that punishes any slip in preparation. This guide breaks down exactly which Monsties to bring, which equipment gives you the widest coverage, which companion to pick, and how to navigate every phase of the battle without getting wiped.
Understanding the Mind Connection Mechanic
Before diving into builds, you need to understand what makes this fight structurally different from every other encounter in the game. Ibushi and Narwa are linked by a system called the Mind Connection. At any given time, one of them carries an active Mantle and acts as the primary attacker, while the other shifts into a support role, stripping your buffs, applying their own, and dealing lighter damage on the side.
Never fully ignore the support Elder Dragon. It still deals damage and actively works to dismantle your party's buff stack every turn.
The Mind Connection also reshapes how the Wyvernsoul Gauge works. Damage dealt to one dragon's Wyvernsoul Gauge depletes it for both simultaneously. This means staggering one stuns both at the same time, which is a significant advantage. The downside is that Synchro Rushes are unavailable for the entire fight because you can never isolate a single target.
Attack Type Reference Table
Both Elder Dragons shift their attack type depending on their current state. Knowing which type is active each round helps you predict Head-to-Head outcomes.
What Are the Best Monsties to Use Against Ibushi and Narwa?
Building your Monstie rotation for this fight requires accepting one fundamental truth: no single Monstie covers both Elder Dragons perfectly. Ibushi has a strong weakness to Fire and a light weakness to Dragon, while Narwa has a strong weakness to Ice and the same light Dragon weakness. However, each one lightly resists the element the other is especially vulnerable to, so you need at least two Monsties in rotation at all times.
Dragon-Type Monsties
Malzeno is a strong pick for Dragon coverage because it can heal your party while dealing damage simultaneously. The catch is that Malzeno carries a Dragon weakness, making Ibushi's Wind Mantle phase particularly dangerous for it.
Stygian Zinogre sits on the opposite end of that trade-off: excellent Dragon resistance, but very susceptible to Narwa's Thunder attacks. Treat it as a safe swap when Ibushi is the active threat.
Fire-Type Monsties for Ibushi
Ratha hits Ibushi's Fire weakness hard, but the Dragon vulnerability means you need to manage its HP carefully during certain phases. Hellblade Glavenus is a more balanced option for Fire damage, offering better elemental resistances at the cost of lower Defense and Speed, which makes raw survivability trickier.
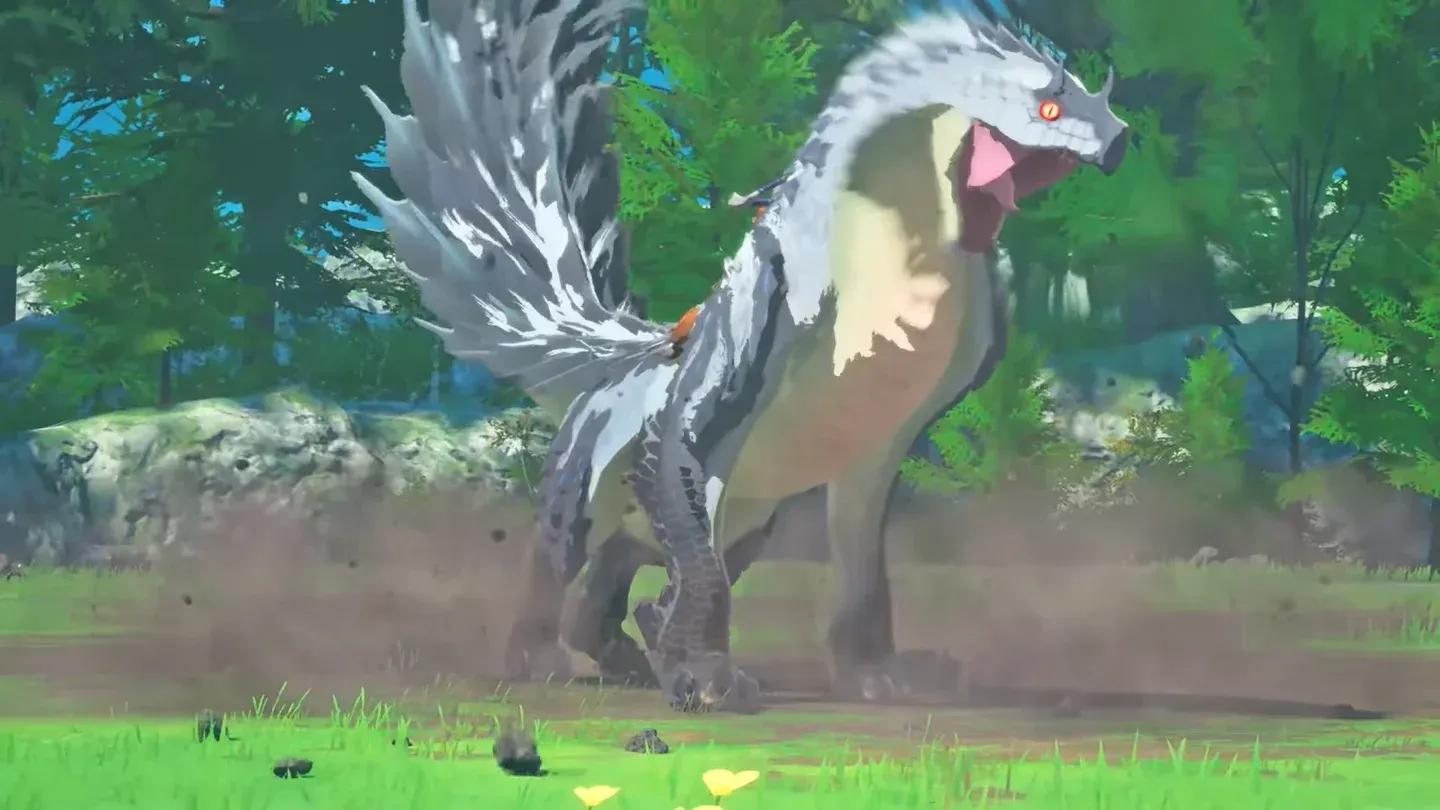
Ice-Type Monsties for Narwa
Goss Harag pairs Ice damage with high Defense, making it one of the sturdier options when Narwa is empowered. Velkhana deals significantly more Ice damage despite having worse resistances, and its higher Speed stat helps it dodge incoming attacks more reliably.
Monstie rotation for dual dragons
What Is the Best Equipment Build for This Fight?
You cannot swap equipment mid-battle, so your loadout needs to handle both dragons across the full fight duration. After testing multiple armor sets, Goss Harag armor upgraded to level three stands out as the most practical choice. It provides the highest Defense values, unlocks three Decoration slots, and offers solid elemental resistances across the board.
Recommended Decoration Setup
- Dragon Def Boost (XL) to reduce Dragon damage intake
- Thunder Def Boost (XL) to reduce Narwa's Thunder attacks
- Elemental Assault (XL) for extra damage on elemental hits
Weapon Selection for Full Elemental Coverage
Since you want weapons that hit both dragons' individual weaknesses, carrying one weapon per relevant element is the most reliable approach.
For the Bow specifically, adding the Accuracy Down Coating Decoration provides meaningful evasion support and can noticeably reduce the number of hits that land on your party. Remaining Decoration slots on other weapons are flexible, so prioritize what fits your playstyle.
Which Companion Should You Bring?
Two companions stand above the others for this fight: Thea and Eleanor. Both Kora and Gael can contribute, but since most of Ibushi and Narwa's attacks hit the entire party rather than a single target, Kora's Focal Point ability loses much of its value here.
Thea Setup
Equip Thea with her Hunting Horn. It will not deal meaningful damage to either dragon, but it buffs the whole party, which is far more valuable in a prolonged two-target fight. Bring Gnocchi as her Monstie companion since Gnocchi uses both Ice and Dragon attacks, giving you coverage against both Elder Dragons from a single companion slot.
Eleanor Setup
Eleanor with her Great Sword can deal exceptional damage, though it only connects effectively against Ibushi. Her Fortified Spirit passive essentially gives you an extra Heart, which functions as a critical survivability buffer in the later phases. Pair her with Glavenus as her Monstie, whose superior Speed and evasion over Angie makes a real difference when the dragons start hitting harder.
How to Beat Ibushi and Narwa
Phase One: Managing the Empowered Dragon
From the opening round, focus the majority of your attacks on whichever dragon currently carries the active Mantle. That dragon has more damageable parts exposed, which translates directly into faster Wyvernsoul Gauge depletion for both targets. Since the gauge is shared, landing stagger on the active dragon staggers both simultaneously.
Keep your HP topped up at the end of every round. If both dragons are about to perform non-Head-to-Head attacks and your party is sitting at low health, you risk a full party wipe. Use Kinship Skills proactively to cancel powerful incoming attacks rather than saving them for offense. Prolonging the fight is always better than losing it.
Phase Two: Dual Empowerment Below 50% HP
When both dragons drop below 50% HP, the fight escalates significantly. Both Ibushi and Narwa become simultaneously empowered, gain access to new moves, and continue to buff each other. This is the most punishing stretch of the encounter.
If you repel both dragons before the fight ends, they will enter this dual-empowered state from the very start of the second encounter. Come prepared for that escalation from round one.
The silver lining is that both dragons now carry active Mantles, which makes it easier to deplete the Wyvernsoul Gauge on either target. Shift your priority to Wyvernfell-heavy skills over raw damage output to get them Exposed faster, which forces more Head-to-Head exchanges and gives you more controlled damage windows.
Rewards for Winning
Defeating both Elder Dragons grants your allies the Follower's Testament Skill, or upgrades it if they have already cleared a previous Elder Dragon fight. If you manage to win without ever repelling either dragon, you also receive an upgraded version of this skill for your own character.