
Mouse P.I. For Hire packs 201 collectibles across its missions, tied to trophies, achievements, and some genuinely hidden secrets that reward players who poke around every corner. Knowing what you're hunting and where to look before you start a mission is the difference between a clean run and a frustrating backtrack session. This guide covers every Newspaper, Baseball Card, Comic, Secret Figurine, and Schematic, organized by mission so you can grab them as you go.
What collectibles are in Mouse P.I. For Hire?
There are five collectible types spread across the game:
The Schematics trophy only requires 63 of the 83 total, so you have some breathing room there. The other three trophy types require every single one, which makes knowing the missables especially important.
Baseball Cards earned as Side Job rewards and any collectibles found in the final 2 missions cannot be recovered from the shop after the fact. Plan accordingly before entering those missions.
Prologue: Big Mouse, Little Hope
The prologue sets up the game's collectible logic quickly. There are 2 Comics and 1 Schematic to grab here.
- Comic 1: From the spinning floor room, head upstairs into the next room, turn around to face the counter, enter the open vent, and grab the collectible at the end.
- Comic 2: After watching your target escape down an elevator, go up the stairs. The comic is on the floor.
Schematic: After grabbing the second comic, go into the next room. The schematic is inside the safe.
Mouse P.I. For Hire Guide: All Collectible Locations
The Vanishing Act
This is the first full mission and has the highest density of collectibles in the early game. There are 3 Newspapers, 3 Baseball Cards, 3 Comics, 4 Schematics, and 1 Figurine here, plus 8 additional Baseball Cards available for purchase from the shop.
Newspapers, Comics, and Baseball Cards
- Newspaper 1: After showing your ID to the MPD Lieutenant, go through the door and check the locker on the right.
- Comic 1: After going through the vent to the backstage, use the lever on the far left to open the curtain. The comic is on one of the seats near the MPD Rookie.
- Baseball Card 1: After the first enemy encounter, go up the stairs they came from. The card is on the table at the top.
- Baseball Card 2: In the apartment building, go up the first flight of stairs, break the window to reach the balcony, break another window to enter an apartment, and grab the card on the stool by the door.
- Comic 2: After exiting the apartments and defeating enemies on the street, go to the far right of the street. The comic is on a bench.
- Newspaper 2: Inside Betty Deux-Fiddle's apartment, on the kitchen counter.
- Baseball Card 3 (in-office): At the P.I. Office, go into your actual office and check your dresser.
Schematics
- Schematic 1: In the apartment building, shoot the box blocking the bathroom door to get the Loft Key, then use it on the locked door to find the schematic on the table.
- Schematic 2: After going through the subway and reaching the next typewriter, it's on a nearby table.
- Schematic 3: After defeating enemies who arrive by train, board the train and exit through the top left doorway to reach the tracks. Find the safe with the schematic.
- Schematic 4: In the same area, enter the bathroom below the stairs.
Figurine
- Figurine: After reaching the P.I. Office, enter the Little & Big Bar, go into the kitchen, tailpick the door, and head into the basement. The figurine is on a stack of books.
The 8 purchasable Baseball Cards in The Vanishing Act cost 500 coins for 4 and 1,000 coins for the other 4. You do not need to buy them immediately. Pick them up gradually as you visit the shop between missions.
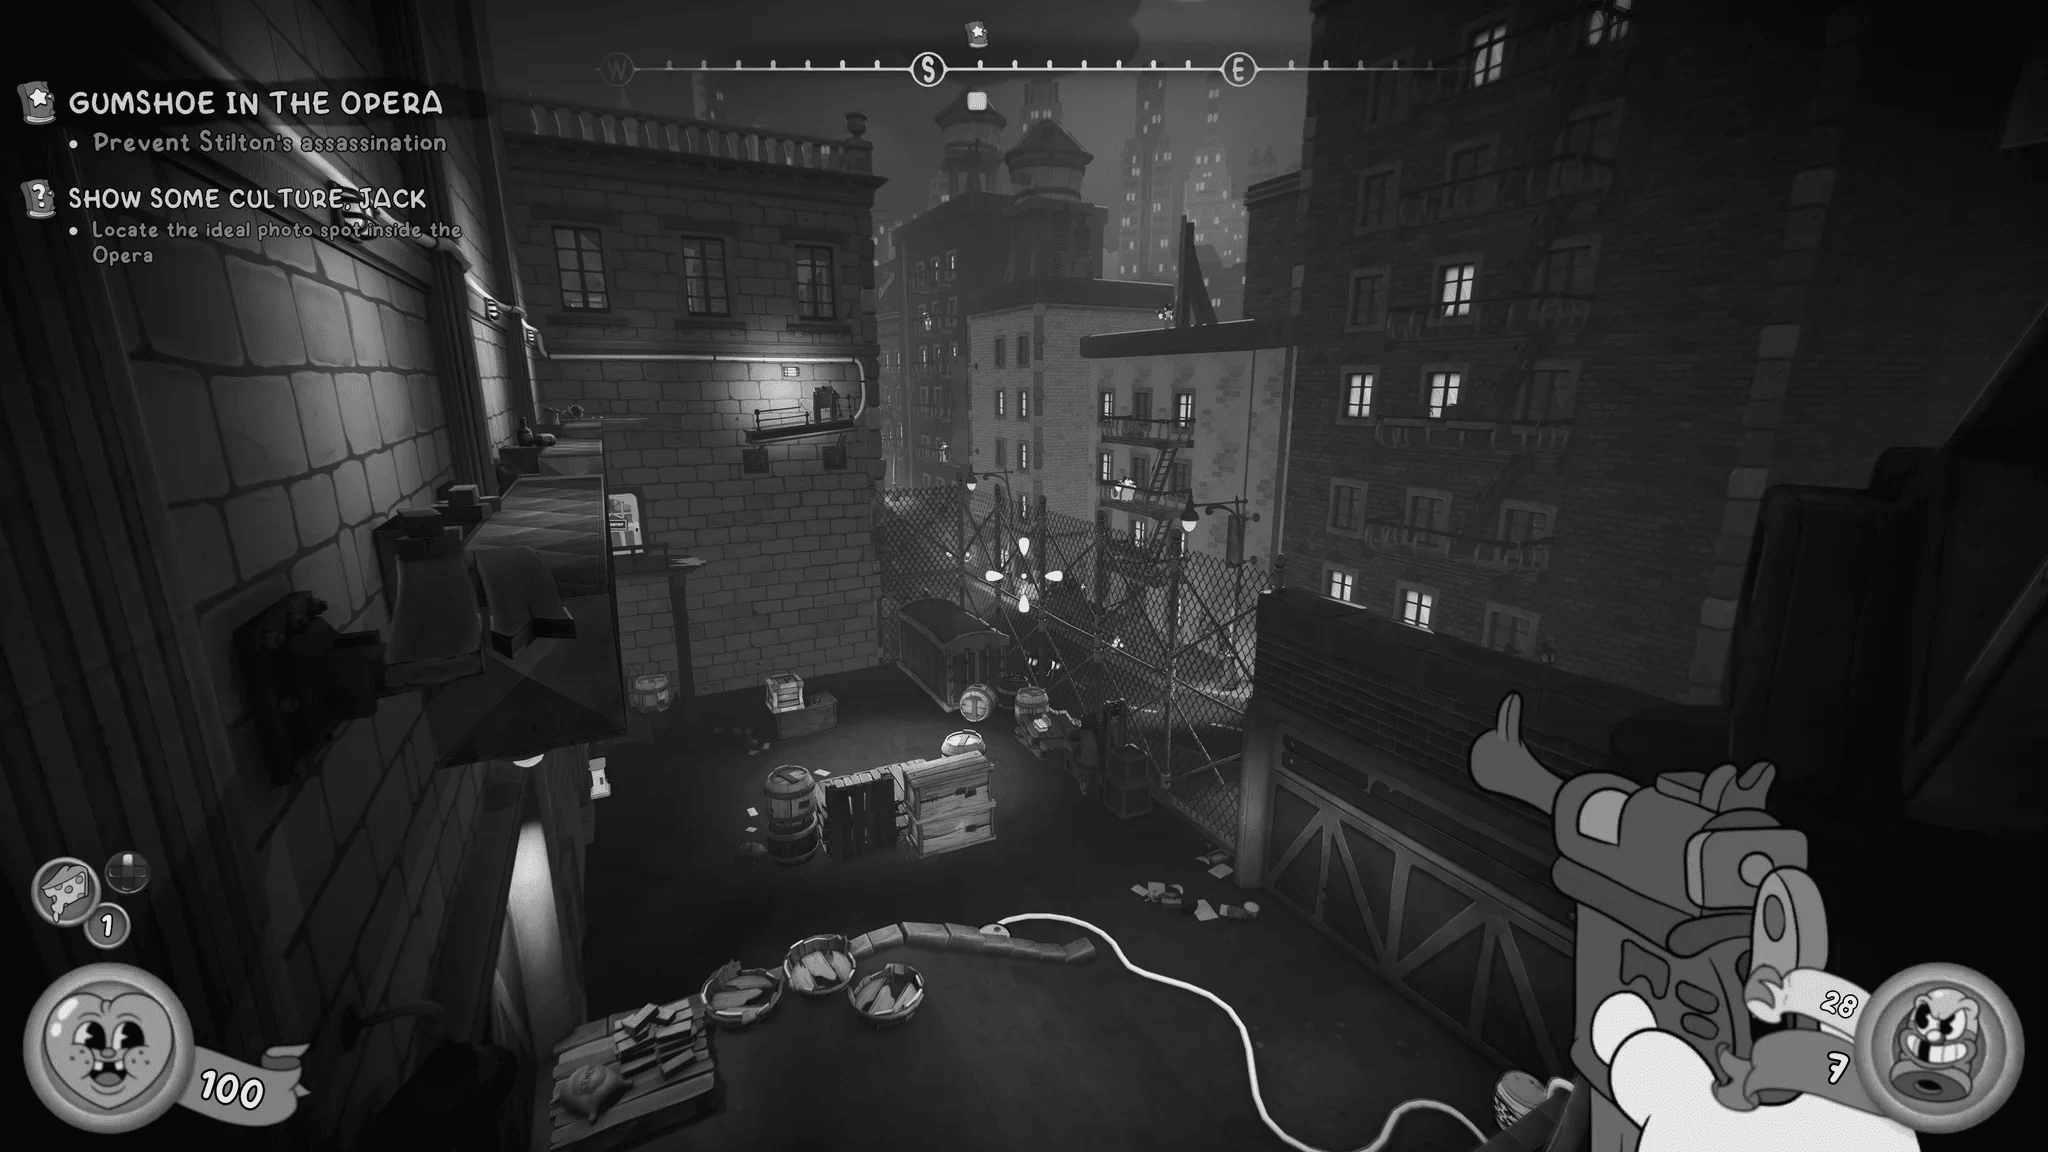
Gumshoe in the Opera
This mission introduces the double jump ability, which opens up a backtrack opportunity for one collectible. Grab the double jump before leaving the area where you fell into the basement.
- Schematic 1: At the mission start, jump on top of the vent by the garbage.
- Newspaper 1: From the previous schematic, enter the building. The newspaper is on the table directly to the right.
- Baseball Card 1: After tailpicking the door past the Stage Designer, check the table to the right of the breakable wall.
- Comic 1: Blow up the wall and drop to the balcony. The comic is underneath the small plank ramp.
- Newspaper 2: On the chair directly beside the Old Rat Stuntman who gives you the double jump.
- Baseball Card 2: After unlocking the double jump, backtrack to where you fell into the basement and double jump onto the nearby ledge. The card is on boxes at the end.
- Schematic 2: From where you learn the double jump, drop to the platforms in the water. The schematic is in the safe.
- Schematic 3: After learning the double jump, follow the path over the water to the next platform. The schematic is on a barrel to your left.
- Comic 2: During the escape while the building is on fire, open the door to the main hall from the balcony seats, immediately turn right, jump over the fire, open the door to a hallway, and check one of the cabinets.
Newspaper 3: After returning to the P.I. Office and pinning your clues, buy this from the Paperboy outside your office.
Mouse P.I. For Hire Guide: All Collectible Locations
Bandel's Laboratory
This mission features a giant octopus tank and a giant head room as landmarks you can use to orient yourself while hunting.
- Schematic 1: After climbing the ladder to one of the typewriters, look left. The schematic is under a pallet.
- Newspaper 1: From the giant octopus room, go upstairs and enter the only open door. The newspaper is on a stack of books on the left.
- Baseball Card 1: In the giant head room, face it, then go down the small stairs on the left. Crouch under the stairs past the fencing to find the card at the end.
- Newspaper 2 and Schematic 2: After defeating the first boss, enter the room by the stairs. The newspaper is on the desk on the right, the schematic on the table to the left.
- Comic 1: From the lever that activates the projector room light, tailpick the door to the right. The comic is on a chair to the left.
- Comic 2: From the lever that raises the train out of the water, tailpick the door to the left. The comic is on a table to the right.
- Baseball Card 2 and Schematic 3: After climbing the broken pathways to activate the elevator, turn around and double jump onto another broken platform.
- Newspaper 3: After the previous collectibles, go up the elevator. The newspaper is in a trash can to the right.
- Schematic 4: From the newspaper, go down the stairs. The schematic is in a safe under the stairs.
A Bit of a Scene
This mission takes you through a police station with multiple entry routes. The vent path on the left side is the one that leads to collectibles inside the jail area.
- Schematic 1: After climbing the ladder into the building, turn left immediately.
- Baseball Card 1: After the street ambush, walk to the end of the road and go down the stairs on the left.
- Newspaper 1: After coming back down from the train area, double jump over the brick wall on the right. The newspaper is in the trash ahead.
- Newspaper 2: After taking the trampoline across to the other apartment building, go through the window. The newspaper is on a chair to the left.
- Schematic 2: After shooting the target to lower the pipes, cross over. The schematic is in the dresser.
- Schematic 3: Enter the police station through the left vent. At the jail area, open the gate on the right side. The safe inside holds the schematic.
- Schematic 4: From the previous schematic, get the prison key from a side room. One of the jail cells has the schematic under the bunk.
- Comic 1: After reaching the police station offices, jump over the boxes on the left and enter the left office. The comic is on the desk.
- Comic 2: From outside the police station, go right, jump onto a car, and double jump over the fence. The comic is on a chair to the left.
- Baseball Card 2: From the previous comic, jump over the next fence, shoot the explosive to break the wall, re-enter the jail cells, get the jail key from the room on the left, and unlock the far left cell with tally marks. The card is in the bowl.
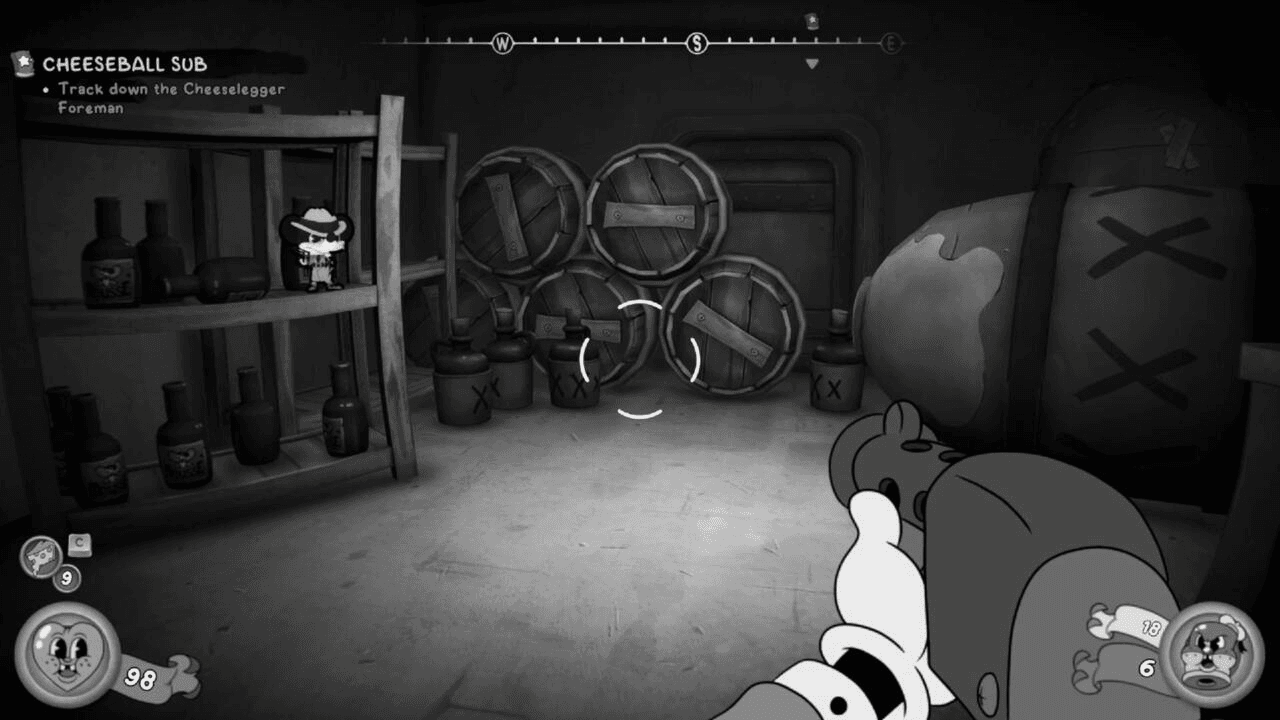
Cheeseball Sub
The timed tailpick in this mission is the one collectible that requires real urgency. If the lock jams, you need to reload from your last save.
- Newspaper 1 and Schematic 1: After reaching the first train, turn around and grab the Ticket Booth key from the crate. Follow the tracks, unlock the door on the right, and go to the end. The newspaper is in the lit room, the schematic is on the bunk bed in the room on the left.
- Newspaper 2: In the broken floor room, jump up the boxes to a higher level. Go past the wooden fence. The newspaper is on one of the boxes.
- Baseball Card 1 (timed): After climbing to the second set of train tracks, turn left and tailpick the door. Complete the pick before the timer runs out or the lock jams. Follow the path to the locker room. The card is hanging on a clothesline on the right.
- Schematic 2: From the suspended train car room, break the window in the top left, jump up, shoot the explosive barrel to break the wall, follow the path through the train to the platform, turn left, and jump into the tipped train.
- Newspaper 3: After climbing the small ladder further into the sewers, go to the second room. The newspaper is on a box immediately to your left.
- Comic 1: In the boss arena, jump to the very top of the middle cargo crate. The comic is on the metal grate near the edge.
- Schematic 3: After the second water glide section, the schematic is on the lower section at the end. Avoid the water as it deals heavy damage. Use double jump into the updraft to get back up.
- Schematic 4: After going through the vent, tailpick the door ahead, then jump into the water and follow the tunnel at the bottom to a hidden safe.
- Figurine: From the previous schematic, return to the main room and activate the lever to start an updraft. Glide up, land on a platform, grab the explosive barrel from the top of the train car, and throw it at the breakable wall to reveal a secret room. The figurine is on a shelf inside.
The water in Cheeseball Sub deals significant damage when you're submerged. For the Schematic 3 detour, drop carefully and use the updraft mechanic to recover altitude afterward.
Swamp Oddity: The piano puzzle
This mission has one of the game's most memorable secrets. After talking to the Old Shrew and entering the music room, you'll find a comic on the piano. Interact with the piano and press the keys ACEG in that exact order. You'll know it worked when Jack makes a Dark Souls 1 reference. The dresser back in the Old Shrew's room will open, revealing a Baseball Card pinned to the wall and a Schematic in the safe.
Other collectibles in Swamp Oddity:
- Newspaper 1: On the wooden platforms in the swamp, pinned to the wall in the shack.
- Schematic 1: After lowering the bridge, jump onto the cages on the left and jump to the small wooden room. The schematic is on the ground.
- Newspaper 2: After the piano puzzle room, go back to the main hall, head through the door to the office, go through the hole in the wall to the left, and jump over the desk.
- Schematic 2: After exiting through the vent to the outside, go behind the building. The schematic is pinned to the wall.
- Newspaper 3: After returning to the P.I. Office and pinning your clues, buy from the Paperboy.
White Lies and Dark Secrets: The three bells
The Figurine in this mission requires shooting 3 bells to unlock the church. The first bell hangs in front of the house where you find a clue. The second hangs on the tree in the center of the area. The third is the giant bell at the top of the church. Once all three are shot, enter the church and pick up the figurine from the room on the left.
Other collectibles in White Lies and Dark Secrets:
- Schematic 1: After getting the Kiss Kiss weapon, enter the house on the right and go into the room to the right instead of dropping down the hole.
- Baseball Card 1: After exiting the cave, go toward the barn on the right. Walk around the left side of the barn across the balcony. The card is on a crate at the end.
- Schematic 2: On the ground near the first wedding ring.
- Comic 1 and Schematic 3: After exiting the barn back outside, jump across the gap. The comic is under the stairs directly ahead. Follow the fence path to find the schematic pinned against a crate.
- Schematic 4: After entering the mansion, go up the stairs and tailpick the door. The schematic is in the safe.
The House of the Empty Mouse: Three statues
This mission has the most elaborate Figurine puzzle. After opening the mansion, find 3 statues and bring each to the library pedestals.
- Statue 1: On the bed in the bedroom.
- Statue 2: Break the barrel in one of the jail cells.
- Statue 3: Go up to the top floor from the main staircase and head to the end of the hall.
Place all three on the library pedestals and a secret door opens to the right. The figurine is on one of the tables inside.
Other collectibles in The House of the Empty Mouse:
- Comic: After dropping the wooden barricade to reach the basement, jump onto the shelf on the right and crawl through the vent. The comic is in the middle of the vent.
- Schematic: After exiting the cellar back outside, go to where you broke the metal pillar earlier to break the wall. Crouch under the wooden boards. The schematic is on a crate.
How to efficiently farm coins for shop purchases
The shop is your safety net for most collectible types, but coins are required. Baseball Cards from the shop cost either 500 or 1,000 coins each. Playing through missions thoroughly and looting every area keeps your coin count healthy. There is no specific farming method documented in the available sources, so the best approach is simply to explore thoroughly on your first pass and use the shop as a backup rather than a primary source.
Getting all 201 collectibles takes attention across every mission, but the structure is forgiving for most types. Focus your in-mission diligence on Figurines and Schematics since those have no shop fallback, keep Side Job prerequisites in mind before the relevant missions, and let the shop clean up anything else you missed along the way.
For more gaming guides and trophy hunting resources, browse more guides on GAMES.GG to find walkthroughs for other recent releases.