
Mouse P.I. For Hire packs a surprisingly deep arsenal for a noir rodent detective game. You start with basic gear, but by the time you've worked through the mission list, you'll have access to everything from acid-spewing shotguns to a literal cannonball launcher. The trick is knowing which weapons to prioritize upgrading and how each one actually plays in combat.
All weapons unlock by completing available missions, so there's no secret vendor or hidden chest to hunt down. The upgrade system, called Schematics, gets introduced during the main campaign, and that's when the real build-crafting begins.
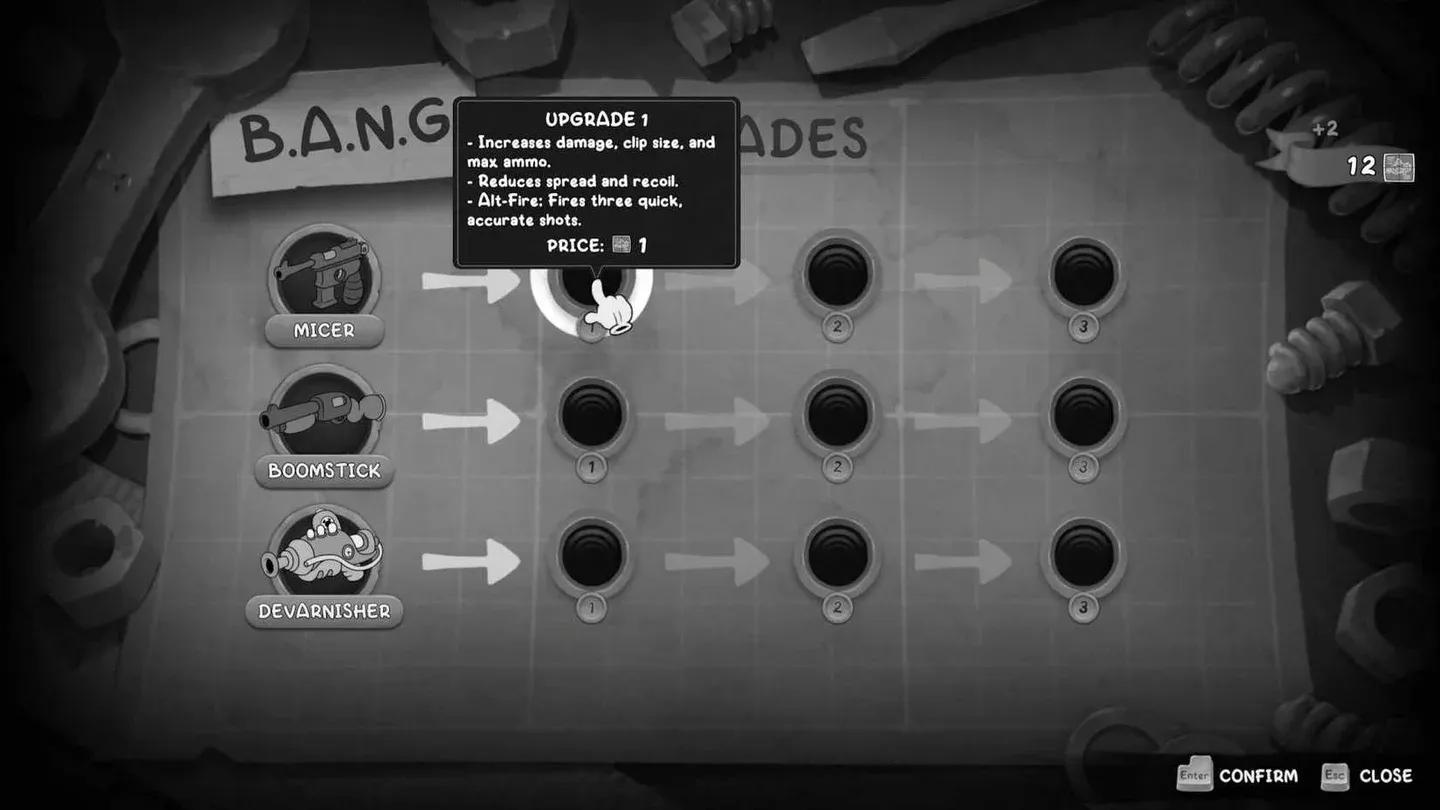
Schematics upgrade system
How do you unlock and upgrade weapons in Mouse P.I. For Hire?
Every weapon becomes available through mission completion, no exceptions. Once the Schematics system opens up mid-campaign, you can start pouring resources into the guns you actually use. Each weapon supports up to Tier 3 upgrades, with each tier stacking improvements on top of the last. The two exceptions are the D-Namite and the Hellrazor, which have no upgrade tiers at all.
Prioritize upgrading weapons that fit your playstyle first. Spreading Schematics across every gun early is a waste since you'll naturally gravitate toward two or three weapons anyway.
What are all the weapons and their tier upgrades?
Here's the full breakdown of every weapon, what each upgrade tier adds, and how each one handles in combat.
Which weapons are best for crowd control?
Three guns stand out for handling groups of enemies.
The Jar-Head is the dedicated crowd-control pick. Its stun effect works on all normal enemies, and the Alt-Fire's concentrated beam rewards players who aim for heads. The catch: stun does not work on bosses, so swap it out before those fights.
The Kiss Kiss handles wave clearing differently. Its explosive rounds deal splash damage and apply burn damage over time, which means enemies that survive the initial hit keep taking damage. The Alt-Fire heavy round amplifies this further.
The James Gun fills a suppression role. Its Alt-Fire dumps a large volume of bullets rapidly, which interrupts enemy attack patterns at mid-range. The high fire rate can prevent enemies from shooting back, making it useful when you're getting overwhelmed.
What's the best weapon for dealing with walls and environmental obstacles?
Two weapons break walls and open new areas: the Loose Cannon and the D-Namite.
The Loose Cannon fires an exploding cannonball that deals area damage and can break weaker walls to access otherwise unreachable zones. It's a legitimate combat weapon with real Tier 3 upgrade potential, so it doubles as both a progression tool and a damage dealer.
The D-Namite is a throwable TNT grenade that explodes on impact. Beyond raw damage, it breaks walls and destroys shields, making it situationally useful even if it can't be upgraded. Keep a stock of these for encounters where shields are a problem.
How does the Portable Freezer change combat?
The Portable Freezer operates on a different logic than every other weapon in the game. Instead of raw damage, it shoots an ice beam that progressively slows enemies on contact. Push the freeze meter far enough and the enemy locks up completely, letting you unload into them without taking any return fire.
Each upgrade tier accelerates how quickly the freeze builds, which is the stat that matters most for this weapon. The Alt-Fire launches an icicle that explodes on impact and applies frost to all enemies in range, making it effective for freezing multiple targets at once.
Paired with a high-damage weapon like the Boomstick or Loose Cannon, the Freezer becomes a setup tool that trivializes tough individual enemies.
What about the Devarnisher and its acid mechanics?
The Devarnisher is the game's damage-over-time specialist. Its primary fire shoots acid that eats away at enemy health continuously after contact. The Alt-Fire at Tier 1 launches a sticky acid blob that sticks to a surface or enemy before detonating, dealing area damage and applying toxic damage over time to anyone caught in the blast radius.
Each upgrade tier increases projectile count alongside the standard clip and ammo improvements, which means more acid coverage per shot at higher tiers. It's not a burst weapon, so don't expect it to delete enemies instantly. The payoff comes in sustained fights where the DoT stacks up.
Weapon tier upgrade summary
All eight upgradeable weapons follow a consistent pattern across their three tiers. The core stats (damage or projectile count, clip size, max ammo, and recoil) improve at every tier. What differentiates weapons is what else changes: the Boomstick gains additional pierce targets at Tier 2 and Tier 3 rather than just raw stat bumps, while the Portable Freezer specifically improves freeze speed rather than damage.
The Hellrazor gets a special mention for being the only melee-style weapon. It can clear a room in seconds, but no B.A.N.G. upgrades exist for it, so what you see is what you get.
For more gaming guides and the latest on new releases, browse more guides on GAMES.GG.