
Over The Top: WWI drops you into 200-player battles across fully destructible trenches, and it will punish anyone who treats it like a standard shooter. Bolt-action rifles, creeping artillery barrages, flamethrowers, and proximity chat all collide in one beautifully chaotic sandbox. Developed by Flying Squirrel Entertainment, a tiny team of roughly four modders, this game demands situational awareness and class discipline far more than raw aim. This guide breaks down every class, every universal perk, and the critical tactics that separate survivors from ticket-draining liabilities.
How Do You Actually Find Real Players in Over The Top: WWI?
Before touching a single class, sort out your matchmaking. Hitting the quickplay button will almost certainly land you in a lobby populated by a handful of real humans and nearly 195 bots moving in perfectly straight lines. These bots are nonreactive, blind, and completely hollow out the chaotic experience the game is built around.
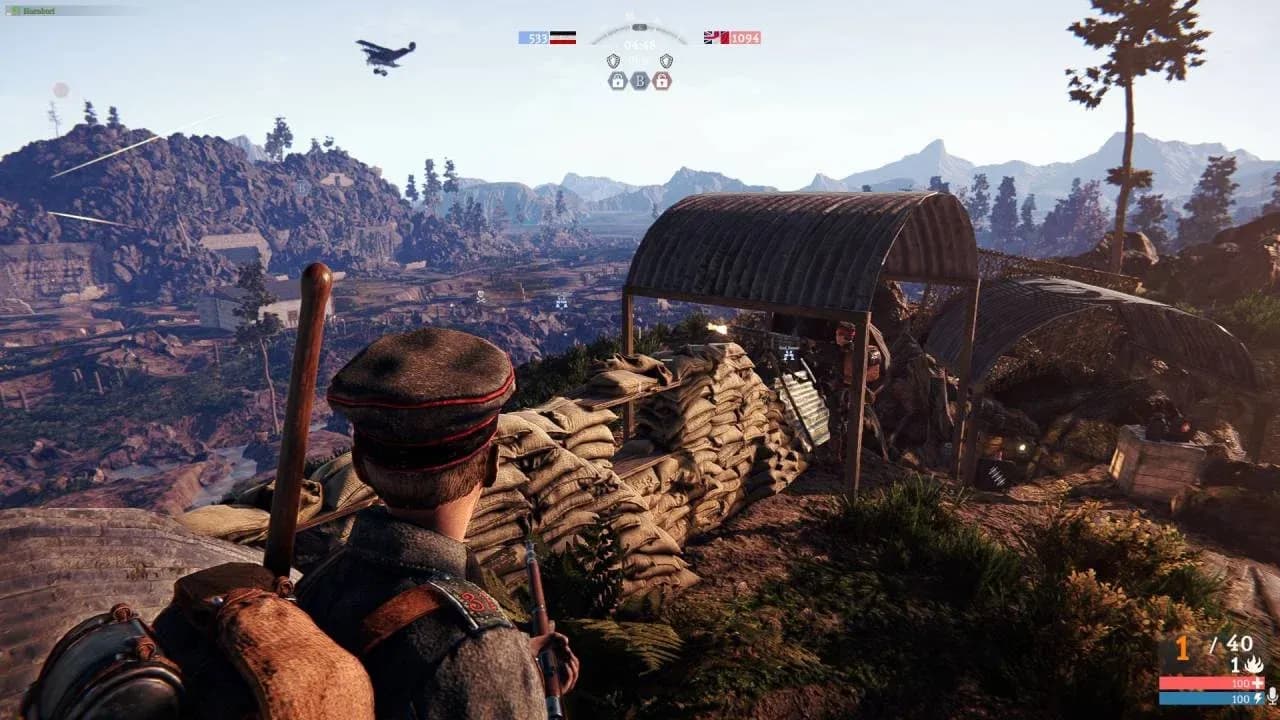
The fix is simple: use the server browser. Look for lobbies with over 80 active players. As real players join, the game automatically removes bots to make room. For players who prefer a more immersive perspective, the community hosts dedicated first-person only servers that you can filter for directly in the browser.

Use the server browser wisely
What Are the Universal Perks and Which Should You Unlock First?
Every class across all three playable nations (German Empire, Great Britain, and France) shares one identical perk tree. You purchase these upgrades with experience earned from capturing zones, reviving teammates, building fortifications, and generally contributing to the match.
Do not sit on your experience. These passives have an immediate impact on your survival rate.
Die Hard Soldier is the single most important unlock for staying alive under artillery fire. Grab it first. Healer is the second priority if you plan to play any support-adjacent role, since a 200% boost to revive health is enormous. Earthworm pairs perfectly with the Engineer and is worth prioritizing if that is your main class.
Every class benefits from Die Hard Soldier. Explosion damage from artillery and grenades is constant in this game, and a 25% reduction will noticeably extend your life expectancy.
Class Breakdown: What Does Each Role Actually Do?
Over The Top: WWI organizes its eight classes into three broad categories: one Command class, four Infantry classes, and three Support classes. Here is what each one brings to the battlefield and how to play it correctly.
Eight classes across three nations
The Rifleman
The Rifleman is the backbone of any assault. Bolt-action rifles outrange everything on the battlefield except dedicated scoped sniper weapons, giving this class surprising reach. Your job is not to charge blindly but to identify chokepoints, find solid sightlines from the trenches, and neutralize Heavy Gunner nests and enemy Officers before they can suppress your team.
Riflemen can also equip a wrench to repair friendly tanks, which dramatically extends armor lifespan on contested objectives. At range, you have enough accuracy to track and engage aircraft, though Zeppelins handle air threats far more efficiently.
The Stormtrooper
The Stormtrooper is a pure close-quarters specialist built for trench clearing. The kit centers on shotguns, submachine guns, and melee tools. Do not attempt to engage Riflemen or Snipers in open ground. You will lose that fight every time.
The correct play is to stay close to your Officer, wait for smoke coverage, and then push aggressively into fortified positions to clean them out. Playing this class out of position is one of the fastest ways to drain your team's tickets for zero gain.
The Sniper
Camping in the back of the map and padding a kill count is the wrong way to play Sniper. Your primary targets are enemy Officers. An Officer staying alive is a mobile spawn point for the entire enemy team. Eliminating them collapses pushes instantly.
Check the map constantly. It highlights troop movement across the battlefield, letting you anticipate where pressure is building. Flanking is the defining skill of this class. Repositioning after every shot prevents counter-snipers from locking onto your position.
If a friendly point is getting hammered by artillery, the enemy Officer calling it in is your highest-priority target. Communicate this to your team and hunt them down before the barrage wipes the defense.
The Specialist
The Specialist carries anti-tank rifles and flamethrowers, making them indispensable on maps with heavy armor pressure. The Tankgewehr 1918 deals 200 ranged damage per shot, and the flamethrower excels at flushing enemies out of tight trench systems.
The tradeoff is a fragile health pool. Direct engagements against Riflemen or Stormtroopers are losing propositions. Patient flanking and attacking from unexpected angles is the only way to extract consistent value from this class.
The Armored Cavalry
The Armored Cavalry wears a large metal chest plate that absorbs significantly more punishment than any other infantry class. This is a pure commitment role with one purpose: break stalemates. Charge directly into chokepoints, absorb incoming fire, and create the opening that allows Riflemen and Stormtroopers to finally advance.
The Heavy Gunner
The Heavy Gunner operates on an overheat system rather than a standard reload mechanic. Managing heat correctly means near-continuous suppressing fire, capable of locking down entire map sectors. A coordinated cluster of Heavy Gunner nests is one of the most difficult situations for an opposing team to deal with. Even when flanked, the class carries a revolver as a sidearm for close-range defense.
The German Heavy Gunner has been flagged by the community as particularly strong. This may be adjusted in future patches, so check current patch notes before building a strategy entirely around this class.
The Engineer
The Engineer is the most technically demanding class in the game and the one most likely to accidentally sabotage its own team. Before picking this role, spend several matches learning how the maps flow.
The golden rule of trench construction is to never dig straight lines. A straight trench gives a single enemy machine gunner a clear sweep of the entire fortification. Build corners, zig-zags, and deliberate dead-ends. Design your positions so they become difficult for the enemy to exploit if the objective falls.
Spawn point management is equally critical. Your team can only have three active spawns at once. An outdated spawn sitting far behind the current frontline wastes one of those slots. Equip your hammer, switch to destroy mode using the melee key, and clear old spawns as the line advances. If a friendly tank gets stuck in a deep trench, a few shovel swings to reduce the incline of the dirt wall will free the driver.
Zig-zag trenches save lives
The Officer
The Officer is the most impactful class in the game when played correctly, and the most damaging when played carelessly. Your body functions as a mobile spawn point for your entire team. Staying alive in an aggressive forward position is your primary contribution to any assault.
Your call-in abilities are accessed through the Alt key and cost credits that regenerate over time and through objective scoring. Here is a breakdown of every ability and when to use it:
The Directional Air Strike and Creeping Barrage are both angle-dependent. Use your mouse to rotate the strike direction before confirming. The red ground overlay shows exactly where ordinance will land. Friendly fire is fully active in this game, and dropping a creeping barrage on your own charging infantry is the fastest way to get universally despised on the server.
Spotting flares should be used constantly to reveal hidden enemies. Your Recon Balloon is a passive counter to enemy artillery, and on linear maps it can single-handedly stop an enemy advance by denying Officer call-ins over an entire zone.
What Weapons Should You Know About?
Weapon ranges in Over The Top: WWI are longer than most players expect. Standard bolt-action rifles and heavy machine guns carry genuine threat at distances that feel excessive coming from other shooters. If you can see a static Heavy Gunner, you can shoot them.
The mortar is widely misunderstood. Players pick it up expecting easy long-range kills, but accuracy degrades sharply at distance. For sustained long-range bombardment, a heavy cannon is a far superior choice. Melee attacks are situational. A bayonet charge looks dramatic, but running at a loaded rifle in the open is rarely a good idea. Reserve melee for ambushes and moments when you are jumping over sandbags to surprise defenders.
The game also includes some deliberately absurd options. Slapping an enemy with a baguette is a real interaction. Playing bagpipes boosts nearby ally morale. The sandbox leans into the chaos intentionally.
Nation-Specific Weapon Highlights
While all nations share the same eight class roles and perk tree, the specific weapons available differ. Here are some standout stats worth knowing:
The one-shot scoped rifles from both nations hit 200 damage with near-perfect accuracy, making them the dominant tools for Sniper players who want guaranteed eliminations. The Tankgewehr 1918 is shared across factions and remains the go-to anti-armor option for the Specialist regardless of which side you pick.
Key Survival Rules for Every Class
- Never pile into a single trench. Concentrating twenty players in one position creates a perfect target for artillery and Heavy Gunner sweeps.
- Check the map constantly. Troop movement is highlighted, and reading it correctly separates reactive players from proactive ones.
- Flank when the frontline stalls. Adding another body to a meat grinder drains tickets. Identify where the enemy is focused and attack from the side.
- Manage spawn points actively. Three active spawns is the cap. Outdated spawns behind the line waste slots that could anchor a forward position.
- Communicate Officer threats. If an enemy Officer is calling artillery, every teammate benefits from knowing where they are.