Search games, articles, guides...CtrlK
Sign InGet Started
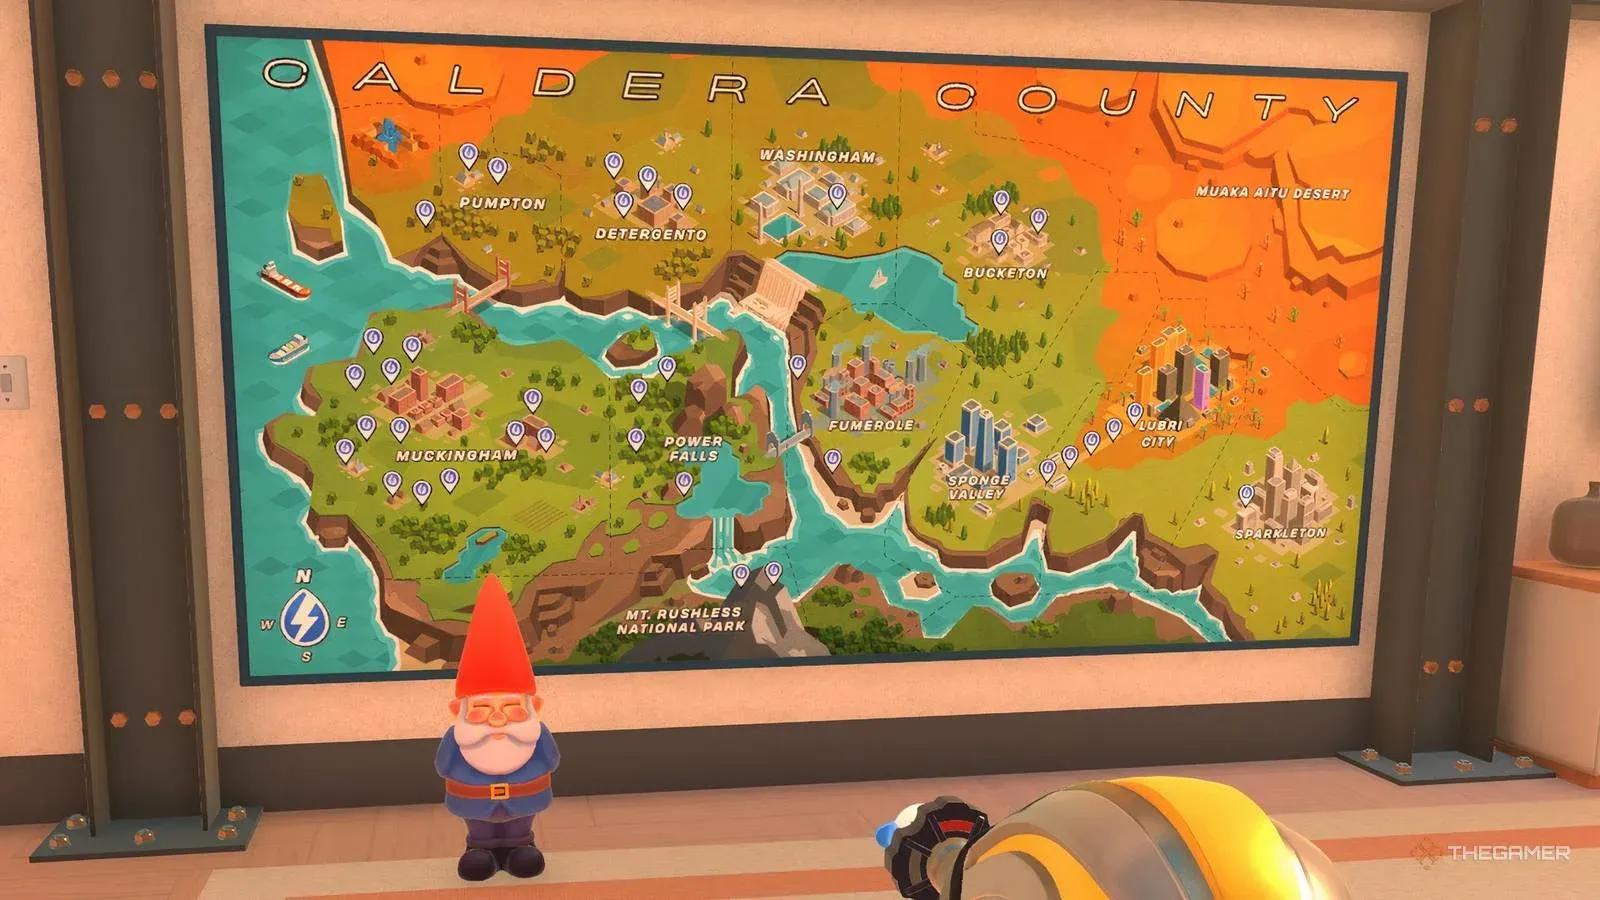
Find every hidden gnome in PowerWash Simulator 2 with this complete location guide. Never miss a secret collectible again.

Written by Nuwel
Content Writer
See more GAMES.GG guides on Google
Add us as a preferred source and our guides show up first in your results.

PowerWash Simulator 2: Complete Achievement and Trophy Guide
All 40 PowerWash Simulator 2 achievements explained, from petting cats to riding roller coasters. Get every trophy with this complete guide.
PowerWash Simulator 2 Career Mode: Cash Tracking Guide
Master Career Mode in PowerWash Simulator 2 with the latest patch fixes, cash tracking tips, and job progression strategies.

PowerWash Simulator Graphics Settings Guide for Best Performance
Get the best visuals and frame rates in PowerWash Simulator with these optimized graphics settings for every PC setup.
Finding the hidden gnomes in PowerWash Simulator 2 is one of those side objectives that sounds simple until you're staring at a half-cleaned level wondering where the little ceramic troublemaker went. These gnomes are tucked into corners, hidden behind foliage, and placed in spots that reward players who actually look around instead of blasting everything in a straight line. This guide covers every known gnome location so you can track them all down without spending an hour circling the same map.
Gnomes in PowerWash Simulator 2 are small collectible figures scattered across levels. They aren't marked on any in-game map, and the game gives you no direct hint that one is nearby. Your best signal is simply noticing something that looks slightly out of place, often tucked behind a bush, wedged near a structure, or sitting in a shadowed corner that your pressure washer hasn't touched yet.
The gnomes can typically be moved around once you find them, which means their exact resting spot can shift slightly depending on how you've been cleaning the surrounding area. The core location, though, stays consistent.
The first gnome most players encounter sits at the home base, which also serves as the central hub you return to between jobs. When you spawn in, face the taller bush positioned just to the right of your starting view. The gnome is tucked directly behind that bush.
Once you've discovered the home base gnome, it can shift position slightly if you start washing nearby surfaces. Don't worry if it moves a few feet—it stays in the general area of that taller bush.
The most common reason players miss gnomes is tunnel vision. PowerWash Simulator 2 rewards methodical cleaning, and most players develop a pattern that covers the obvious dirty surfaces while completely ignoring corners and background objects. Gnomes exploit exactly that habit.
Here are the spots worth checking in any level:
Each level places its gnome in a specific spot based on these patterns. Checking these zones systematically before you start cleaning will save you from backtracking later.
While exact positions vary per map, gnomes tend to follow placement patterns based on level type. The table below summarizes what to expect:
| Level Type | Typical Gnome Zone | Key Landmark to Check |
|---|---|---|
| Residential | Garden or yard perimeter | Tall bushes near spawn |
| Vehicle/Object | Undercarriage or rear | Shadow areas beneath the object |
| Outdoor Environment | Tree lines or fence edges | Far corners from starting point |
| Hub/Base | Behind decorative foliage | Right-side bush at spawn |
Finding a gnome doesn't trigger a loud fanfare or a pop-up achievement on its own. The satisfaction is mostly in the discovery and in completing your level fully. That said, gnome locations are tied into the broader achievement and completion tracking in PowerWash Simulator 2, so players going for 100% runs will need every one of them.
Collectible discovery plays a role in full completion runs. If you're chasing every unlock, treating gnome hunts as mandatory rather than optional will save you backtracking time later.
The players who find every gnome on a first pass through a level share one habit: they treat the gnome hunt as a separate task from the cleaning job. Before touching the pressure washer, spend 60 to 90 seconds walking the full perimeter of the level. Check behind every large plant, under every raised surface, and along every fence line.
Once you've spotted the gnome, note its position and then clean normally. You don't need to interact with it mid-job; just knowing where it is means you won't accidentally finish the level without registering its location.
For more collectible guides and hidden secrets across other games, browse the full guides section at GAMES.GG to find similar walkthroughs built around the same methodical approach.