
Central Port is the fifth and final sector in Pragmata, and it packs the most collectibles of any area in the game: 38 in total. You'll be hunting across five distinct sub-areas, from Port Entrance all the way up to the Orbital Elevator. The good news is that nothing here is permanently missable. If you skip something during your first run, Unknown Signal Mode (the post-story cleanup mode) lets you revisit every area with all collectibles intact.
Before going any further, note that some collectibles in Central Port require the Cleansing Ability, which you unlock after fixing Diana. A handful of items in earlier sectors also become accessible at that point, so check those too once you have it.
What collectibles are in Central Port?
Central Port contains 8 collectible types spread across its five sub-areas. Here's the full breakdown before you start:
Central Port collectible map
Central Port 01: Port Entrance
This opening sub-area has 5 collectibles and introduces the Cleansing Ability requirement. After the train ride, Escape Hatch 1 is directly in your path, so you won't miss it.
REM 1 (Parasol) takes a bit more effort. Before descending the stairs, jump onto the cargo boxes at the top and thrust left. You'll reach the REM that was visible through the window from below.
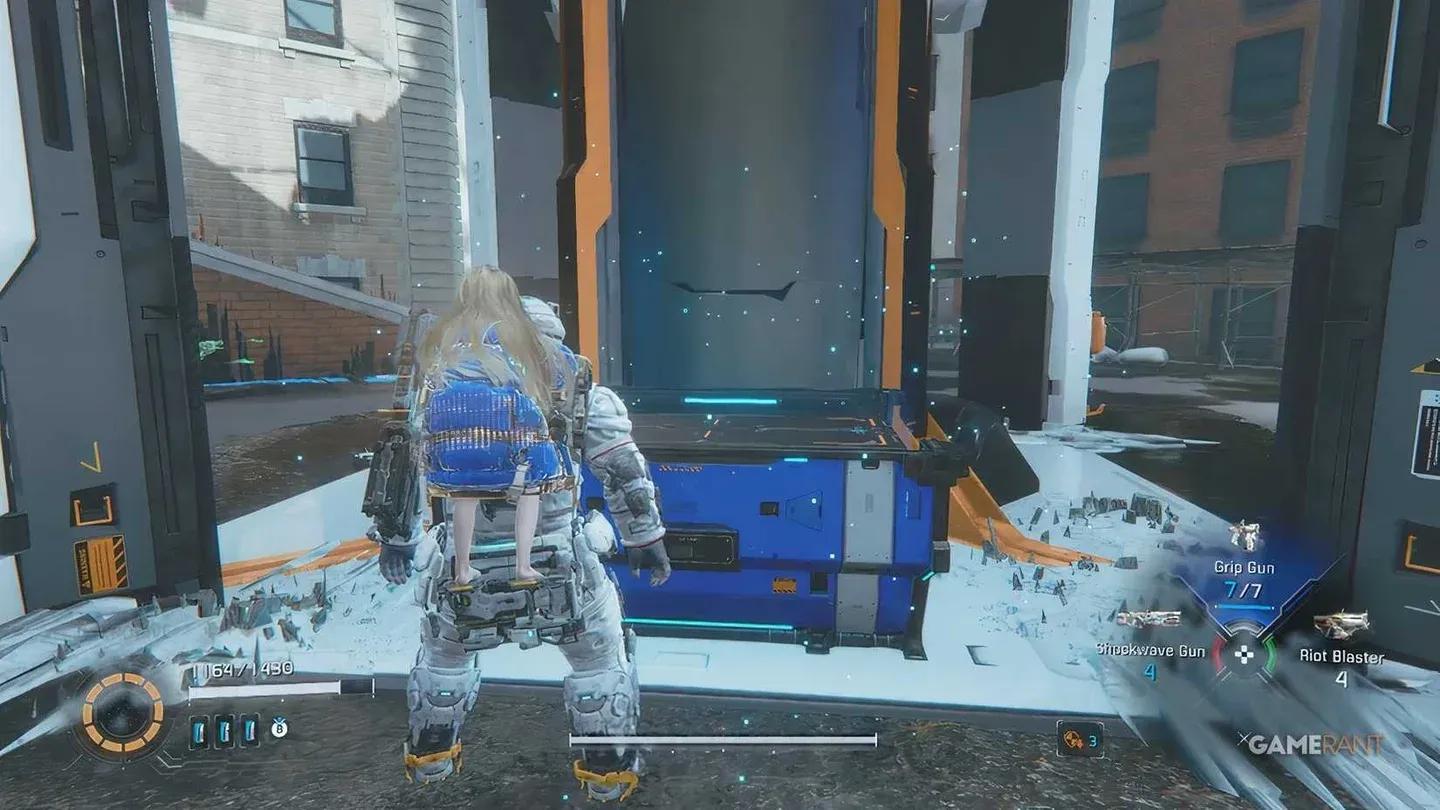
Mod 1 (Untapped Potential) sits behind a shutter door in the larger room where you first cleanse enemies. An invisible enemy guards it, so clear the room carefully before grabbing the mod.
Mini Cabin 1 is easy to walk past. Before going through the next door, turn around and look into the distance behind you.
Central Port 02: Research Sector
After the elevator ride with a view of the Orbital Elevator, you'll enter a room that contains Escape Hatch 2, a Red Zone Key, and Training Data 1 all at once. Scan the room thoroughly before moving on.
Safe Box 1 appears in the outdoor area that follows, after Diana mentions she can't cleanse something nearby.
Safe Box 2 requires taking a broken staircase down. Use your scanner to spot it before committing to the drop.

Mod 1 behind shutter door
Central Port 03: Regolith Lab
This sub-area is the most collectible-dense section of Port Entrance and rewards players who explore every side path.
After fighting the enemy with the stretchy arms, Escape Hatch 3 is in the next room on the left. Take the stairs to the left of that hatch to find Mod 2 (Heat Transfer) and Safe Box 3 together.
From the Safe Box, rotate 180 degrees and look to your upper right. Mini Cabin 2 is perched on yellow pipes above you.
Heading upstairs on the right side leads to a Red Zone entrance. Inside, you'll collect Pure Lunum 1 and Pure Lunum 2.
REM 2 (Water Gun) is in the room after the Red Zone. A Holo-Wall conceals it, so check the walls carefully.
Mod 3 (Cursed) requires cleansing a crystal in the same area, which opens a dark stairwell. Follow it down to a room with enemies and the mod waiting at the end.
Safe Box 4 is on the direct story path shortly after.
Pure Lunum 3 appears downstairs next to a large crystal, after the bigger combat encounter in this zone.
Central Port 04: Lunafilement Lab
This is the longest sub-area in Central Port, containing 8 Safe Boxes, 3 Pure Lunum nodes, 1 REM, 1 Training Data, and 1 Storage Expander.
Escape Hatch 4 is in the room with taxis sticking out of the wall (hard to miss). Turn around from the hatch and walk through the door to find a Red Zone, Storage Expander 1, and Pure Lunum 4 together.
Through the door to the right of the hatch, you'll need to unlock 5 locks to open a door. On the ground level, cleanse Dead Lunafilement to reveal Safe Box 5. The room beyond the 5-lock door contains REM 3 (Sandcastle).
Pure Lunum 5 is in the room where you unlock Lock number 2, during the bigger fight there.
Training Data 2 is just outside that room, next to the railing.
On the left side of Escape Hatch 4, after Hugh asks Diana about cleansing people, head upstairs. In the next room, cleanse the Dead Lunafilement and drop down to find Safe Box 6 and Safe Box 7 together.
Pure Lunum 6 appears in the room immediately after defeating the Sentinel boss.
Safe Box 8 is in the room to the left after you see the hologram of Higgins dying.
Central Port 05: Orbital Elevator
The final sub-area brings the sector to a close with 5 Safe Boxes, 1 Mini Cabin, 1 Escape Hatch, and 1 Mod.
Escape Hatch 5 is directly on the path and almost impossible to miss. Through the right door, Safe Box 9 is waiting. Head downstairs in the same area until the path ends, and you'll spot Mini Cabin 3 a few meters above you straight ahead.
In the missile area, the platform with the Multihack pickup has a Holo-Wall. Behind it are Safe Box 10 and Safe Box 11.
After the next fight in the caution zone, take the lower door first and follow the path out to a ledge. Mod 4 (Adrenaline Flood) is sitting on that ledge, visible from below.
Safe Box 12 is on your direct path after that. Escape Hatch 6 is just in front of the tower, and Safe Box 13 is directly behind you when facing the hatch.
What unlocks after fixing Diana in Central Port?
Once you have the Cleansing Ability from fixing Diana, several previously blocked collectibles across earlier sectors become reachable. The newly accessible items include:
- Mass Production Array 04 (Business District): Safe Box 11
- Terra Dome 02 (Eco Modeling Lab): Safe Box 8, Safe Box 9, and Pure Lunum 3
- Lunum Mines 01 (Mine Entrance): Storage Expander 1, Safe Box 2, and Safe Box 3
- Lunum Mines 04 (Main Excavation Site): Safe Box 13
Backtrack to these areas as soon as the ability unlocks, or clean them up in Unknown Signal Mode after finishing the story.
How does Unknown Signal Mode work for collectibles?
Unknown Signal Mode is Pragmata's post-story cleanup mode, functioning as an epilogue that keeps all areas open. Collectibles carry over from your main run, so anything you picked up stays collected. Any gaps in your collection show up as remaining pickups across each sector. There's no time pressure and no story gates blocking access, making it the cleanest way to finish your 100% run.
For more guides covering every sector and collectible type in the game, browse more guides on GAMES.GG.