

Capcom hid 25 tiny dancing Mr. Raccoon statues across every major area in Resident Evil Requiem, and tracking them all down rewards you with something genuinely useful: the ability to upgrade Leon's weapons to Level 3, pushing every gun to its absolute ceiling. These aren't just cosmetic trinkets. Missing them means capping your arsenal well below its potential, especially on harder difficulties. This guide breaks every statue down by zone, character, and exact placement so you can grab them all in a single run.
How Do Mr. Raccoon Statues Work?
Before diving into locations, here's what you need to know about how the system operates.
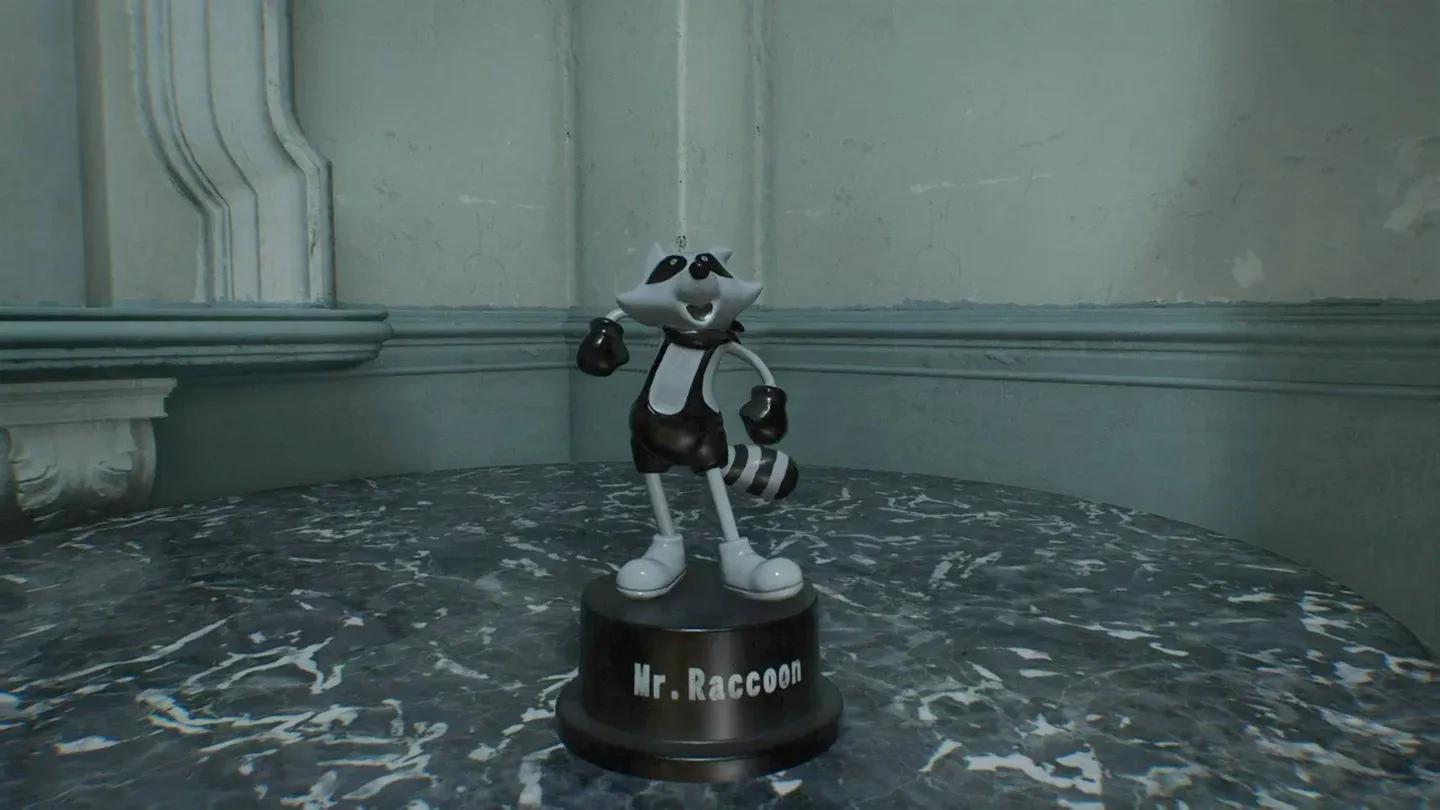
Each Mr. Raccoon statue is a small mechanical figurine that actually moves and produces a faint metallic ticking sound when you're close. Playing with headphones gives you a real advantage since that audio cue cuts through ambient noise. To collect one, simply shoot it or hit it with a melee attack. Once destroyed, it's permanently counted across all playthroughs, so you never need to grab the same one twice.
Some statues are Leon-exclusive, others are Grace-exclusive, and a handful require specific access items like the ID Wristband (Level 3) before you can reach them.
How to Get the Mr. Raccoon Maps
Two in-game books mark statue locations directly on your Map screen, saving you a lot of backtracking:
Mr. Raccoon collection tracker
Rhodes Hill Care Center Locations (10 Statues)
The Care Center is split into multiple sections that lock off as the story progresses. Treat each sub-area as its own checkpoint.
1F and 2F Main Building (Leon and Grace)
Statue 1 – 1F Rehabilitation Ward (Leon) After clearing the zombie doctors and patients in the Rehabilitation Ward, look at the stone fireplace before heading upstairs. The statue sits on the mantle alongside a note reading: "Hunt us, seek us! Find us, break us!" This is your very first one and hard to miss if you're paying attention.
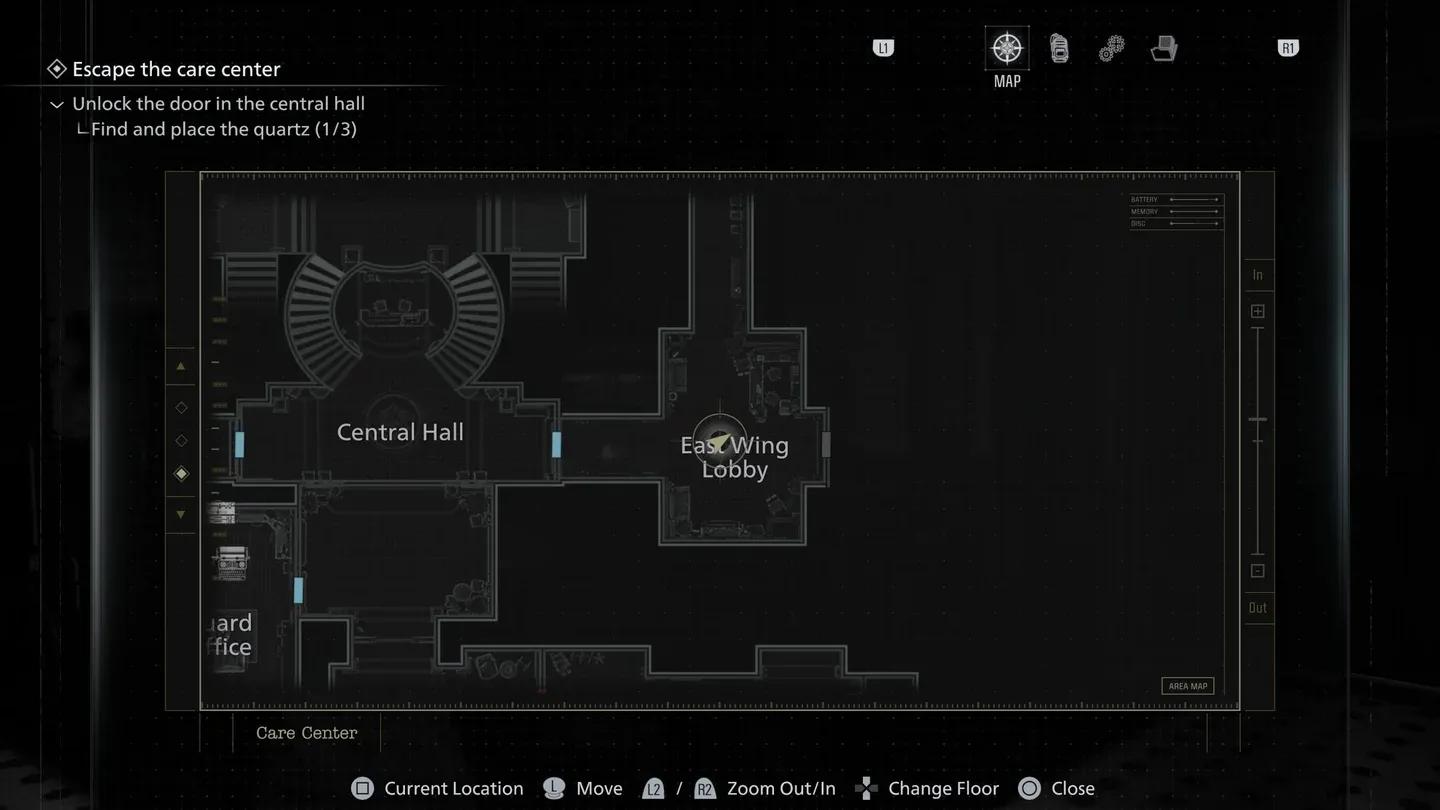
Statue 2 – 1F East Wing Lobby (Grace) Step into the East Wing using the keycode and you'll land in a darkened reception area. The statue is dancing on the corner of the front desk.
Statue 3 – 1F East Wing Staircase (Grace) Head to the far east of the ground floor to find a winding staircase. At the very bottom, a dressing table holds the statue. While you're there, also grab the Antique Coin sitting nearby.
Statue 4 – 2F Kitchenette (Grace) After obtaining the Level 1 Security Bracelet, climb the stairs into the West Wing's kitchenette area. The statue is perched on top of the coffee maker, partially obscured by the ambient lighting. Move closer and it becomes obvious.
Statue 5 – 1F Medication Room (Grace) This one requires the ID Wristband (Level 3). Enter the Medication Room and unlock the empty cell. Search the foot of the bed against the back wall to find the statue tucked behind the rear leg of the frame.
Statue 6 – 2F Records Room (Leon) Grace can access this room earlier in the campaign, but only Leon can pry open the warped cabinet door using his hatchet. Inside, the statue is sitting in the upper section of the cabinet, shifted slightly to the right.
Care Center Basement (Grace)
Statue 7 – Workshop (Grace) After powering the Workshop door with an energy cell, walk straight in. The statue is right on the central workbench in front of you, next to a readable document.
Statue 8 – Bunkroom (Grace) From the Save Room, head east and use another power cell to open the southern door into the Bunkroom. The statue is sitting on top of the old wall-mounted TV. The room has heavy ambient noise, so lean in close and listen for the ticking.
Care Center Courtyard (Grace and Leon)
Statue 9 – Private Lab (Grace) This room is only accessible for a brief story window. As you enter the lab containing the Helicopter Key, check the desk on the left side of the room. The statue is in plain sight but the window closes fast, so grab it before interacting with the main objective.
Statue 10 – Rooftop Balcony (Leon) This is the most unconventional statue in the entire game. During the sniping sequence where Leon covers Grace and Emily from the rooftop, do not jump down once the area is clear. Instead, aim your sniper scope to the left toward the lamp posts above the gate leading back to the Care Center. One of the statues is dancing right on top of a gatepost. Shoot it from your elevated position because once you drop down, this one is gone for good.
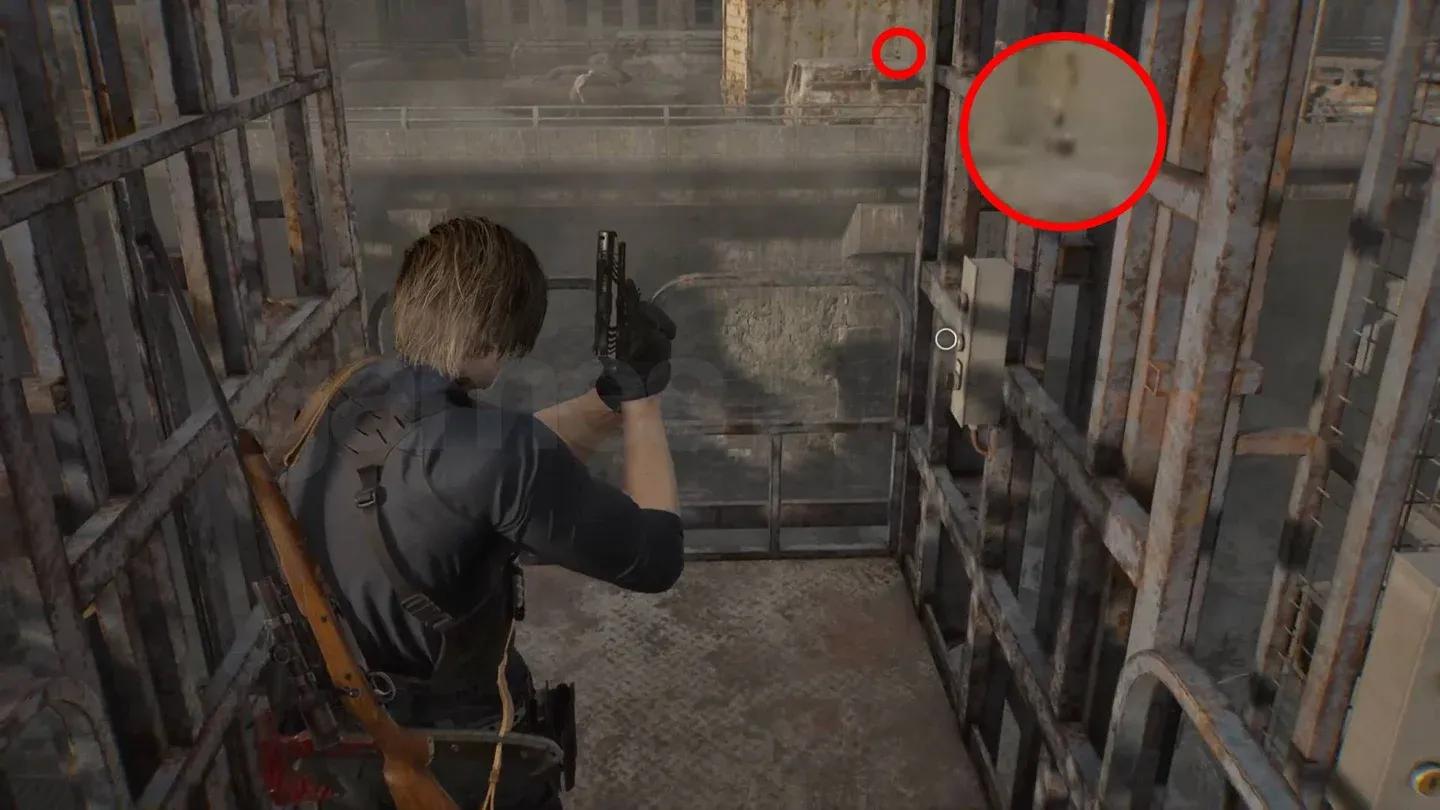
Rooftop sniper statue location
East Raccoon City Locations (9 Statues)
All nine of these belong to Leon. You have until you detonate the explosives and unlock the gate deeper into the city to collect them all.
Statue 11 – Cafe Oasis From your starting point in East Raccoon City, walk down the road to the T-intersection and turn right into Cafe Oasis. The statue is on a piece of furniture behind the counter.
Statue 12 – Central Camp / Overpass (Sniper Required) At the top of the elevator in the Central Camp, aim your sniper rifle west toward the overpass below. Sitting on top of a parked car on the overpass is the statue. You won't hear the ticking from this distance, so scan carefully.
Statue 13 – Underground Parking Garage Head through the gate toward the hotel and descend the ramp. Before reaching the flooded section, take the door on your left. Inside and to the right, the statue is balanced on a stack of wooden crates.
Statue 14 – Destroyed Bus on Main Street After crossing the bridge east from Central Camp, you'll spot a broken-down bus in the center of the road almost immediately. The statue is sitting by the driver-side window at the front of the bus.
Statue 15 – Cedarbrook Apartments Climb the metal walkway to the top floor. One of the apartments has an open refrigerator in the hallway. The statue is inside the fridge.
Statue 16 – Gas Station Convenience Store Climb over the stacked cars into the gas station forecourt. Step into the convenience store on the right (the same room where a chainsaw zombie bursts out from behind cardboard boxes). The statue is on a shelf directly in front of you as you enter.
Statue 17 – Ridgewood Station Sewers Fill the fuel canister at the gas station and use it to access the construction yard. Descend the ladder into the tunnel and turn right. Through the metal grate, you'll see the statue sitting in the drainage tunnel on the opposite side. A well-aimed shot through the grate takes care of it.
Statue 18 – Ridgewood Station Underground Train Continue through the sewer tunnel system from the previous statue until you reach the underground train station. Climb into the derailed train car and look to your right. The statue is resting on one of the interior seats. Watch out for Spiderlings in this area.
Statue 19 – Willis Tower After ziplining across to the partially collapsed Willis Tower, turn right immediately. You'll find the remnants of a room with a bookcase. The statue is standing on the bookshelf in the southeastern section of the space.
East Raccoon City statue map
Raccoon City Center and RPD Locations (4 Statues)
These four are all Leon collectibles. Collect them before exiting the far side of the orphanage.
Statue 20 – Raccoon City Center Starting Point After the motorcycle sequence, resist the urge to push straight forward. Instead, veer left toward the rubble at the end of the path. The statue is nestled between destroyed vehicles and a ruined fuel tanker, partially buried in debris.
Statue 21 – RPD 1F Operations Room In the northwest corner of the Operations Room, the statue is hiding behind crumbling debris and rubble. Its head is partially covered, making it easy to overlook on a first pass. Shoot through the gap to collect it.
Statue 22 – RPD 2F Library Walk to the north side of the central bookshelf in the Library. Near the baseboard, a gap between stacked books reveals a small opening. The statue is tucked inside. Shoot through the gap rather than trying to walk around to it.
Statue 23 – Gun Shop Kendo Side Street After the cutscene at Gun Shop Kendo, before heading to the Save Point, take the small passage to the right of the shop. Look up at the window of the adjacent building. The statue is on the windowsill, and you'll notice an Umbrella billboard right next to it as a landmark.
ARK Locations (2 Statues)
The ARK is the final major area of the campaign. Two statues remain here, one for each character.
Statue 24 – ARK Hallway Outside Save Room (Leon) When Leon first enters the ARK, there's a Save Room to the left and a hallway leading right toward a stairwell. Before descending those stairs, turn right. The statue is sitting on top of a stack of weapons cases against the wall.
Statue 25 – ARK Operations Room (Grace) As Grace, push through the crate-filled room with zombies until you reach the Operations Room Save Point at the far end. Inside, the statue is on a shelf to the right of the main computer console. Collect it before climbing out of the window to the scaffolding outside, because that exit is a point of no return.
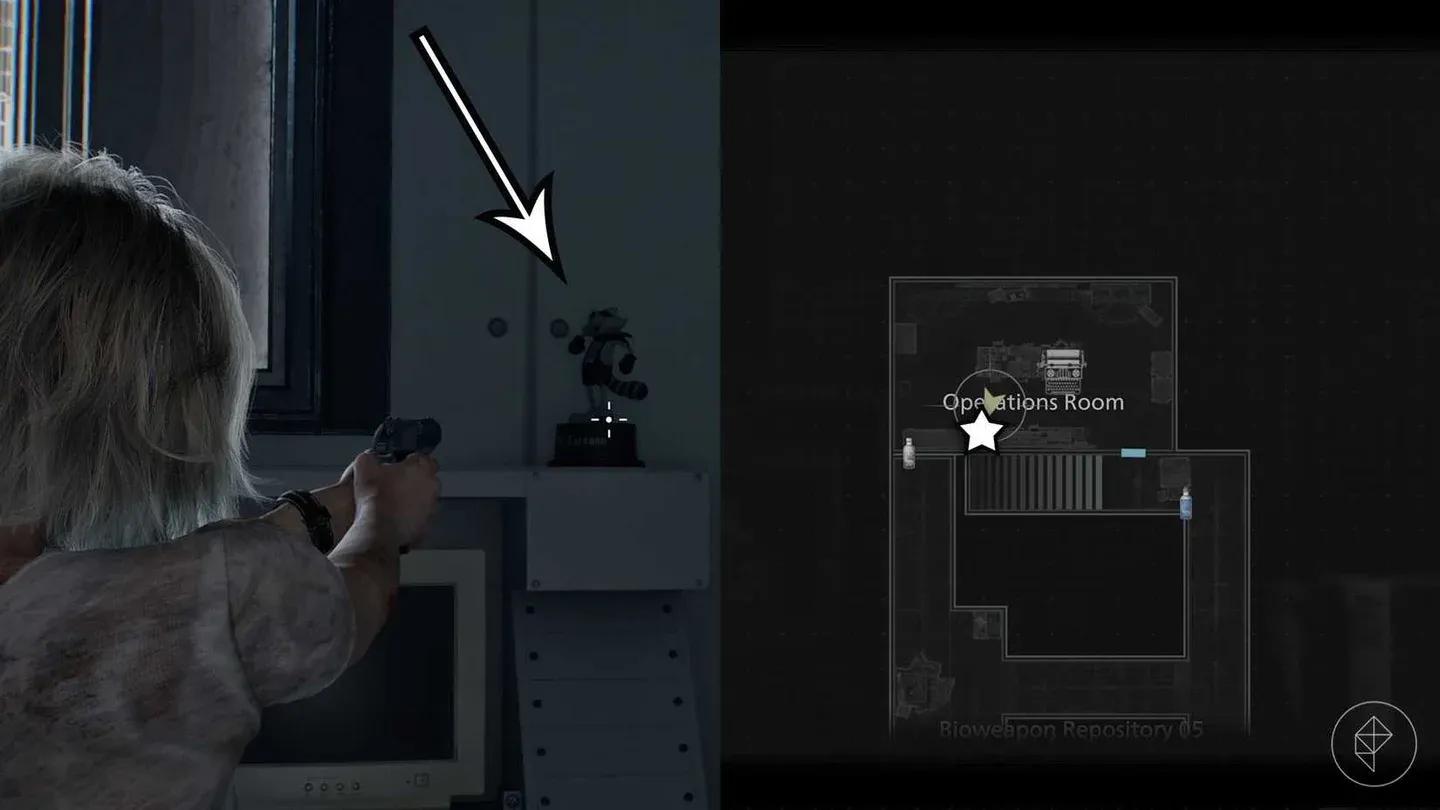
ARK Operations Room statue
What Do You Unlock for Collecting All 25?
Destroying every Mr. Raccoon statue across all zones completes the "You Little Rascal" achievement and trophy. More importantly, it permanently unlocks the ability to upgrade Leon's weapon components to Level 3 via supply boxes. This means every gun in his arsenal can reach its maximum damage output, fastest reload speed, and tightest handling, a serious advantage when tackling the game on its hardest difficulty settings.
Activate the upgrade option through the Bonus menu after collecting all 25. The unlock carries over across playthroughs, so you only need to do this once.
Leon Level 3 weapon upgrade