
Kick a Lucky Block has a deceptively simple loop: kick the block, grab the Brainrot, outrun the wave, collect money, repeat. But the reason most players stall out long before reaching Celestial zones comes down to one mistake: they treat it as a pure power game. The real progression engine is three systems running in parallel, and ignoring any one of them creates a bottleneck that wastes every upgrade you buy. This guide breaks down the correct upgrade order, AFK strategy, and Rebirth timing so you stop losing runs and start farming the zones that actually matter, all within Roblox.
How does Kick a Lucky Block actually work?
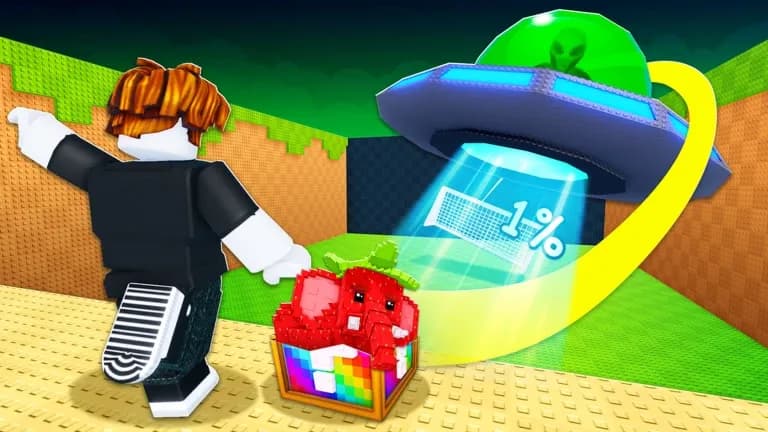
According to the Roblox Wiki, the core loop works like this: you kick the lucky block inside the yellow zone using a timed kick meter, the fuller the meter the better the result, and then you guide the Brainrot you earned back to the safe zone before the tsunami wave catches you. Once home, the Brainrot goes on a pedestal and starts generating money, which you collect by stepping on the green pad.
That income funds every upgrade in the game. The three systems you are always balancing are Kick Power (how far the block travels), Run Speed (whether you survive the wave), and Brainrot income (how fast you fund the next upgrade).

Weight Shop upgrade screen
Speed upgrades are NOT reset when you Rebirth, according to the Roblox Wiki. That makes early speed investment carry permanent value across every future cycle.
What is the right upgrade priority order?
The upgrade priority shifts as you progress, but the underlying logic stays the same: power gets you to better zones, speed keeps what you earn, and Brainrot leveling funds everything else. Skewing too hard toward any single system creates a bottleneck.
Here is the spending split recommended by community progression data documented across the kickaluckyblock.wiki sources:
Speed becomes more important the deeper you push because, as noted in the Roblox Wiki, Mythic zones and above generate faster, more dangerous waves that require spending millions into speed upgrades. Early zone tsunamis from Common through Legendary move slowly, so you can get away with lighter speed investment in those stages.
A practical field rule from the kickaluckyblock.wiki pro tips guide: if you fail 2 out of 5 returns, your speed is under-leveled for your current power bracket. Stop buying power and fix speed first.
Dumping all currency into a single big power purchase when your speed is already behind creates flashy kick attempts with weak long-term results. Distance without extraction is just wasted time.
Run Speed Shop purchase screen
How should you handle barbell upgrades specifically?
Barbells (the weights you lift to build Kick Power) are your primary power source, purchased at the Weight Shop according to the Roblox Wiki. Each weight tier generates a different power-per-squat rate, which means stronger barbells make every AFK training window dramatically more efficient.
The key decision point documented in the kickaluckyblock.wiki barbell guide is whether to buy a cheaper mid-tier barbell now or save for a top-tier option. The guidance is clear: if your current income puts you close to the top-tier threshold and your speed is in reasonable shape, saving is the better play. The next AFK cycle becomes so much stronger that it accelerates every subsequent attempt.
Stage-by-stage barbell goals
Set a purchase rule before each launch session. For example: speed tier first, then barbell, then unit leveling. This prevents panic spending after one near-miss Celestial run.
How do you reach Celestial zones reliably?
Getting into Celestial range once is not the hard part. Farming it consistently is. The challenge is landing with enough depth in the zone and then getting home safely.
The practical Celestial push loop documented there works in five steps:
- Pre-load power with a timed AFK squat block, minimum 10-20 minutes, longer if income allows.
- Attempt only on strong kick quality, preferring Perfect kicks; Excellent can work if your power margin is high.
- Track how deep into the zone you land, not just whether you enter it.
- Skip greedy pickups if return odds are low.
- Reinvest into speed before repeating if the wave caught you early.
Landing near the start of Celestial repeatedly still produces lower-tier outcomes. You need depth, not just entry. That depth comes from stacking a bigger power cushion before each launch and avoiding frequent low-value attempts between major push sessions.
Celestial zone landing depth view
How should you manage Brainrots for maximum income?
Brainrot placement and leveling is the long-term income engine that funds every upgrade. The placement rules are straightforward: place new units immediately so they start earning, level your strongest earners first, then distribute upgrades to the rest.
When your base fills up, replace low-value non-mutation units first. Mutation quality becomes the dominant income factor in mid-to-late game.
Do not chase mutation-only builds too early. Forcing that standard in early game delays slot filling and Rebirth cycles, which slows total growth more than a few weak units ever would.
When should you Rebirth?
Rebirth resets your Kick Power but applies a multiplier that speeds up future income, making timing matter. The kickaluckyblock.wiki pro tips guide offers a quick check before each Rebirth decision:
- Can you still buy meaningful upgrades quickly with current income?
- Is your next power milestone too far away to reach efficiently?
- Will the Rebirth multiplier boost income enough to recover faster next cycle?
If the answer to the last two is yes, Rebirth is likely the right call. One important note from the pro tips source: if income feels slow, Rebirth earlier rather than later to increase the multiplier and restore momentum.
Before logging off for an AFK session, spend remaining currency on upgrades to increase passive earnings. Online AFK generally yields better returns than fully offline, but offline progression still matters when your base is set up well.

Rebirth timing confirmation screen
Common mistakes that slow progression
Most plateaus come from a small set of repeatable errors, documented across both sources:
For players who want to go deeper into related Roblox strategy guides, the same balancing principles apply across many similar progression games on the platform. If you enjoy this style of incremental upgrade loop, the Slime RNG beginner's guide covering rolling, upgrades, and Rebirth covers comparable systems worth understanding.
Efficient weekly routine
For casual players, this cadence from the kickaluckyblock.wiki barbell guide keeps all three systems moving:
- Days 1-2: Farm and level income units
- Day 3: Push barbell tier
- Day 4: Speed checkpoint purchases
- Day 5: Celestial attempts
- Days 6-7: AFK accumulation plus selective upgrades
This rhythm prevents the common trap of over-focusing on one metric for days at a time, then scrambling to catch up on everything else.
For more Roblox upgrade guides covering free codes and event strategies, the Be A Lucky Block CoralBlox vs LukeBlox event guide is worth checking out if you want to stack extra rewards alongside your progression runs.