
Setting up a Guild in Sailor Piece is straightforward until you hit the Guild Image ID field. Most players stall out here because the game doesn't explain where that ID comes from or how to get one. The short answer: you need to upload an image to Roblox's Creator tools first, then copy the asset ID it generates. The whole process takes under five minutes once you know the steps.
How does the Guild Image ID system work in Sailor Piece?
Sailor Piece doesn't host images on its own servers. Instead, it pulls Decal IDs from Roblox's platform. Every image you upload to Roblox as a Decal gets a unique asset ID, and that number is what you paste into the Guild Image ID field when you create your guild. You have two options: upload your own custom image and grab its ID, or browse existing Decals in the Roblox Store and use one of those IDs instead.
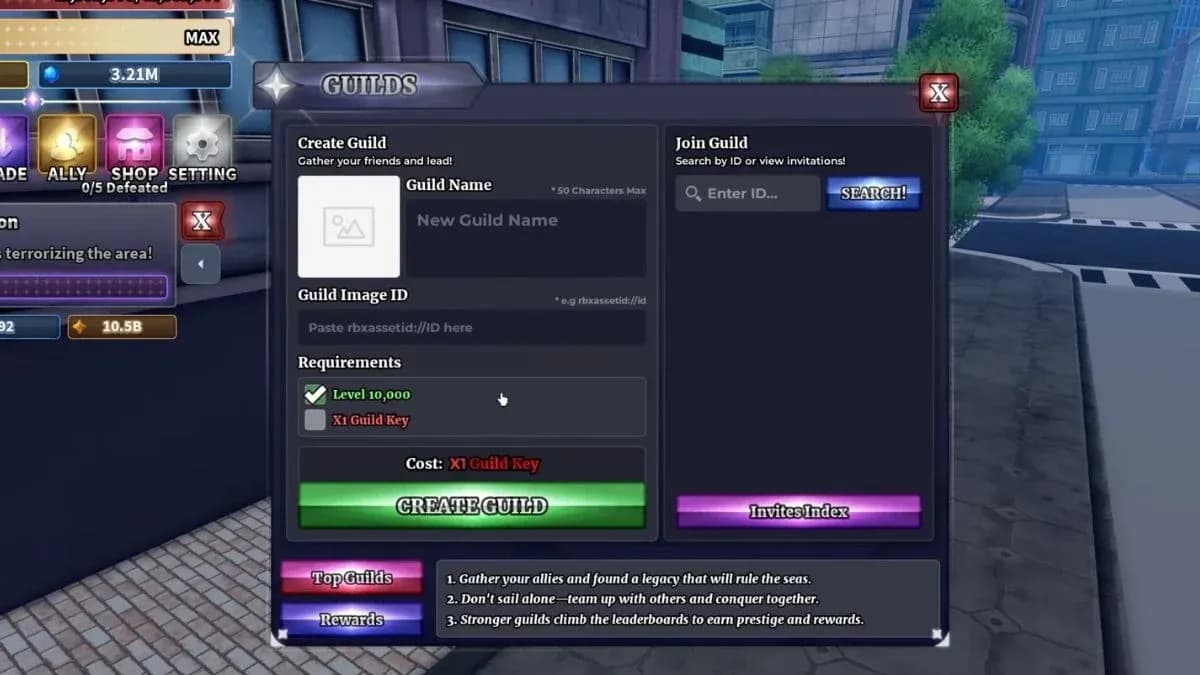
Guild Image ID input field
How to upload your own image to Roblox
This is the route if you want a fully original guild icon — your crew's logo, a custom piece of art, or anything else you've made.
- Open the Roblox Creator Dashboard in your browser and log in.
- Select Creations from the left-hand menu.
- On the right side, choose Development Items, then navigate to the Decals category.
- Press the Upload button and select the image file from your device.
- Once the upload finishes, return to the Decals section under Development Items.
- Find your image, click the three-dot menu on it, and copy the asset ID.
That asset ID is your Guild Image ID. Keep it copied before jumping back into Sailor Piece.
How to use the Guild Image ID in Sailor Piece
With your Decal ID ready, head back into the game. The Guild NPC isn't available from the start. You need to reach the Second Sea first, which requires collecting 2 Ancient Fragments and the 7 map pieces. Once you have those, teleport to Punch Island and find the Guild NPC standing near the road signal.
From there:
- Give your guild a name.
- Paste your Decal asset ID into the Guild Image ID field.
- Meet the remaining requirements (level 10,000 minimum and a Guild Key).
- Press Create Guild.
How to get more Guild Image IDs without uploading anything
Not every player wants to go through the upload process. Roblox already has thousands of public Decals you can use for free.
- Go to the Decals section of the Roblox Creator Store.
- Use the search bar at the top to find images. Searching "funny," "anime," or "pirate" will pull up themed results that fit Sailor Piece's tone.
- Click a Decal you like and copy its asset ID from the URL bar or the main page listing.
- Paste that ID into the Guild Image ID field when creating your guild.
Guild Requirements
Before you can even reach the Guild Image ID step, you need to meet Sailor Piece's baseline requirements:
- Level 10,000 minimum to start a guild.
- A Guild Key, obtained by defeating high-level NPCs in the Second Sea or opening Aura Crates.
- Guild Keys can be traded with other players, though they're rare and can cost millions of Clan Rerolls on the trading market.
Why bother with a custom guild image?
Guilds in Sailor Piece are more than a social tag. They let you compare stats with teammates, earn XP together, and compete for leaderboard rewards. A recognizable guild icon makes your crew easier to identify in those leaderboards and gives the whole thing a more serious identity. It takes five minutes to set up and the payoff is permanent as long as the Decal stays live on Roblox.
For more Sailor Piece content, from spec passives to trading values, browse the full guides library at GAMES.GG to stay current on the meta.