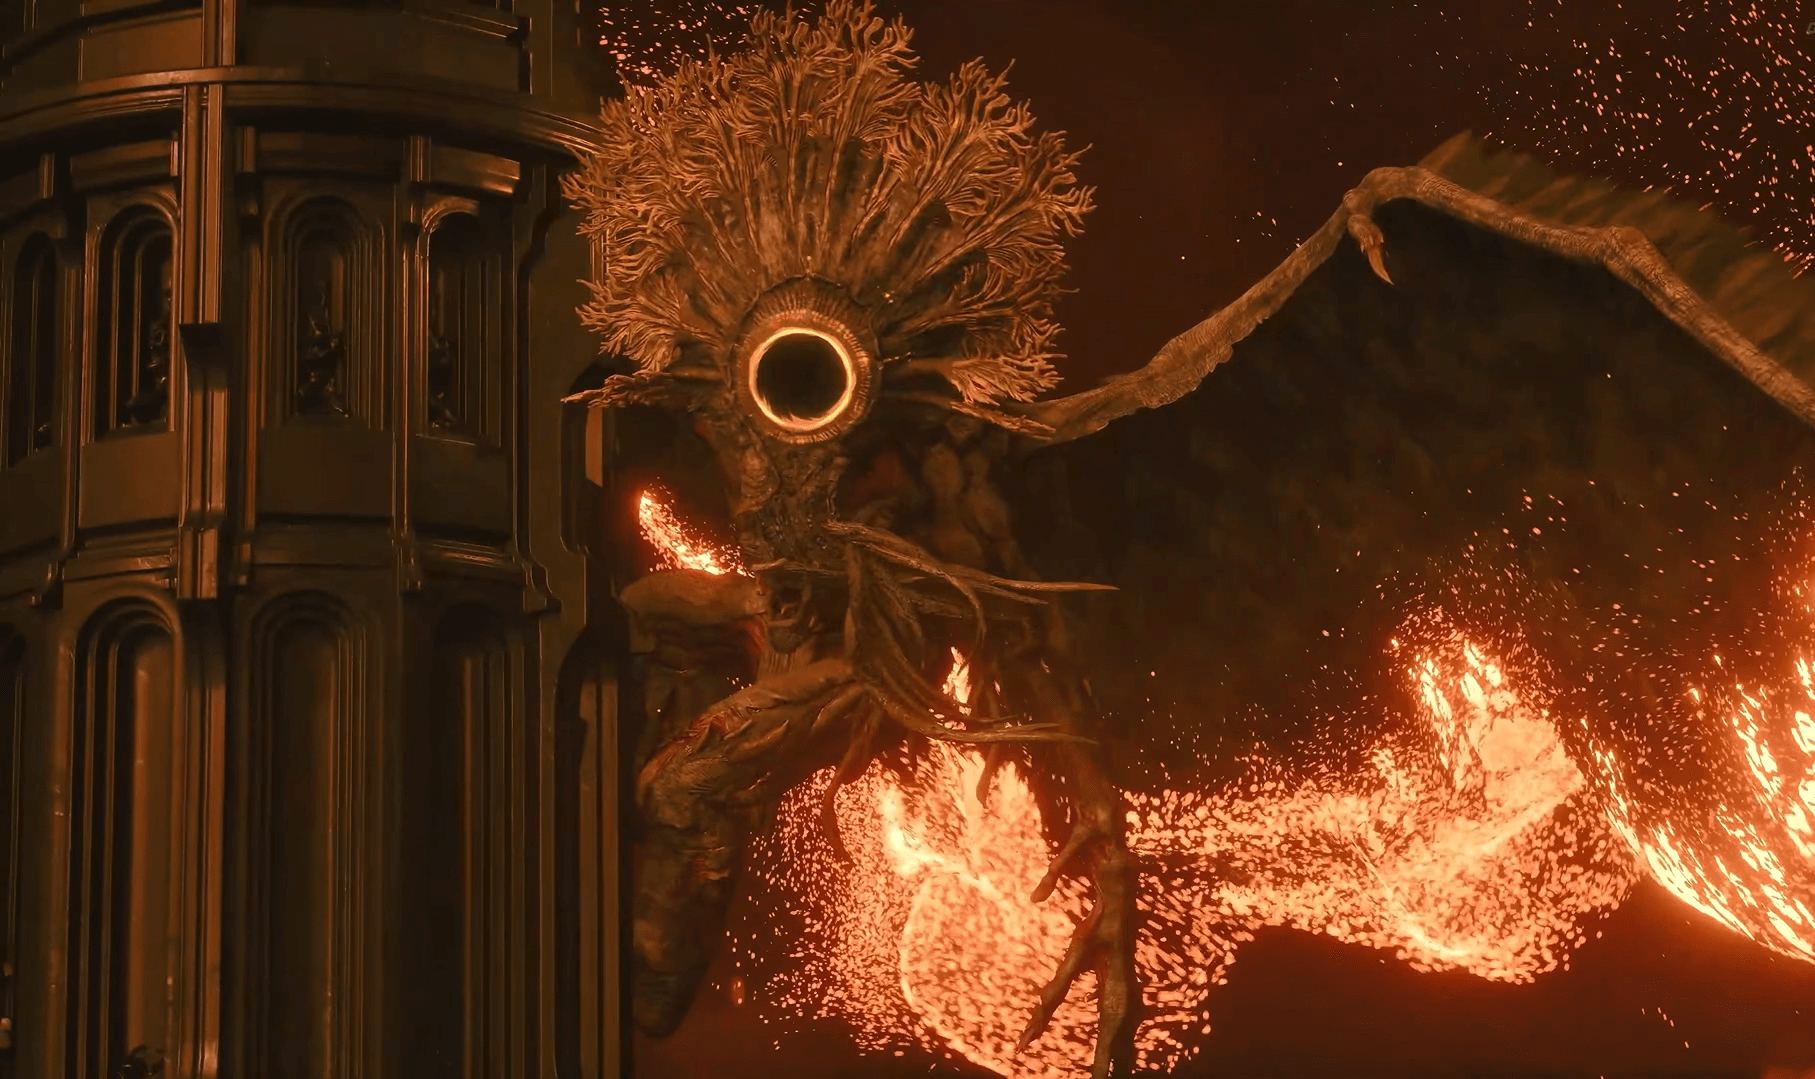

The Architect is Saros fifth boss and probably the most disorienting fight the game throws at you before the endgame stretch. It's not just a bullet-hell gauntlet — the arena itself actively works against you, shrinking across three phases until you're dodging projectiles on what amounts to a dinner plate. Knowing what's coming in each phase is half the battle.
How do you prepare for the Architect fight?
The Architect waits at the top of the Desecrated Fortress biome. Before heading in, get your proficiency as close to 30 as possible. According to Polygon's coverage of the fight, a proficiency of 23 is workable, but higher is better — complete side paths and collect Lucenite wherever you can.
For your main weapon, a long-range option with autohit is the safest pick. The Architect spends most of its time airborne and constantly repositioning, so landing consistent shots on a moving target is easier with autohit. If your aim is reliable, non-autohit weapons can also work since the boss has a clear weak spot: its large, prominent eye.
For your Power Weapon, two solid options stand out based on community testing documented by Polygon:
- Dispirator: Its projectiles track targets, making it reliable while the Architect is flying.
- Prominence: Better suited to Phase 3, when the boss stays closer and you have cleaner sightlines.
Before the fight begins, practice two things specifically: parrying Nova orbs and grapple hook timing. Both become mandatory skills the moment Phase 2 starts.
Architect Phase 1: Staying mobile in the air fight
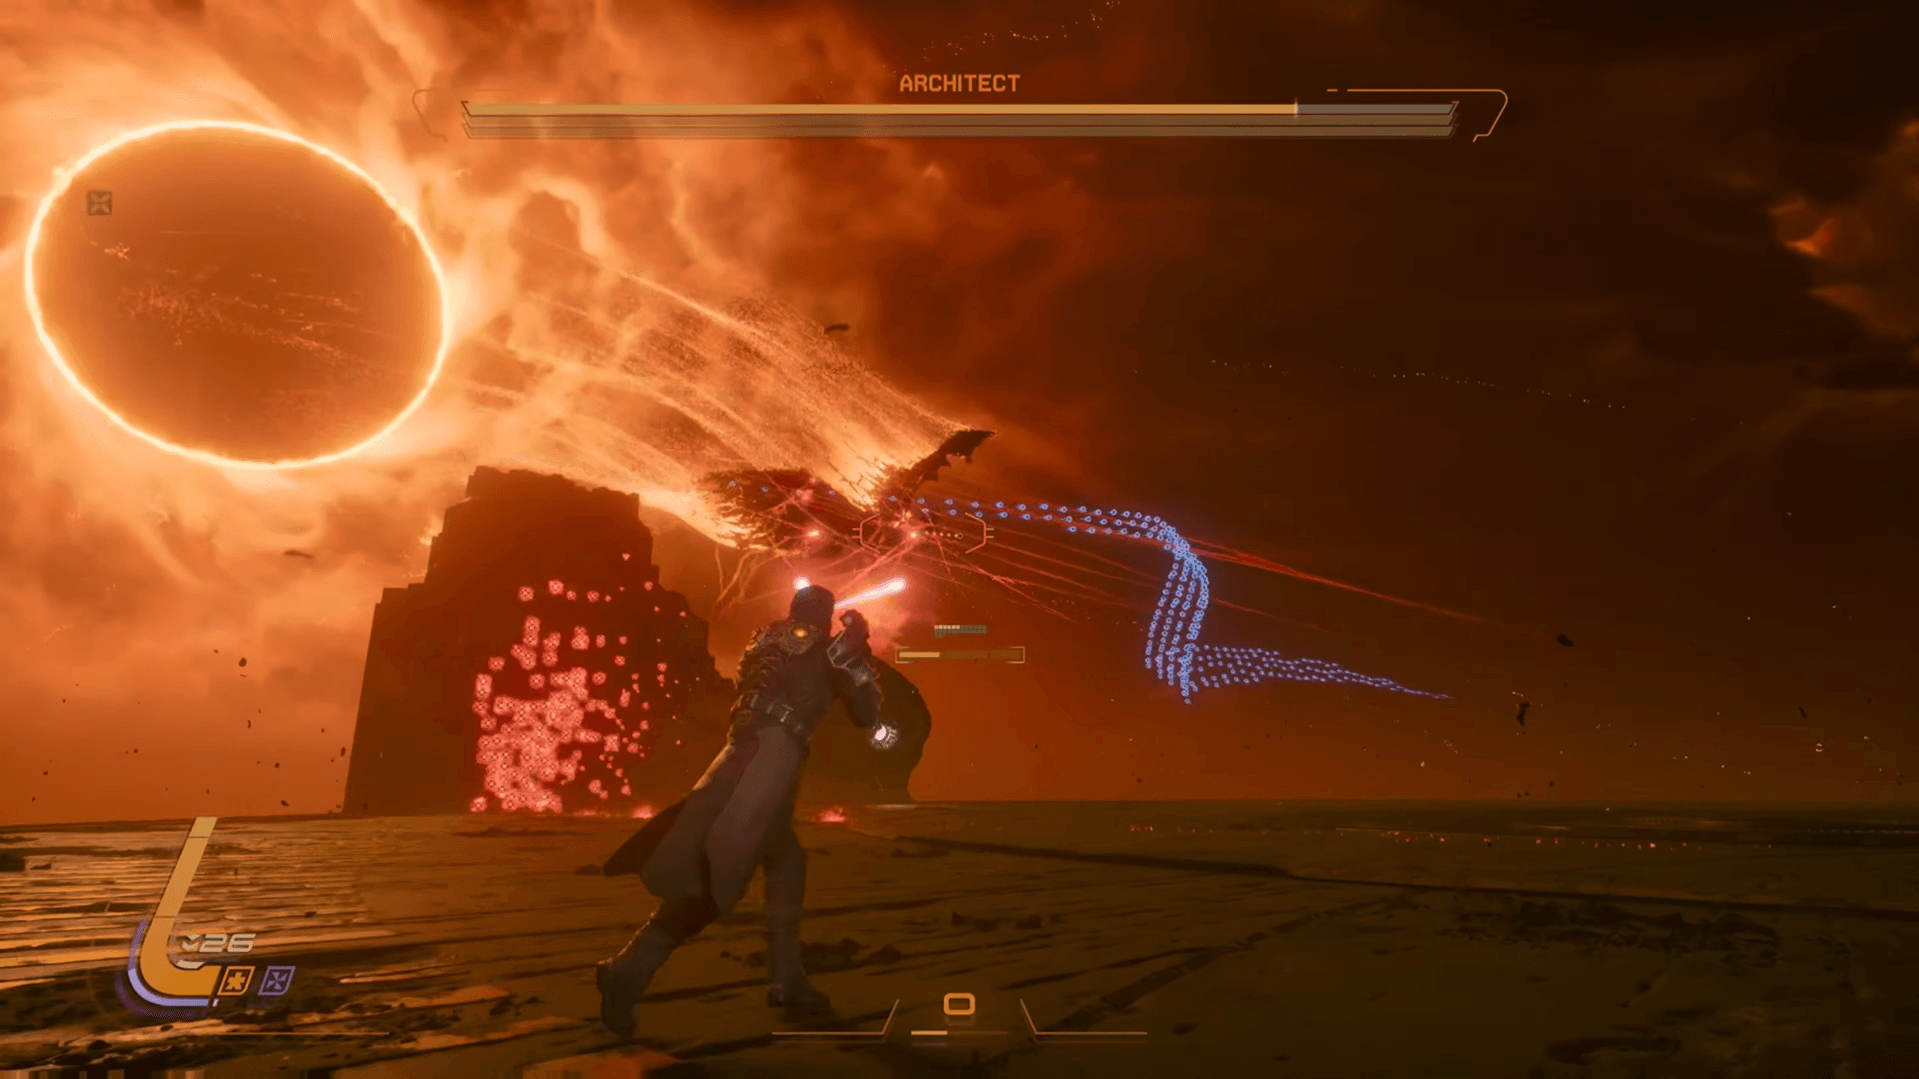
For most of Phase 1, the Architect stays airborne and cycles through several projectile attacks. The core rule here applies to every Saros fight: dodge yellow (corrupted) projectiles, never touch red (nova) ones, and use your shield to absorb blue projectiles and recharge your Power Weapon.
Saros Boss Guide: How to Beat the Architect
Here's what the Architect throws at you in this phase:
- Red laser sweep: Fires a large laser across the arena, leaving a persistent trail of nova projectiles on the ground. Move away from where the laser landed immediately after it fires.
- Claw drag: Flies across the arena dragging its claws, producing a five-high wave of blue projectiles spreading in both directions. Jump over or dash through, but this is also a great shield-and-recharge opportunity.
- Yellow wall with nova top: A wall of yellow projectiles with a red nova line on top. Don't jump — the wall is too high. Dash through the yellow portion or run to the far side of the arena so the projectiles arc upward and spread apart.
- Blue spiral bursts: Small spirals of blue projectiles fired in pairs or groups of three. Easy to shield through and good for recharging.
- Haphazard blue flyby: A fast flyby dropping dozens of blue projectiles loosely across the arena.
Once the Architect hits 50% of its first health bar, according to Polygon's breakdown, it starts chaining two nova laser attacks in sequence and mixing nova orbs into its corrupted volleys. Distance is your friend here — backing to the far edge of the arena causes the mixed orb volleys to spread out, giving you more room to navigate.
The Architect's eye is its weak spot and the place to aim for maximum damage. During Phase 1, it's difficult to land consistent hits there since the boss stays high in the air, but any damage to the eye counts.
Architect Phase 2: The platform starts shrinking
Once you deplete the first health bar, the Architect crashes onto the platform. The impact shockwave throws you off the stage entirely, and the outer ring of the arena crumbles away, exposing grapple points. Grapple back immediately — falling doesn't kill you according to Polygon, but you will take health damage.
Saros Boss Guide: How to Beat the Architect
The platform is now noticeably smaller, and the Architect will repeat this slam mechanic throughout Phase 2, so stay ready to grapple at any moment.
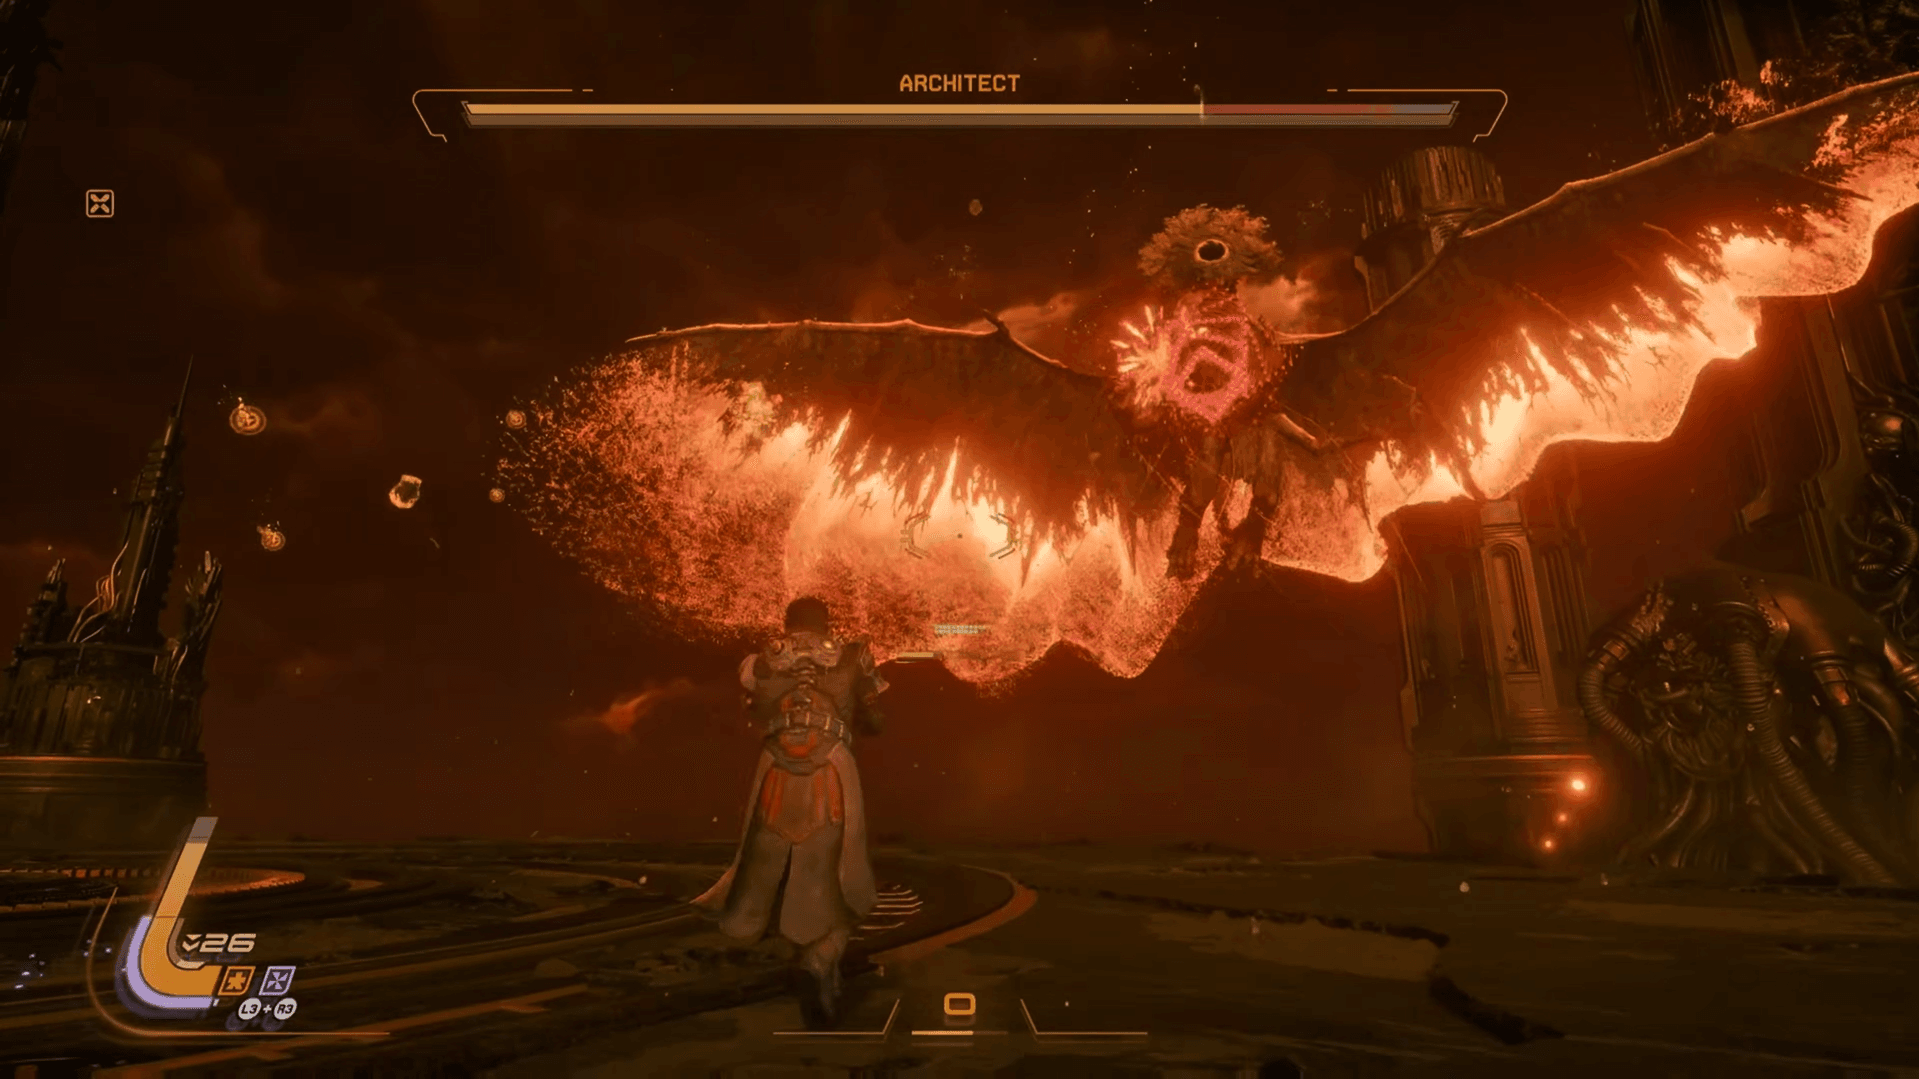
The trickiest new attack here is the square nova tunnel: the Architect fires a square-shaped formation of nova projectiles with a cluster of blue projectiles right behind it, usually three tunnels in a row. Dashing sideways to escape entirely is often not viable on the smaller arena. Instead, time a jump to clear through the opening in the nova tunnel, then immediately raise your shield to absorb the blue projectiles trailing behind it.
When the Architect lands on the perch in front of the eclipse and summons 5 large corrupted orbs, head to the opposite edge of the arena. As the orbs explode and scatter shockwaves diagonally, jump and dash through the gaps. If you can't avoid it cleanly, jumping off the arena and grappling back is a valid escape.
The yellow projectile wall returns in Phase 2, but now comes in multiple rapid waves without the nova line on top. Jump over each wave and stay back — the timing is tighter than Phase 1.
Architect Phase 3: Small arena, high aggression
Phase 3 opens the same way Phase 2 did: the Architect slams the platform, sends you flying, and you grapple back. This time the arena shrinks to a small circle. Making it worse, according to IGN's guide, the Architect repeats the slam multiple times in the opening seconds of this phase, shattering more of the platform with each hit and leaving circular shockwaves you need to jump over.
Positioning near the edge and always dodging toward the center of the platform to avoid accidentally dodging off the side.
Saros Boss Guide: How to Beat the Architect
Two new attacks appear here:
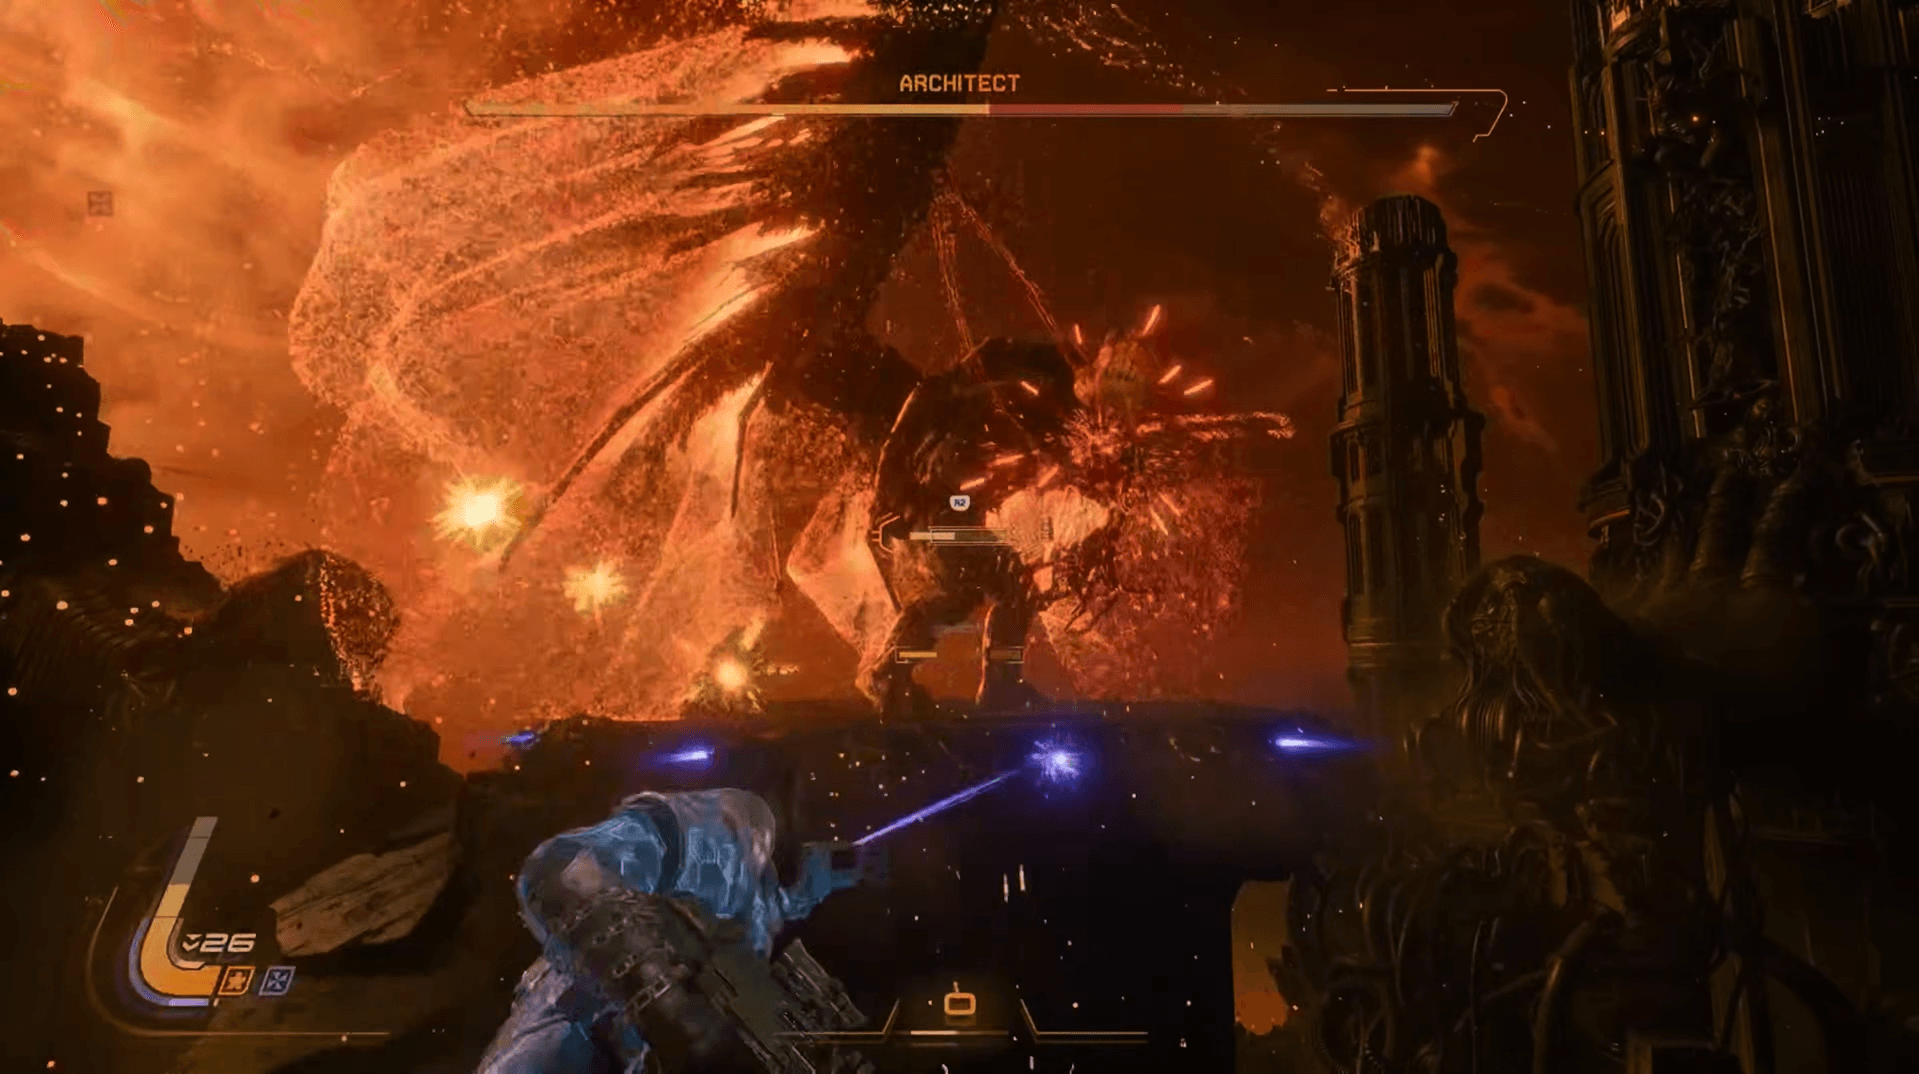
- Claw slam sequence: The Architect grabs the side of the arena and slams one claw, then the other, then both simultaneously. Each hit produces a circular corrupted shockwave plus a spread of yellow projectiles. Jump the shockwave and position between the trailing projectiles. Expect consecutive slams — don't relax after the first one.
- Ground-level beam sweep: The Architect lowers its head and fires a giant red beam, sweeping it horizontally across the entire platform. The laser leaves a trail of nova orbs on the ground that takes time to disappear, forming a rising wall in the middle of the arena. Be careful dodging follow-up attacks while that trail is still active.
The good news: the Architect stays much closer to the arena in Phase 3. This is your best window to burn Overdrive, fire your Power Weapon, and focus fire on the eye. The attack intervals are shorter than previous phases, so keep moving between shots rather than standing still to aim.
Hitting the Architect mid-attack with your Power Weapon can interrupt the next attack in its pattern. Use this selectively when you need a breather to reposition.
What do you get for beating the Architect?
After the Architect goes down, you'll collect approximately 1,100 Lucenite without any modifiers active, according to IGN's wiki. Nitya then contacts you, and your suit picks up a signal pointing toward The Passage.
For more boss strategies and Saros content, browse more guides on GAMES.GG.