

The Fall From Grace trophy in Saros sounds deceptively simple on paper: use the environment to eliminate a hostile without shooting them. The catch is that second part. One stray bullet and the attempt is void, which makes this one of the more frustrating trophies to set up deliberately. The good news is there's a reliable method once you know what to look for.
What does the Fall From Grace trophy require?
The trophy description reads "using the environment to eliminate a hostile without shooting it." That means a clean environmental kill with zero weapon damage on the target. No chip shots, no accidental grazes. The enemy has to go into the pit entirely from your Parry attack sending them over the edge.
The two conditions you need to satisfy:
- Land a Parry that fills the enemy's stagger meter completely
- The enemy must fall into a bottomless pit as a result, without taking any bullet damage from you
Parry stagger meter filling up
How do you unlock the Parry ability first?
The Parry is a Permanent Equipment unlock, not something you start with. You receive it during the Shattered Descent section of the story when you meet a character named Alab. This means the trophy is effectively locked behind story progress, and you won't be able to attempt it until you're well into the second half of the game.
Bottomless pits also become far more common in later areas, so there's no real shortcut here. Reach the Shattered Descent, meet Alab, and the Parry becomes available from that point forward.
Do not attempt this trophy early in the game. The Parry won't be available, and suitable pit locations are rare in the opening areas.
Which enemies are the best targets for an environmental kill?
Not every enemy type works equally well. Flying enemies are the primary targets because they naturally hover over open space, including near pit edges. The best candidates are:
The key mechanic here is that the Parry works by redirecting a red orb attack back at an enemy. The orb does not have to come from the flying enemy you want to knock into the pit. You can use a ground-based enemy's red orb attack and aim it at the flying target nearby.
Enemies like the Rupture, Confessor, and Dynast all generate red orbs that can be Parried and redirected. Position yourself so their attack trajectory lines up with a flying enemy near a pit edge, then redirect the orb.
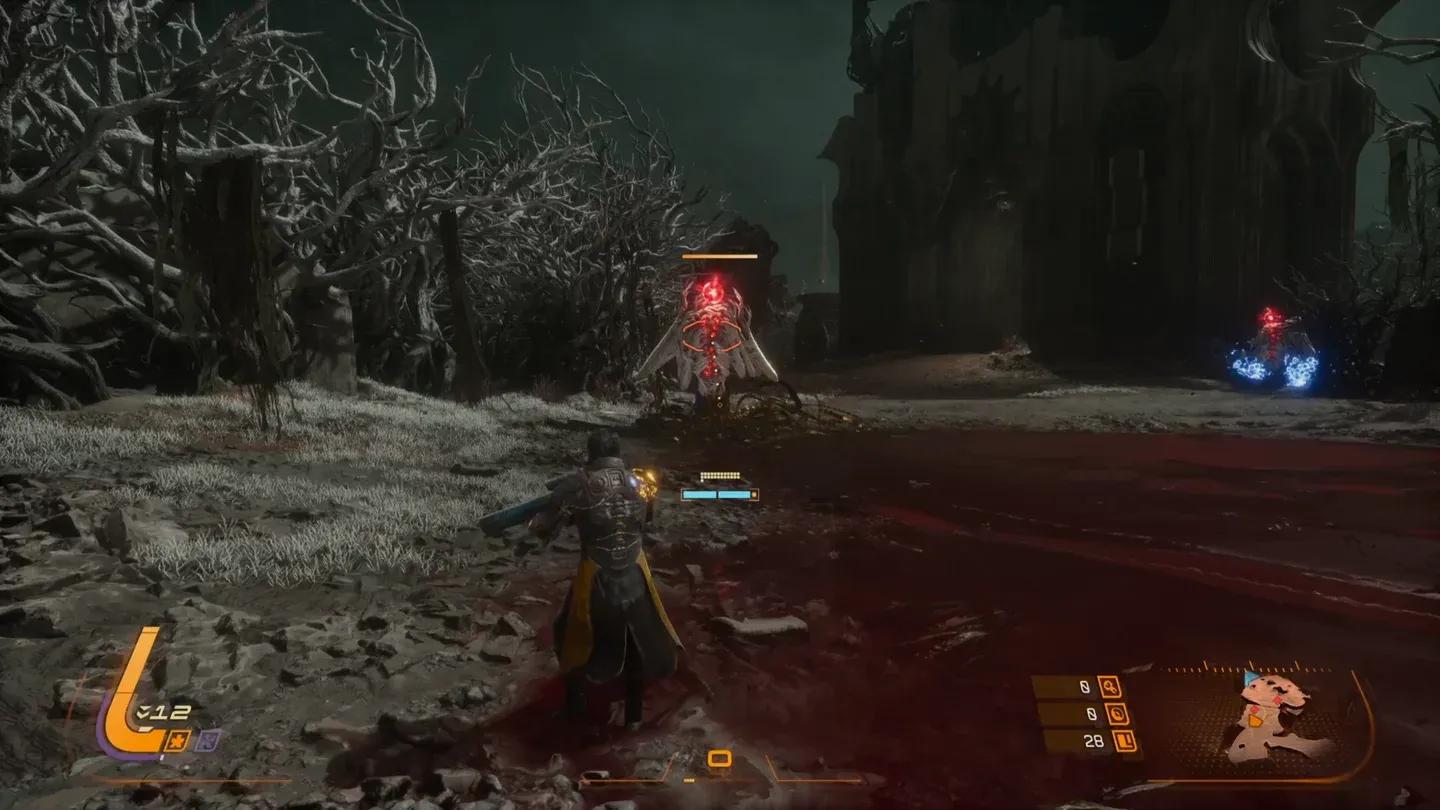
Nightmare Stand enemy positions
What is the best location to attempt this?
A Nightmare Stand is the recommended setup. These are harder encounters, but they bring together exactly the mix of enemies you need: ground enemies generating red orbs and flying enemies patrolling the outer edges of the arena.
The flying enemies in a Nightmare Stand tend to hug the arena perimeter, especially when you position yourself against a wall. That wall-hugging behavior pushes them closer to the edges, which is exactly where you want them for a pit kill.
Hug the side of a wall during a Nightmare Stand to push flying enemies toward the arena perimeter, where they're closest to falling off.
The setup in practice:
- Enter a Nightmare Stand that contains both flying enemies (Custodian, Flexion, Excubitor, or Veil) and red orb enemies (Rupture, Confessor, or Dynast)
- Position yourself near a pit edge with flying enemies on the far side
- Bait a red orb attack from a ground enemy
- Parry the orb and redirect it at a flying enemy near the pit
- If the stagger fills completely, the flying enemy falls
How do you avoid accidentally shooting the target?
This is where most attempts fail. The sources note that stray bullets are the biggest obstacle, and it's easy to clip an enemy you weren't aiming at during a chaotic Nightmare Stand fight.
Use a Handcannon or the Tactical Rifle to reduce accidental hits. These weapons have slower fire rates and more deliberate aim, which gives you more control over where shots land.
Automatic weapons or spread-fire options are a liability here. One accidental hit on your target enemy voids the attempt entirely.
A few habits that help:
- Focus fire on the red orb enemies only, never the flying targets
- Clear other nearby enemies before setting up the Parry attempt if possible
- Keep distance from the flying enemies so you're not accidentally meleeing them either
This trophy rewards patience over brute force. The Nightmare Stand setup isn't fast, but it puts all the necessary pieces in the same arena at the same time. Lining up the Parry redirect takes practice, so expect a few failed attempts before the geometry clicks into place.
For more on Saros and other games, browse more guides at GAMES.GG.