
Farming in Solarpunk is not a side activity. Every crop decision feeds directly into research unlocks, Traderbot trades, animal care, and airship upgrades. Treat wheat like food and you will hit a wall before your second major flight. Treat eggs like breakfast and the next range upgrade gets pushed back by several in-game days. The whole system rewards players who think one gate ahead, and punishes those who eat their progression items by accident.
What should you grow first in Solarpunk?
The starter farm has one job: keep you alive long enough to build something better. That means two crops, planted as soon as possible.
Berries cover early food. They are safe to replant, easy to manage, and give you a food buffer while you sort out water and storage. Cotton is the other priority, and it deserves more attention than most new players give it. Cloth appears in early research, crafting recipes, bed progress, and Traderbot trades. Growing a few cotton plants and then stopping is a common mistake that slows progression for hours.

First crops: berries and cotton
A practical starter routine:
- Plant berry seeds and replant every harvest until food storage is stable.
- Plant cotton seeds alongside berries and keep expanding the plot.
- Water manually at first. Sprinklers come later.
- Build dedicated storage so seeds, food, and cloth stay separated.
Watermelon fits into this early window too. It handles thirst better than berries, works as travel food before longer airship trips, and fills early Traderbot trade slots. Just protect the seed supply. Cooking or eating through your watermelon seeds before you have enough for trades is a quiet way to lose progress.
Crop function reference
Use this table to understand what each crop actually does before spending it.
Where do you find Wheat in Solarpunk?
Wheat does not appear on the starter island. It becomes available after your first major airship range upgrade, once the travel circle expands outward.
Once you have that upgrade, head to the east and west islands in the second ring. One side has a cluster of smaller islands, and the other has a larger island. Check both. Bring home every piece of Wheat you find, and more importantly, collect every seed before leaving.

Wheat found in second-ring islands
When you land on a wheat island:
- Harvest all available Wheat.
- Collect every seed on the ground and nearby ledges.
- Check paths and corners before flying back.
- Return home and plant Wheat immediately.
- Keep expanding until the major progression gates are covered.
How much Wheat do you need before feeding chickens?
This is where most players run into trouble. Unlocking Animal Basics feels like permission to start a chicken farm, but the Wheat economy is not ready for that yet.
The safe target before serious chicken feeding is 45+ Wheat, covering three specific gates:
Bread is made by crafting Dough from Wheat, then putting Dough into a furnace. Ten Bread means ten Dough, which means 30 Wheat. That number surprises players who assumed bread was cheap to produce.
Once those three gates are covered, Wheat can start flowing into animal feed without derailing anything else.
How to lead chickens home
Chickens follow you when you hold Wheat in your hand. Keep it equipped and walk slowly toward your animal area. If a chicken stops following, check that you still have Wheat selected and that the path is not blocked.
Before leading any chickens home, the animal area needs to be ready:
- At least one feeding trough placed and accessible.
- At least one water trough filled.
- At least one chicken coop with enough space around it.
- A Wheat plan that does not interfere with the Traderbot gates.
Spacing matters more than it looks. If animal structures are packed too tightly, chickens cannot use them properly, which leads to the frustrating situation of having feed available but hunger never reaching 10/10.
Why are your chickens not producing eggs?
Egg problems almost always trace back to one of two causes: wrong progression order or infrastructure issues. Check both before assuming something is broken.
The clean egg route, in order:
- Find Wheat after the first airship range upgrade.
- Grow enough for Animal Basics, the 10 Wheat trade, and 10 Bread.
- Research Animal Basics with 5 Wheat.
- Complete the 10 Wheat Traderbot trade.
- Make 10 Bread from 30 Wheat worth of Dough.
- Build troughs and coops with proper spacing.
- Lead chickens with Wheat.
- Feed seriously only after the wheat gates are done.
- Keep feed, water, and shelter stable until eggs appear.
Save your first six eggs
Once eggs start arriving, the instinct is to cook with them. Resist that. The first 6 eggs are needed for an airship upgrade trade. Cooking them before that trade is complete does not permanently block you, but it does push back the next range upgrade by however long it takes to collect six more.
Six eggs needed for airship upgrade
The safe rule is straightforward:
- First 6 eggs go to the airship upgrade trade.
- Extra eggs beyond that can go into cooking.
- Egg-based recipes become safe once chickens produce reliably and the upgrade is done.
Greenhouse protection and thunderstorms
Thunderstorms can damage fully grown exposed plants. That is a minor inconvenience when the crop is berries, but a real setback when it is Wheat, carrots, or sunflowers sitting ready to harvest.
Early habits that help:
- Harvest mature crops before bad weather when you can see it coming.
- Keep extra seeds in storage at all times.
- Do not leave every rare crop sitting fully grown outside during storm season.
- Once your build route allows it, use protected growing space for progression crops.
If you only have limited greenhouse space, prioritize Wheat, carrots, and sunflowers over casual food crops. Those are the plants where losing a full-grown harvest actually costs progression time.
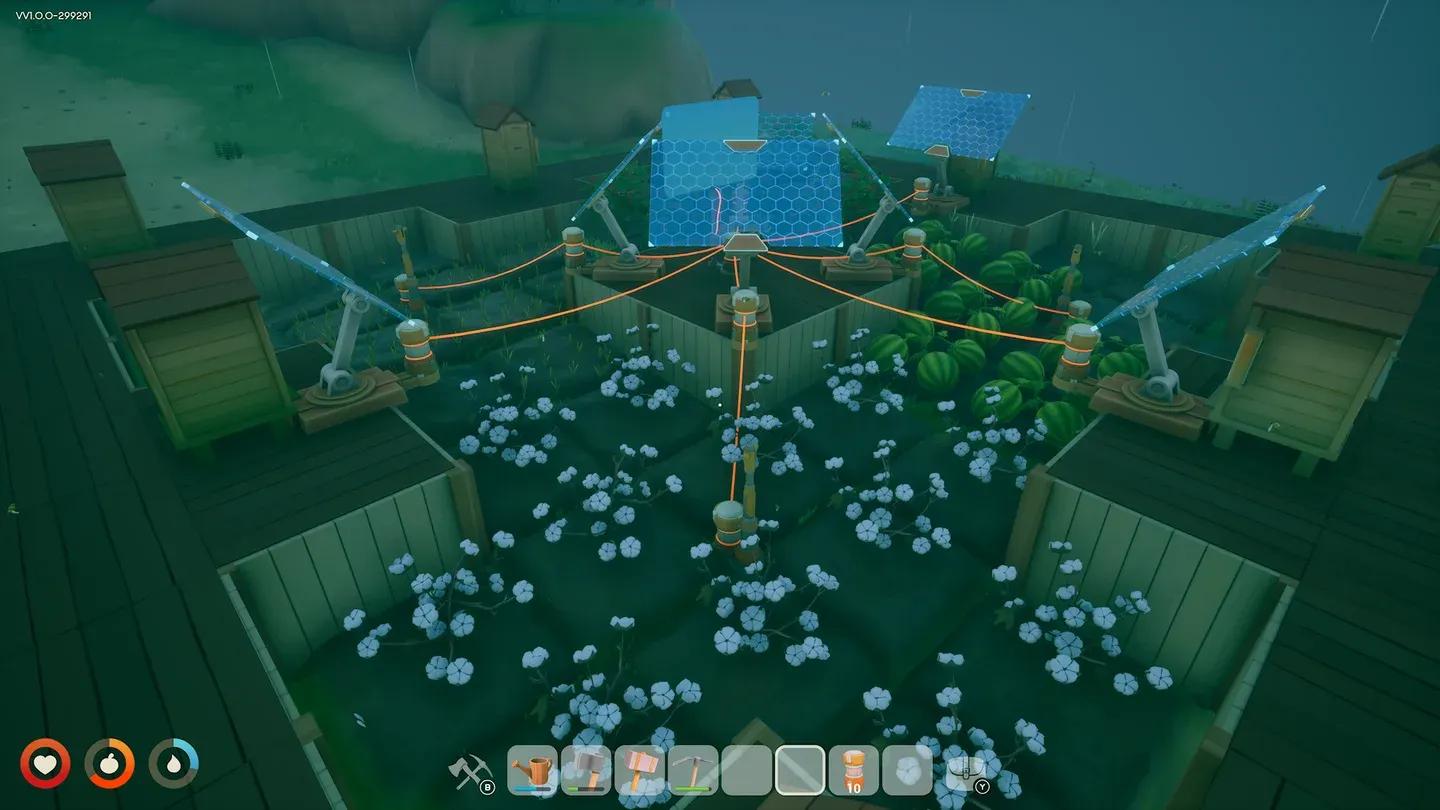
Sprinklers: are they worth it?
Yes, once your farm grows past a few manual plots. A compact sprinkler layout covers 8 nearby plots, which saves a significant amount of daily watering time once Wheat, carrots, and sunflowers are all in rotation.
The catch is power. Sprinklers add real energy demand, and if your base grid is already handling drills and the Advanced Dock, adding several sprinklers without checking the Network Display can destabilize everything.
Put sprinklers on a switch once the farm scales up. Running them during rain wastes power you might need elsewhere.
Seed packs and rare crop expansion
Seed packs are easy to ignore until you accidentally cook your only carrot seeds. Their real purpose is expansion: turning a small rare-crop line into something large enough to support research, animals, and Traderbot trades simultaneously.
Best targets for seed packs:
- Carrots and sunflowers, which appear later and are harder to replace than berries.
- Wheat, if animal feed is the current bottleneck.
- Any crop where you spent the seed supply too early.
Do not waste seed packs on crops you already have in surplus. Save them for the crops that are actively blocking your next unlock.
Recommended farming progression route
For more strategies across every system in the game, the Solarpunk guides collection covers research progression, airship prep, energy management, and everything else that connects to the farming loop described here. Solarpunk sits comfortably in the adventure games space, but its farming system has more depth than most players expect from that genre going in.