
Solarpunk research table and blueprint unlock guide
Solarpunk runs two parallel progression systems at the same time, and if you only follow one of them, your save will start feeling stuck in ways that are hard to diagnose. The Research Table unlocks base survival items, farming tools, the Map, the Airship Dock, and animal systems. The Traderbot blueprint system unlocks energy, electronics, automation, and logistics. Both gate each other in ways that are easy to miss, and spending the wrong resource at the wrong moment can cost you several in-game days of progress.

Research Table unlock screen
What are all the Research Table tier requirements?
Every tier after Tier 1 requires a specific material to manually unlock before any recipes inside that tier become available. These gate materials are not random. Each one signals that you have reached a new phase of the game.
The pattern is deliberate. Beeswax proves your beehives are running. Iron Bar proves you have started processing ore. Copper proves you have reached exploration range. Wheat and Sunflower prove you have pushed into later crop progression. If you cannot unlock the next tier, stop flying around randomly and identify the specific gate material you are missing.
What should you research first at Tier 1?
Tier 1 is available from the start. The four unlocks worth prioritizing before anything else are Rain Collector, Chest, Beehive, and Bed. These four items handle clean water, storage, Beeswax production for Tier 2, and day-cycle control. Decorative unlocks like Deco Plants Pack or Deco Tables and Chairs can wait until your survival systems are stable.
A clean early order:
- Rain Collector for clean water and watering can refills.
- Chest to prevent inventory chaos as resources pile up.
- Beehive to start Beeswax production for Tier 2 and early Traderbot trades.
- Bed to control the day cycle and avoid dangerous nighttime gaps.
- Well as a backup if your water routine still needs support.
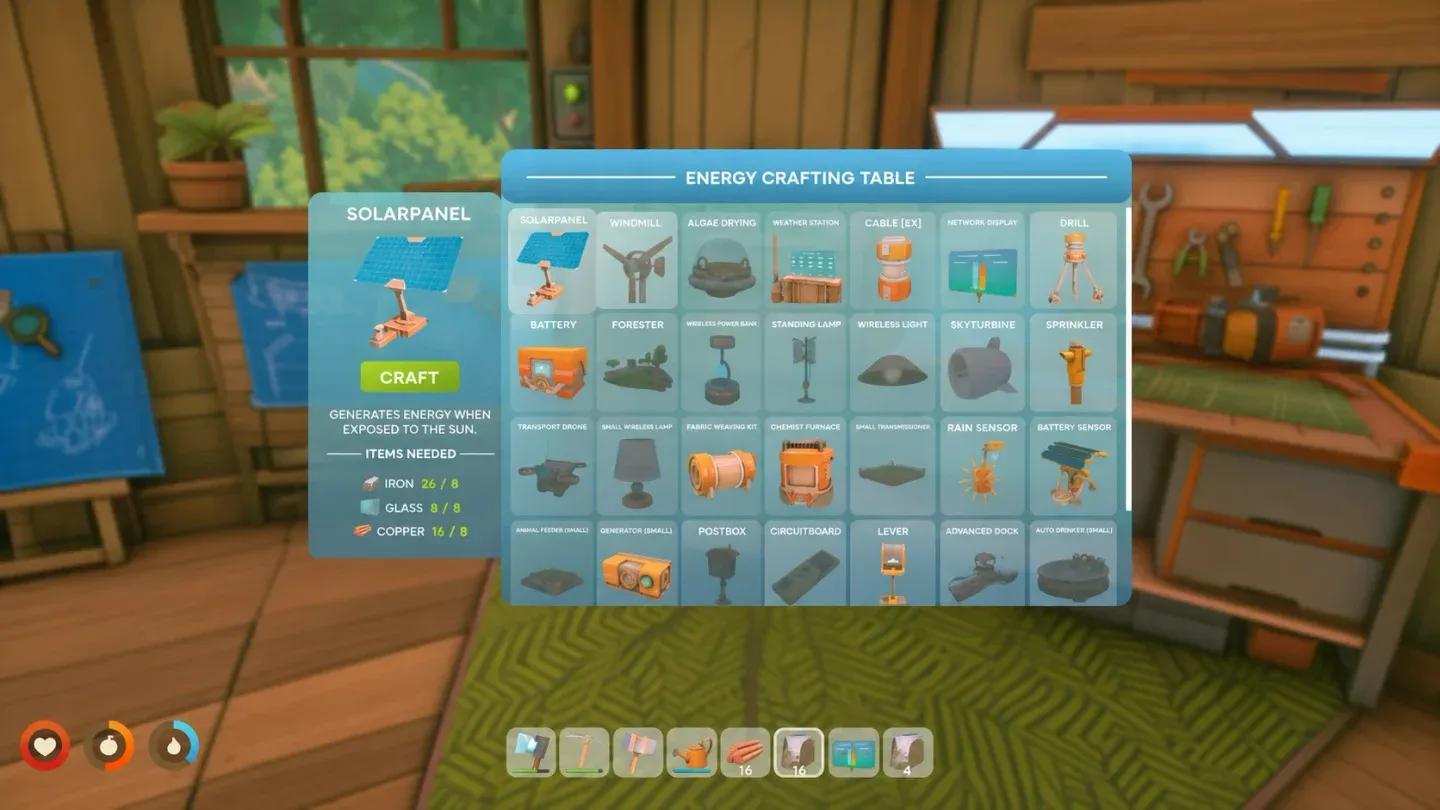
Tier 2 priorities: Map, Furnace, and why cotton matters
Tier 2 costs 1 Build-Hammer and 1 Beeswax. The single most valuable unlock inside it is the Map, which requires 2 Cloth to craft after researching. Before the Map exists, navigation means squinting at nearby islands from cliff edges and guessing airship range. After it, you get a proper island-ring view and can plan routes with purpose.
The Furnace is the other critical Tier 2 unlock. It turns raw ore into processed bars, which every subsequent tier demands. Build it early, but do not burn through all your wood if Wax Briquettes are close to being available.
One practical trick: cotton is easier to spot at night because it glows in the dark. If you are short on cotton during the day, do a second sweep of your starter island after sunset.
Tier 3 and the Airship Dock decision
Tier 3 costs 1 Iron Bar. The only unlock in this tier worth targeting immediately is the Airship Dock, which costs 5 Cloth, 5 Iron, and 5 Wood to build after researching. Everything else in Tier 3, including Storage Shelves, Signs, and the Magnetic Fishing Rod, is useful but secondary to getting off the starter island.
Researching the Airship Dock is not the full unlock. You still need to collect the Crashed Airship Component from the wreck on your starting island before the first airship can be built. Make sure that component is in your inventory before you start gathering the build materials.
Wax Briquette is also worth noting here. Once beehives and cloth production are stable, switching to Wax Briquettes reduces the pressure on your wood supply significantly.
What are all the Traderbot blueprint tiers?
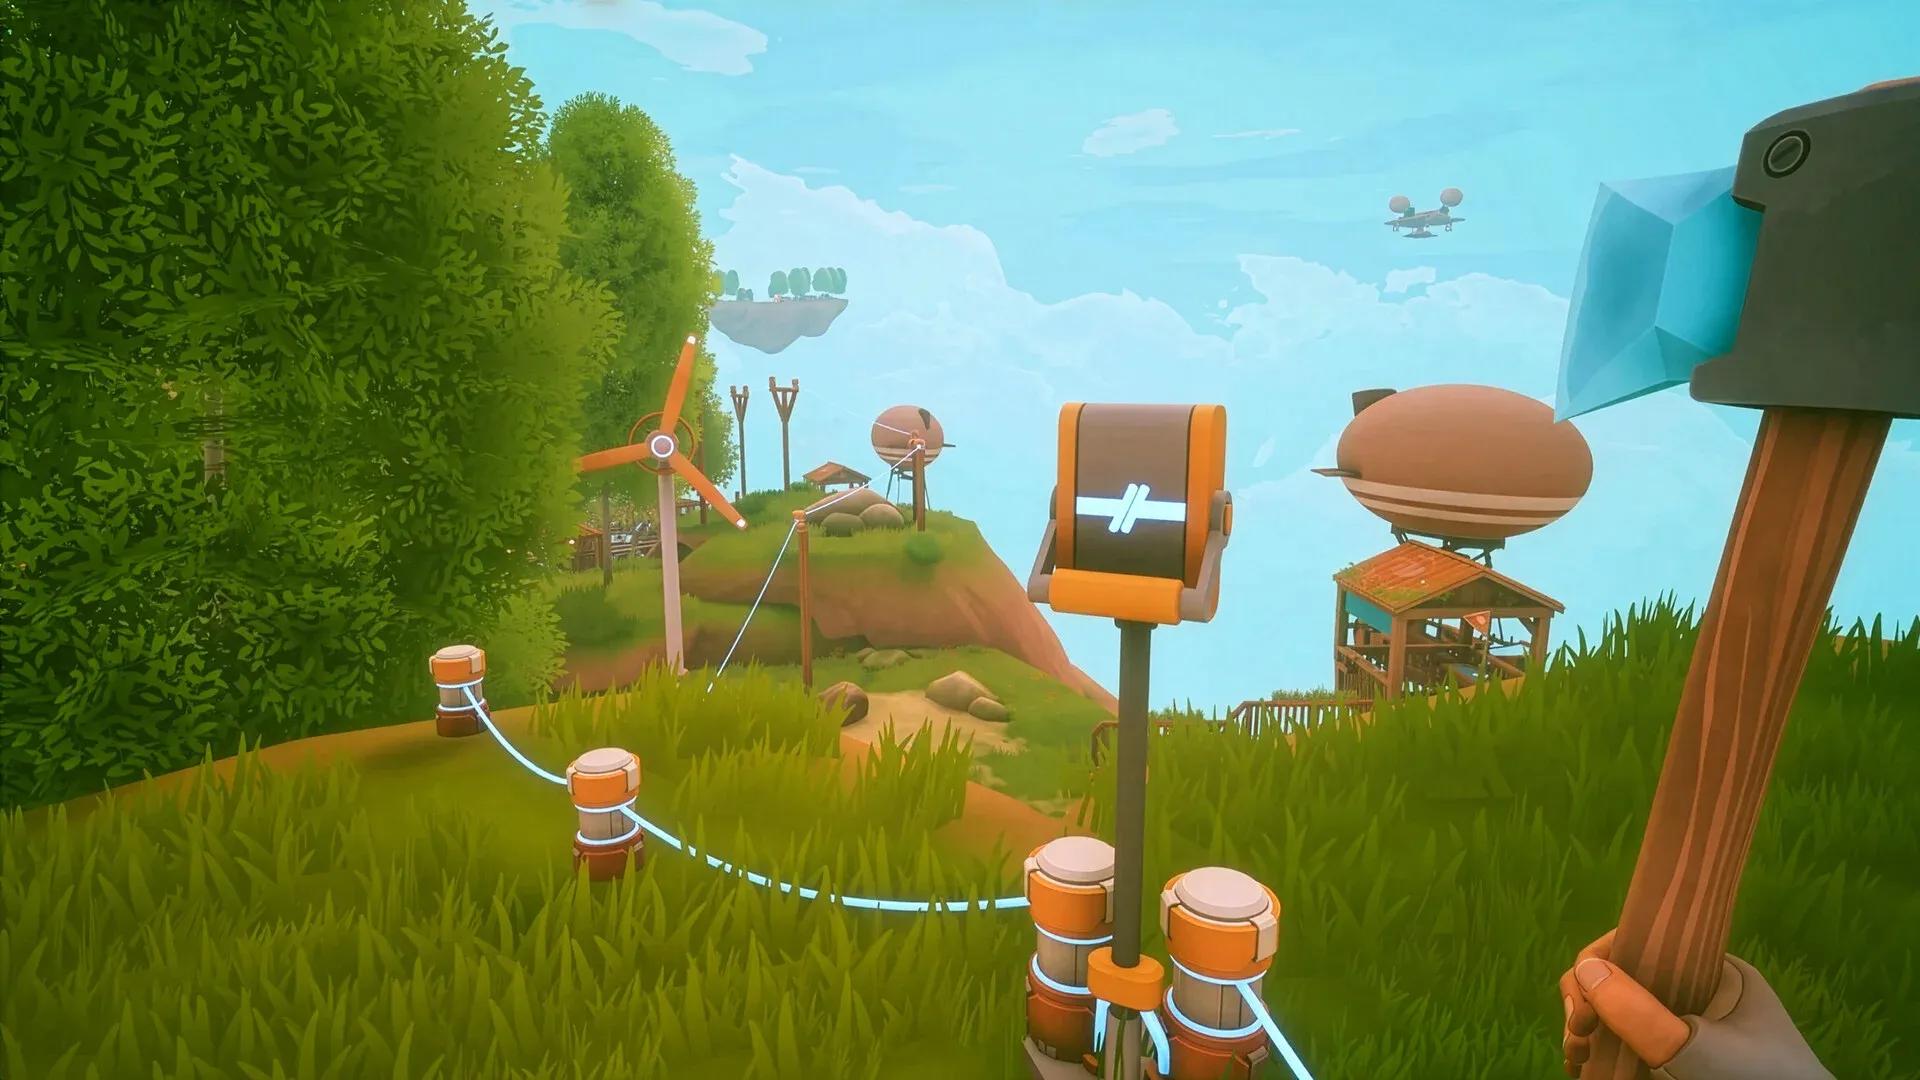
Traderbot blueprints are a completely separate system from the Research Table. They unlock energy systems, automation, transport, and late-game logistics. Missing this system entirely is one of the most common reasons players feel stuck after reaching the airship.
Silicon comes from smelting Quartz, which is only accessible after the first airship range upgrade. Cobalt requires pushing to later islands after another range expansion. Do not spend your first Silicon or Cobalt casually before checking whether either one is the gate for the next blueprint tier.
What is the full Traderbot trade route?
The Traderbot trade sequence is not a list of optional errands. It is the main route through blueprint tiers, airship range upgrades, and late-game systems. Here is the complete sequence:
The critical early logic: Watermelon, Cotton, and Beeswax open the blueprint path. 32 Copper expands airship range. Quartz becomes Silicon, which opens blueprint Tier 2. Wheat and Bread come before serious chicken feeding. 6 Eggs expand airship range again.
Should you pick Battery or Animal Transport first?
This is the most common decision point at blueprint Tier 2, and the answer depends on your base setup. If your base already runs solar panels, drills, sprinklers, or the Advanced Dock, pick Battery first. A collapsing power grid blocks all of those systems simultaneously, and Animal Transport does nothing to fix that.
Animal Transport is the right pick only if your power grid is genuinely stable and moving animals is the immediate bottleneck in your progression.
The underlying rule across all of these decisions is the same: unlock systems before comfort. Power, water, storage, airship range, and crop gates should come before decoration unless your base is already fully stable.
Tier 5 and Animal Basics: the Wheat trap
Tier 5 costs 1 Wheat to unlock, then Animal Basics costs 5 more Wheat to research. Many players find Wheat for the first time and immediately spend it, which blocks both the tier gate and the recipe.
After finding Wheat:
- Bring Wheat and seeds home.
- Plant Wheat immediately and grow a surplus.
- Save 1 Wheat to unlock Tier 5.
- Save 5 Wheat for Animal Basics.
- Keep enough Wheat for Traderbot's 10 Wheat and 10 Bread gates.
Animal Basics is not a signal to dump all Wheat into feed. It is a signal to build a Wheat surplus before chickens enter the egg route.
Tier 6: Growbox, Cooking, and the Sunflower gate
Tier 6 costs 1 Sunflower. By the time you reach this tier, you are managing later crops, animals, cooking systems, and seed expansion simultaneously. The most progression-relevant unlocks are:
- Growbox: protects and controls important crop production.
- Seedspack: requires 1 Raspberry, 1 Wheat, 1 Cotton, 1 Sunflower, and 1 Carrot to research, and expands rare crop lines.
- Better Animal Feed: matters once animals are a real part of your system.
- Cooking: useful once progression ingredients are secured, but do not immediately cook Wheat, eggs, carrots, or Sunflowers without checking remaining gate requirements.
- Pig Shelter: becomes relevant once your farm supports more animals.
Tier 6 unlocks: Growbox and Cooking
What is blocking your next unlock?
Use this reference when progression stops feeling obvious:
Naming the specific bottleneck before your next flight turns an aimless trip into a productive one. Most stuck saves come down to one missing material, not a broken progression system.
For more strategies across the full game, the Solarpunk guides collection covers airship routing, energy systems, and farming in detail. If you are newer to adventure games with survival and crafting loops, the general structure here follows a familiar rhythm: stabilize, automate, expand.