
Soulmask hit version 1.0 on April 10, 2026, and with the full release came new game modes, a second map, and a more polished server configuration system. Running your own dedicated server gives you full control over everything from XP rates to invasion frequency, and the setup process is more straightforward than most survival games in this space. This guide walks through every step, from downloading the server files to locking down your backups.
What do you need before you start?
Before touching SteamCMD, make sure your machine actually meets the requirements. The Soulmask server process alone consumes 12GB of RAM, so the minimum spec is 16GB RAM. You also need a 64-bit processor (quad-core recommended, dual-core is the floor), at least 30GB of free disk space (more if you plan to run both maps), and either Windows 10 64-bit, Windows Server 2019, or Linux.
On the networking side, four ports need to be open:
Forward all four on your router and make sure your firewall (Windows Firewall or your Linux equivalent) allows inbound traffic on each. If your server doesn't show up in the browser, the most common cause is a blocked query port (27015 UDP). You can always find your server's direct invitation code inside the WS.log file and share it with players as a fallback.
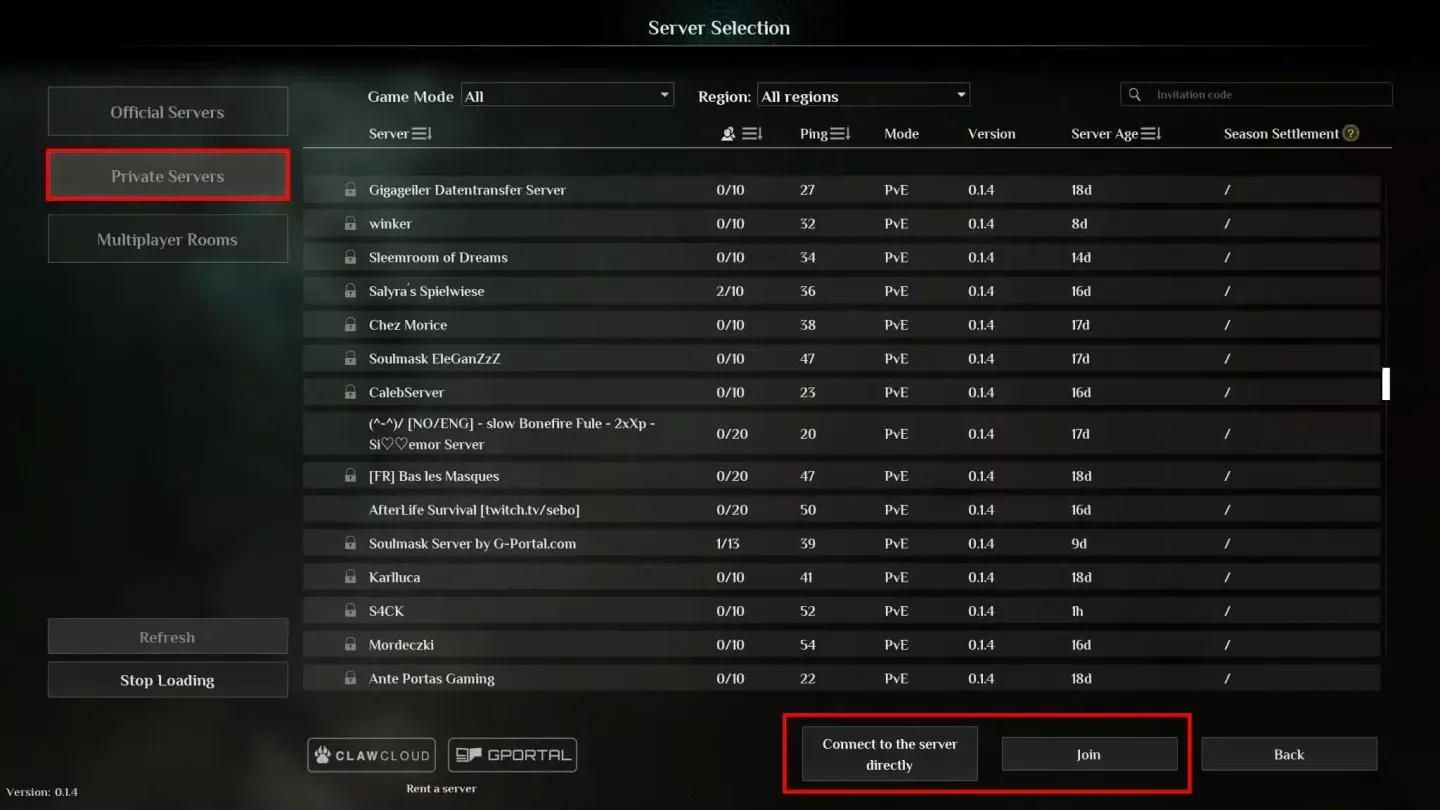
Port forwarding for Soulmask server
How do you install the Soulmask server files?
The installation uses SteamCMD, Valve's command-line tool for downloading game server files without owning the game on the account.
- Create a folder for your server files, for example C:\SoulmaskServer.
- Download SteamCMD and extract it into that folder.
- Create a batch file called UpdateSoulmask.bat containing the following:
@echo off
steamcmd.exe +login anonymous +force_install_dir C:\SoulmaskServer +app_update 3017310 validate +quit
- Right-click the file and run it as Administrator.
- Wait for the download to finish. All server files will land in your install directory.
Linux users swap the app ID to 3017300 instead of 3017310. That's the only difference between platforms at the download stage.
Once the files are down, create a second batch file called StartServer.bat. A working example launch command looks like this:
WSServer-Win64-Shipping.exe Level01_Main -server -log -UTF8Output -forcepassthrough -MULTIHOME=0.0.0.0 -Port=8777 -QueryPort=27015 -EchoPort=18888 -SteamServerName="My Soulmask Server" -MaxPlayers=60 -PSW="joinpassword" -adminpsw="adminpassword" -pve -saving=300 -backup=900 -online=Steam
Replace the server name and passwords with your own values. Drop -PSW entirely if you want an open server.
What game modes are available in Soulmask 1.0?
Soulmask 1.0 ships with four distinct modes, each targeting a different playstyle. The launch parameter you use (either -pve or -pvp) sets the base ruleset, but the GameXishu.json file lets you customize almost everything on top of that.
Warrior Mode is the most distinctive of the four. You start with a blank character (Common quality, no talents) plus a starter gear kit, and the mode strips out several of the survival friction points while making combat itself harder. It's worth noting that game mode availability on dedicated servers may depend on server version, so check the official Steam page if a specific mode isn't appearing.
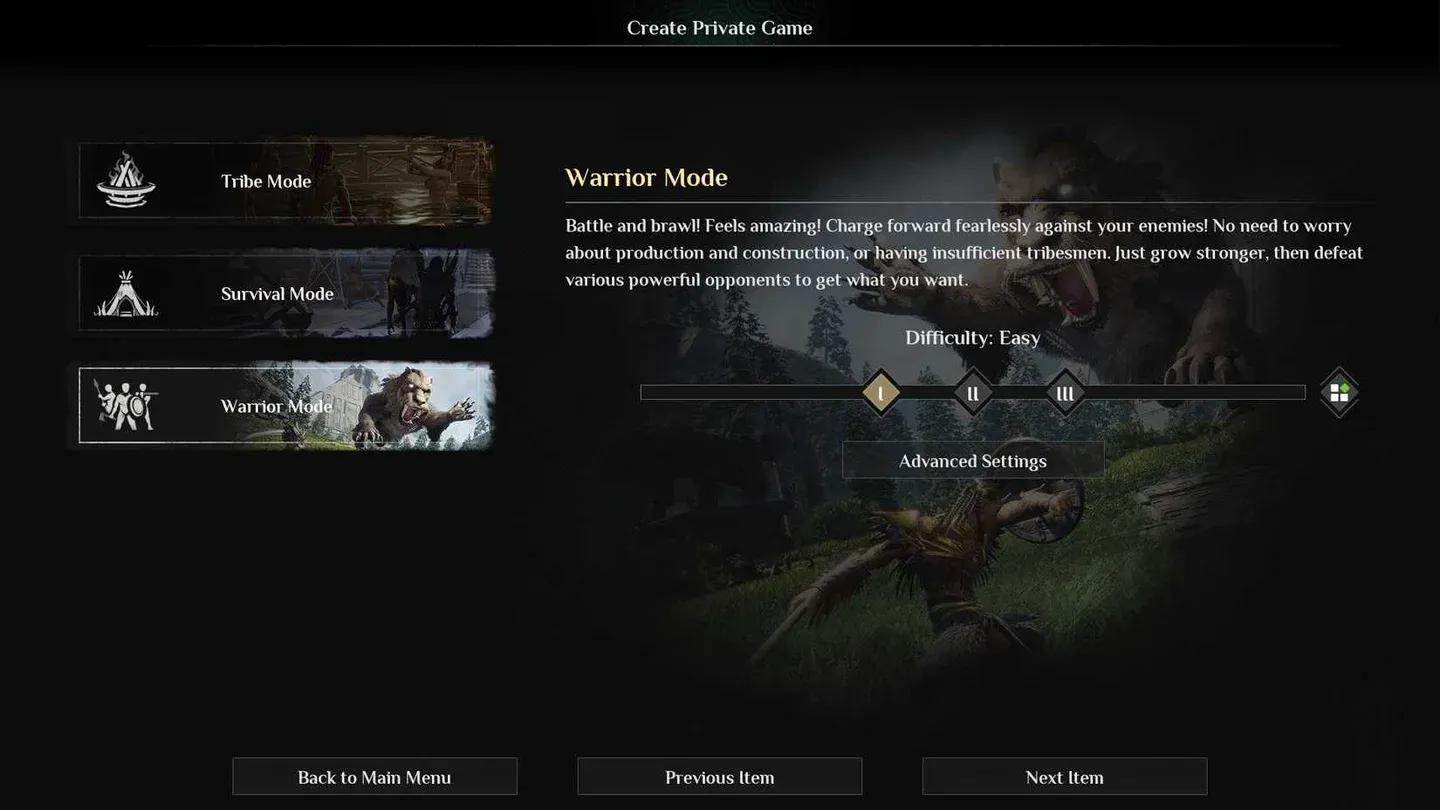
Soulmask 1.0 game mode options
How do you configure gameplay settings in GameXishu.json?
All the deep server tuning lives in GameXishu.json, found at WS\Saved\GameplaySettings\GameXishu.json. This file doesn't exist until after the server's first run, so boot the server once, shut it down cleanly, then open the file.
The settings break into several major categories:
- Experience & Progression — XP multipliers for awareness, character, mask, proficiency, gathering, crafting, and combat
- Resources & Crafting — Drop rates for gathering, mining, logging, slaughtering, and crafting speed
- Survival — Food, water, and durability consumption rates; item decay timers; carry weight; inventory size
- Combat — PvE and PvP damage ratios, dodge i-frame duration, structure damage
- Tribe & Taming — Recruitment limits, taming speed, animal limits, hibernation settings
- Building — Decay rate, repair speed, construction limits, portal settings, conveyor and power mine limits
- Invasions — Heat accumulation, invasion scale and strength, enemy count, cooldown timers, attack windows
- Cluster — Cross-server mode toggle (KaiQiKuaFu), battle mode access
Awareness XP specifically has its own multiplier separate from character and mask XP, which matters if you're trying to build a server where progression feels faster in some areas than others. After testing different multiplier combinations, the most common community approach is to raise awareness and gathering XP first, since those are the biggest bottlenecks in the early game without touching combat XP.
What are the key server launch parameters?
Beyond the basics in the StartServer.bat example, several parameters are worth knowing:
The -initbackup flag is underused. Adding it to your launch command means every restart creates a clean backup before anything loads, which is a simple safety net for catching corruption early.
How do you run both Soulmask maps?
Soulmask 1.0 supports two maps. Cloud Mist Forest is the original map, launched with Level01_Main. Shifting Sands is an Egypt-themed DLC map, launched with DLC_Level01_Main. The Shifting Sands DLC was free to claim between April 10 and May 10, 2026.
To let players travel between both maps, you run two separate server instances linked as a cluster. The main server (Cloud Mist Forest) gets -serverid=1 -mainserverport=8781, and the child server (Shifting Sands) connects back with -serverid=2 -clientserverconnect=MAIN_IP:8781. You also need KaiQiKuaFu=1 set in GameXishu.json on both servers.
A few things to keep in mind for clusters:
- Each server needs a unique set of ports (game, query, echo, RCON)
- Both servers should share the same join password and game mode
- Character data (level, mask, tech tree, tribesmen) transfers through an ocean portal
- Buildings, placed resources, and local inventory do not transfer between maps
- Newly created characters can't transfer until they've progressed past the starting state

Cross-map cluster server setup
Where are the important server files?
Keeping track of file locations saves a lot of time when something goes wrong:
The world.db file is your entire world save. Copy it somewhere safe before any major configuration change, before a game update, and before attempting a cluster migration. The automatic backup system writes to the backup\ folder on the interval set by -backup, but a manual copy costs nothing and has saved many servers from unrecoverable states.
For more guides covering survival games, crafting systems, and server management, browse more guides on GAMES.GG.