
What are Techniques in Temtem Swarm?
Techniques are the backbone of every run in Temtem Swarm. As a subtype of perk, they define how your Temtem deals damage and interacts with enemies across each wave. Most fire on a cooldown, triggering automatically as the timer resets, though some work as passive effects that stay active constantly. Getting a handle on how Techniques are structured is the fastest way to build smarter and survive longer.
How do Technique types and classes work?
Every Technique carries a type drawn from the twelve damage types in the game, including Fire, Water, Electric, Toxic, Mental, Nature, Crystal, Earth, Wind, Digital, Melee, and Neutral. Type matchups matter: a Technique's type interacts with the Temtem's own type to either amplify or reduce its effectiveness. Running a Temtem whose type aligns with its equipped Techniques is a consistent way to squeeze more damage out of the same cooldown.
Beyond type, every Technique falls into one of two classes:
- Physical: Close-quarters attacks. These tend to originate from the Temtem itself or strike lateral and forward positions.
- Ranged: Long-range projectiles, beams, area effects, and summoned hazards.
Class affects which stats feed into damage calculation, so stacking the right offensive stats for your chosen class pays off significantly over a long run.
What are the eight targeting modes?
Targeting is where Techniques start to feel meaningfully different from each other. There are eight distinct targeting behaviors:
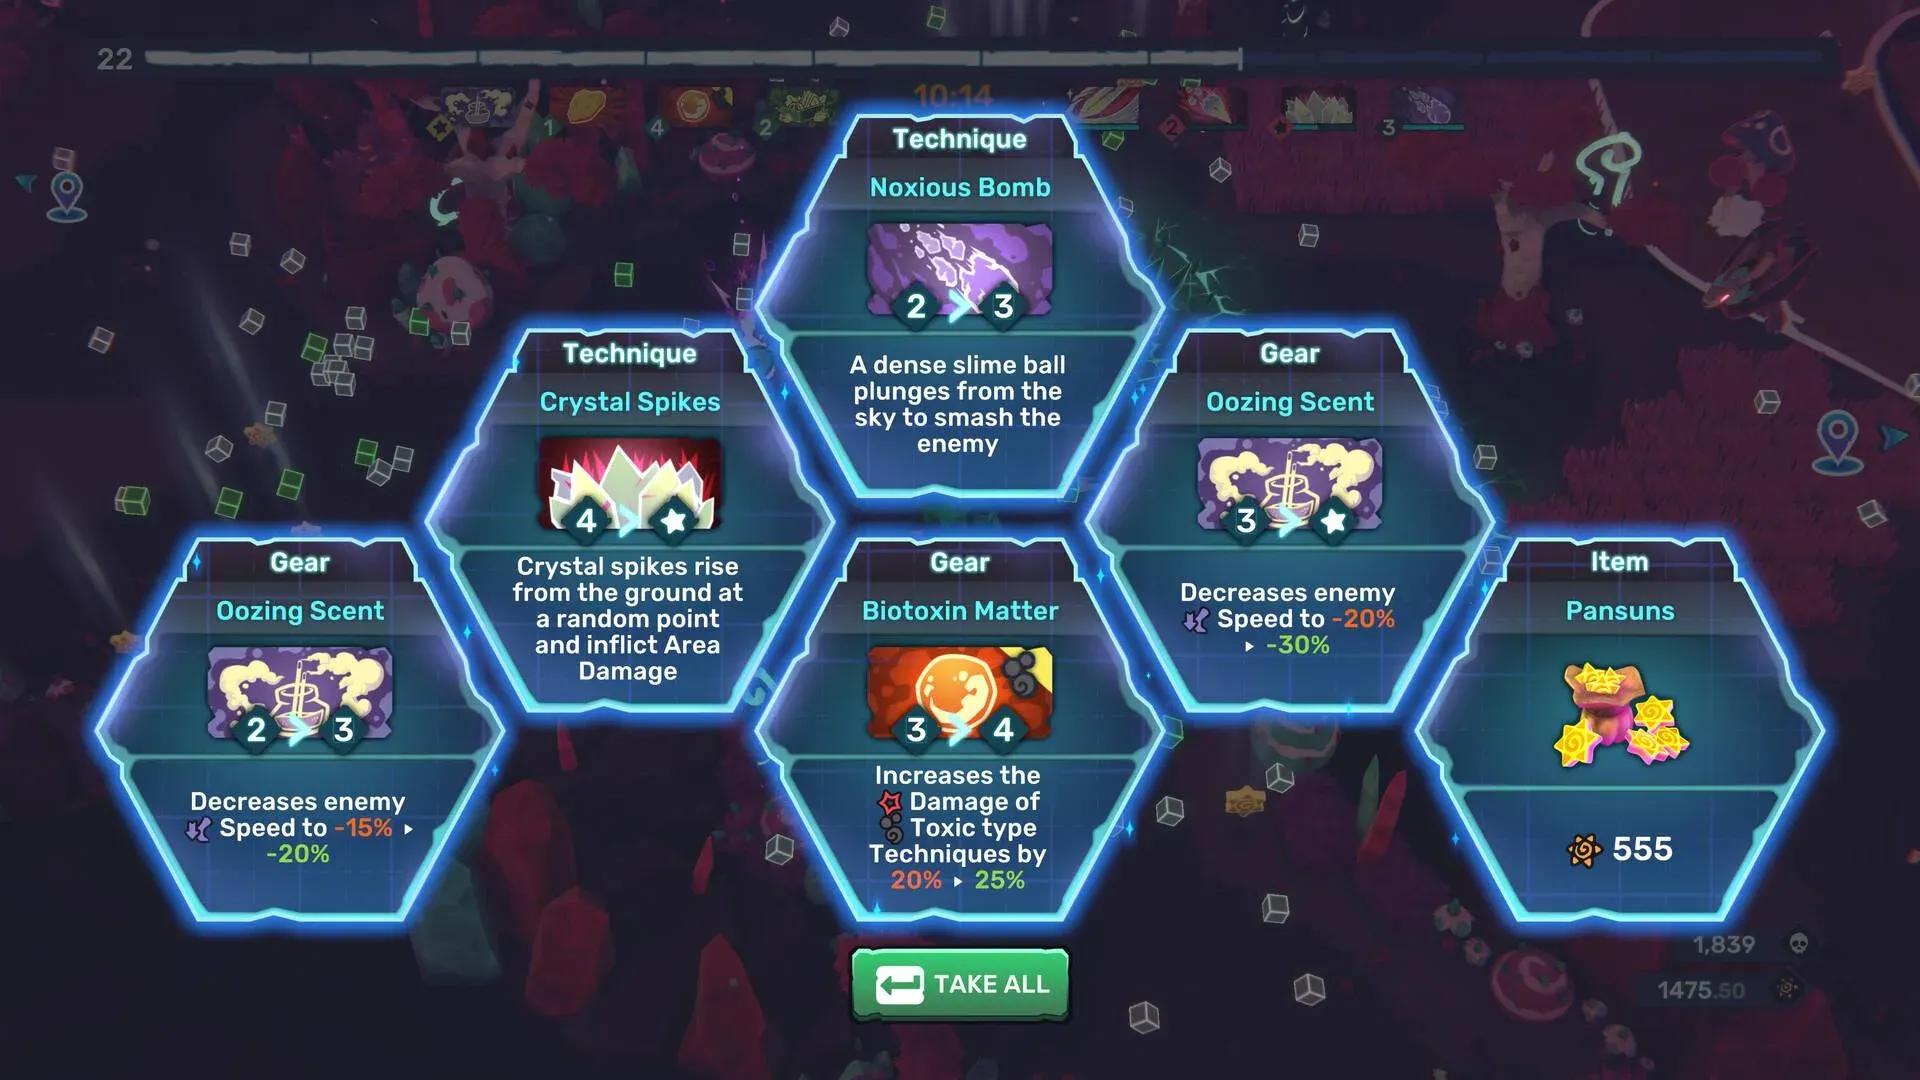
Aimed Techniques like Data Corruption and Sludge Gift reward active play since you control where they land. Self-targeting Techniques like Ki Field and Hellfire are more passive but consistently cover the space around your Temtem. Random Position Techniques like Crystal Spikes and Tentacle Slash scale well with area and damage bonuses since they fire regardless of where you are looking.
Targeting mode icons explained
What are the four Technique categories?
How you unlock and access Techniques depends on their category:
- Ultimate: Exclusive to a specific Temtem. These do not transfer to other characters.
- Starter: Each Temtem begins with one. Once unlocked, Starter Techniques become available to any Temtem that shares the same type.
- Normal: Available to any Temtem with access to the matching type, though some require specific kudos to unlock first.
- Synergy: Only appear in a run when you hold the highest upgrade level of the Technique and pick up its paired Gear item.
Synergy Techniques are worth planning around. For example, Toxic Ink pairs with the Toxins gear, while Ki Field links to Oozing Scent. Ki Field works especially well as a centerpiece Technique for Platypet builds because it creates a constant damage circle that does not require aim, and the Oozing Scent synergy is a key reason it performs so well in practice.
How does the upgrade system work?
Every Technique has a base version and an upgraded + variant. Upgrading changes more than just numbers. Looking at a few examples:
- Data Burst fires at the nearest enemy every 1.85 seconds at base. Data Burst + drops the cooldown to 0.3 seconds, turning it into a near-constant stream of digital projectiles.
- Crystal Spikes deals 22 damage with a 2.75s cooldown. Crystal Spikes + bumps that to 36 damage at the same cooldown but changes the pattern to expanding circles.
- Mineral Hail fires at a random position every 1 second for 10 damage. Mineral Hail + switches targeting to Random Enemy, cuts the cooldown to 0.25 seconds, and becomes a stalactite storm.
- Undermine places a floor trap that deals 20 damage when stepped on. Undermine + lets each explosion chain-trigger other traps, with each consecutive detonation dealing 50% more damage.
- Toxic Ink + upgrades from a single ink blast to 4 rotating ink blasts that poison enemies, a significant coverage increase.
The upgrade jump on Data Burst is one of the most dramatic in the game. Going from a 1.85s cooldown to 0.3s is roughly a 6x increase in fire rate, which makes it a completely different Technique at max level.
Which Techniques apply status conditions?
Status conditions are a major part of Temtem Swarm's damage system. Many Techniques apply conditions that deal ongoing damage or control enemies, and pairing them with the right follow-up Techniques multiplies your output.
Key status-applying Techniques:
- Poisoned: Applied by Pollution, Toxic Waste, Venom Spread, Noxious Bomb, and Toxic Ink
- Burned: Applied by Fire Bite, Fire Tornado, Hellfire, Warm Cuddle, and Ignis Fatuus
- Frozen: Applied by Ice Shuriken, Fluid Barrier +, and Water Cannon +
- Slowed: Applied by Haito Uchi, Data Corruption, Ki Field +, Quicksand, Roots, and Wave +
- Trapped: Applied by Petrify, Resin Trap, and Asteroid Belt +
- Doomed: Applied by Beta Burst + and Darkness
Venom Spread is particularly notable. Hitting an already-Poisoned enemy with it triggers massive area damage and spreads Poison further. Pairing it with any Technique that reliably applies Poison first, like Toxic Waste or Pollution, creates a strong chain. The Swarm patch 0.5 notes from Crema also detail how Toxic Ink was reworked to fire a rotating beam pattern rather than a single frontal blast, making it much more reliable at applying Poison to clustered enemies.
Poison status on enemy Temtem
What are the strongest Techniques to build around?
A few Techniques consistently appear in high-performing setups:
Data Burst + is the standout Digital pick. The cooldown reduction from 1.85s to 0.3s makes it one of the highest-frequency damage sources in the game. Pair it with the Drill synergy gear for added effect.
Ki Field creates a persistent damage aura around your Temtem. The + version also applies Slow, making it a reliable crowd-control option. It works especially well for Platypet because it creates a circle of damage that operates constantly without requiring aim.
Venom Spread + deals massive area damage against Poisoned enemies and leaves a Poisoning, Slowing zone behind. It rewards building a full Toxic type setup.
Magic Lens + is a utility pick that creates two barriers enhancing any Techniques that pass through them, increasing their damage by 100% and expanding their area. It is one of the few Techniques that amplifies other Techniques rather than dealing direct damage.
Undermine + rewards positional play. The chain explosion mechanic, where each blast can trigger adjacent traps for 50% cumulative bonus damage, can delete clustered enemies in seconds.
For more build ideas and character-specific strategies, browse the latest guides on GAMES.GG to find setups that complement your preferred playstyle.