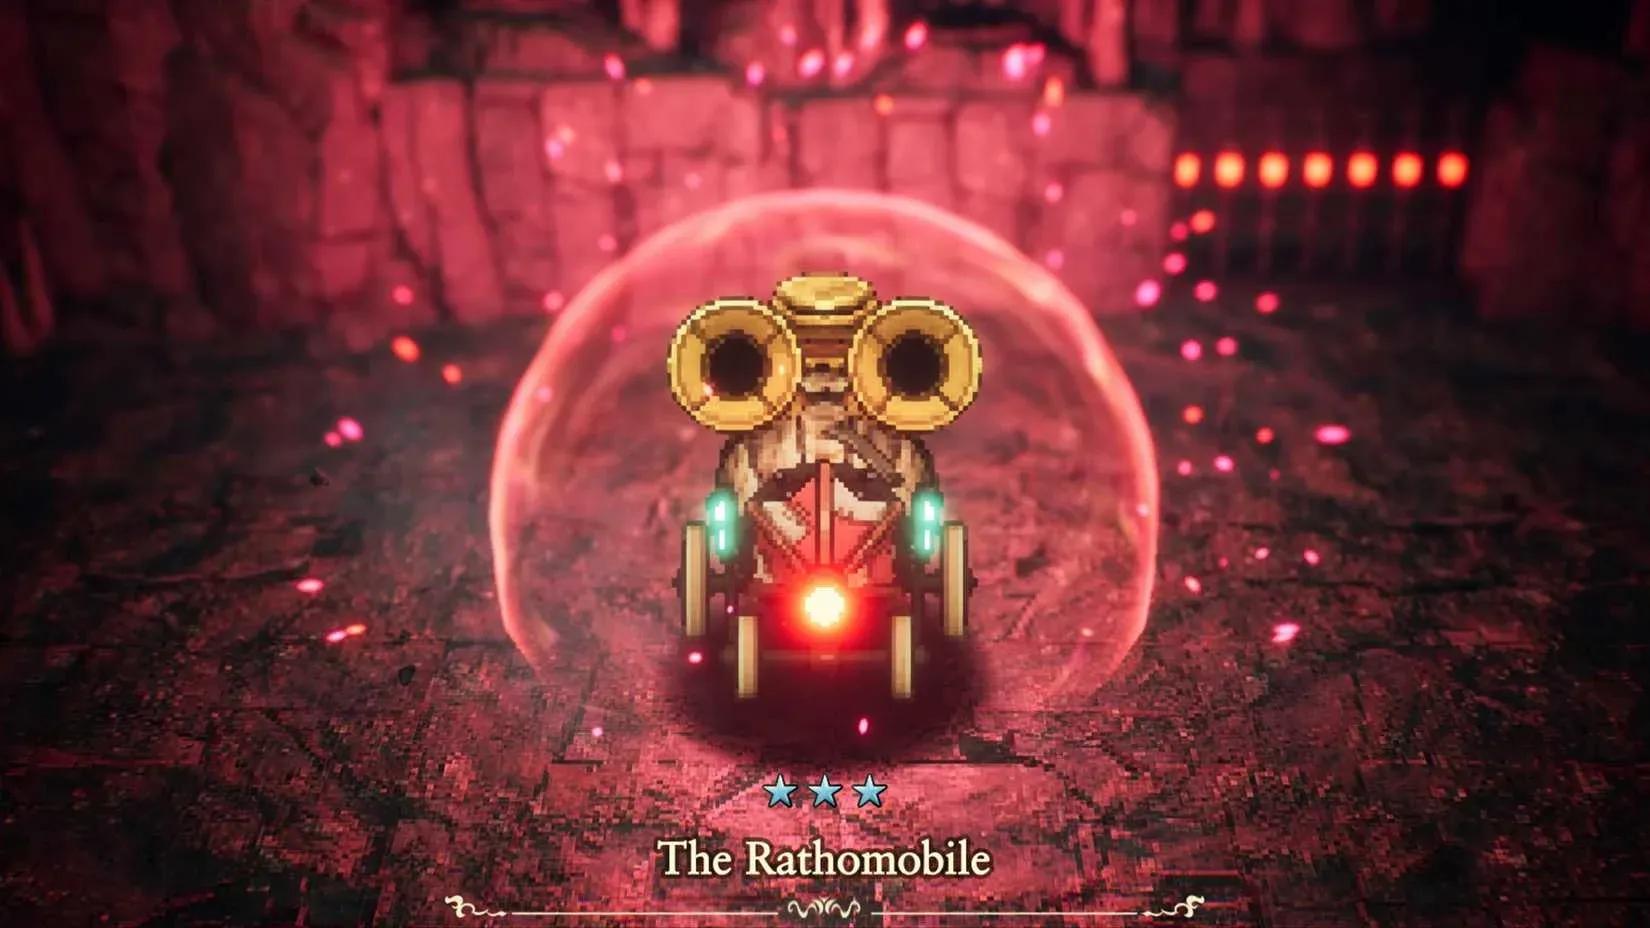

The Adventures of Elliot: The Millennium Tales throws some genuinely tricky bosses at you early on, and The Rathomobile is one of the more punishing ones. This wood-based mechanical vehicle packs missiles, clustered bombs, a spiraling charge pattern, and a force field that makes it completely immune to damage until you figure out the trick. The good news is that by the time you reach this fight in the Southern Caves during the Age of Reconstruction, you already have exactly what you need to take it apart.
What is The Rathomobile and where do you find it?
The Rathomobile is a mechanized boss encountered in the Southern Caves area during the Age of Reconstruction. You access the fight by using the Ignite spell to open a sealed passage, so if you have not unlocked Ignite for Faie yet, you will not be able to reach it. Beating this boss is the only way to unlock the Heavy Hammer weapon type, which becomes important as you push deeper into the game.
This fight is specifically designed to teach you that some bosses require environmental interaction, not just raw damage output. The lesson sticks.
Ignite unlocks the boss passage
How to break The Rathomobile's barrier
The fight opens with The Rathomobile surrounded by a red barrier that blocks all incoming damage. Weapons do nothing here. The only way to strip the barrier is to hit it with two bombs.
You can use bombs from your own inventory, but the smarter play is to let the boss supply them. One of its primary attacks launches a cluster of 4 bombs that land on the ground with a brief delay before exploding. If you move quickly, you can pick up two of those bombs and throw them straight back. Even if your reaction time is not perfect, grabbing one and throwing one of your own gets the barrier down just as well.

Ignite deals bonus damage
Once the barrier drops, immediately apply Faie's Ignite spell. Ignite adds periodic extra damage on top of your normal attacks, which matters a lot in this fight. From there, switch to your strongest weapon combination and start dealing damage. Testing the fight with Sword and Spear together works well at this stage, rotating between the two to keep pressure up.
What are The Rathomobile's attack patterns?
Knowing what is coming makes the fight significantly easier. Here is a breakdown of every attack The Rathomobile uses:
The spiral charge is the one that catches most players off guard. The Rathomobile drives to the edge of the room and then spirals inward toward the center, leaving bombs along its path. Avoid both the vehicle itself and the dropped bombs. When it reaches the center, it pauses briefly, giving you a free damage window. Get in a few hits, then back off before it resumes movement and transitions into the charge attack.
How does Ignite interact with the barrier?
Here is something worth knowing: Faie's Ignite bypasses the red barrier entirely. Even when The Rathomobile re-activates its defense, Ignite continues dealing its periodic damage ticks. This means you are never completely locked out of dealing damage, even if you are scrambling to collect bombs.
Depending on how quickly you deal damage, the barrier may come back once or twice during the fight. The second time follows the same process: collect two bombs, break the barrier, reapply Ignite, and keep attacking. In the later phase of the fight, missiles appear more frequently, but the barrier should not return more than twice if you are dealing damage efficiently.
Two bombs break the barrier
Why this fight matters beyond the reward
The Heavy Hammer weapon type is the direct reward for clearing this boss, and it opens up new build options going forward. Beyond the loot, the fight is a deliberate introduction to bosses that require specific mechanics rather than brute force. Later encounters in the game build on exactly this concept, so players who internalize the bomb-barrier loop here will find those future fights much less disorienting.
For more help across the game, the full strategy guides collection covers other bosses, weapon unlocks, and progression tips. If you are exploring other action adventure games alongside this one, the same patience-and-pattern approach applies to most boss encounters in the genre.