
Necromancy اب Hytale میں Rekindle Embers Grimoire کے ساتھ آ چکی ہے، جو آپ کو اپنی skeletal army کھڑی کرنے کی طاقت دیتی ہے۔ یہ نایاب magic item آپ کے combat encounters کو بدل دیتا ہے کیونکہ یہ آپ کو پانچ undead minions تک summon کرنے کی اجازت دیتا ہے جو آپ کے ساتھ لڑیں گے۔ اگرچہ یہ وہ مکمل magic system نہیں ہے جس کا کھلاڑی انتظار کر رہے ہیں، لیکن یہ Hytale کے spellcasting مستقبل کی ایک دلچسپ جھلک ہے اور Zone 4 کی exploration کے لیے ایک طاقتور ٹول ہے۔
بات یہ ہے: یہ grimoire روایتی mana-based magic سے بالکل مختلف کام کرتا ہے۔ resource pool کو drain کرنے کے بجائے، یہ ایک Life-Drain mechanic استعمال کرتا ہے جس میں ہر cast پر health خرچ ہوتی ہے۔ آپ کو aggressive summoning اور survival کے درمیان توازن رکھنا ہوگا، جس سے necromancy ایک high-risk, high-reward پلے اسٹائل بن جاتا ہے جو smart positioning اور tactical thinking کا صلہ دیتا ہے۔
Rekindle Embers Grimoire کہاں تلاش کریں
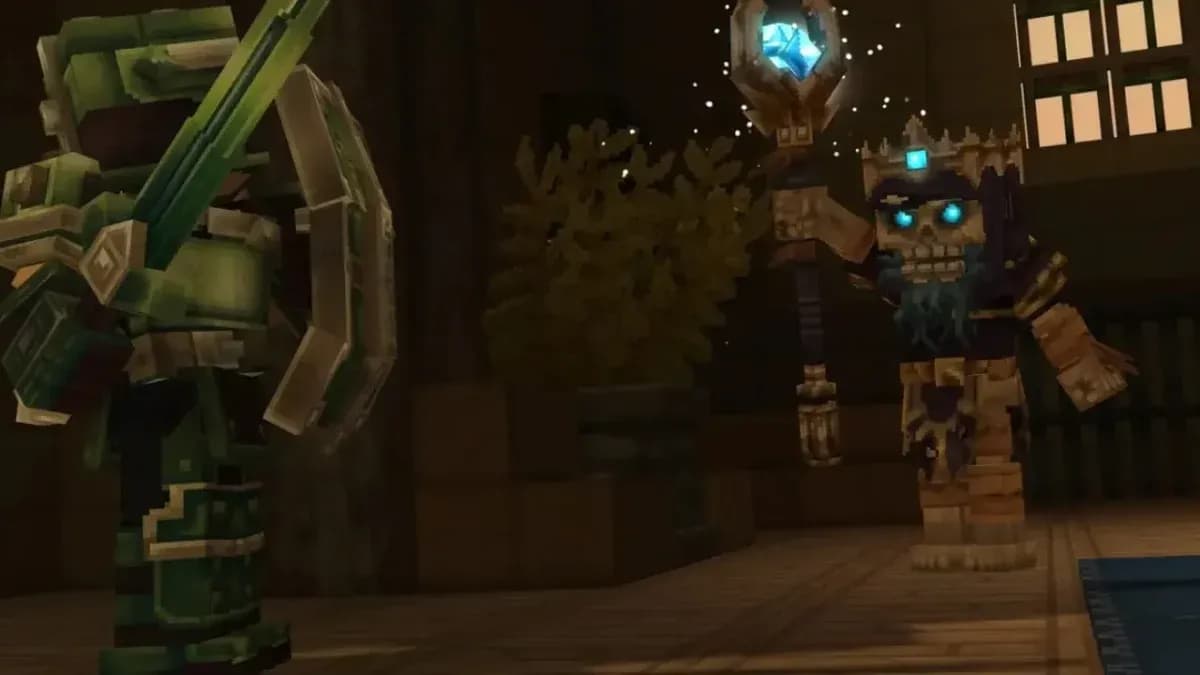
Rekindle Embers Grimoire خصوصی طور پر Zone 4 میں Burnt Skeleton Praetorians سے drop ہوتا ہے۔ یہ elite enemies Devastated Lands کے charred ruins اور volcanic chambers کی حفاظت کرتے ہیں، اور یہ عام skeleton variants سے کافی زیادہ سخت جان ہوتے ہیں۔
زیادہ تر کھلاڑی جو چیز مس کر دیتے ہیں وہ یہ ہے کہ drop rate تقریباً 2.5% ہے، جس کا مطلب ہے کہ اپنا grimoire حاصل کرنے سے پہلے آپ کو غالباً کئی بار kills کرنی پڑیں گی۔ Praetorians تصادفی طور پر spawn نہیں ہوتے—آپ انہیں مخصوص dungeon chambers میں پائیں گے جن پر scorched stone archways اور glowing ember particles کے نشانات ہوتے ہیں۔
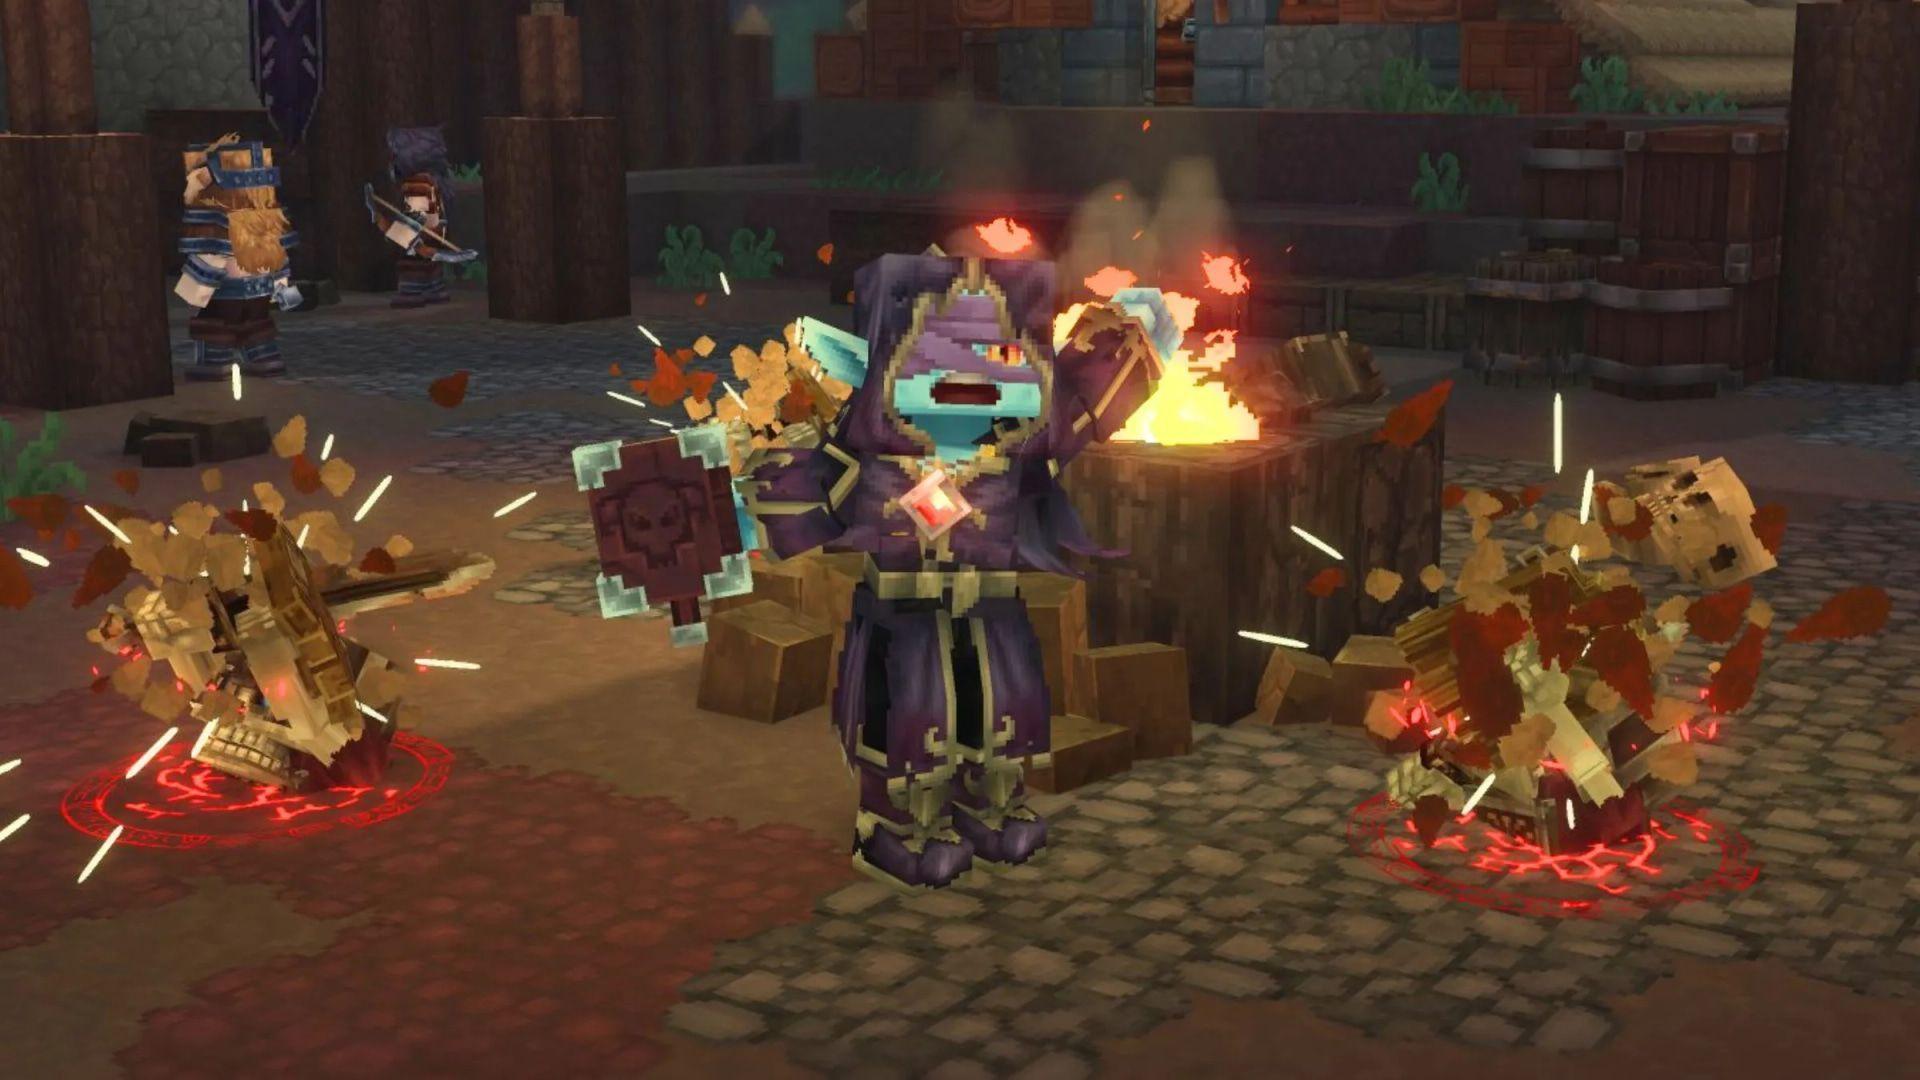
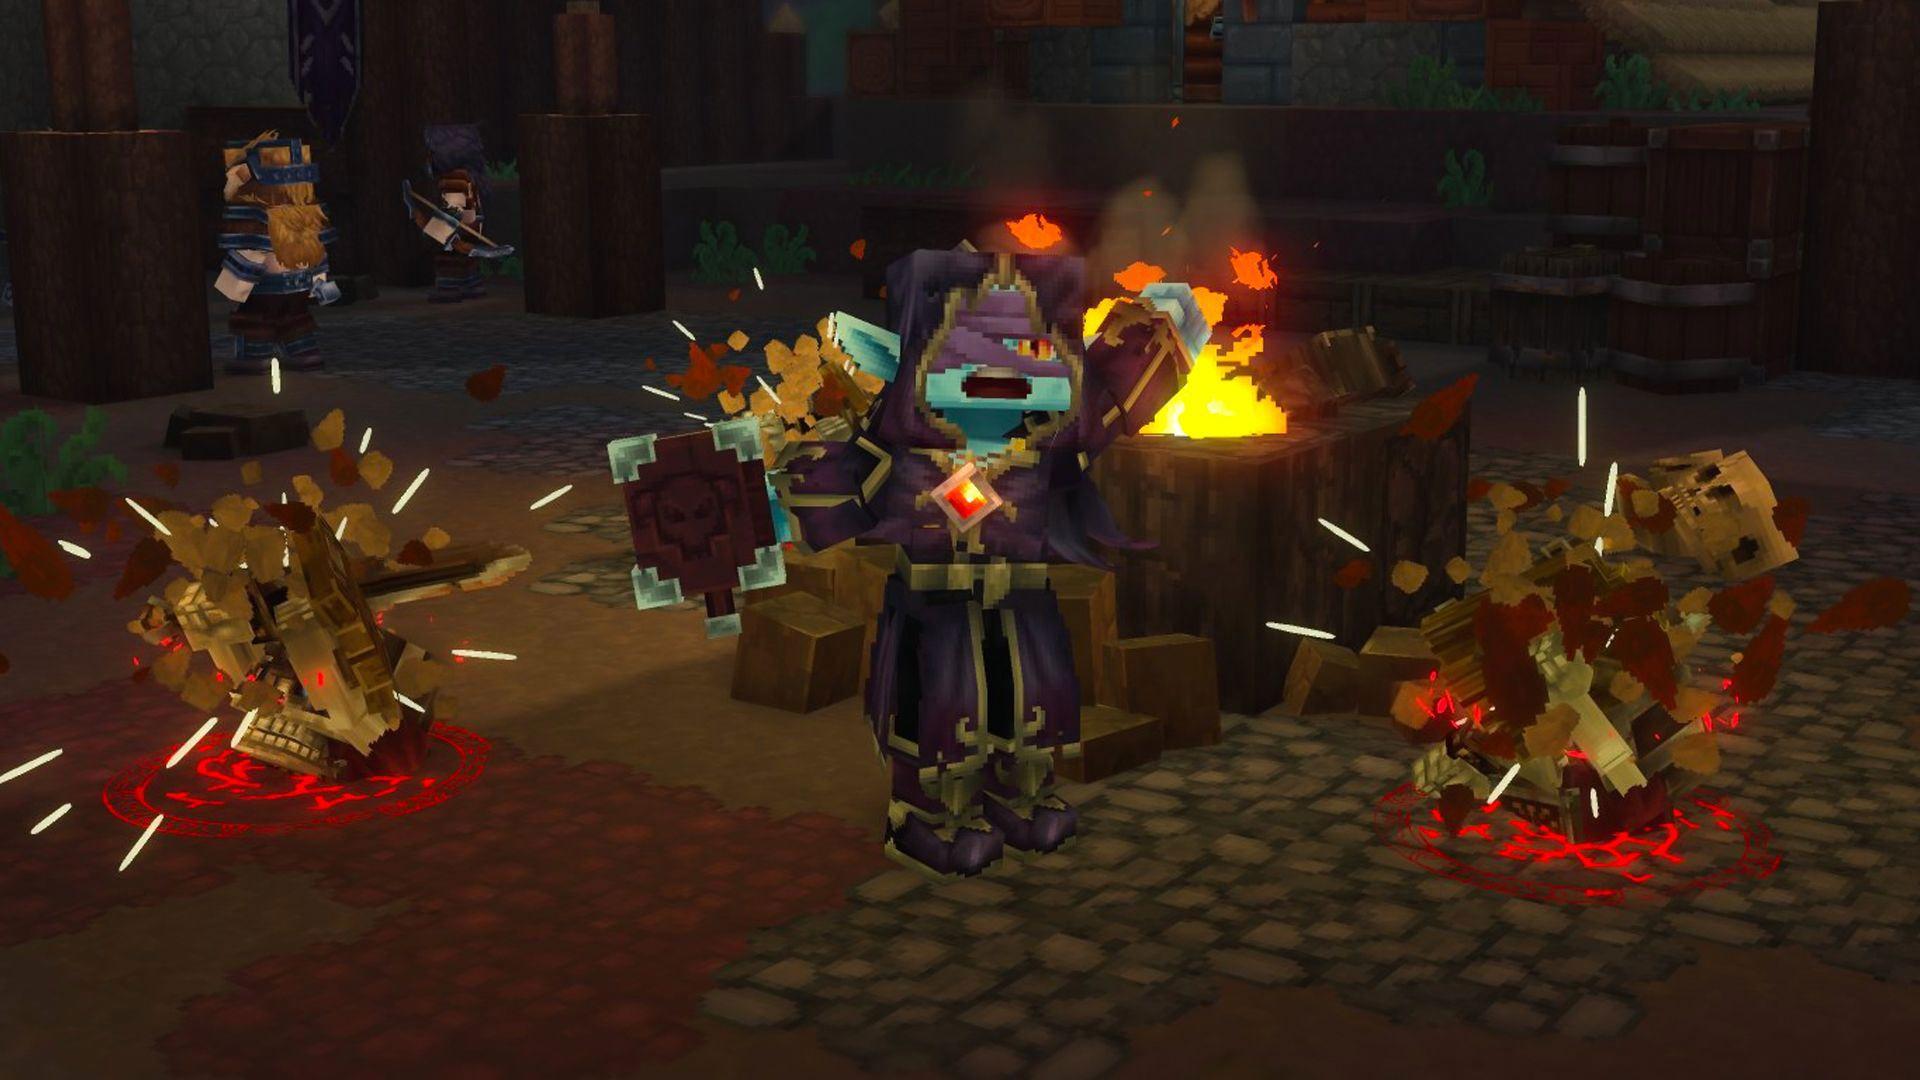
Skeleton Praetorian combat encounter
Pro tip: پہلے ارد گرد کی skeleton waves کو صاف کریں۔ Praetorians عام طور پر تب spawn ہوتے ہیں جب آپ ان کے چیمبر میں 15-20 عام enemies کو شکست دے چکے ہوں، اس لیے سیدھا boss room کی طرف بھاگنے سے spawn ٹرگر نہیں ہوگا۔ آپ کو elite enemy کے ظاہر ہونے کو یقینی بنانے کے لیے ہر علاقے کو طریقہ کار کے ساتھ صاف کرنا ہوگا۔
Necromancy Summoning کیسے کام کرتی ہے
Rekindle Embers Grimoire ایک infinite spell source کے بجائے ایک limited-use summoning tool کے طور پر کام کرتا ہے۔ ہر grimoire میں صفحات کی ایک محدود تعداد ہوتی ہے، اور ہر summoning آپ کی کتاب سے ایک صفحہ استعمال کرتی ہے۔ آپ بیک وقت پانچ skeletal minions تک کھڑے کر سکتے ہیں، لیکن آپ کو طویل dungeon runs کے دوران اپنے صفحے کی تعداد کو احتیاط سے manage کرنا ہوگا۔
کامیاب summoning کے لیے آپ کو یہ چاہیے:
- Piles of Bones (قابلِ تنصیب فرنیچر آئٹم، نہ کہ loose Bone Fragments)
- کم از کم 20% health تاکہ casting کے اخراجات سے خود کو ختم ہونے سے بچایا جا سکے
- skeletons کے spawn ہونے کے لیے کھلی جگہ تاکہ وہ terrain میں نہ پھنسیں
- آپ کے primary hand slot میں active grimoire لیس ہو
Summoning کا عمل موجودہ build میں فی cast آپ کی 5% زیادہ سے زیادہ health استعمال کرتا ہے۔ اس Life-Drain mechanic کا مطلب ہے کہ آپ کم health پر summons کو spam نہیں کر سکتے—آپ کو healing items یا casts کے درمیان محتاط ٹائمنگ کی ضرورت ہوگی۔
Bone pile summoning setup
آپ کے skeletal minions 5 منٹ تک یا آپ کی موت تک برقرار رہتے ہیں، جو بھی پہلے ہو۔ وہ بنیادی combat AI کی پیروی کریں گے، رینج کے اندر hostile mobs پر حملہ کریں گے اور آپ کی پوزیشن کے قریب رہنے کی کوشش کریں گے۔ یہاں کلیدی بات ان کی حدود کو سمجھنا ہے: یہ indestructible tanks نہیں ہیں۔
Skeleton Minion کا رویہ اور Stats
ہر summoned skeleton اس لاش کی قسم کی بنیاد پر stats حاصل کرتا ہے جسے آپ استعمال کرتے ہیں۔ Trork corpses عام skeleton remains کے مقابلے میں نمایاں طور پر مضبوط minions پیدا کرتے ہیں، جن میں زیادہ health pools اور damage output برقرار رہتا ہے۔ یہ لاش کے انتخاب کو dungeon exploration کے دوران ایک tactical فیصلہ بناتا ہے۔
آپ کے minions Zone 1 اور Zone 3 میں 200% سورج کی روشنی سے زیادہ damage لیتے ہیں، جس سے grimoire دن کے وقت surface exploration کے لیے تقریباً بیکار ہو جاتا ہے۔ اپنی necromancy کی سرگرمیوں کو رات کے وقت یا زیر زمین ماحول کے لیے پلان کریں جہاں آپ کی فوج فوری طور پر جل نہ جائے۔
اپنی Necromancy Build کو بہتر بنانا
Rekindle Embers Grimoire خصوصی طور پر Spirit attribute کے ساتھ scale کرتا ہے، نہ کہ Strength یا Intelligence کے ساتھ۔ بہت سے کھلاڑی melee-hybrid builds بنانے کی کوشش میں stat points ضائع کر دیتے ہیں، صرف یہ دریافت کرنے کے لیے کہ ان کے summons کم سے کم damage دیتے ہیں کیونکہ انہوں نے Spirit investment کو نظر انداز کیا۔
بہترین کارکردگی کے لیے، آپ کو یہ کرنا چاہیے:
- Spirit allocation کو ترجیح دیں (نمایاں damage scaling کے لیے کم از کم 15 پوائنٹس)
- Scholar-tagged لباس پہنیں تاکہ health کے اخراجات کو تقریباً 15% تک کم کیا جا سکے
- اپنے off-hand میں ایک ڈھال (shield) رکھیں defensive casting کے لیے (grimoire کو دونوں ہاتھوں کے آزاد ہونے کی ضرورت نہیں ہے)
- Healing items ساتھ رکھیں تاکہ boss fights کے دوران Life-Drain mechanics کو پورا کیا جا سکے
میرے لیے جو چیز سب سے بہتر کام کر گئی وہ یہ تھی کہ grimoire کو ایک Shortsword کے ساتھ جوڑا جائے تاکہ casts کے درمیان فوری recovery frames مل سکیں۔ آپ اپنی skeleton squad کو summon کر سکتے ہیں، براہ راست combat کے لیے melee پر سوئچ کر سکتے ہیں، پھر ضرورت کے مطابق اپنی پوزیشن تبدیل کر کے اپنے minions کو ریفریش کر سکتے ہیں۔
"Bone Shield" کی صلاحیت کو درحقیقت ایک آزاد ہاتھ کی ضرورت نہیں ہوتی، باوجود اس کے کہ UI کیا تجویز کرتا ہے۔ آپ grimoire پکڑے ہوئے بھی defensive spells cast کر سکتے ہیں، جس سے آپ کو chaotic encounters کے دوران زیادہ لچک ملتی ہے۔
جدید Necromancy حکمت عملی
یہاں ایک ایسی حکمت عملی ہے جسے زیادہ تر کھلاڑی نظر انداز کر دیتے ہیں: dungeons میں داخل ہونے سے پہلے passive جنگلی حیات پر حملہ کر کے اپنی soul energy کو پہلے سے چارج کریں۔ grimoire کے Life-Drain mechanic کو محتاط تیاری کے ذریعے "health buffer" بنا کر جزوی طور پر پورا کیا جا سکتا ہے۔
آپ بڑے encounters سے پہلے Piles of Bones کو حکمت عملی کے ساتھ رکھنا چاہیں گے۔ انہیں chokepoints کے قریب یا کور کے پیچھے رکھیں تاکہ آپ کے summoned skeletons فائدہ مند پوزیشنوں پر spawn ہوں۔ یہ combat کے دوران summon کرنے اور اپنے minions کو براہ راست دشمن کے AoE حملوں میں spawn ہوتے دیکھنے سے بہتر ہے۔
خاص طور پر boss encounters کے لیے:
- لڑائی میں شامل ہونے سے پہلے اپنے پانچ skeletons کی پوری squad کو summon کریں
- گرے ہوئے minions کو دوبارہ پوزیشن میں لانے اور دوبارہ summon کرنے کے لیے boss کے aggro سوئچز کا استعمال کریں
- فوری health recovery کے لیے hotbar slots پر healing items رکھیں
- دستیاب ہونے پر Trork corpses کو ٹارگٹ کریں تاکہ زیادہ پائیدار summons مل سکیں
Necromancy کی عام غلطیاں جن سے بچنا ہے
نئے necromancers کی سب سے بڑی غلطی 20% health سے نیچے cast کرنے کی کوشش کرنا ہے۔ اگر آپ اپنی health management کے ساتھ محتاط نہیں ہیں تو موجودہ build لفظی طور پر Life-Drain کے ذریعے آپ کو مار ڈالے گی۔ summon کرنے سے پہلے ہمیشہ اپنی HP بار چیک کریں۔
ایک اور عام غلطی: sunlight damage multiplier کو نظر انداز کرنا۔ دن کے وقت Zone 1 کی سطح پر exploration skeleton minions کے ساتھ عملی طور پر ناممکن ہے۔ وہ دشمنوں کے انہیں مارنے سے پہلے ہی جل جائیں گے، جس سے آپ کے grimoire کے صفحات ضائع ہوں گے اور کوئی combat value نہیں ملے گی۔
اپنے تمام stat points کو Strength میں مت ڈالیں یہ سوچ کر کہ آپ ایک hybrid melee-necromancer بنا سکتے ہیں۔ grimoire خصوصی طور پر Spirit کے ساتھ scale کرتا ہے، لہذا وہ Strength پوائنٹس آپ کے minion کی کارکردگی کو بالکل بہتر نہیں کریں گے۔ necromancy build کے ساتھ کمٹ کریں یا grimoire کو مکمل طور پر چھوڑ دیں۔
یہاں وہ چیزیں ہیں جن سے بچنا ہے:
- کم health پر cast کرنا (20% سے نیچے خود کو ختم کرنے کا خطرہ ہے)
- Zone 1/3 کے دن کے وقت summon کرنا (سورج کی روشنی minions کو تباہ کر دیتی ہے)
- Spirit کے بجائے Strength میں غلط stats مختص کرنا
- Piles of Bones کے بجائے Bone Fragments کا استعمال
- لاگت میں کمی کے لیے Scholar-tagged لباس کو نظر انداز کرنا
Hytale کے مستقبل کے جادوئی نظام کو سمجھنا
Rekindle Embers Grimoire Hytale کے حتمی جادوئی اوور ہال (magic overhaul) کا صرف ایک حصہ ہے۔ مکمل ریلیز ایک تین سطحی resource system متعارف کرائے گی: Mana (elemental staves کے لیے)، Favor (totems کے لیے)، اور Corruption (grimoires کے لیے)۔
فی الحال، elemental staves صرف cosmetic آئٹمز کے طور پر موجود ہیں—وہ early access build میں فعال combat ٹولز نہیں ہیں۔ ڈویلپمنٹ ٹیم grimoire system کا استعمال projectile physics اور minion AI pathing کو ٹیسٹ کرنے کے لیے کر رہی ہے اس سے پہلے کہ وہ ہائی ویلوسٹی elemental spells کو نافذ کرے جن کے لیے مختلف balancing کی ضرورت ہوگی۔
اس کا آپ کے لیے کیا مطلب ہے: necromancy grimoire کو حتمی جادوئی نظام کے بجائے ایک preview feature کے طور پر دیکھیں۔ یہ اب سے 1.0 ریلیز کے درمیان نمایاں طور پر تیار ہوگا، ممکنہ طور پر نئی صلاحیتیں، مختلف resource mechanics، اور وسیع تر summoning کے اختیارات حاصل کرے گا۔
منصوبہ بند Mana system خود بخود regenerate ہوگا اور Tier 3 Cobalt-infused armor سیٹس کے ساتھ scale کرے گا، جو group content میں پائیدار ranged DPS کرداروں کی اجازت دے گا۔ فی الحال، grimoire کے منفرد Life-Drain mechanic سے لطف اندوز ہوں جب تک یہ قائم ہے—یہ مستقبل کے اپ ڈیٹس میں ڈرامائی طور پر تبدیل ہو سکتا ہے۔
دیگر گائیڈز کے ساتھ Necromancy کا تال میل
Necromancy mechanics کو سمجھنا تب اور بھی قیمتی ہو جاتا ہے جب اسے دیگر Hytale سسٹمز کے ساتھ ملایا جائے۔ casting کے اخراجات کو کم کرنے کے لیے بہترین Scholar-tagged سیٹس کی شناخت کرنے کے لیے ہماری Hytale Armor Tier List دیکھیں، یا اپنے grimoire کے ساتھ جوڑنے کے لیے بہترین off-hand ہتھیاروں کے لیے Hytale Weapon Tier List کا جائزہ لیں۔
Zone 4 کی کارکردگی کو زیادہ سے زیادہ بڑھانے میں دلچسپی رکھنے والے کھلاڑیوں کے لیے، ہماری Hytale Mithril Ore Best Farming Locations گائیڈ ان علاقوں کا احاطہ کرتی ہے جہاں Burnt Skeleton Praetorians spawn ہوتے ہیں، جس سے آپ بیک وقت دونوں وسائل فارم کر سکتے ہیں۔
Rekindle Embers Grimoire Hytale کے combat کو سیدھے سادے melee encounters سے tactical summoning گیم پلے میں تبدیل کر دیتا ہے۔ Life-Drain mechanics میں مہارت حاصل کریں، Spirit attributes میں سرمایہ کاری کریں، اور آپ ایک ایسی skeletal army کی کمان سنبھالیں گے جو Zone 4 کے مشکل ترین چیلنجوں کو صاف کرنے کی صلاحیت رکھتی ہے۔ بس سورج کی روشنی سے دور رہنا یاد رکھیں۔