

Warframe's mod system is the single most impactful mechanic in the entire game. As the community puts it, mods account for roughly 99% of your power, meaning the difference between struggling at level 40 enemies and shredding Steel Path comes down almost entirely to how well you understand and apply this system. Whether you're an MR10 hitting a wall on later planets or a returning Tenno looking to sharpen your builds, this guide walks you through everything from the basics of installation to the meta mods that top players rely on.
What Exactly Are Warframe Mods?
Mods are collectible cards that slot into your equipment to boost stats and add new effects. Every moddable item in Warframe, from your Warframe itself to primary weapons, secondary weapons, melee, companions, and even Archwings, uses the same core modding framework. With over a thousand mods in the game, the depth here is real, but the underlying rules are consistent once you understand them.
Each mod has several key attributes:
- Rarity: Reflects the quality of the mod (Common, Uncommon, Rare, Legendary), though rarity does not always indicate how hard the mod is to find.
- Drain: The mod capacity cost when installed. Higher-ranked mods have higher Drain.
- Polarity: A symbol on the mod and certain slots. Matching a mod's polarity to its slot reduces Drain by 50%. Mismatching increases Drain by 25%.
- Item: Shows what type of gear the mod is compatible with (rifles, shotguns, pistols, melee, Warframes, etc.).
- Fusion rank: The current upgrade level of the mod, which increases its effectiveness and Drain.
- Upgrade: The actual stat bonus or effect the mod provides.

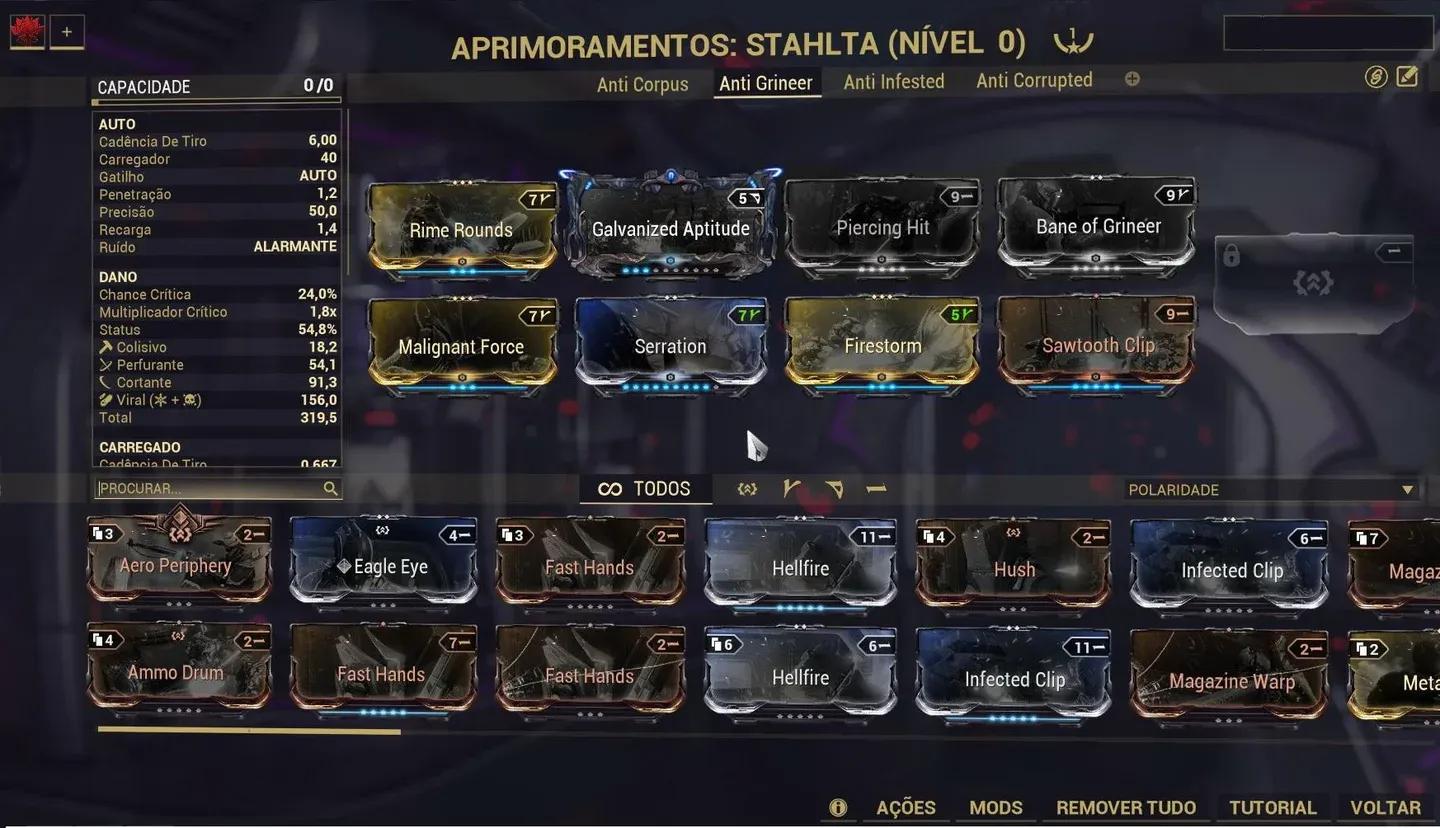
Arsenal mod installation screen
How Does Mod Installation Work?
To install mods, open your Arsenal in the Orbiter and select the item you want to upgrade, then click Upgrade. You'll see a grid of mod slots and your available mod collection at the bottom. Drag mods into slots manually, or use Auto Install if you're still learning the system.
Here's a breakdown of how many slots each type of equipment has:
Exilus slots house utility and movement mods. You can put Exilus mods in regular slots too, but unlocking the dedicated Exilus slot with an Exilus Adapter frees up a general slot for more impactful mods.
Aura slots are exclusive to Warframes and provide team-wide passive buffs. Critically, Aura mods also increase total mod capacity, so always have one installed. The same logic applies to Stance mods on melee weapons: a matching polarity Aura or Stance doubles your maximum mod capacity, while a mismatched polarity reduces it by 20%.
How Do You Increase Mod Capacity?
At maximum rank, most items have a base mod capacity of 30 (some reach 40). Two items can double this:
- Orokin Reactor: Doubles capacity for Warframes, companions, and other non-weapon gear. Can only be applied once per item.
- Orokin Catalyst: Doubles capacity for weapons. Also a one-time application.
Applying either of these is one of the highest-value investments you can make on a piece of gear you plan to use long-term.
What Is Polarity and Why Does It Matter?
Polarity is a symbol system that governs mod efficiency. There are eight polarity types in the game, including Madurai, Vazarin, Zenurik, Unairu, Penjaga, Umbra, and a universal Any polarity. You don't need to memorize them all; just focus on matching symbols visually.
When a mod shares the same polarity as its slot:
- Drain is reduced by 50%
When a mod's polarity doesn't match the slot's polarity:
- Drain is increased by 25%
Since roughly 94% of mods have polarities, placing them in neutral (no-polarity) slots is always an option, but you lose the efficiency bonus.
Forma polarization slot menu
How Do You Add Polarity With Forma?
Forma is a rare resource that lets you add or change the polarity of any mod slot on an item. This is how experienced players squeeze maximum capacity out of their builds, fitting powerful high-Drain mods into matching slots for a 50% cost reduction.
A few important rules when using Forma:
- The item must be at maximum rank before you can apply Forma.
- Applying Forma resets the item's rank to 0. You must level it up again, but subsequent max-rank completions do not grant Mastery Points.
- There is no cap on how many times you can Forma a single item.
How Do You Level Up Mods With Fusion?
Mods don't gain experience automatically. You upgrade them through Fusion, which costs Endo (a dedicated mod-upgrade resource) and Credits. The cost scales with both the rank you're targeting and the rarity of the mod. Upgrading a Legendary-rarity mod costs approximately 300% more Endo than upgrading a Common mod of the same rank.
To fuse a mod:
- Go to the Mods Console in your Orbiter.
- Select the mod you want to upgrade.
- Choose Fusion and select the target rank.
- Confirm and pay the Endo and Credit cost.
You can jump from rank 0 to max rank in a single Fusion session as long as you have the resources. The preview screen shows you exactly what improves at each rank before you commit.
What do you do with duplicate mods? You have three options:
- Sell duplicates for Credits.
- Dissolve them into Endo for Fusion fuel.
- Transmute any four different unranked mods (excluding Legendary and Set mods) into a new random mod, at a Credit cost ranging from 0 to 84,000 Credits.
What Are the Best Mods for Each Equipment Type?
Here are the community-tested meta mods organized by gear category. These form the backbone of most viable builds and are a great starting point before you experiment with more specialized setups.
Warframe Mods
Your Warframe's four core stats to mod around are Ability Strength, Ability Efficiency, Ability Range, and Ability Duration. For most frames, prioritize Strength and Efficiency first.
- Vitality: Boosts Health for survivability.
- Steel Fiber: Increases Armor to reduce incoming damage.
- Intensify: Raises Ability Strength for more potent abilities.
- Streamline: Reduces Ability Energy cost for more frequent casting.
- Stretch: Expands Ability Range.
- Continuity: Extends Ability Duration.
- Redirection: Strengthens Shields.
Primary Weapon Mods
- Serration: Core damage multiplier for rifles, bows, and snipers.
- Split Chamber: Adds Multishot for rifles, bows, and snipers.
- Point Strike: Raises Critical Chance for rifles, bows, and snipers.
- Vital Sense: Boosts Critical Multiplier for rifles, bows, and snipers.
- Point Blank: Core damage for shotguns.
- Hell's Chamber: Multishot for shotguns.
- Blunderbuss: Critical Chance for shotguns.
- Ravage: Critical Multiplier for shotguns.
Secondary Weapon Mods
- Hornet Strike: Core damage multiplier for pistols.
- Barrel Diffusion: Multishot for pistols.
- Lethal Torrent: Fire Rate and Multishot for pistols.
- Pistol Gambit: Critical Chance for pistols.
- Target Cracker: Critical Multiplier for pistols.
Melee Weapon Mods
- Pressure Point: Core damage multiplier for melee.
- Reach: Extends melee attack range.
- Fury: Increases melee attack speed.
- True Steel: Raises Critical Chance for melee.
- Organ Shatter: Boosts Critical Multiplier for melee.
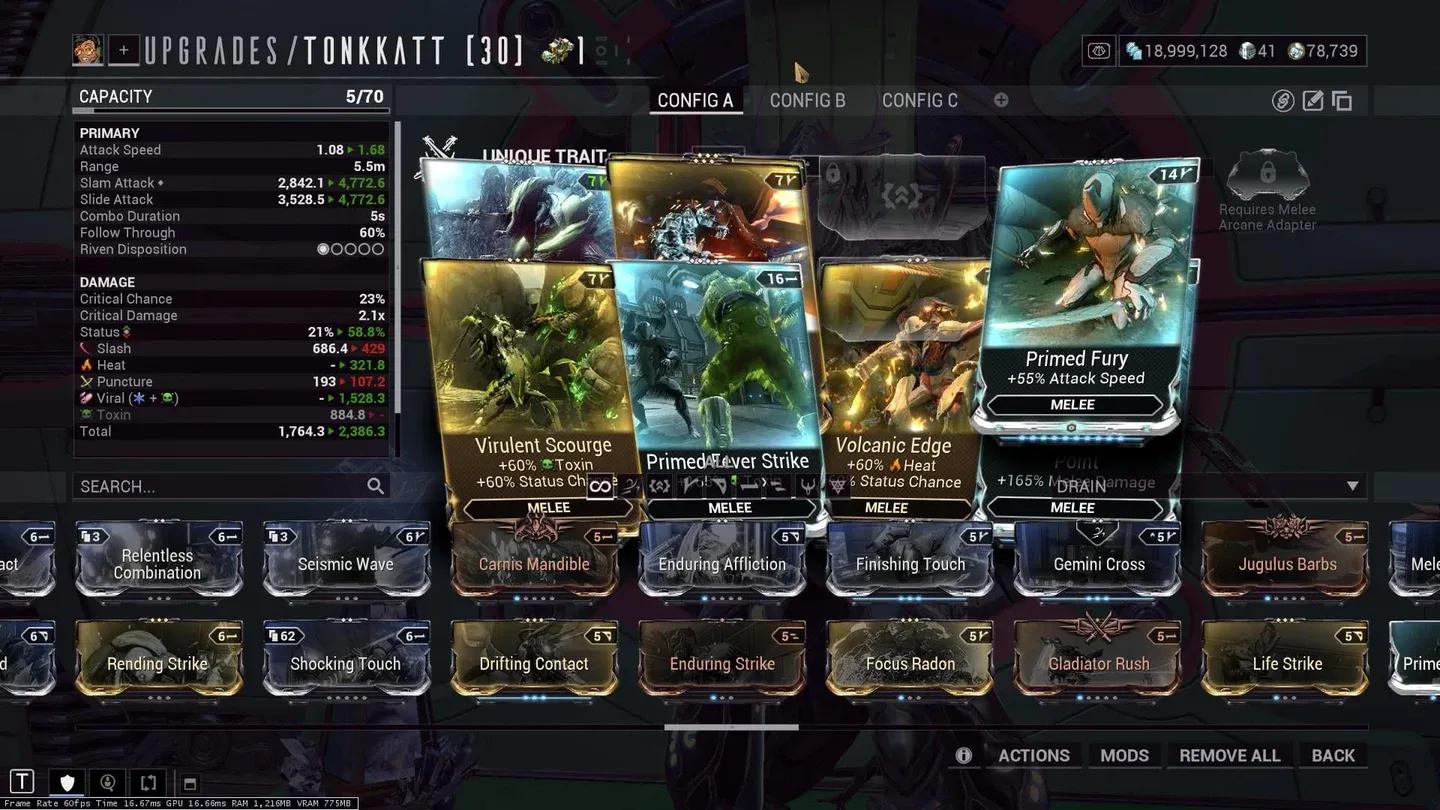
Melee weapon mod setup
Companion Mods
- Enhanced Vitality: Increases companion Health.
- Vacuum / Fetch: Pulls in resources and mods automatically.
- Animal Instinct: Reveals enemy and resource locations on the minimap.
- Medi-Ray: Enables health regeneration for you.
- Regen: Allows companions to revive themselves after going down.
- Link Armor / Health / Shields: Scales companion stats based on your Warframe's stats.
How Do You Mod for Endgame Damage?
Once your foundational mods are ranked up, the next step is building for specific enemy types. What most players miss at mid-game is that adding elemental damage combinations is often more impactful than simply stacking more base damage.
The three most effective elemental combos for general use are:
- Corrosive (Electricity + Toxin): Strips armor from Grineer and Corrupted enemies. Excellent on low-status-chance weapons.
- Viral (Toxin + Cold): Halves enemy Health, amplifying all other damage. Pairs best with high-status-chance weapons.
- Heat (standalone): Applies a damage-over-time effect and strips armor when stacked. Works well alongside both Corrosive and Viral setups.
For armored targets and Steel Path, Corrosive + Heat is a reliable go-to. For high-status weapons against unarmored or Infested enemies, Viral + Heat maximizes kill speed.
Ideally, save multiple mod loadouts per weapon and swap them at mission start based on the faction you're fighting.
Elemental mod combo setup
How Do You Get Mods in Warframe?
Mods drop from a wide variety of sources. Here's where to focus your farming:
- Enemy drops: Most enemies have a ~3% chance to drop a mod on death. Each enemy has its own loot table, so research the specific enemy that drops the mod you need.
- Mission rewards: Endless missions like Survival and Defense offer rotation rewards that can include mods.
- Alerts and Events: Some have predetermined mod rewards visible on the Star Chart.
- Orokin Vaults: Always contain one Corrupted mod when opened.
- Isolation Vaults: Always reward Necramech mods.
- Void/Orokin tilesets: Special canisters in these tilesets drop mods at high rates.
- Baro Ki'Teer: Sells Primed mods and Auras on a rotating inventory. Check his stock every time he visits.
- Player trading: If you have Platinum, buying mods directly from other players is the fastest way to get specific high-value mods.
- Daily login rewards: Small but consistent chance to receive a mod.
Riven Mods: How Does Cycling Work?
Riven Mods are powerful mods with randomized stats specific to a single weapon. You can obtain them by completing The War Within quest, finishing daily Sorties, or trading with other players. When a Riven's stats aren't ideal, you can reroll them using Kuva, which is best farmed in Requiem Kuva Survival and Kuva Flood missions on the Kuva Fortress.
The Kuva cost per reroll increases with each attempt:
After each reroll, you choose to accept the new stats or keep your current ones. Riven Mods are an endgame investment, so don't prioritize them until your foundational mods are fully ranked up.
Warframe-Specific Modding: What Stats Should You Prioritize?
Beyond the universal mods listed above, each Warframe has unique stats that reward specific mod choices. Understanding the two main stat categories helps you make smarter decisions:
Ability Stats (affect your powers directly):
- Ability Strength determines damage, buff potency, and debuff effectiveness.
- Ability Efficiency reduces Energy cost per cast. Capped at 175%.
- Ability Range governs AoE radius, projectile range, and cone angles.
- Ability Duration controls how long effects last and affects Energy drain on channeled abilities.
Passive Stats (affect your frame's survivability and movement):
- Armor reduces damage taken to Health.
- Health is your total HP pool.
- Shields absorb damage before Health takes a hit.
- Energy determines your casting pool.
- Sprint Speed governs movement.
For most Warframes, Ability Strength and Efficiency are the highest-priority stats to mod for. Efficiency also has an important interaction with channeled abilities: higher Efficiency reduces the Energy drain rate per second, while higher Duration reduces how often the drain ticks. Aim for 100% Duration alongside your Efficiency investment to hit the effective 75% Energy cost reduction on channeled skills.
Weapons: What Stats Actually Drive Damage Output?
For ranged weapons, the stats that drive the most damage per second are:
- Critical Chance and Critical Multiplier: High-crit builds multiply damage significantly. Stack both for best results.
- Multishot: Fires additional projectiles per shot without changing ammo consumption. One of the most efficient DPS multipliers in the game.
- Status Chance: Determines how often elemental effects proc. High-status builds pair best with Viral or Heat.
- Fire Rate: Increases sustained damage output. Prioritize this after crit and status foundations are set.
For melee weapons, the priority shifts slightly:
- Attack Speed drives DPS by increasing how many hits land per second.
- Critical Chance and Multiplier remain core for high-damage builds.
- Combo Duration extends how long your built-up combo counter stays active, which matters for builds that scale with the combo counter.
- Heavy Attacks consume the entire combo counter and deal damage multiplied by that counter, which reaches a maximum of x12 after 240 melee hits. Certain mods scale exclusively with Heavy Attacks and the combo counter.