

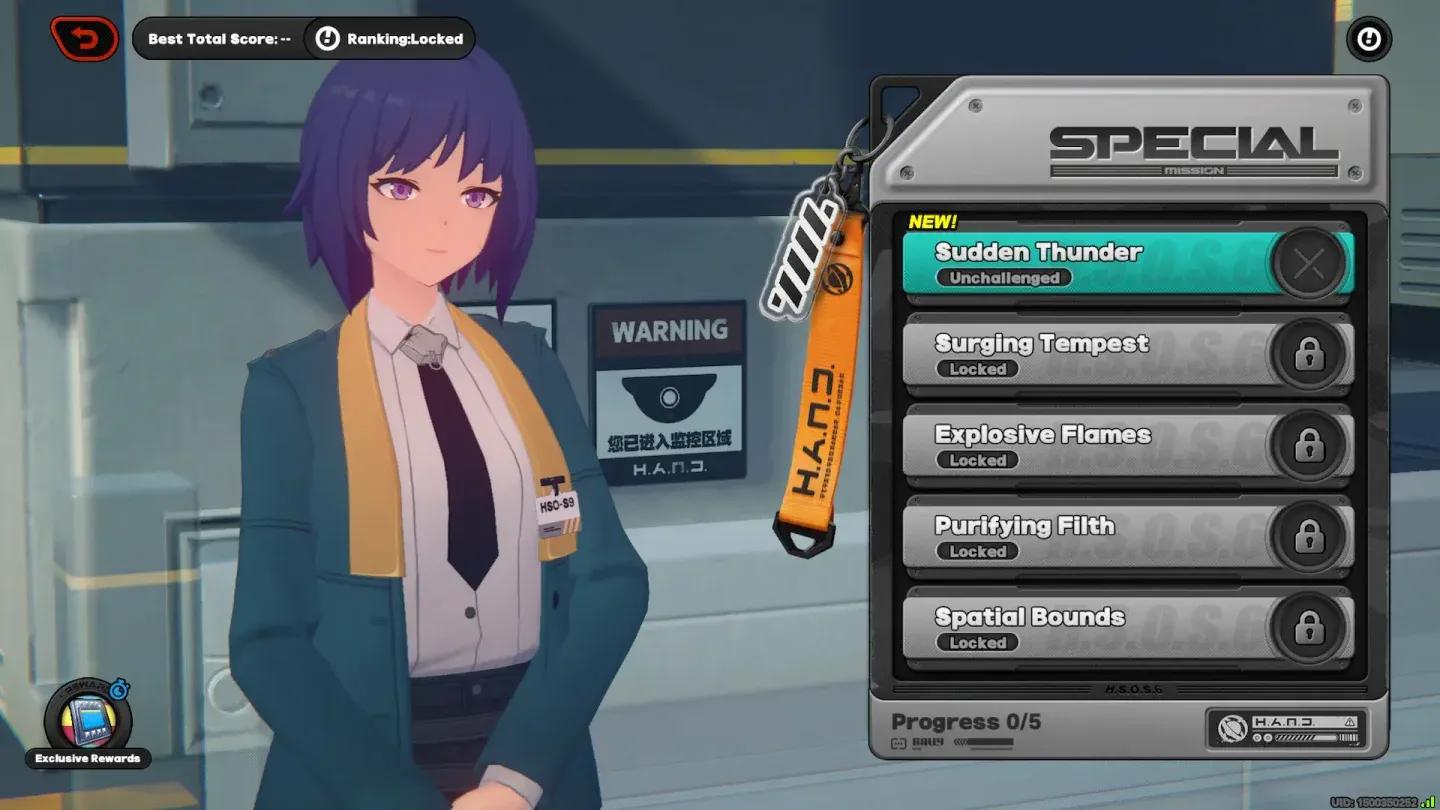
What is the Special Disaster Control Squad event in ZZZ?
The Special Disaster Control Squad is a Version 2.7 combat event in Zenless Zone Zero where you help Hoshimi Miyabi and the Hollow Special Operations deal with a sudden surge of Ethereals across multiple Hollows. The twist: you can't just bring your best six agents and steamroll everything. You split your roster into three two-person squads that fight in sequence, and each squad's performance feeds directly into the next team's power level through a Charge Bar mechanic. Getting the most out of this event means thinking about your entire roster, not just your strongest pair.
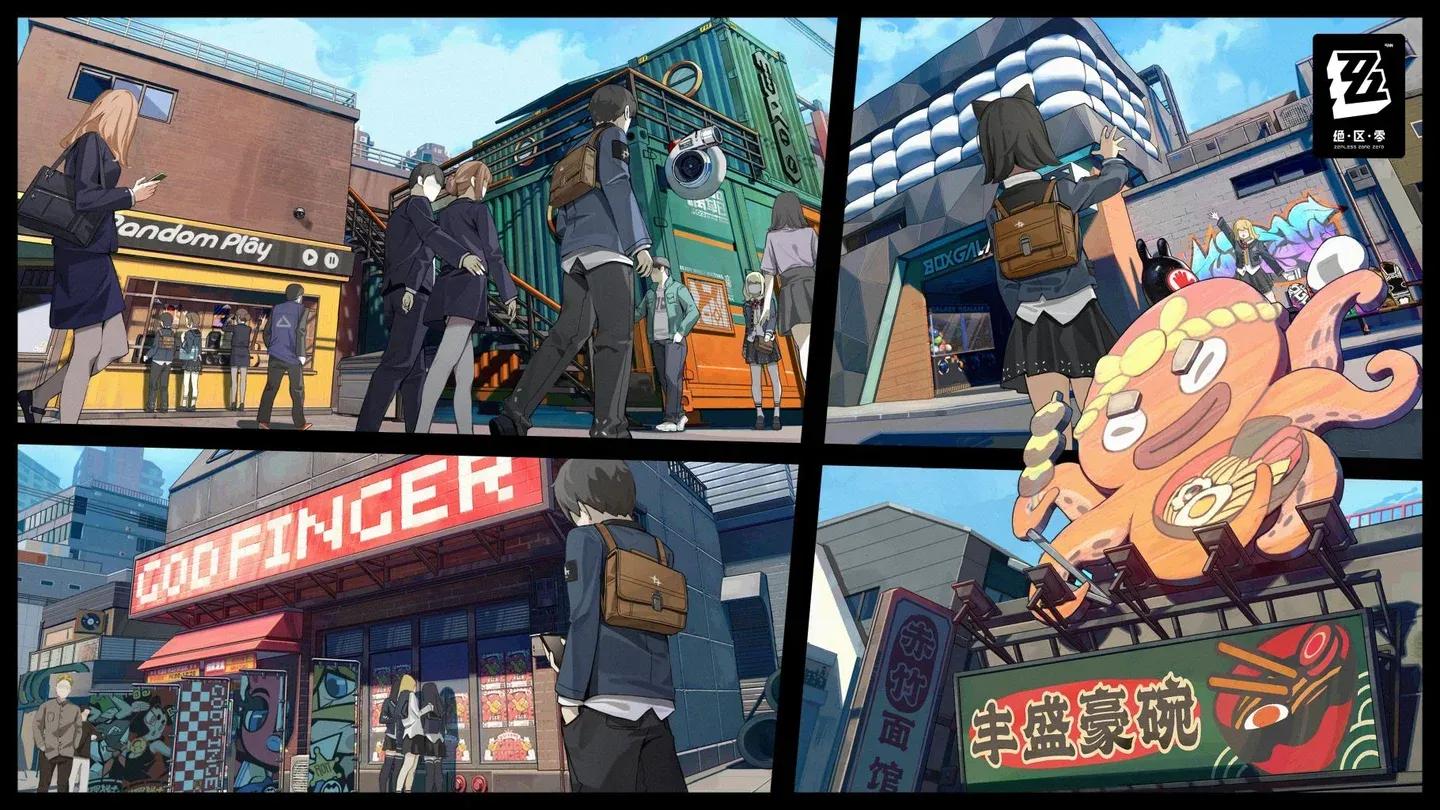
Find Miyabi on Sixth Street
Event schedule: when does each stage unlock?
The event runs from April 3 to April 20, 2026 (server time: 10:00 start, 03:59 end). A new themed stage unlocks each day for the first five days, so you can't rush through everything on day one.
All five stages remain accessible until the event closes on April 20, so missing a day doesn't lock you out permanently. That said, completing all five is required for the full reward pool, so don't leave it until the last day.
How to start the event
Head to Sixth Street and look for Hoshimi Miyabi near the Random Play video store. She's been trying to figure out how to handle a wave of Ethereal anomalies across several Hollows. After talking to her, follow her to HAND Headquarters and speak with the HSO staff member A-Xin, who will brief you on the full operation and unlock the event interface.
The story framing is straightforward: the Ethereals aren't individually dangerous, but there are a lot of them and a handful do pose real threats, which is why the HSO and Hollow Investigative Association are deploying multiple squads simultaneously.
A-Xin briefs you at HAND HQ
How does the relay battle system work?
This is where the event gets interesting. Each stage gives you up to 3 minutes of continuous combat. Enemies keep spawning throughout, and killing them builds your stage score. Your final rating depends on how high that score climbs.
Here's the mechanic that separates good runs from great ones: as you fight with each squad, you fill a Charge Bar. Once it's full, you swap to the next squad in your lineup. Each swap also upgrades the active stage buff, and upgraded stage buffs unlock new, more powerful mechanics. The implication is clear: you want to be filling that Charge Bar aggressively, not just surviving.
Before entering a stage, you can also assign additional individual buffs to each squad. The in-game tutorial confirms you can tap an auto-deploy option to get recommended squad members and buff setups if you want a starting point.
The key constraint: agents assigned to one squad cannot be reused in another. If you put Miyabi in Squad 1, she's unavailable for Squads 2 and 3. This is what makes team planning the real challenge here.
What should your squad setup look like?
The strongest approach is to put your most self-sufficient damage dealer in Squad 1, since you'll be building Charge there from scratch. Use Squads 2 and 3 to take advantage of the upgraded stage buffs. Support agents who enable specific damage types become more valuable when a stage buff rewards that damage type, so reading each stage's buff description before building your lineup is worth the 30 seconds it takes.
You can also adjust the point multiplier before entering, which increases enemy HP but improves scoring efficiency. Higher multipliers are the path to top ratings if your squads can handle the increased pressure.
What are all the event rewards?
Completing all five stages and their Challenge Missions gets you a solid haul of upgrade materials on top of the Polychrome.
Each of the five stages contributes 60 Polychrome, 12 Original Chips, 3 Senior Investigator Logs, 6 Bangboo System Widgets, and 20,000 Denny. The single Tuning Calibrator drops only when you clear all five stages, so partial completion won't get you that one.
Finishing the Spatial Bounds stage (Day 5) also unlocks the "Anti-Disaster Specialist" profile title.
Full event reward preview
What's the point multiplier and should you use it?
The multiplier option adjusts enemy HP and scoring efficiency simultaneously. A higher multiplier means tougher enemies but more points per kill. For players chasing top ratings, the math generally favors higher multipliers once your squads can reliably clear the stage. If you're just going for completion rewards, the default setting is fine. The rewards themselves are not gated behind rating tiers, so the multiplier choice is primarily about your score ranking.
For more ZZZ event guides and the latest on Version 2.7 content, browse more guides on GAMES.GG.