

The Slicer is the closest thing Deep Rock Galactic: Rogue Core has to a pure melee powerhouse. His plasma blade chews through swarms in a single wide arc, his dash repositions faster than any other Reclaimer, and his shield can hard-counter entire boss attack phases. Get the build right, and you will feel nearly unstoppable on the deeper floors. Get it wrong, and you will burn your cooldowns on fodder and die to the first elite that walks through your shield.
What does the Slicer actually do?
The Slicer runs three abilities that work together around a single theme: get in close, deal massive burst damage, and get out before the swarm retaliates.

Slicer Slice ability cooldown
Slice is the class ability. Pressing the ability button unsheathes the plasma blade, and a single horizontal swing deals 560 damage in a wide arc, cutting through armor and hitting multiple targets at once. The base cooldown sits at 20 seconds, so every upgrade or Bio-Booster that shaves time off that timer directly increases your damage output. Any terrain within 3 meters of the player gets converted to glass on use, which is worth keeping in mind in tight cave sections.
Blitz is the dash skill, and it is arguably more important than the blade itself. It performs a gravity-defying forward dash toward your cursor on a 4-second cooldown, meaning you can use it almost constantly. It works in any direction, including upward, so it doubles as a traversal tool for reaching elevated positions. It also cancels fall damage entirely regardless of drop height, which saves runs more often than you might expect.
Shield Belt deploys a directional shield that blocks all incoming ranged attacks for 15 seconds on a 90-second cooldown. The long cooldown makes it situational, but it is the right call against the Gotoorak Gatekeeper, Expenite events, and the Elevator events at the end of each floor.
What are the best weapons for Slicer?
The Slicer thrives at close range, so the weapon priority is straightforward: a fast primary that handles fodder, and a hard-hitting secondary for elites and bosses.
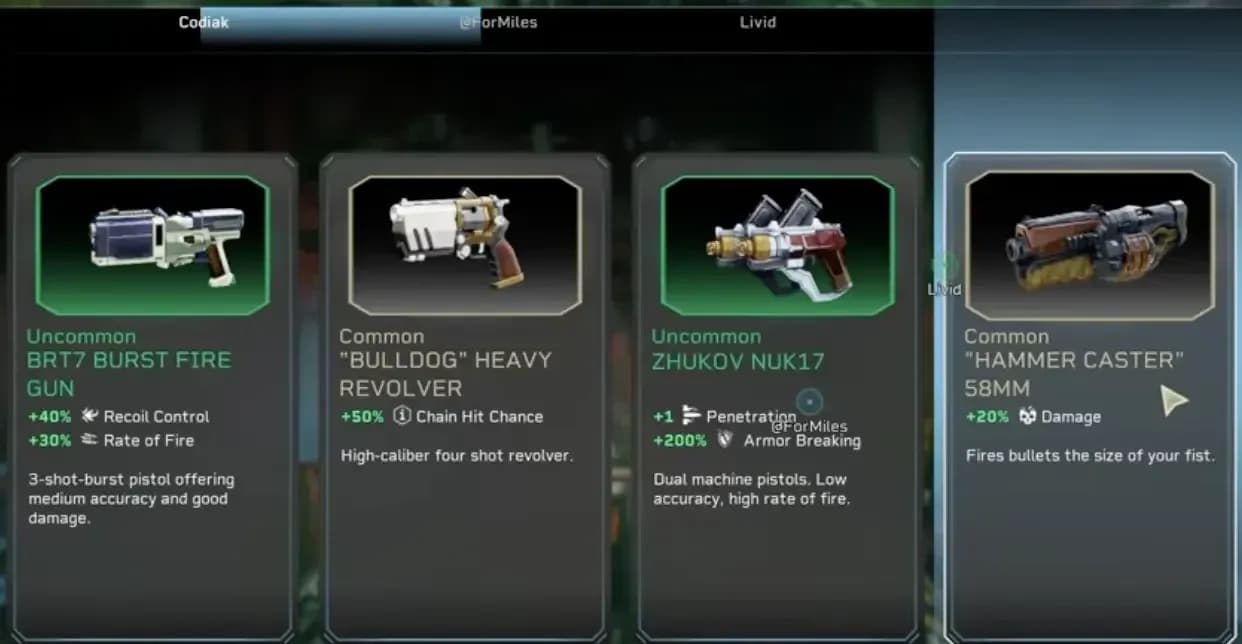
Zhukov NUK17 loadout pick
For equipment, skip traversal tools entirely. Blitz already handles mobility better than any gadget. Bring the flare gun instead so you are not manually throwing flares every ten seconds in dark cave sections.
What are the best Bio-Boosters for Slicer?
Slicer has two preset Bio-Booster decks: Footwork and Carnage. Once you have ascended any two Reclaimers, you can swap one of those decks out for another Reclaimer's deck.
Footwork focuses on positioning and survivability. Its boosters trigger on melee hits and reward staying in the thick of it with movement speed bursts and damage bonuses at close range.
Carnage is the kill-momentum deck. Every booster in it fires on kills, keeping your damage and cooldowns rolling as long as you are putting enemies down.
The four priority picks across both decks:
- Death Resonance (Carnage): Each kill refunds 10% of the Slice cooldown. With enough fodder kills, your blade is almost always available.
- Seeing Red (Carnage): Each kill grants +30% damage for 2 seconds. Stack kills and your pickaxe starts one-shotting Creepers.
- Close Quarter Combat (Footwork): +20% damage against any target within 2.5 meters. Since the Slicer is always in that range, this is a flat damage boost.
- Outmaneuver (Footwork): Dealing melee damage grants a burst of movement speed for 0.5 seconds. Also removes the movement penalty from using the pickaxe as a melee weapon.
For the full recommended Bio-Booster selection in a single run:
- Close Quarter Combat
- Death Resonance
- Seeing Red
- Outmaneuver
What Expenite upgrades should Slicer prioritize?
The Slicer's Expenite upgrade path splits into two goals: maximize blade uptime and maximize damage per swing. Both paths are worth pursuing, and the best runs combine them. For a full breakdown of every available option, check the complete Expenite upgrades guide.

Expenite upgrade selection screen
Blade uptime upgrades:
- Flux Conduit: Increases ability recharge rate, directly reducing Slice downtime.
- Cool Precision: Another ability recharge rate boost that stacks with Flux Conduit.
Damage amplification upgrades:
- Critical Shot: Increases critical hit chance on the blade's primary swing.
- Critical Hit Chance: Flat crit chance increase, useful across all attacks including the Slice.
- In the Zone: Boosts critical hit damage, turning crits from good to devastating on bosses.
Recommended full upgrade list:
- Backburner
- Cool Precision
- Boom! You're Dead!
- Defensive Fighting
- Immunity Buffer
- Critical Shot
- In the Zone
Critical hit upgrades become borderline mandatory on the boss floor. The Slicer's blade already hits hard, but landing a critical on a weakpoint during a Slice swing can chunk a boss's health bar in a way that no other Reclaimer can replicate.
What are the best Workbench ability upgrades for Slice?
The Workbench offers four upgrades specifically for the Slice ability:
Tempered Core and Eclipse System are the strongest picks here. Tempered Core's flat damage increase scales the blade's base 560 damage up to 700, and Eclipse System's Penetration property lets the arc hit through multiple targets simultaneously.
What Enhancements should you run?
Enhancements are the most stable part of the build since they are not subject to run RNG. Use the highest-level versions you have available.
- Health: Straightforward survivability increase.
- Nimble: Improves movement, which compounds with Blitz.
- Sweet Tooth: Increases healing from Red Sugar Chunks. Pairs well with any upgrade that increases Red Sugar drop rates.
- 2x Ammo Pouch: More ammo means fewer situations where you are stuck waiting on a Slice cooldown with nothing to shoot.
- Handle Grip: Increases pickaxe swing damage.
- Skull Crusher: Increases Power Attack damage with the pickaxe.
- Unstoppable: Lets you throw objects farther, useful for Toolboxes and Geodes.
How should you play Slicer in a team?
The Slicer's role in a squad is front-line disruption. Dash into a swarm, fire the Slice to clear fodder and strip armor from elites, then Blitz out before the counterattack lands. Your teammates clean up what survives.
Blitz should almost never sit on cooldown. Four seconds is fast enough that holding it in reserve costs more than it saves. Use it aggressively for repositioning, height gain, and fall damage cancellation, and only hold it if a boss phase is about to start and you need the mobility on demand.
Shield Belt is worth saving for predictable high-damage windows: the Gatekeeper's ranged phase, Scorcher Horde modifiers, and Elevator events where your whole team is standing still. Popping it early on regular enemies wastes 90 seconds of potential coverage.
For coordinating roles across your full squad, the Rogue Core team composition guide covers how Slicer fits alongside the other four Reclaimers.

Shield Belt blocking boss projectiles
Complete recommended build at a glance
Bio-Boosters:
- Close Quarter Combat
- Death Resonance
- Seeing Red
- Outmaneuver
Expenite Upgrades:
- Backburner
- Cool Precision
- Boom! You're Dead!
- Defensive Fighting
- Immunity Buffer
- Critical Shot
- In the Zone
Enhancements:
- Handle Grip
- Pommel Rebalancing
- Skull Crusher
- Battering Ram
- Armor Pack
Weapons:
- Primary: Zhukov NUK17 or Decker SMG
- Secondary: Bulldog, Silverback, or Hammer Caster
- Equipment: Flare Gun
For more on the systems that feed into this build, including how to get the most out of Bio-Booster interactions, the Bio-Booster hacking guide explains how to unlock class modifiers that can push the Slicer even further. For a full index of Rogue Core guides covering every Reclaimer and mechanic, visit the Deep Rock Galactic: Rogue Core guides hub.