

Episode 3 of Directive 8020 is where the game stops holding back. You get a brand-new playable character, a crash landing that can kill your captain, a QTE that determines whether Williams suffers brain damage, and a Mess Hall full of secrets that most players walk straight past. This guide covers every stealth route, every branching decision, and every collectible so nothing catches you off guard.
How to sneak past Williams to the Control Room
Episode 3 opens with Josef Cernan, a Science Crew member who needs to reach the Control Room without being spotted by a potentially infected LaMarcus Williams. Stay crouched using B on Xbox or O on PlayStation, and press X/Square at any time to scan and see Williams's outline through walls.
Cernan's stealth opening route
Head up the stairs and into the door on the right to reach a safe room. From here, check the CCTV screen on the right wall to get a read on the layout ahead and confirm where the Control Room door sits. When you leave, hide behind the pipes and wait for Williams to circle away before moving toward the back-right stairs.
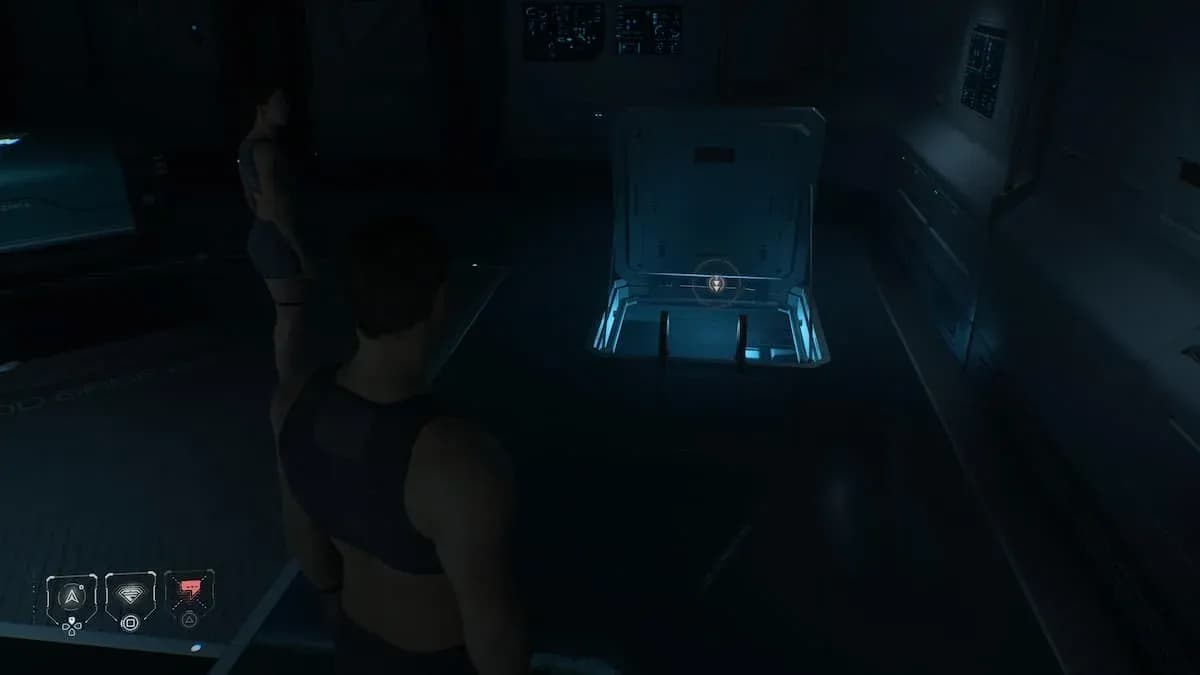
The Control Room door is locked when you arrive. Face away from it and look northwest to find an interactable panel. Use your Utility Strap to open the window shutter. Since the glass is already broken, vault through the opening.
How to restore power to the Control Room door
Once through the window, walk around the middle desk and vault through a second broken window. At the back right of this room, use the Utility Strap on the Lockdown control to restore power. Williams will immediately start forcing the door, so turn left and use the Utility Strap on the vent door to open it. Crawl through, vault back out the window on the other side, then sneak up to the Control Room.
Use the scan function frequently. Williams changes his patrol pattern after you restore power, so the route that worked earlier will get you caught if you repeat it.
The Stafford crash landing: how to keep him alive
After Cernan's fate is decided, the episode shifts to the Cassiopeia crew processing Carter's death. As Young, interact with Carter's body and follow the on-screen prompts to place him in the pod. Then examine all five highlighted points on his body: his leg, chest wound, face, wrist (missing comms unit), and chest (second missing comms piece).
A conversation between Stafford and Eisele follows. Choosing Speculate and then Concede triggers a Turning Point reaction from Eisele. The result depends on which trait you've built for her:
The crash landing scene is the most consequential moment in Episode 3. When Stafford offers to reboot the landing computer, three outcomes are possible:
- Reboot + Landing Computer was restored in Episode 2: Stafford goes to the controls. Complete the QTEs to get him back to his seat safely. Fail them and he dies.
- Sit down (or let the timer expire): No QTE required. Stafford stays buckled and survives without risk.
- Reboot + Landing Computer was NOT restored: The system is inoperable when Stafford arrives. He cannot get back to his seat in time and dies regardless of QTE performance.
If you are not confident the Landing Computer was kept active through Episode 2, choosing to sit down is the safe call. There is no achievement penalty for staying seated, and Stafford survives either way.
The Always Wear a Seatbelt achievement unlocks for keeping Stafford alive through this scene.
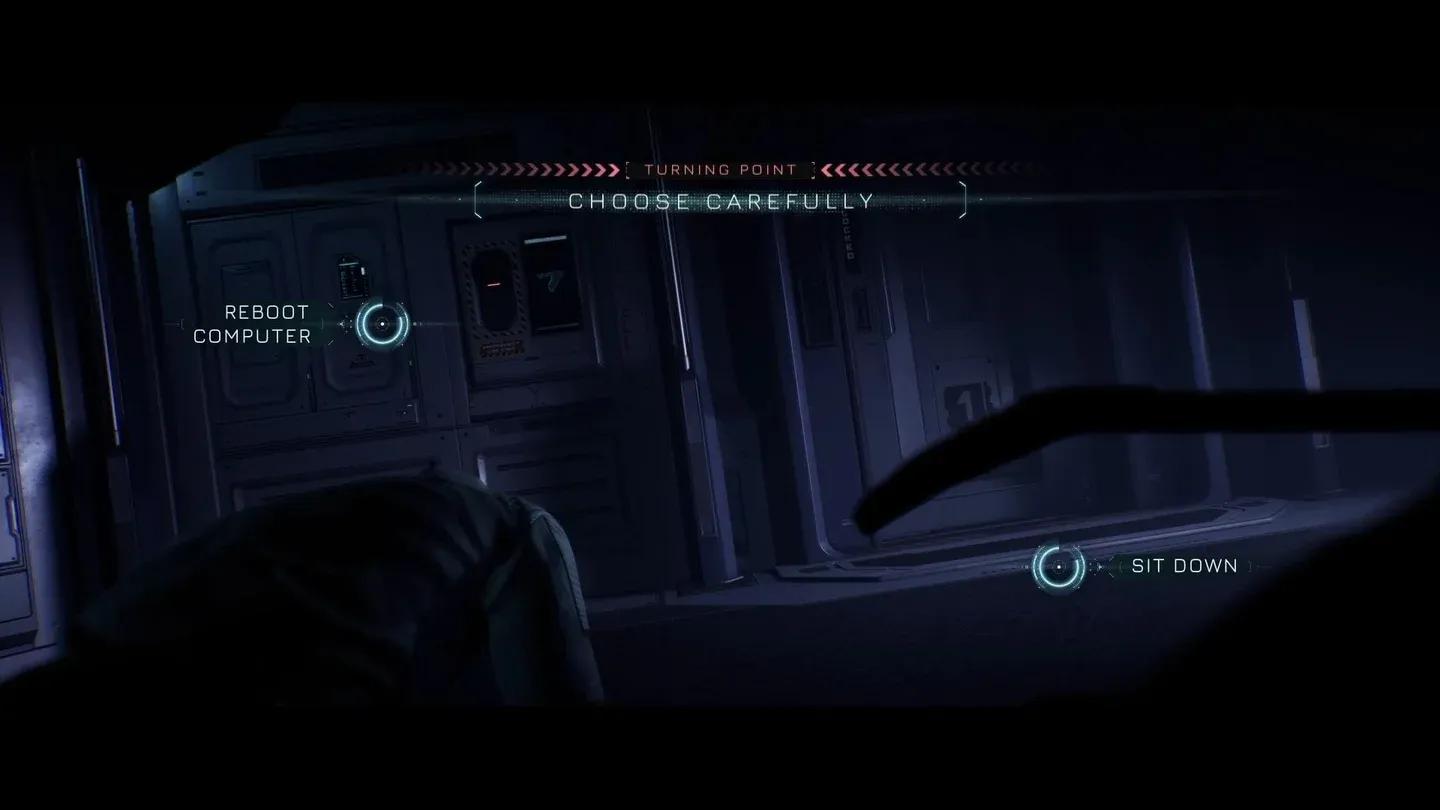
The reboot decision point
How to handle Williams's seizure (and why it matters)
After the crash, control switches to Cernan as he wakes Samantha Cooper in the Pod Room. Williams immediately has a seizure in his pod, and Cooper produces a stabilizer injection. You need to hold Williams down via a QTE (spam X/Square).
- Succeed: Cooper administers the injection. Williams gets a bloody nose as a minor side effect but avoids serious brain damage.
- Fail: Cooper cannot inject him in time, leading to potential brain damage and more severe side effects later in the game.
This outcome carries forward. When Eisele arrives in the Pod Room later in the episode, Williams experiences his side effects on the spot if the injection was successful, making the scene play out differently depending on what happened here.
Finding the Wedge tool and navigating the vents
To escape the locked pod area, head down the ladder into the lower pod storage. After climbing through the tunnels, check the right side of the walkway for a floating doll collectible under the claw arm (Dark Picture Doll 3/8). Use the Utility Strap on the Lockdown panel to the right of the walkway to unlock a vent, then crawl through.
Climb the ladder at the end of the tunnel and follow it to the Hub. The Tool Storage room is locked. Scan the floor to find the red power line, then use the Utility Strap on the panel it leads to. This unlocks the door.
Inside Tool Storage, immediately turn left to find a wall-mounted video screen with a Simms recording collectible (5/10). Then go to the right side of the room and pick up the Wedge tool. This tool opens any door with a yellow overdrive lock for the rest of the episode.
All secrets in the Mess Hall section
Once Cooper and Anders split off to search the Mess Hall, there are five collectibles to find before the episode ends. Most players miss at least two of them.
The closet in the Power Cell room requires a four-digit code. Find it by using the Wedge tool to open the sealed door to the right of the gym window, then enter the small room and squeeze through to reach the CCTV. The code is written on the door frame: 0-4-0-2. Go back and enter it to unlock the closet and claim the Nutrimito poster collectible (3/3).
The Power Cell can be removed from one receptor and reinserted into another. You need to shuttle the same battery between two doors to progress. Do not leave the Mess Hall area before doing this or you will have to backtrack.
How to find Carter's Utility Strap
Below the large Cassiopeia sign in the Mess Lobby, complete a QTE to move the rubble (spam X/Square), then squeeze through the gap. You will find Carter's Utility Strap. What appears on it depends on whether Carter managed to send a warning message at the end of Episode 1.
Finding the strap unlocks the Lost and Found achievement. If you skip this area entirely, neither branch of the associated Turning Point node unlocks.
What happens at the end of Episode 3?
After reuniting with the full crew, the group discovers a growth in the Sleep Techs' quarters. Williams argues for collecting a sample. As Cooper, you choose how to respond, which shapes her traits, but the outcome is fixed: the sample gets collected regardless of your dialogue pick. That moment closes Episode 3 and sets the stage for Episode 4.

The sample that ends Episode 3
For the rest of the crew's fates across the full game, the character destinies guide breaks down every trait, key episode, and decision for all five crew members. If you want to make sure everyone survives, the full survival guide covers every decision point across all 8 episodes. For secrets beyond Episode 3, check the complete secrets guide covering all 60 collectibles across every episode. More walkthroughs, puzzle solutions, and tips are collected in the Directive 8020 guides hub.