

EA Sports UFC 6 introduces Flow State as its biggest new gameplay mechanic, and it changes how every fight plays out at a fundamental level. Think of it less like popping an ultimate ability and more like a fighter finding their rhythm mid-fight. Each of the 30 perks has three distinct layers, every fighter gets a set built around their real tendencies, and knowing how to read yours before the first bell rings is the difference between using the system well and leaving serious momentum on the table. This guide covers all 30 perks, every trigger condition, and how to match your fighter's Flow setup to your actual game plan. If you enjoy sports games with deep mechanical systems, check out the sports games section for more.
How does Flow State work in EA Sports UFC 6?
Flow State operates on a three-layer structure. Every fighter in the roster gets a combination of five perks and one activated Flow State, all drawn from a pool of 30 and designed around that fighter's real tendencies.
- Base Effect is always active from the start of a fight. It quietly shapes how your fighter performs before any meter fills.
- Flow Boost is the specific in-fight action that charges your Flow Meter fastest. This is the layer most players ignore, and it's the one that matters most for building momentum efficiently.
- Activated Flow State is the payoff. Press down on the d-pad once the meter peaks, and your fighter enters a heightened state where the screen dims and your fighter stands out in colour while strikes leave light trails.
The activated state is genuinely powerful. One reviewer noted finishing a fight on their first attempt using the mechanic, and online play can devolve into both players racing to fill their meters. That's a fair criticism of the balance, but it also means understanding the system gives you a real edge.
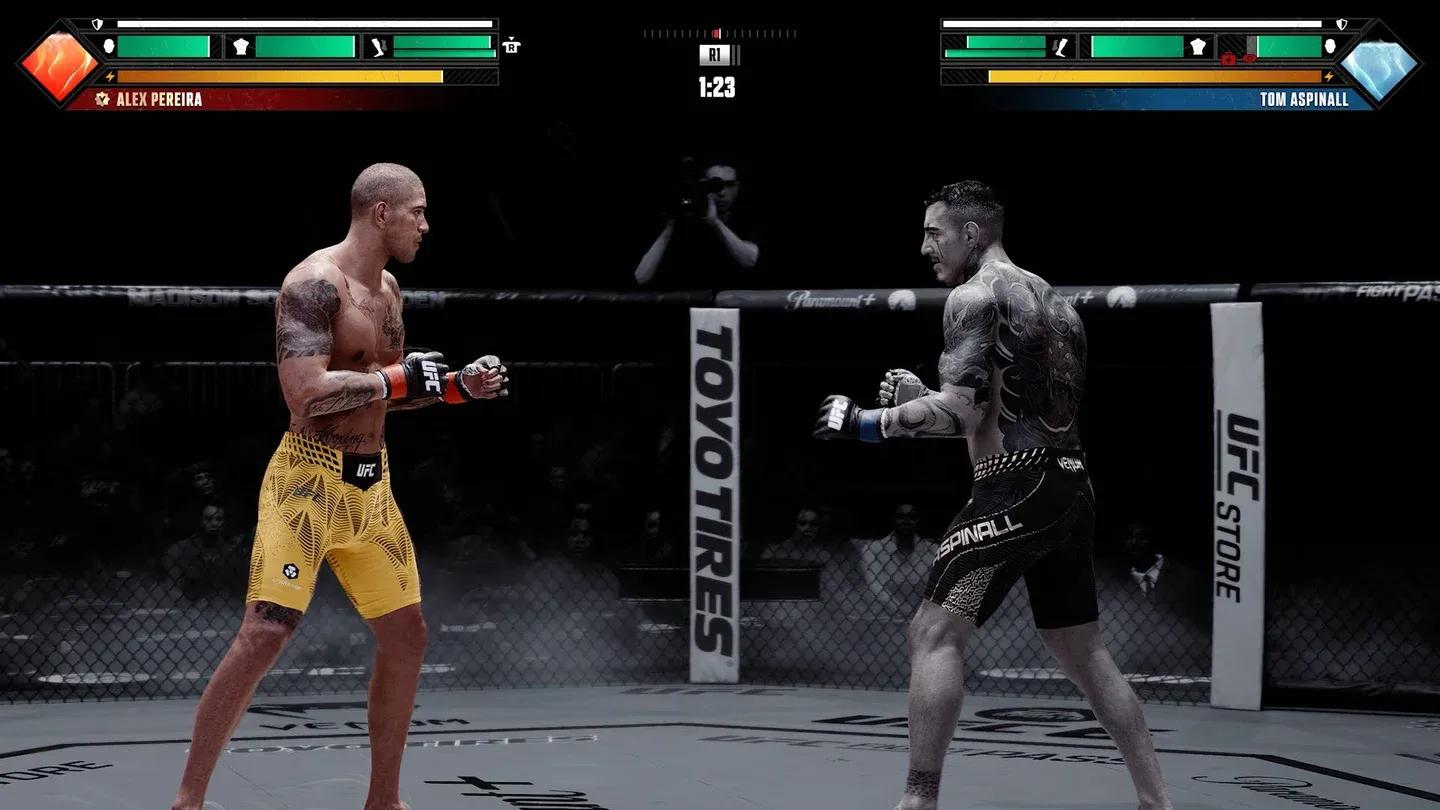
Flow State meter activation
| Layer | Function |
|---|---|
| Base Effect | Always active, shapes fighter identity from round 1 |
| Flow Boost Trigger | Specific action that builds the Flow Meter fastest |
| Activated Flow State | High-impact payoff when meter peaks, triggered by d-pad down |
All 30 Flow State perks: complete reference
Every perk below has three columns matching the three layers. The Flow Boost column tells you exactly what to do to charge your meter.
| Flow State | Base Effect | Flow Boost Trigger | Activated Effect |
|---|---|---|---|
| Anvil | Easier denials from top positions | Hit opponent twice quickly in ground and pound from postured positions | Improves ground-and-pound duration, power, and stamina cost |
| Bonesaw | Elbows and knees more powerful and accurate in stand-up | Hit opponent with two elbows or knees in stand-up within a short time | Increases damage and cut/swelling from elbows and knees |
| Bulwark | Stronger block when moving sideways or backwards | Evade a strike when block meter is low | Instantly fills block meter, reduces block, body, and leg damage |
| Checkmate | Stronger submission offense | Deep submissions, attacker submission transitions, or submission chains | Speeds up submission attacks, increases meter drain, harsher deep submission penalties for 12 seconds |
| Electric Eel | Better takedown defense and clinch escapes | Deny a clinch entry or reverse a takedown | Improves takedown defense, increases stand-up and clinch strike power |
| Escapist | Stronger submission defense from top positions | Deny any submission entry from top, bottom, or clinch | Speeds up transitions from all top guard positions and as defender in submissions |
| Featherstep | Better footwork when retreating | Hit opponent quickly after a lunge evasion | Strikes deal more damage from long range |
| Grizzly | Clinch and takedown actions spend less stamina | Either fighter performs a takedown scramble through a late denial | Lowers stamina cost for takedowns and clinch, raises opponent's cost for escapes and scrambles |
| Groundskeeper | Ground game actions spend less stamina | Two successful transitions within a short time, excluding instant transitions | Significantly decreases stamina cost for ground game and ground and pound |
| Hot-Blooded | Stand-up strikes spend less stamina in rounds 1 and 2 | Hit opponent with the fourth strike of a combo | Stand-up strikes cost significantly less stamina |
| Hunter | Better footwork when advancing or moving sideways | Hit opponent when their back is against the fence | Improves advancing footwork, increases damage with opponent against fence |
| Kraken | Better takedowns from stand-up | Perform a takedown shortly after opponent misses a strike | Enhances all takedowns, slows opponent stamina recovery from your top position |
| Lancer | Frontal kicks more powerful and accurate | Hit opponent with a frontal kick as they strike | Frontal kicks deal more damage and are better at causing health events |
| Last Stand | Stronger submission defense from bottom positions | Escape any submission, excluding desperate escapes | Increases ground stamina recovery, regenerates submission meter, reduces damage to it |
| Like Water | Reduced incoming damage during stationary or advancing sways | Land strikes out of sways after evading a strike | Increases damage of attacks landed after a sway, even non-counters |
| Perpetual | Stand-up strikes spend less stamina in rounds 3 to 5 | Hit opponent while having significantly more short-term stamina | Increases stand-up stamina recovery for 16 seconds |
| Phoenix | Faster recovery from stuns | Survive a stun without being knocked down | Increases health and stamina recovery, greatly reduces stun duration |
| Point Down | Punches from sways are more powerful | Evade a strike with a sway immediately after throwing a punch | Improves advancing footwork, power, and stamina efficiency; opponent can taunt back for partial benefits |
| Quicksand | Easier denials from bottom positions | Perform any sweep | Faster grappling actions from bottom or advanced top positions for 16 seconds |
| Reaper | Round kicks more powerful and accurate | Hit opponent with a round kick from long range while they retreat | Round kicks deal more damage and are better at causing health events |
| Revenant | Recover more health between rounds | Hit opponent when your own health is low, except in ground game | Greatly accelerates health recovery |
| Shackles | Better clinch control, clinch strikes, and takedowns from dominant clinch | Clinch opponent shortly after evading a strike | Improves clinch control, clinch striking, and bails from takedowns to clinch |
| Spectre | Reduced incoming damage while swaying backwards or sideways | Evade two attacks with sways within a short time | Sways and lunges cost less stamina, further reduce incoming damage |
| Spindrift | Spinning kicks more powerful and accurate | Hit opponent with a spinning kick when they have low short-term stamina | Spinning kicks deal more damage and are better at causing health events |
| Springloaded | Better get-ups | Successful get-ups quickly after performing a denial | Improves get-ups, muscle-modified transitions, and health event potential |
| Stinger | Straight punches more powerful and accurate | Hit opponent from long range with a straight punch as they strike | Straight punches deal more damage and are better at causing health events |
| Tank | Stronger block when standing or advancing | Hit opponent's head quickly after a successful block | All stand-up strikes deal more damage for a short time after blocking, even non-counters |
| Tiger | Curved punches more powerful and accurate | Hit opponent with a curved punch when vulnerable due to evasive action | Curved punches deal more damage and are better at causing health events |
| Titan | More stun resistance when you have more health than opponent | Hit opponent while suffering from a health event or shortly after | Deal more damage shortly after being hit or when either fighter is in a health event |
| Unbreakable | More stun resistance when you have less health than opponent | Mitigate damage with sways or lunges in stand-up | Reduces incoming damage |

All 30 perks at a glance
What are the seven Flow State style families?
The 30 perks cluster into seven style families. Your fighter's family tells you which actions to prioritise and when the activated state hits hardest.
Pressure and cage cutters
Hunter, Hot-Blooded, Tank, Point Down, Bonesaw, Shackles. These perks reward forward movement, fence trapping, and combination volume. Hot-Blooded is especially useful in early rounds since it reduces stand-up stamina cost in rounds 1 and 2, while Hunter turns cage pressure into direct damage bonuses. If your game plan is to set the pace and force reactions, this family is your foundation.
Counter strikers and defensive snipers
Stinger, Like Water, Spectre, Featherstep, Bulwark, Electric Eel. Patience is the currency here. Stinger triggers off long-range straight punches thrown as the opponent attacks, and Like Water rewards landing out of sways even when the attack isn't technically a counter. Bulwark's activation is particularly useful in desperate moments since it instantly refills the block meter when you evade with it nearly depleted.
Kick specialists
Lancer, Reaper, Spindrift. These three cover distinct kick families. Lancer handles frontal kicks (front kicks, side kicks, axe kicks), Reaper handles horizontal round kicks, and Spindrift handles spinning kicks. Each triggers off a specific situation where that kick type is most dangerous, so the right one depends entirely on your fighter's kicking identity.
Boxing power archetypes
Tiger, Stinger, Titan. Tiger supports hooks and uppercuts, Stinger supports straight punches, and Titan thrives in chaotic exchanges where health events are happening. The overlap between Stinger and the counter family is deliberate since clean straight-punch fighters can build Flow through both patience and pressure.
Wrestlers and top control
Kraken, Grizzly, Anvil, Groundskeeper, Shackles, Checkmate. This is the grappling pressure cluster. Kraken triggers off takedowns after opponent whiffs, which rewards the classic MMA timing of shooting after a missed strike. Checkmate builds through submission chains and deep submission attempts, then activates to speed up submission attacks and increase meter drain for 12 seconds. Groundskeeper handles stamina efficiency on the ground through successful transitions.
Scrambles and anti-sub defense
Escapist, Last Stand, Quicksand, Springloaded. Less about finishing, more about surviving and flipping momentum. Quicksand triggers off any sweep and then speeds up grappling actions from bottom or advanced top positions for 16 seconds. Last Stand builds through successful submission escapes and rewards you with ground stamina recovery and a regenerating submission meter.
Durability and survivalists
Phoenix, Revenant, Titan, Unbreakable, Perpetual. These perks are built for late-round stealing and comeback scenarios. Phoenix is the most dramatic since surviving a stun without going down triggers it, then the activated state greatly reduces stun duration and recovers both health and stamina. Perpetual specifically covers rounds 3 to 5 with stamina reduction, making it a natural fit for high-volume fighters who want to outlast.
Which fighter should you pick based on Flow State?
Ratings still matter, but Flow State is what separates fighters with similar numbers. Three real examples from the roster show how the system works in practice.
Alex Pereira carries Tiger, Reaper, Like Water, Bulwark, and Phoenix. That combination reads as a counter-kickboxer with layered defensive tools and genuine comeback danger. The Base Effects alone make him harder to hurt while swaying, more dangerous with curved punches and round kicks, and faster to recover from stuns.
Max Holloway runs Point Down, Stinger, Last Stand, Unbreakable, and Perpetual. Volume, resilience, and late-fight pressure. The Perpetual perk specifically benefits him in rounds 3 to 5, and Unbreakable gives stun resistance when behind on health, which fits his real-life style of absorbing and returning.
Islam Makhachev has Checkmate, Kraken, Escapist, Tiger, and Reaper. Elite grappling pressure with dangerous striking layered on top. Checkmate and Kraken handle the takedown and submission side, while Tiger and Reaper mean his stand-up isn't passive filler.
Before selecting your fighter, check their Flow Boost triggers and ask whether those actions match how you actually fight. A wrestler's perks do nothing for you if you plan to stand and bang the whole time.

Makhachev grappling Flow setup
When should you activate Flow State?
The activation timing depends entirely on what your perk does. There's no universal best moment.
- Damage perks (Tiger, Stinger, Reaper, Hunter, Lancer, Spindrift) hit hardest when the opponent is retreating, pressured against the fence, or already dealing with a health event.
- Defensive perks (Bulwark, Spectre, Unbreakable) are most valuable when your block or health is the immediate concern, not chasing more damage.
- Recovery perks (Phoenix, Revenant, Perpetual) should activate when you need to stabilise, not when you're already winning comfortably.
- Grappling perks (Checkmate, Kraken, Anvil, Groundskeeper) are most effective when you already have position and want to turn control into a finish.
- Scramble perks (Escapist, Last Stand, Quicksand, Springloaded) activate when you're escaping a bad spot, not when you're already on top.
The biggest mistake is holding the meter too long waiting for a perfect moment. The Base Effects are always working, but the activated state has a window. Use it when the fight situation matches the perk's purpose, not just when the meter is full.
For more on the systems shaping EA Sports UFC 6's fighter identity, the full EA SPORTS FC 26 guides collection covers similar mechanics across EA's sports lineup. If you want to go deeper on EA's sports game systems, the EA SPORTS FC 26 game page has everything from PlayStyles breakdowns to Archetypes leveling guides for players who want to understand how EA builds identity-driven mechanics across its titles.


