
You start Outbound with a van, a vague sense of direction, and not much else. The game hands you freedom immediately, but that freedom has a quiet catch: every time you reach a Signal Tower or Landmark, you have to choose which blueprint to download. Pick wrong and your progression stalls. Pick right and the whole world opens up faster than you'd expect. After spending serious time testing what actually matters in the early game, the answer is clear. Six blueprints do the heavy lifting, and everything else can wait.
What makes a blueprint worth taking first?
The early game in Outbound runs on two things: raw materials and the machines that process them. Cosmetic blueprints like furniture, wallpapers, and floor coverings do nothing for your ability to gather resources, repair bridges, or upgrade your engine. The six blueprints below fall into three categories that directly gate your progression.
- Gathering tools (Axe, Sickle): let you harvest bulk materials instead of picking up scraps
- Crafting stations (Sewing Table, Sawmill): turn raw materials into usable components
- Van upgrades (Base Building Deck, Bolt Press): expand your space and engine capability
If a Signal Tower offers you a rug versus the Axe, take the Axe. Every time. The one exception worth considering, is the Solar Panel, which provides passive energy and makes a reasonable backup pick if none of the six core blueprints are on offer.

Choose blueprints wisely at towers
The Axe: your first priority at any Signal Tower
Wood is the single most demanded resource in the early game. You can pick up loose sticks off the ground without any tool, but those small pieces barely dent your crafting queue. The Axe lets you break down the large logs scattered across the map, which yield significantly more wood per node than ground-level scraps. Stock up hard right after unlocking this, but keep one thing in mind: burning through your wood supply as van fuel is a trap. Save the bulk of it for crafting and the Sawmill.
The Sickle: the fiber problem solved
Fiber shows up in more early recipes than most players expect. The Sewing Table, the Spinning Wheel, and backpack upgrades all need it. Without the Sickle, you're limited to harvesting small bushes that yield 1 Fiber each. With it, you can cut through the large bushes for 3 Fiber per swing. That triple yield sounds modest until you realize how many Fiber-dependent recipes sit between you and a functional base setup.
For a deeper look at the best spots to farm Fiber efficiently, the Outbound Fiber farming guide covers the two best lake-side locations and Sickle upgrade advice in detail.
Sickle triples your fiber yield
The Sewing Table: your inventory and your stamina
Once you have a Fiber stockpile, the Sewing Table becomes the most immediately useful machine in your van. It unlocks Backpack Upgrade 1, which expands how much you can carry before hitting the overencumbered penalty. That upgrade alone changes how efficiently you can clear resource nodes without running back to the van every few minutes. The Sewing Table also lets you upgrade clothing and pants, which raise your max health and stamina. The stamina boost matters more than health in practice, since getting around on foot is a constant activity and running out of stamina mid-exploration is genuinely annoying.
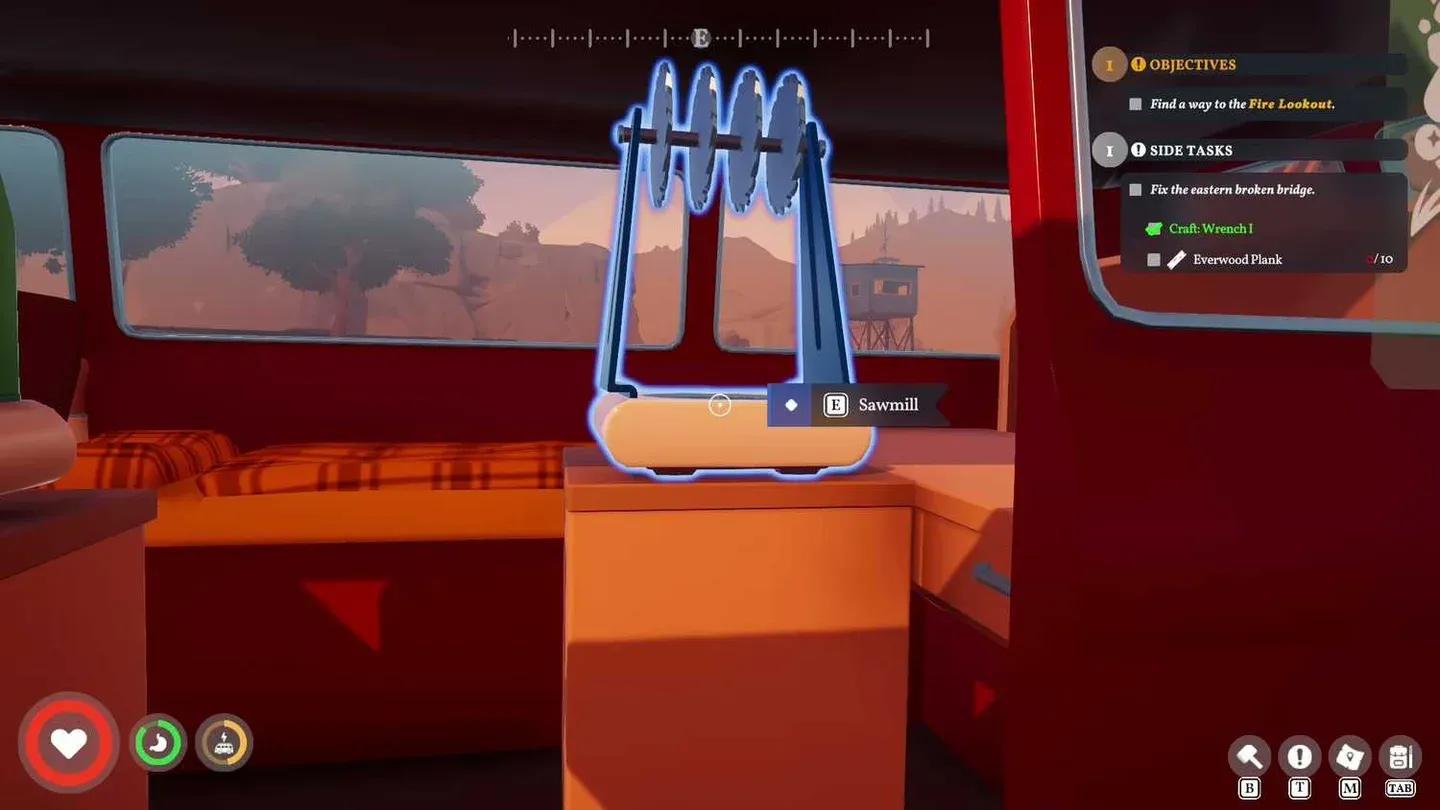
The Sawmill: the blueprint you can't skip
The Sawmill is a Landmark reward, not a random Signal Tower drop. You get it by finding and completing the requirements at the Fire Lookout tower. This machine converts raw logs into Wooden Planks, and Wooden Planks are the only material that can repair the broken bridges blocking access to new biomes. Without the Sawmill, you physically cannot progress past the first zone.
Planks also go into the structural upgrades for your van's upper deck, so the Sawmill feeds directly into the next blueprint on this list. For a full walkthrough on fixing those bridges once you have the Sawmill running, the broken bridges repair guide walks through all three crossings and the drawbridge step by step.
Sawmill turns logs into planks
The Base Building Deck: space is the real bottleneck
Your starter van interior fills up fast. Once you start placing the Sewing Table, Sawmill, and Bolt Press, there's almost no room left to move around, let alone store resources or sleep. The Base Building Deck blueprint comes from the Treehut Landmark, located north of the starting area across the bridge near the Fire Lookout. It unlocks the ability to add a full upper floor to your van, effectively doubling your usable build space. Most players move their refining machines up top once this is available, freeing the interior for storage, cooking, and sleeping.
The Bolt Press: engine upgrades or you're going nowhere
As your van gets heavier with machines and materials, the stock engine starts struggling on inclines. The Bolt Press converts Metal Scraps into Bolts, which are the required component for the first tier of van engine upgrades. Those upgrades increase climbing power and reduce fuel burn under load. Without Bolts, you can't reach steeper areas of the map, including the Windmill. Start stockpiling Metal Scraps before you even unlock this machine so you can batch-produce Bolts the moment it's built.
What if the blueprint you need isn't available?
Signal Towers don't always offer what you want. If none of the six core blueprints are on the table, the Solar Panel is the best fallback, providing passive energy to your van without any ongoing resource cost. The Water Collector is a reasonable secondary option if hydration is becoming a constant drain on your time. Beyond those two, drive to the next tower rather than settling for furniture. The map has enough Signal Towers that hopping between them is a real strategy.
Also worth noting: you can unlock every blueprint in the game eventually. The order matters for speed, not completion. If you grabbed a cosmetic early by mistake, it's not a save-ruining decision, just a minor slowdown.
Getting started the right way
The blueprint system in Outbound rewards players who think two steps ahead. Grab the Axe and Sickle to fill your material reserves, build the Sewing Table to expand your carry capacity, rush the Fire Lookout and Treehut for the Sawmill and Base Building Deck, then lock in the Bolt Press before the terrain starts fighting back. That sequence covers every major early-game bottleneck in one clean run.
If you're just getting started and want a broader overview of the game's opening loop, the Outbound beginner's guide covers the right van setup, Signal Tower strategy, and resource priorities to get your mobile base functional fast. For more tips across every system in the game, browse the full Outbound guide collection.