
Hunger in Outbound is the kind of mechanic that sneaks up on you. You're busy chopping wood, sprinting between signal towers, and repairing machinery, and suddenly your character can barely move. The hunger gauge depletes with nearly every action, and once it bottoms out, sprinting and heavy resource work become impossible. Crop plots are the fix. Set one up correctly and you'll have a self-renewing food supply rolling out of your mobile base for the rest of the run.
What do you actually need to start farming in Outbound?
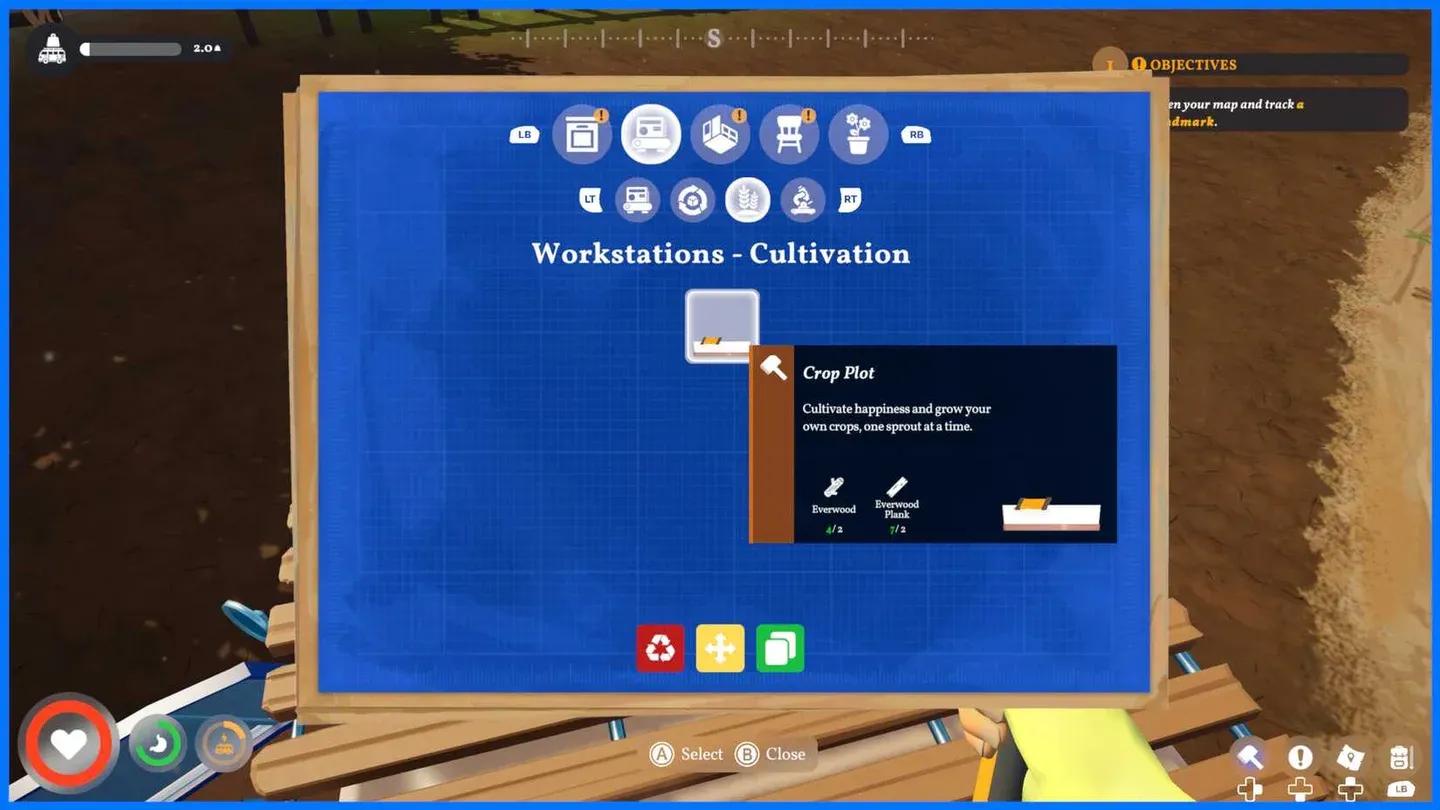
Before touching any soil, you need the Gardening Blueprint. This unlocks the Crop Plot in your building menu. Without it, the option simply doesn't appear. Blueprints are found at Signal Towers as you progress through the game's areas, so keep scanning every tower you pass.
Once you have the blueprint, two items stand between you and your first harvest:
Everwood comes from the glowing trees in the first biome. To turn it into Everwood Planks, you need a Sawmill built at your van first. Scrap Metal is easy to source: check the ground around Signal Towers in the first, second, and fourth areas and you'll find it lying around freely.
Crop plot interaction point
How to actually plant crops
Here's the thing most players miss: Outbound has no seeds. There are no seed packets, no seed vendors, no dedicated seed items anywhere in the game. To grow carrots, you plant a carrot. To grow coastberries, you plant a coastberry. The food itself is the seed.
Once your Crop Plot is built, the planting process works like this:
- Walk up to the front of the crop plot.
- Aim your cursor at the small orange label on the front, flanked by two wooden pegs.
- Interact with the empty box icon on that label to open your inventory.
- Select the fruit or vegetable you want to multiply (carrots, roadberries, coastberries all work).
- Confirm by selecting Plant.
After planting, green text appears below the menu showing exactly how many in-game days remain until harvest. That timer is your reference point for everything that follows.
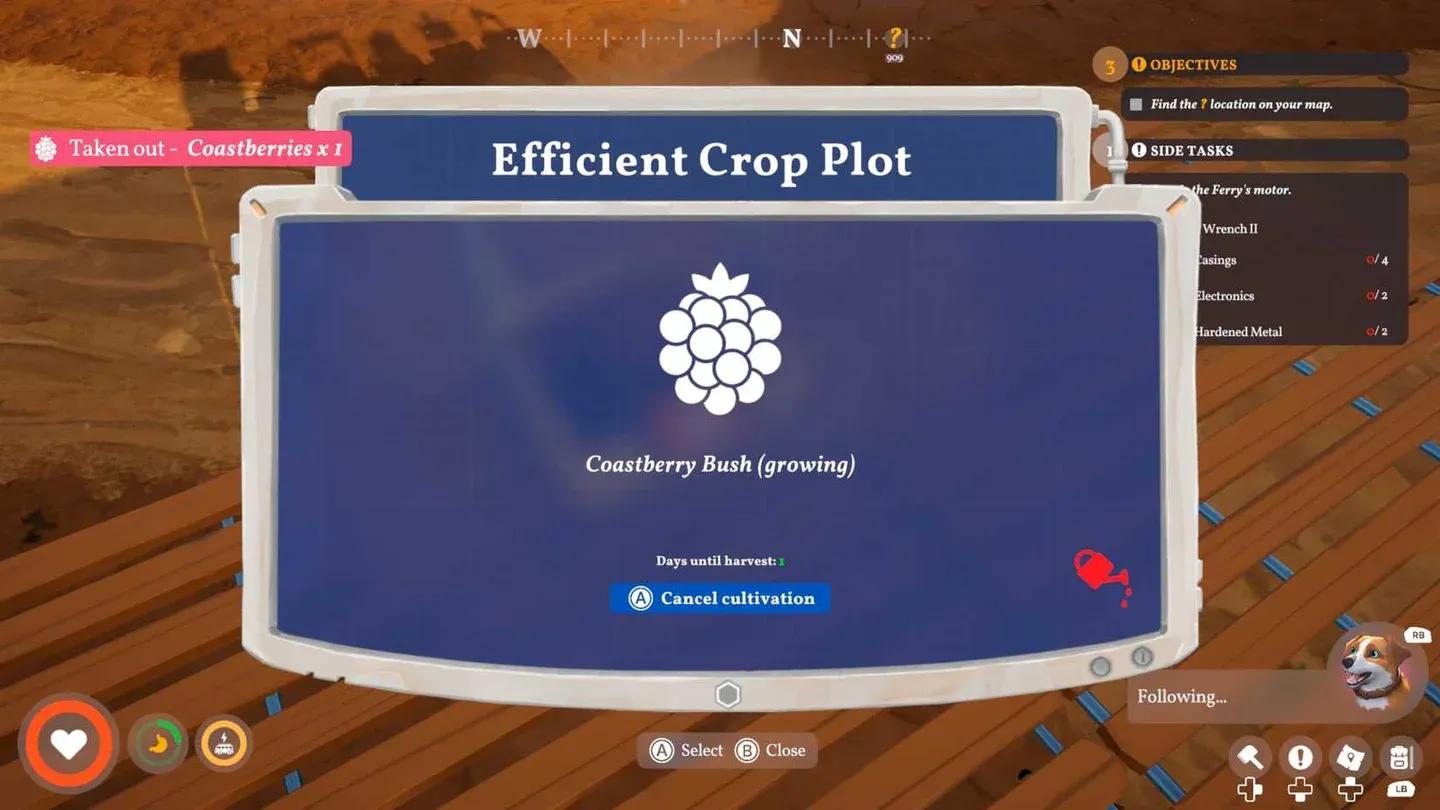
Days until harvest display
How does watering work?
Once a crop is planted, watch the orange label. If a small red watering can icon appears on it, the plant needs water. Equip your Watering Can, make sure it's filled, then look at the soil directly and interact to water it. The red icon disappears once the soil is hydrated.
Water sources run out faster than you'd expect once farming is part of your routine. Make a habit of draining every well and picking up every water bottle during exploration. The Water Collector blueprint can also be installed on your van's roof to gather water passively, which removes most of the supply pressure.
If you forget to water and the red icon sits there for a while, the growth timer simply pauses. Plants don't die or wither in Outbound, so a neglected crop just waits until you come back and hydrate it.
What's the return on a single planted crop?
The yield is genuinely impressive. Planting a single coastberry in an Efficient Crop Plot and keeping it watered for one in-game day produces 10 coastberries. That's a 10x return on a single piece of fruit.
The Basic Crop Plot works the same way but has longer grow times. The Efficient Crop Plot blueprint becomes available in the second and third areas of the game and cuts that growth cycle down significantly. Replacing basic plots with efficient ones as soon as the blueprint appears is worth prioritizing.
Crops also grow regardless of your distance from the van. Plant a batch, go spend an hour exploring a distant landmark, and return to a full harvest. You don't need to babysit the garden.
Do you actually need to farm to survive?
Honestly, no. You can complete the main story eating nothing but raw forage: Roadberries are common in the first area, Coastberries dominate the second, and scavenged food from landmarks like the Fire Lookout and Windmill fills gaps. Raw berries and carrots restore enough hunger to keep going without cooking anything elaborate.
That said, farming becomes worth it the moment you start doing heavy resource work or want to cook higher-tier meals that provide stamina buffs. Foraging gives you 1 to 3 berries per bush. A single crop plot gives you 10 from one planted fruit. The math makes farming the obvious choice for any run longer than the first area.
For a broader look at surviving the early game, the Outbound ultimate beginner's guide covers van setup, Signal Towers, and the core resource loop in detail.
Tips to keep your farm running efficiently
- Plant before exploring. Every time you park at a new landmark, check your plots. If they're empty, plant something before heading out. By the time you finish the landmark, the harvest is often ready or close.
- Keep a stock of every crop type. Store at least 2 of each fruit or vegetable in your van. Eating your last carrot means a foraging trip before you can restart that crop.
- Watch your sprint use. Sprinting burns hunger faster than walking. If food is low and your van is far away, walking preserves your remaining energy until you can harvest.
- Grow anything anywhere. Your van acts as a controlled environment. Desert crops grow fine in the frozen mountains, and forest berries grow in the canyons. Biome restrictions don't apply inside your mobile base.
For more on expanding your van and tackling the world's obstacles, check out the full Outbound guides collection covering everything from fixing broken bridges to unlocking the windmill terminal.