
Saros has one of the most flexible difficulty systems in any recent roguelite, and it lives inside the Carcosan Modifiers menu. Rather than a simple easy/hard toggle, it hands you 30 individual modifiers split between buffs and penalties, then asks you to balance them on a dial before your run begins. Get it right and you can meaningfully shift how the game feels without breaking it. Get it wrong and you might accidentally stack yourself into a nightmare. Here is everything you need to know to make smart choices.
What are Carcosan Modifiers in Saros?
Carcosan Modifiers are run-wide effects that alter specific parameters of each Cycle. There are exactly 30 modifiers in total: 15 Protections (buffs) and 15 Trials (debuffs). They unlock after you beat the second boss and you access them through the Primary Unit in the Passage.
Protections ease the difficulty in specific ways. They might cut damage taken, widen the Perfect Reload window, or remove Corruption penalties from Artefacts. Trials do the opposite, introducing complications like enemies spawning projectiles when killed or weapon stats that degrade over time.
The system is completely optional and does not give you extra resources or penalize you beyond what each modifier explicitly states. What it does is let you calibrate the challenge to match your current comfort level or the specific type of run you want to attempt.
The modifier balance dial
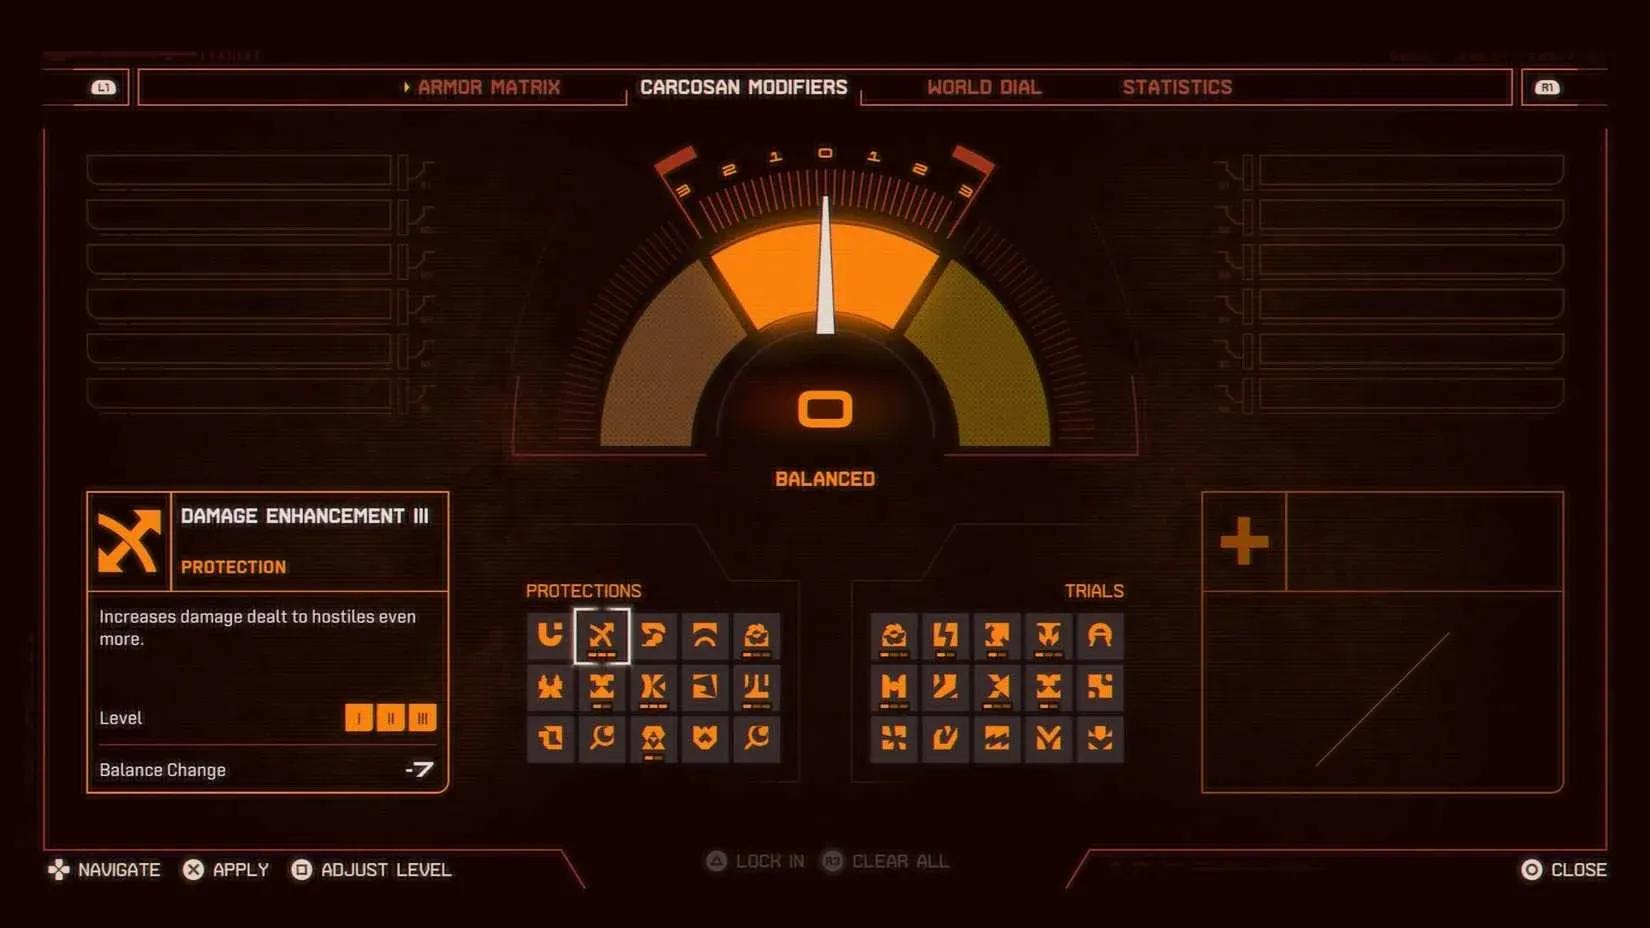
How does the modifier dial work?
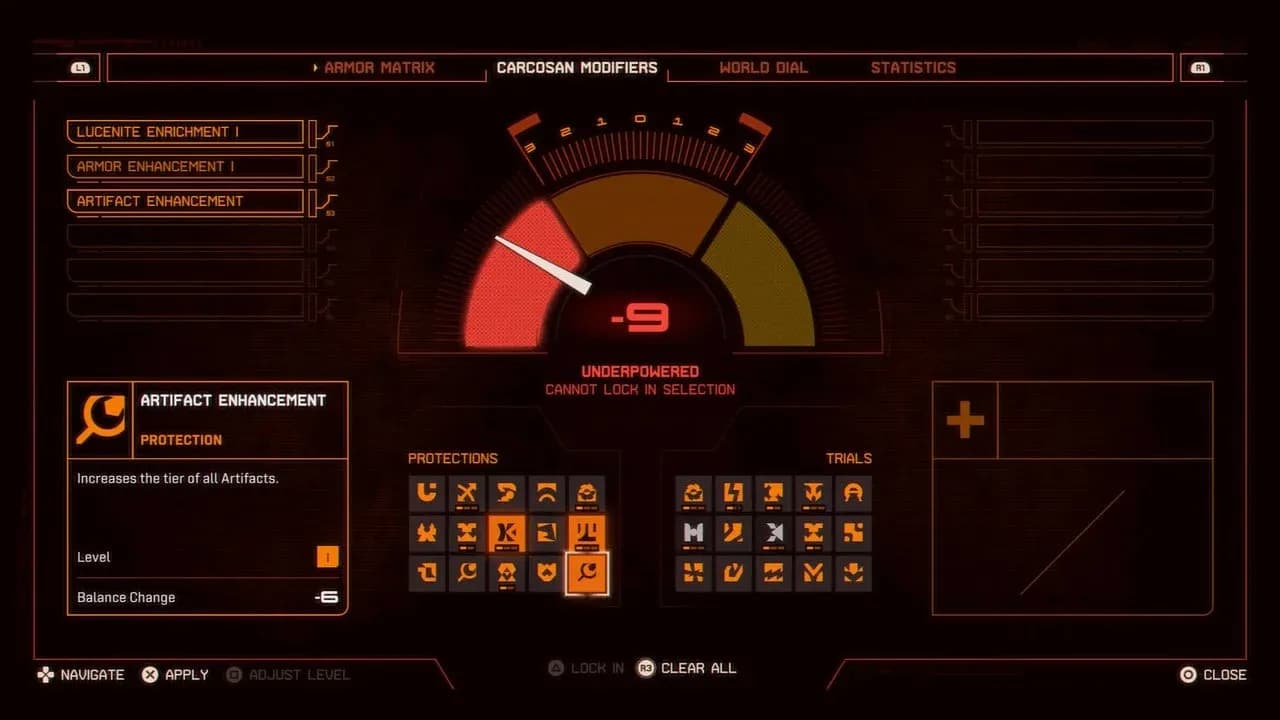
Open Primary, then navigate to the Carcosan Modifiers section. At the top you will see a gauge with a pointer. Every modifier you equip shifts that pointer left (Protections) or right (Trials). Your modifiers only take effect when the pointer sits in the center or right portion of the gauge—the "Balanced" or "Overloaded" zone. If the pointer drifts too far left into "Underpowered," all modifiers deactivate.
You cannot stack Protections past a balance value of -3 without adding Trials to counterbalance. Trials have no stacking cap, so if you want a brutal challenge you can pile them on without restriction.
Some modifiers come in multiple tiers. Damage Enhancement, for instance, has three levels at -2, -4, and -7 balance points. Higher tiers deliver stronger effects but require more dial weight to offset.
You can equip up to six modifiers total across both categories before locking in your selection for the run.
All Carcosan Modifiers in Saros
Here is the complete list of every modifier, what it does, and its balance point cost. Multi-tier modifiers show each level's cost separated by slashes.
Protections
Trials
Best Modifiers for Survival
If staying alive matters more than anything else, prioritize modifiers that cut incoming damage and give you multiple chances to recover. The strongest defensive Protections are:
- Armour Enhancement (reduces all incoming damage to Integrity)
- Second Chance Overlord (restores Second Chance after every boss kill)
- Corruption Reduction (cuts Corruption buildup from enemy projectiles)
- Corruption Cleanse Enhancement (speeds up Corruption removal)
- Overlord Restoration (fully heals you before each boss encounter)
The pairing of Second Chance Overlord and Overlord Restoration is especially strong for boss fights. You enter at full health and get your Second Chance refreshed after winning, which gives you a much larger error budget across the entire run. The catch is that Second Chance Overlord alone costs -10 balance points, so you will need substantial Trials to offset it unless you enable the Unlimited Protection Modifiers setting.
Best Modifiers for DPS
For players who want to accelerate power scaling and kill things faster, these Protections deliver the biggest offensive gains:
- Damage Enhancement (direct damage increase to all hostiles)
- Power Accelerator (more Power from absorbing projectiles with the Shield)
- Lucenite Enrichment (Proficiency levels up faster, improving weapon scaling)
- Artefact Immunity (Artefacts keep their effects without Corruption downsides)
- Artefact Enhancement (bumps all Artefacts up one tier)
The Artefact Immunity and Artefact Enhancement combo deserves special attention. Artefact Enhancement raises every Artefact you find by one tier, while Artefact Immunity strips the Corruption penalties that higher-tier Artefacts usually carry. Together they let you run powerful Artefacts without the usual trade-offs.
For raw damage output, Damage Enhancement III + Perfect Reload is hard to beat. Damage Enhancement III costs -7 balance points, so pair it with a moderate Trial like Lucenite Devaluation I (+3) and Hostile Death Projectiles (+3) to land at a valid dial position while keeping the run manageable.
Reccomended Modifiers
Here are the high-value synergies and what each pair accomplishes:
- Lucenite Magnetism + Lucenite Enrichment: Maximizes Proficiency gain. You collect more Lucenite and each piece contributes more toward leveling up.
- Damage Enhancement + Perfect Reload: Maximizes damage per second. Every Perfect Reload extends your damage window, and the Enhancement multiplies the output.
- Corruption Reduction + Corruption Cleanse Enhancement: Minimizes the Corruption threat entirely. Corrupted projectiles deal less buildup and what does accumulate clears faster.
- Shield Power Enhancement + Power Accelerator: Maximizes Power generation. Your Shield absorbs without draining Power, and absorbing projectiles fills it faster.
- Artefact Immunity + Artefact Enhancement: Maximizes Artefact value without the usual Corruption penalties attached to high-tier items.
- Second Chance Overlord + Overlord Restoration: The best boss safety net in the system. Full health going in, Second Chance restored coming out.
Getting the most out of the system
The Carcosan Modifiers menu is available before every run, so there is no reason to lock into a single setup permanently. Adjust based on what you are trying to accomplish. Farming a specific biome for collectibles? Strip the Trials and load up Protections with Unlimited Protection Modifiers enabled. Attempting a boss you keep dying to? Stack Overlord Restoration and Second Chance Overlord for that run specifically.
For players who want to understand the full scope of what each biome demands before choosing their modifiers, the Saros biomes guide breaks down every zone's hazards and enemy types in detail. Knowing what you are walking into makes it much easier to choose modifiers that address the specific threats ahead.
If you are still finding the base game punishing even with Protections active, the Saros beginner's guide covers the fundamentals of projectile parrying, the Adrenaline meter, and weapon scaling that underpin every run regardless of your modifier choices. For everything else, the full Saros strategy guide collection has you covered.