

The Doormaker is one of Slay the Spire 2's most punishing Act 3 bosses, and for good reason. Unlike standard encounters where you simply whittle down a single health bar, this fight forces you to destroy magical doors before the boss even becomes targetable, and every cycle you fail to end quickly makes the next one harder. If your build leans heavily on debuffs, the Doormaker will punish you hard. If you know the mechanics, though, you can end this fight before it ever spirals out of control.
How Does the Doormaker Fight Work?
The Doormaker encounter is built around a repeating two-phase loop. Understanding exactly what happens in each phase, and when, is the foundation of every winning strategy.
Doormaker's phase loop
The Door Phase
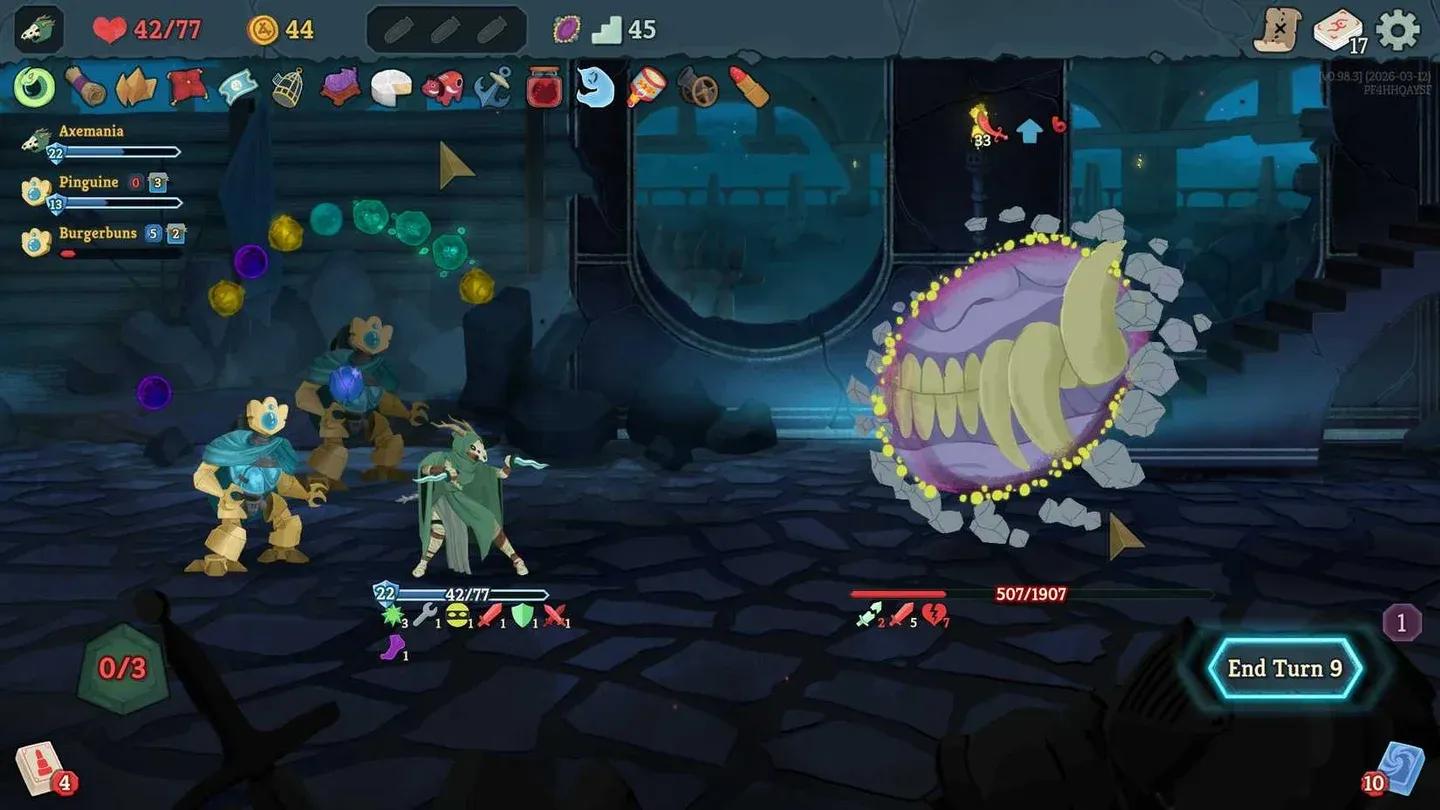
Every cycle opens with the Door, a cluster of levitating rocks that completely shields the Doormaker from any direct damage. You cannot touch the boss until the Door is gone. The Door attacks you every turn, and its pattern escalates across three turns:
That Empower on Turn 3 is critical to understand. The longer you leave the Door alive, the stronger both the Door and the eventual Doormaker become. Each new Door that spawns in subsequent cycles arrives with more health and more Strength than the last.
The Doormaker Phase
Once the Door is destroyed, the Doormaker itself steps onto the battlefield. Its own three-turn pattern is where the real danger lives:
Turn 1 of the Doormaker phase is your golden window. The boss is completely stunned and cannot retaliate. This is the single most important moment in the entire fight, and how well you exploit it determines whether you win cleanly or get ground down over cycles.
Why Does This Fight Get Harder Over Time?
The Doormaker's Empower mechanic creates a snowball effect that punishes slow play. Every time either the Door or the Doormaker uses Empower, Strength stacks permanently on the boss. This means:
- The Door hits harder in every new cycle
- The Doormaker's Turn 3 Big Attack becomes increasingly dangerous
- Surviving later cycles requires more and more block
Additionally, any debuffs you apply to the Doormaker persist between appearances, which sounds helpful but cuts both ways. Your Weak and Vulnerable stacks carry over, yes, but so does every Strength stack the boss has accumulated. Debuffing builds also face a specific trap: when a Door dies, all debuffs on it vanish. You have to reapply fresh debuffs to each new Door, making slow poison or status-stacking strategies far less efficient here.
Strength stacks each cycle
Best Strategies to Beat the Doormaker
Prioritize Destroying the Door Fast
Speed is everything in the Door phase. The faster you eliminate the Door, the sooner you reach the stun window, and the fewer Empower stacks the boss accumulates. Builds with high burst damage or strong multi-hit cards handle this phase much more naturally than slow, defensive setups.
During the Door phase, aim for a balanced approach: block enough to preserve your health, but never stop pressing damage. The Door will respawn, so there is no value in playing conservatively and letting it live.
Exploit the Stun Window Aggressively
When the Doormaker appears on Turn 1 of its phase, it cannot act. This is not a small bonus, it is the core mechanic you should build your entire turn around. Before the Door dies, plan your next hand. Hold back your strongest attack cards, save that potion you have been carrying, and be ready to unload everything the moment the boss appears.
Players who think ahead and pre-plan their burst turns will consistently deal the majority of their damage during these free windows.
Build for Burst, Not Sustained Damage
The Doormaker's structure rewards decks that can spike damage in short windows rather than grind out consistent pressure. When you are planning your run and spot the Doormaker on the Act 3 map, start steering your card picks toward high-damage single-turn combinations.
Scaling damage effects, cards that grow stronger the more you play them in a single turn, are particularly strong here because they can be detonated during the stun window for massive payoffs.
Use Block Wisely Between Stun Windows
Once the Doormaker's stun ends, it hits hard. Turn 2 brings a solid attack, and Turn 3 delivers the Big Attack alongside another Empower before it retreats. You need enough block cards available to survive Turn 3, especially in later cycles when Strength stacks have built up.
Do not burn all your block cards during the Door phase. Keep at least one strong defensive option in reserve for the Doormaker's active turns.
Spend Resources Early, Not Late
One of the most common mistakes in this fight is hoarding potions waiting for the perfect moment. The Doormaker fight gets harder every cycle, so a potion used in Cycle 1 is worth more than the same potion used in Cycle 3. If you have a damage potion, use it on the first stun window. If you have a block potion, use it before the Turn 3 Big Attack.
What Builds Struggle Against the Doormaker?
Debuff-heavy builds, particularly those relying on poison, Weak stacks, or Vulnerable applied to enemies, face a structural disadvantage. Every Door that dies resets its own debuffs, forcing you to reapply from scratch. If your deck's damage engine depends on stacking status effects over multiple turns, the Doormaker's cycling mechanic directly counters that plan.
This does not mean debuff builds cannot win, but they need to compensate with enough direct damage to make each stun window count, rather than relying purely on status payoffs.