
The Depths is one of the most layered areas in Mouse: P.I. For Hire, and Shrewd Shrews is the mission that sends you down into it. After finishing White Lies and Dark Secrets and uncovering the truth about Betty Lynch's death, you find a map of the old sewer system that opens up an entire underground shrew city on your map. What follows is a multi-stage gauntlet of enemies, flooded pump rooms, a thieving magnetic hand, a fighting pit, and a handful of secrets that are easy to miss if you rush through.
How do you start Shrewd Shrews?
Head to your car and drive to The Depths. The mission kicks off immediately once you enter the sewer corridor. Before anything else, make sure you have solid ammo reserves. The Depths throws enemies at you in waves, and several combat encounters lock the doors until every enemy is down.
Entering The Depths sewer
Sniff out the shrew trail
From the entry corridor you can go straight for some money or turn right into enemy territory. Clear the sewer area of enemies and crocodiles first. Once the room is clean, ignore the locked door and the gated waterway for now. Head back to the entry and cross to the southeast corner where a crocodile waits. Kill it, then find the vent on the right and crawl through.
The vent hits a T-junction. Go right. This takes you to the room behind that locked door, where a lever opens the gate blocking the waterway. Pull it, leave through the door, and the locked entrance stays open. Flying enemies greet you on the other side. Clear them and jump down the waterfall.
What secrets are behind the waterfall?
Before moving on, walk directly into the waterfall. There are crocodiles in there, so have your weapon ready. Up the stairs and across the pipes is a platform with a schematic on the table and a safe with cash inside. The safe has no spikes, timers, or movement restrictions, making it one of the easier ones in the mission. A vent above the workbench loops you back to the waterfall side.
Grab the schematic and crack the safe before leaving the waterfall area. Coming back later is possible but wastes time.
Back on the main path, approach the cages and equipment on the floating platform and photograph them. This gives you the Lab Stuff and Cages? clue. After more enemies, a typewriter appears next to a locked door that opens once the room is clear.
Through that door, go up the ramp on the right and pull the lever. This drops a landing across the room and activates a floor fan you can helicopter tail over. On the far side is a control board with three levers.
- Lever 1: Enemies spawn and the gears on the north wall start turning. There is a schematic hidden inside the gear mechanism. Wait for the valves to rise, jump in, stay close to the fence, and double jump above the gears to reach it.
- Lever 2: Smoke pours out and the lever breaks off. A replacement sits on the table near the entry door. Picking it up triggers another enemy wave. Return to the panel, replace the lever, and pull it. The gear mechanisms activate and flying enemies pour from the ceiling.
- Lever 3: A floor fan powers on beneath a hook that drops from the ceiling. Helicopter tail over the fan, grapple the hook, and ride up to the platform where the gate is lifted.
The Old Shrew Lady is waiting up top. Talking to her gives you the Old Shrew, again? clue. Save at the nearby typewriter and take the elevator down.
Finding the Old Shrew Lady in the underground city
The elevator ride down reveals the full underground shrew city. On arrival, a broken elevator sits to the west. Head east past the shopping stands and follow the path around. A ladder next to the bar with the falling rocks sign goes up to the next level.
From there, navigate through the shelter, jump across to the shade over Rusty's, then to the south wall platform, then to the center platform around the big pipe, and keep heading east. A final platform leads through a doorway to the Old Shrew Lady.
The Old Shrew Lady says she wants to help but needs you to fix a few things first. She hands you a Valve and disappears.
The shrew city below
How do you fix the waterworks?
A door opens behind where the Old Shrew Lady was standing. Follow the path to a dead end, look up, and shoot the target to lower a grappling point. Swing across, then blow open the Totally Normal Wall to the left with a stick of D-namyte.
Inside that hidden room is a missable clue, likely Steve Bandel's cape connected to The Missing Magician case. Photograph it to collect the Magician's Cape clue. This opens the doors on the north wall.
Save at the typewriter through the sliding doors, then go upstairs. Clear the enemies after the cutscene and grapple up to the next level. Ahead is the pump room. Kill all enemies, then interact with the valve. A wave of enemies floods in. Once they are all dead, a second valve bursts and a lift descends.
Ride the lift up, shoot the duck target across the gap to drop a hook and a jumping platform, then use the trampoline and helicopter tail to reach the upper level. Save at the typewriter by the ladder and climb up.
Clearing the enemies in the next area opens the large doors. Inside, a magnetic hand suspended from the ceiling swoops in and steals the valve before you can grab it.
Chasing the magnetic hand
The door next to the valve opens and the fight continues. Clear the room, then use the trampoline on the south end to reach a switch on the second floor. Pull it to drop a ladder. At the top, grab the ammo, armor, and schematic from the table on the left.
Crawl into the vent. The bottom drops out partway through and dumps you into the next room.
Survive the onslaught
You land in a large arena. A Pepper-D dispenser sits straight off the front of the stage. Clear the high and low enemies. Using the James Gun here makes short work of the denser groups. After the last enemy drops, confetti bursts around the stage and the Old Shrew Lady appears.
Secret before talking to her
Do not talk to her yet. Go west, jump up to the platform using the barrels, then use it to reach the middle platform around the pipe. Jump onto the banner hand above the stage, then double jump into the air duct you fell from. There is a gap in the duct, so jump across and follow it to the end. A safe in a blocked pipe is visible to the north. Helicopter tail over, tailpick the safe (timed, with spikes), and collect the cash inside.
Talk to the Old Shrew Lady. She gives you a VIP Pass and the magnetic hand exits north.
The Lost and Found room and surviving the pit
The previously locked door on the north wall is now open. Inside, the hand drops the valve on a table under graffiti reading "Lost and Found". Do not pick it up yet.
Use the trampoline across from the table to get on top of the pipes along the east wall. Jump north into the hidden room where Newspaper 22 sits in a chair. It covers the Quite Big Affair.
Save at the typewriter, then grab the valve. The floor collapses.
You land in a fighting pit. Jack eats spinach and the brawl begins. Fire vents up from the grates, so stay mobile and kick shielded enemies with F before punching. You can also kick regular enemies directly into the fire. Healing items drop from enemies, so watch the floor during the fight.

The fighting pit brawl
Returning to the pump room
The north gate opens after surviving the pit. Grab ammo, collect the Shrew Route: Quagmire clue, and save at the typewriter to the right of the shelves.
Head up the stairs. Newspaper 23 sits in a chair at the top left, an old issue about Betchaville.
Secret safe near the pit
Before using the elevator, walk the thin pathway to the right of the building near the enemy door to the west. A cove hides a safe with a schematic inside. It is timed, movement restricted, and has spikes, making it the trickiest safe in the mission.
Take the broken elevator (press button 3) back up to the big door area. Clear the first enemies, then deal with the flying shrews that pour in when the wall blows open. Once clear, jump off the pipe through the wall and swim down to the bottom of the flooded room as fast as possible to attach the valve. The water drains.
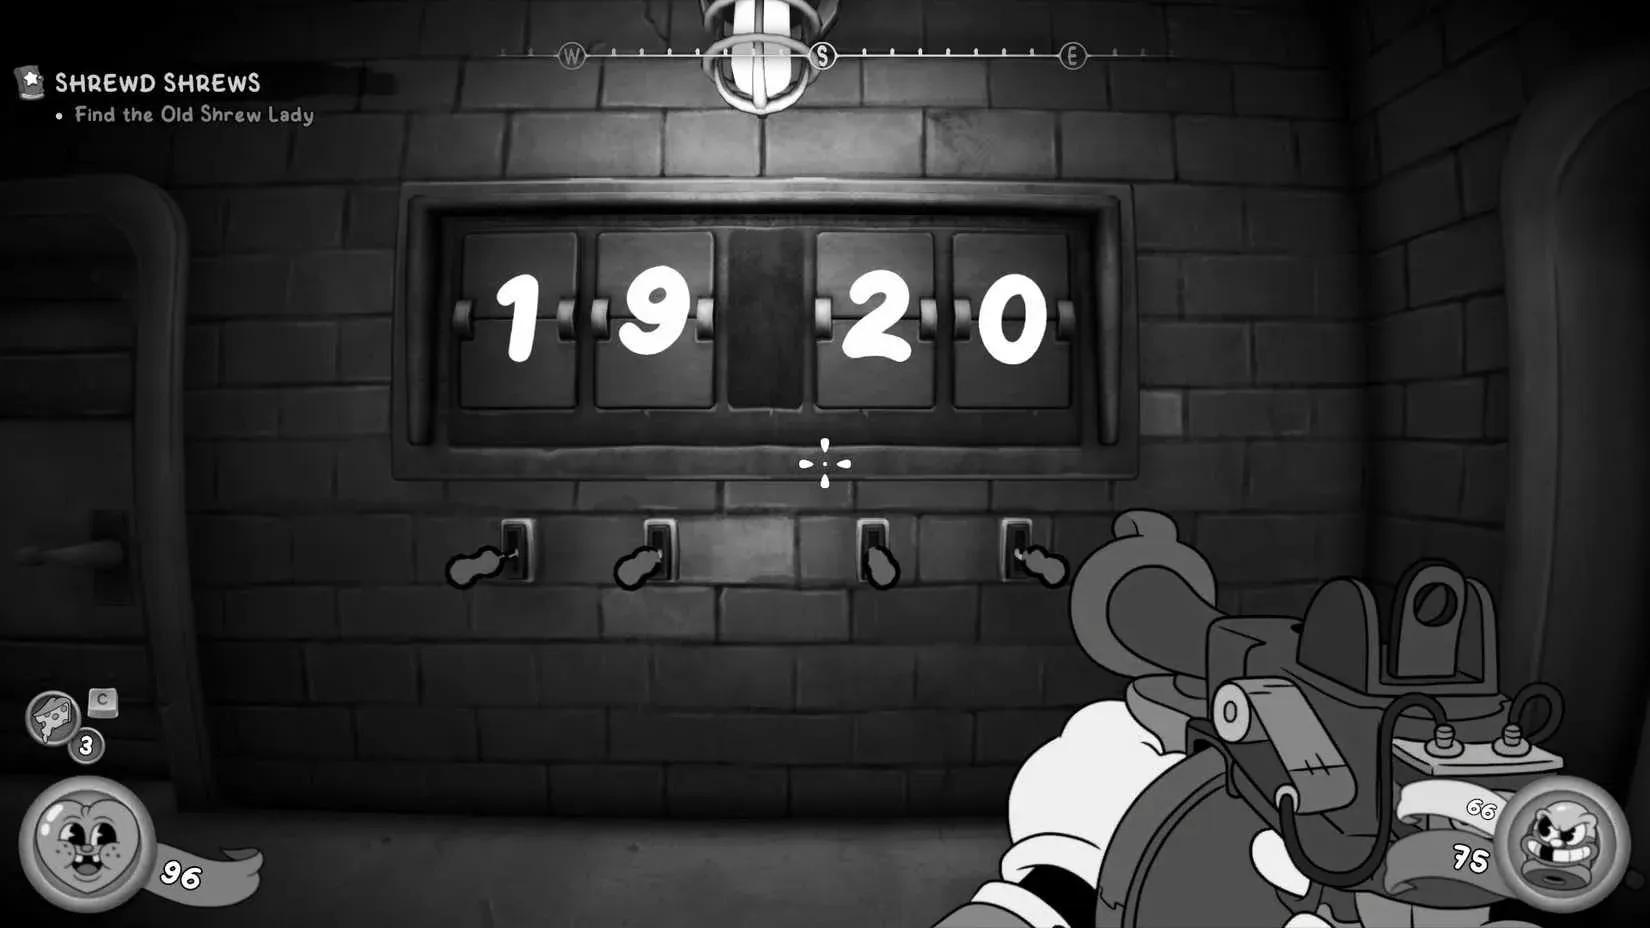
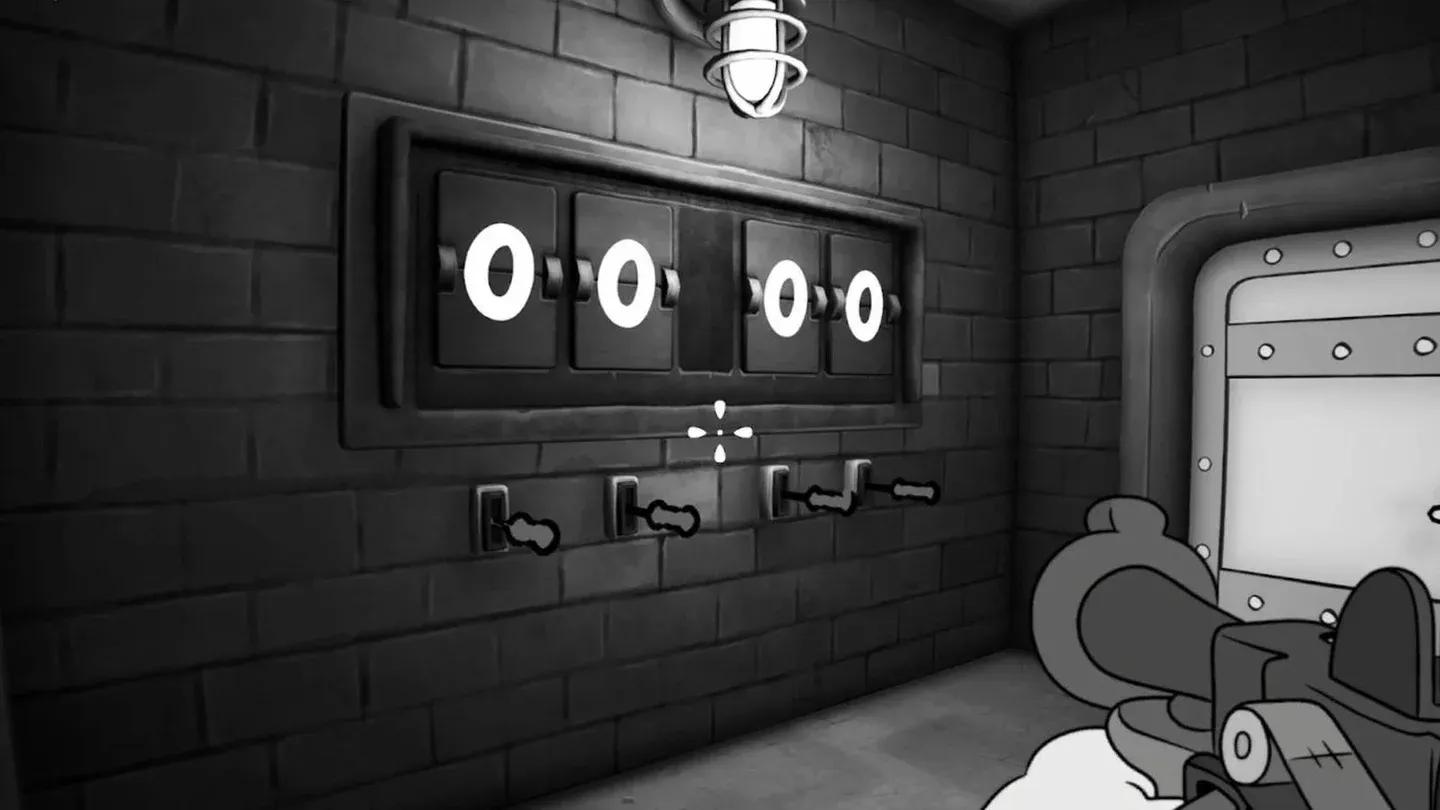
Secret door codes
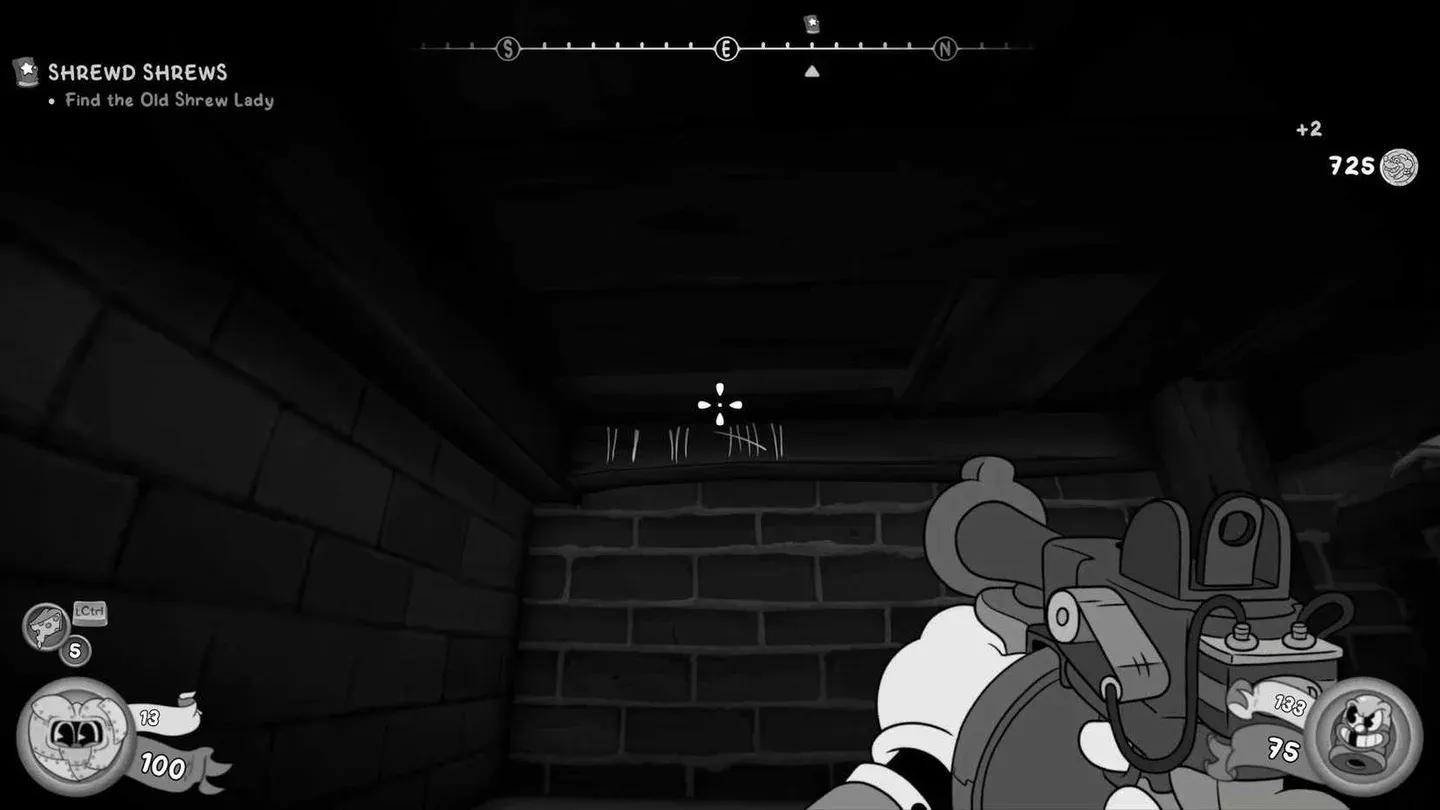
Before leaving the city, check the south wall for four dials with levers underneath. Notes scattered around the town contain the four-digit codes. Pull each lever to set a number, then pull the door lever to claim the reward.
Secret door code panel
Wrapping up Shrewd Shrews
When the valve is fixed, find the Old Shrew Lady on the first floor next to some pillows. She thanks you but makes a point of criticizing the mess you made getting there. The broken elevator at the city entrance now works. Take it up, use the Quit-o-Phone, and drive back to the office.
Back at the office, you can buy Baseball Card 27/41 (batter William Brown) from the ammo shop for $100. Talk to Wanda in the entry of Little and Big Bar. Jack tells her the case has grown beyond Steve Bandel and that shrews are being dumped in the sewers.
What clues do you pin after Shrewd Shrews?
Head to your board and pin all four clues collected in this mission:
- Shrew Route: Quagmire (allows Jack to Resolve Lead, raising questions about why shrews are being taken to the Quagmire)
- Magician's Cape (tied to The Missing Magician case)
- Lab Stuff and Cages?
- Old Shrew, again?
With these pinned, Jack has two directions. He can pursue Curd's murder by talking to Cameron Bozo through It All Points Here, Right?, or head straight to the Quagmire to start Swamp Oddity and dig deeper into the Shrew Shortage case.
For more collectible hunting across the full game, the all newspaper locations guide covers all 38 Mouseburg Herald papers across every mission. If you missed any comics, the complete comics collectible guide maps out all 29 across the game. And if you want a full picture of what Mouse: P.I. For Hire does well before continuing, check out our review. Browse the full Mouse: P.I. For Hire guide collection for walkthroughs covering every other mission.