
The Module system in Neverness to Everness seems simple at first glance, but plenty of players waste hours pulling from the wrong tier and then wonder why their damage output feels weak. Modules fit into your character's Console like puzzle pieces, granting stat increases and unlocking set bonuses through the Cartridge system. Understanding how this works from the start will put you ahead of players who treat it as an afterthought.
Play Neverness to Everness Now
Start playing today and claim all available launch rewards and bonuses.
Download Neverness to Everness
How do you get Modules in NTE?
Modules come from one place only: the Rewind gacha system, which you access through each character's Console menu. The game doesn't give you a quick-access button for this, so you'll navigate through the Character Menu every single time.
Here's how to reach it:
- Open the Character Menu
- Go to the Console tab for any character
- Hit the Rewind button in the bottom-left (or press L3 on PS5)
- Choose your difficulty tier
- Spend Carrota to pull
One pull costs 80 Carrota. Ten pulls run 800 Carrota. The currency type changes based on which tier you're pulling from.
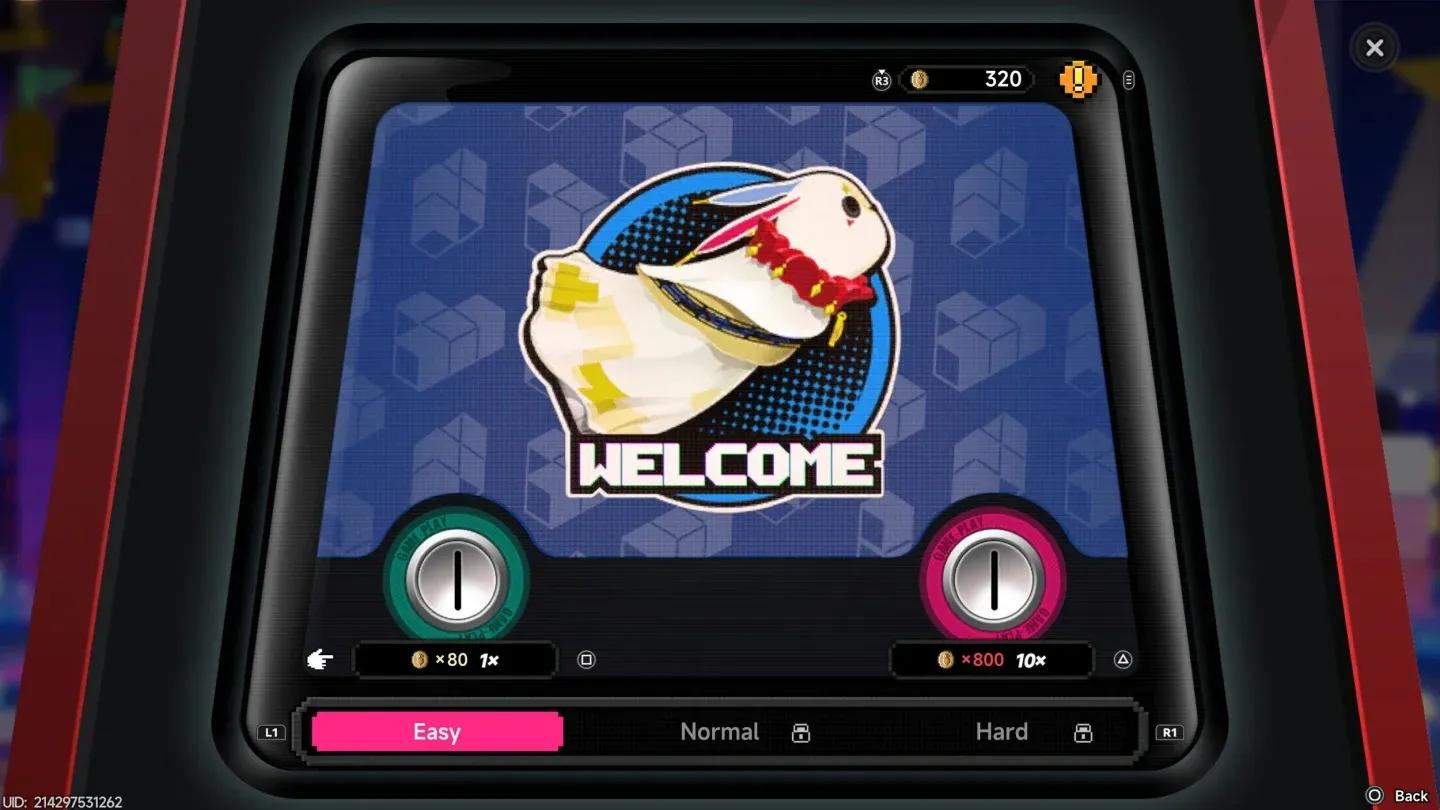
Rewind gacha access point
Where do you farm Carrota?
Carrota is the only currency that works for Rewind pulls. It comes in three types: Bronze, Silver, and Gold. Each type feeds into a different difficulty tier.
Your best farming spot for all three is the Rabbit Hole Anomaly Zone in New Herland District. Challenges there drop Carrota guaranteed, plus Cartridges that work with your Console board setup. Travel to the Rabbit Hole teleport, enter the instance zone, and clear whatever dungeon appears. You'll also pick up Manhole EXP materials here, which you need for leveling Modules after you pull them.
What are the three Rewind tiers?
Each tier uses a different Carrota type and drops Modules of different rarity. Normal and Hard Rewind unlock when you hit Hunter Level 20 and Hunter Level 30 respectively.
Easy Rewind gives you completely random shapes with no control. Normal and Hard let you build a custom pool of up to eight preferred Module shapes, which changes how efficiently you can farm for specific Console layouts.
If you need to hit Hunter Level 20 or 30 faster, check the guide on how to ascend characters and raise Hunter Rank for the fastest progression route.

Rewind difficulty tiers
How do you use Modules on the Console board?
After pulling Modules, you slot them into your character's Console board like Tetris pieces. Shapes range from two-square to four-square blocks. Each character has a different Console layout, so a shape that fits perfectly on one character might be awkward on another.
Two factors determine how much value you extract from your Module setup:
- Cartridge set bonuses: The Cartridge equipped to a character's Console gives extra buffs when you slot two or four specific Module shapes. Missing these thresholds means leaving stats on the table.
- Character-specific Module bonuses: Each character gets a unique bonus based on which Module types fill their board. Mint, for example, gains 7.5% CRIT Rate for every Type III Module (three-square pieces) on her Console. These bonuses stack, so loading her board with Type III pieces multiplies the effect.
Balancing Cartridge set requirements against character-specific bonuses separates functional builds from optimized ones. For a concrete example of how this works in practice, the Esper Zero build guide walks through specific Arc, Cartridge, and Module combinations.
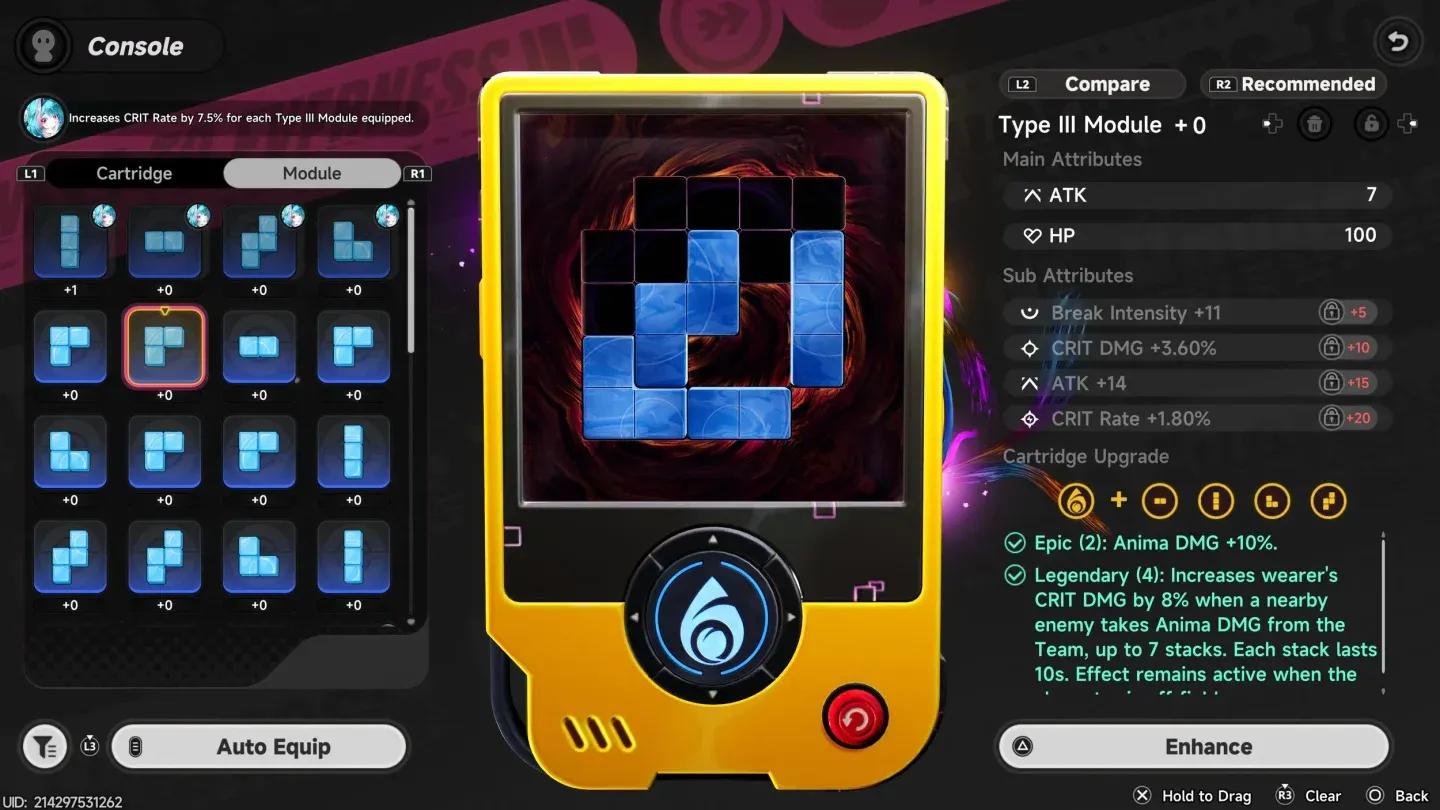
Console board layout view
How do you upgrade Modules?
Every Module levels up individually to boost its main stat. At certain level thresholds, substats unlock, adding secondary stat bonuses on top of the base value.
Two upgrade materials work:
- Other Modules: Feed unwanted pulls directly as EXP. This is why you keep pulling even after getting the shapes you need.
- Manhole EXP materials: Farmed in Rabbit Hole Anomaly Zone. Use these when you want to preserve Module variety.
What most players get wrong about the Module system
The three biggest early mistakes: pulling Easy Rewind endlessly when Silver Carrota has already piled up, completely ignoring the custom pool feature in Normal and Hard modes, and feeding high-rarity Modules as EXP without checking if a better shape would improve their Console layout.
The Rewind system isn't just a stat delivery mechanism. The shape-selection layer, Cartridge set bonus interactions, and character-specific type bonuses all reward treating the Console board as a build puzzle instead of a passive upgrade slot.
For the full collection of NTE systems guides covering everything from Cartridges to character ascension, browse the complete Neverness to Everness strategy guides collection.