
Path of Exile 2 introduced Kalguuran Gems as part of the Return of the Ancients expansion in patch 0.5. These are a completely separate category from standard skill gems, and they operate on an entirely different resource: Runic Ward. Unlike regular gems that cost mana or life, every Kalguuran skill draws from your Ward pool, which you build up through Runeforged armor and specific passive skills. The gems themselves drop as random loot already unlocked, require no attribute investment, and level up using Thaumaturgic Flax rather than experience.
How does Runic Ward work?
Runic Ward functions as the dedicated resource for all Kalguuran skills. You generate it by Runeforging the Rune Ward stat onto armor pieces. Several Kalguuran skills also generate Ward passively: Remnants of Kalguur, for example, spawns Runic Ward Remnants when you stun or kill enemies, with a 50% chance on stun (once every 3 seconds) and a 25% chance on kill, each granting up to 205 Ward at higher gem levels.
The key difference from mana is that Runic Ward can overflow with certain skills, and some abilities like Leylines actively drain it while active. Managing your Ward pool is the central skill expression of any Kalguuran build.
Kalguuran support gem setup
Complete list of all Kalguuran Gem skills
The table below covers every Kalguuran Gem skill, its type, and its core function. Stats shown reflect the base-level behavior; values scale with gem level.
Which Kalguuran skills are best for offense?
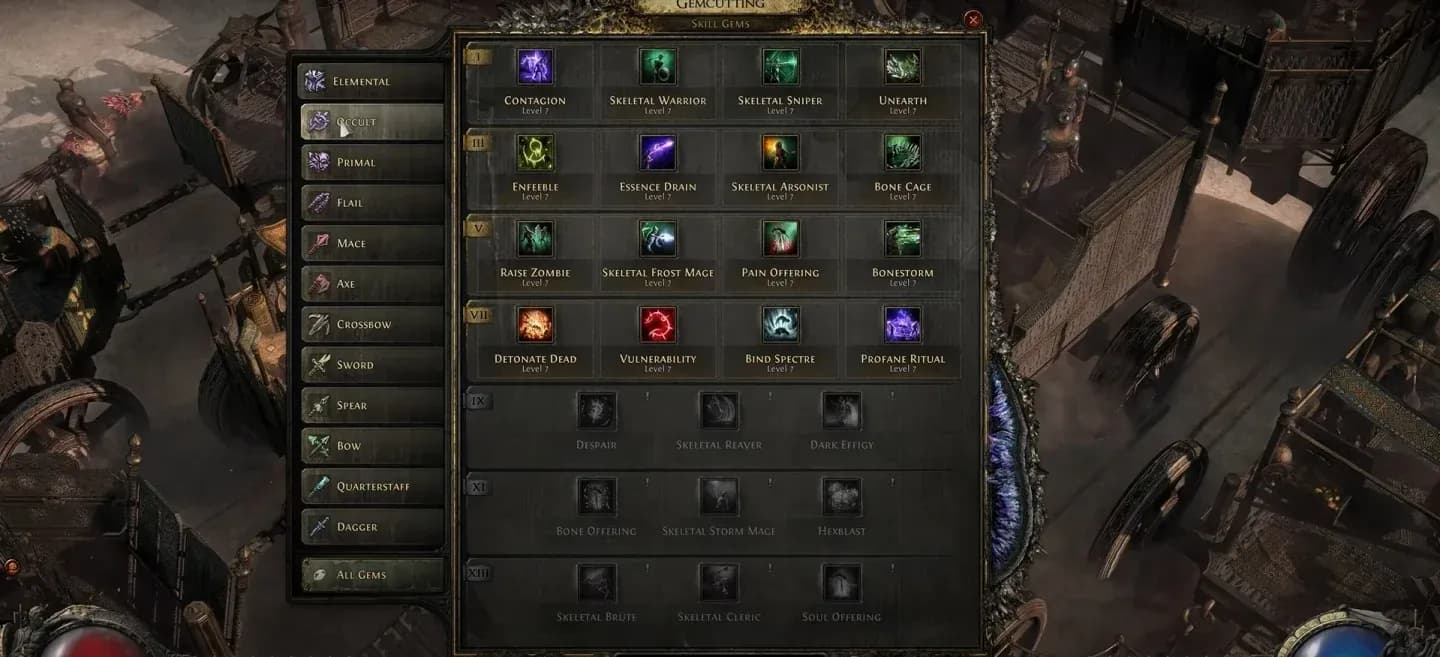
Kalguuran gem selection screen
High-damage skills worth building around
Skyfall is the most dramatic damage skill in the set. At max gem level it deals 553 to 829 Physical damage and an equal amount of Cold damage at the targeted location, requires 270 Glory to use, and creates 6 temporary minions when you consume a Verisium Infusion. The Glory generation loop (spending Ward generates Glory at 100%) means the skill rewards sustained Ward generation rather than burst dumping.
Conductive Runes is the go-to for Electrocution builds. It lays 10 hazard runes in an 8.5-meter cone, each dealing Lightning damage with 50% more Electrocution buildup from hits. With a 0.4-second arming time and 0.3-second detonation after activation, enemies walking into a prepared cone take rapid sequential explosions.
Voltaic Barrier pairs well with any Projectile Attack build. The 6-meter wall converts 100% of Physical damage to Lightning and delivers 300% more Electrocution buildup to anything standing between the pylons. Projectiles fired through the wall then chain as Lightning beams to up to 3 additional enemies.
Detonate Living functions as a finisher. It culls enemies below the threshold and detonates them for a Physical explosion dealing up to 14.2% of the corpse's maximum life across a 2.6-meter radius. Against rare or large enemies, the percentage-based scaling means the explosion damage can outscale any flat number.
Cold damage options
Grim Pillars creates 8 ice-crystal spears in a 4-meter creation radius. Each pillar has its own health pool, and when destroyed, explodes for Cold damage with 50% more Freeze buildup. The 80% less damage penalty only applies if something other than you destroys a pillar within 0.5 seconds, so timing matters.
Frostflame Nova is niche but potent in Fire/Cold hybrid builds. It does no direct damage, but the wave latches onto Ignited enemies, rapidly stacking Freeze buildup while refreshing the active Ignite. The 10% more Freeze buildup per 1% of ailment threshold from the active Ignite can push Freeze thresholds dramatically higher than normal Cold skills.
Which Kalguuran skills are best for defense and utility?
Defensive skills
Refutation is the most aggressive defensive tool in the set. Spending all your Runic Ward activates a 4-second auto-block buff that applies Parried to every enemy you block, making them take 50% more Attack damage for up to 3.9 seconds. The Stun Threshold scaling (5% more per 10 Ward spent) means building a large Ward pool makes the buff harder to break.
Runic Reprieve is the channeled alternative. While channeling, all damage from blocked hits is removed from Runic Ward instead of Life. You cannot recover Ward during the channel, and blocking too much accumulates Heavy Stun buildup, so it works best as a short emergency button rather than a sustained defensive stance.
Hollow Shell trades offense for party protection. It spends 100% of your Runic Ward to pulse Guard equal to 56–64% of the Ward spent to all nearby allies. The 6-second Guard duration and 6-second target cooldown make it a strong co-op tool, particularly in groups where one player maintains a large Ward pool specifically for this purpose.
Resource management and utility
Animus Exchange is the Ward recovery safety net. Sacrificing Life converts at 70% efficiency to Runic Ward, and the recovered Ward can overflow your maximum. At higher gem levels it can sacrifice up to 800 Life per use with a 4-second cooldown, so it is not a spammable heal but a meaningful burst recovery option.
Leylines rewards stationary casters with up to 29% more Spell damage while standing on an active Leyline, but it drains Ward constantly and blocks recovery. Leylines reappear 8 seconds after dissipating, so the rhythm of the skill requires positioning around predictable energy zones rather than free movement.
Triskelion Cascade modifies the next Cascadable Spell you cast, centering it on your location and firing it in a six-point Triskelion pattern. The cost is steep: 300–800% of the empowered spell's cast time is added to the skill's cooldown, and the empowered version deals 11–30% less damage with 31–40% less area of effect. The upside is the coverage pattern, which hits six distinct areas simultaneously.
Support gems: which ones matter?
The Kalguuran support gems change how your other skills interact with the Ward economy.
Runic Infusion is the most direct damage amplifier: supported skills cost an additional 20% of your maximum Runic Ward, but deal added Physical damage equal to 25% of that Ward cost. Stacking maximum Ward makes this support scale aggressively.
Styrn's Ferocity is the armor-breaking support. Supported skills Crush targets for 8 seconds, and hits against Crushed enemies break Armor equal to 10% of Physical damage dealt. Stacking this with high-Physical skills can strip armor quickly against tanky map bosses.
Scouring Flame converts Ward cost into Ignite magnitude: supported skills gain 25% of life and mana cost as extra Runic Ward cost, and inflict Ignites with 50% more magnitude. For Fire builds, this is a straightforward damage amplifier.
Healing Runes is the group-play support: it drains up to 10% of maximum Runic Ward every 5 seconds, healing nearby allies for 200% of the amount drained. At high Ward totals, that translates to meaningful sustained healing without any active button press.
How to get Kalguuran Gems and level them up
Kalguuran Gems drop as random loot throughout the Runes of Aldur league content. They have no attribute requirements, so any class can equip any gem immediately on pickup. Unlike standard gems that gain levels through experience, Kalguuran Gems level up exclusively with Thaumaturgic Flax, which also drops as random loot in the same content.
The gem drop pool is not deterministic. Rune Remnants found on the map already have one fixed rune shape inscribed, which determines the Kalguuran skill reward available after clearing the enemies they spawn. If the fixed shape does not match the skill you want, you cannot change it on that Remnant.
For players still getting to grips with the broader game systems, our early game tips and tricks guide covers the core mechanics that underpin how gems and resources interact before you reach the league content.
How do Kalguuran Gems fit into existing builds?
The no-attribute-requirement design means Kalguuran Gems slot into any build without stat investment, but the Ward economy creates a real cost. Every skill that costs Ward needs a source of Ward generation, and the primary source (Runeforged armor) requires completing the Runeseeker questline.
For minion builds, Eternal March and Wardbound Minions are the obvious pickups. Eternal March revives your most powerful minions instantly by spending Ward, scaling the revived life pool at up to 20 times the Ward spent at higher gem levels. Wardbound Minions summons Cold-casting temporary minions that scale in number with the Ward you spend on cast.
Attack builds benefit most from Fragments of the Past, Voltaic Barrier, and Verisium Manifestations. Fragments of the Past requires any Martial Weapon or Unarmed and creates a persistent volcano that fires Ice Fragment projectiles every 0.5 seconds. Verisium Manifestations summons attack minions passively on hit, with up to 10 active at once and an 8-second duration.
For a full picture of what changed in patch 0.5 beyond Kalguuran Gems, including the new endgame storylines and the Atlas rework, our patch 0.5 Return of the Ancients complete guide has everything you need. You can also browse the full Path of Exile 2 guide collection for deeper dives into crafting, builds, and endgame progression.