

Your Trampler is everything in SAND: Raiders of Sophie. It's your mobile base, your respawn point, your cannon platform, and your extraction vehicle all rolled into one lumbering mechanical giant. The default blueprints you start with are functional, but they're not built to win. If you want to survive PvPvE raids against other crews and automated walkers, you'll need a custom design that fits your squad size, combat style, and extraction habits. This guide walks you through every step of that process.
What is the Trampler editor and how do you access it?
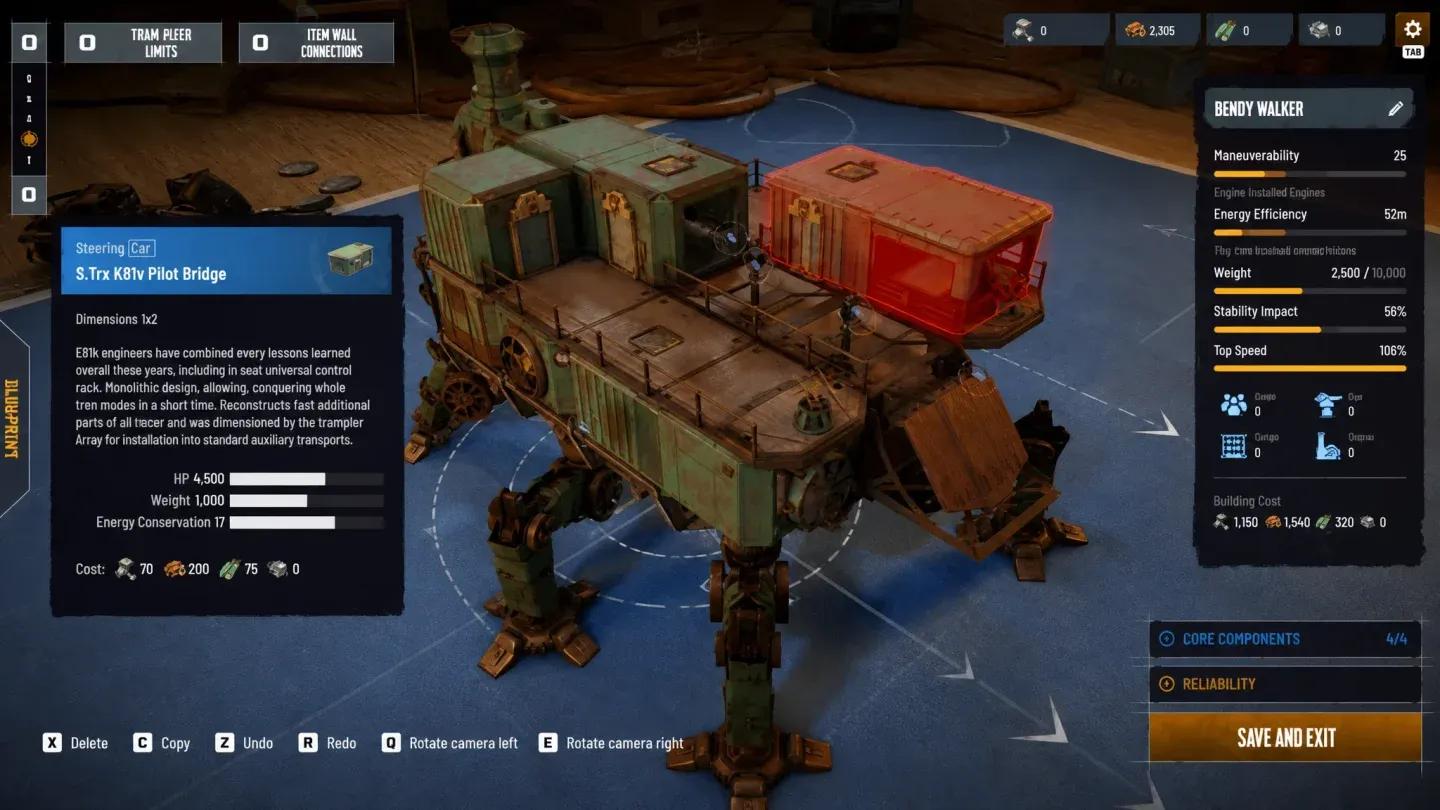
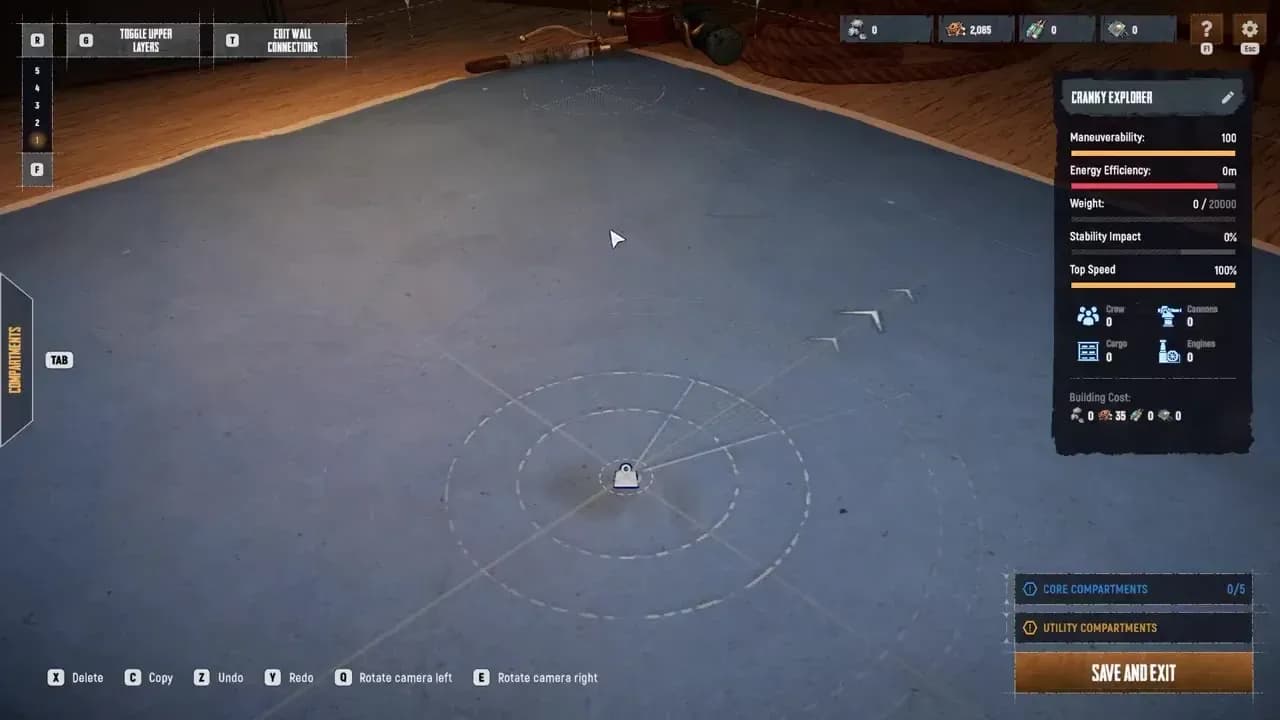
The Trampler Editor is a full blueprint construction tool accessible from the main menu's blueprint section. Here you can either edit one of the three default blueprints (one per crew size) or create something entirely new from scratch. Press C or click Create Blueprint at the top of the blueprint list to open a fresh design screen.
Navigation inside the editor works as follows:
Getting comfortable with these controls before you start placing parts saves a lot of frustration. The copy shortcut (C on an existing deck) is particularly useful for filling out floor sections quickly without reopening the parts menu every time.
What are the five required components for a valid Trampler?
Every blueprint must include five core structures before the game will recognize it as a valid Trampler. The editor's lower-right corner shows a checklist of these requirements, so you can hover over it at any time to see what's still missing.
- Chassis — The walking foundation of the entire vehicle. Place this first from the chassis tab; everything else attaches to it.
- Motor Reactor — Powers the engine and all mounted systems. This is also the most vulnerable component: if enemies destroy the reactor, the whole Trampler goes down. Keep it protected.
- Fly Bridge (Steering) — The steering compartment that lets you pilot the mech. Place it from the essentials tab.
- Valid Entrance Area — A clear ladder path from the bottom of the Trampler to the interior. Without this, your crew can't board.
- Captain's Compartment — Houses your bed and the main control console. This is also where you respawn after being eliminated during a raid.
Once all five components are in place and connected with decks, the construction warnings in the editor will clear. Save the blueprint, and it becomes available for any future raid as long as you have the required materials on hand to build it.
How do you connect components and expand the build?
Components don't just float next to each other. You need to link them using standard decks from the Decks and Frames tab. Place decks between compartments and use the C copy shortcut to fill gaps fast. Construction warnings in the editor will flag any disconnected sections.
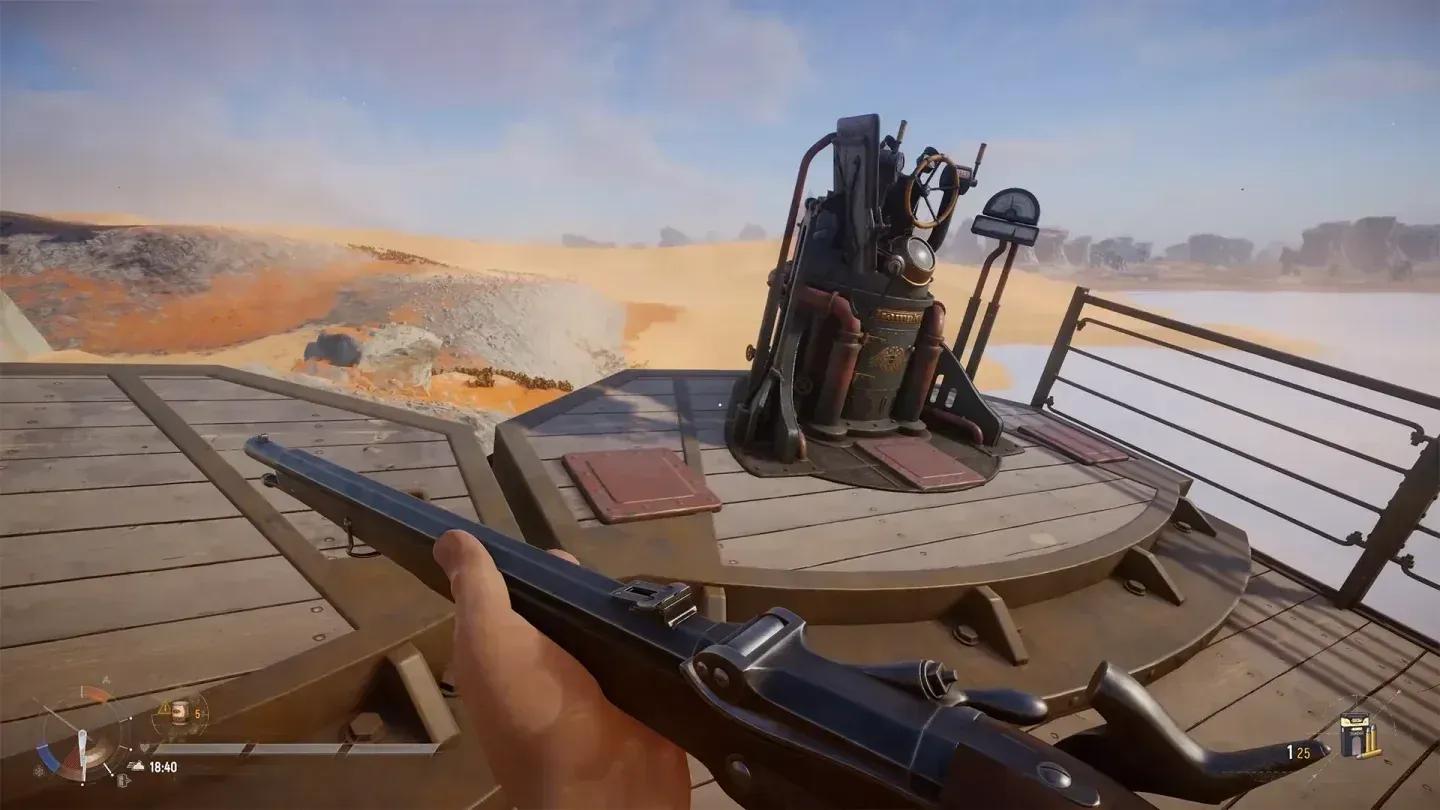
For combat, open the Combat tab and place turret decks wherever you want cannon mounts. You may need to remove standard decks first with X to clear a firing arc. Prioritize front-facing and high-angle positions to handle ambushes across the dunes and elevation differences.
For storage, the Utility tab holds storage decks. Only items stored on your storage racks can be extracted at the end of a raid, so place these deliberately. Position them close to your entry ramp to minimize time spent exposed during PvPvE encounters.
To build upward, place a support frame with a hatch from the Decks and Frames tab, then add more decks above it. Multi-floor builds give you more room for turrets and storage but add weight.
Turret deck placement
What common design mistakes should you avoid?
After testing builds across multiple raid types, a few patterns consistently cause problems:
Overbuilding weight. Every deck and module adds to the Trampler's total mass. Too much armor and too many floors turns your mobile asset into a slow, predictable target. Keep watching the statistics panel on the right side of the editor as you build. Speed and maneuverability need to stay viable, not just durability.
Undersupplying power. Skimping on the Motor Reactor early leads to disabled turrets or stalled movement mid-Voyage when you need both running simultaneously. Oversupply power in your initial design so later upgrades don't force a rebuild.
Blind spots in turret coverage. Leaving rear and high-angle arcs unguarded makes it trivial for other players to flank you. Turret placement is a survival decision, not a cosmetic one.
Wrong crew room count. Tramplers support a maximum crew size of six players. If you don't build enough crew rooms to match your squad, the Trampler can't properly support the team. Scale crew rooms to your actual group size.
Exposed reactor and storage. Enemy players will target both. Surround the Motor Reactor with structural cover, and keep storage racks away from the outer edges of the build.
Monitor build statistics
How do you unlock more Trampler parts?
The editor's parts library is limited early on because most components are locked behind the Tech Tree, which is the game's main progression system. Spending resources in the Tech Tree unlocks additional reactors, cannons, chassis types, and structural materials like wooden covers for protecting your build.
The practical advice here is to hold off on finalizing a custom blueprint until you've made meaningful Tech Tree progress. Building a custom Trampler with only starter parts gives you a marginally better layout but misses the more capable components that change what the vehicle can actually do. Check out the full Tech Tree upgrade breakdown to plan which unlocks to prioritize before committing to a design.
For loadout planning beyond the Trampler itself, the weapons and ammo crafting recipes guide covers every cannon and weapon option with exact material costs.
Tech Tree parts unlocks
Deploying and testing your blueprint
Once your blueprint is saved, you have two ways to test it. Voyages put you in the persistent open world where you can adjust turret arcs, check movement feel, and refine the layout without the pressure of a high-stakes wipe. Storm Dives are battle-royale-style modes with better loot but significantly higher risk. Use Voyages for testing new designs.
One thing worth knowing: Trampler blueprints are shared across all your characters, but inventories and Tech Trees are region-locked to the region you chose at character creation. If you lose every Trampler and run out of resources entirely, you'll need to either start a new character or join another crew's Trampler to get back on your feet.
For everything from looting strategy to selling extracted goods, the buying and selling items guide covers the shop interface so your extracted loot actually converts into the resources needed to build your next blueprint.
For the full collection of tips covering combat, looting, and progression, browse the SAND: Raiders of Sophie strategy guides on GAMES.GG.