
This guide covers 27 known choice points in Grand Theft Auto 6, including follow-up prompts, relationship decisions, rewards, and the final bridge choice.
The decisions below carry different stakes. Some change criminal profiles, character stats, or access to a vehicle; others change an outfit or leave the immediate mission sequence unchanged. Find your scene in the checklist, then read its consequences before answering. Coverage includes early chapters, later missions, and side encounters. Story spoilers appear throughout.
Known choices checklist
Each row represents one decision point. Conditional follow-up decisions, such as setting the price of cut product, count separately from the choice that unlocks them.
| No. | Mission or scene | Decision |
|---|---|---|
| 1 | Hey Arnold! | Kill or spare Arnold |
| 2 | Steal the Scooter | Steal Peggy's scooter or refuse |
| 3 | Buck Me! | Say Nothing or Saved Cash |
| 4 | Day Release | Shake Mattia's hand or let the timer expire |
| 5 | Day Release | Black, gold, or brown dress |
| 6 | Day Release | Accept Mattia's drugs or let the timer expire |
| 7 | Day Release | Mention Brian's retirement or stay silent |
| 8 | What's In the Bag | Give Linda the necklace or let the timer expire |
| 9 | Balcony scene | Hold Lucia's hand or do not |
| 10 | Communication tower preparation | Ask for help or go solo |
| 11 | Chapter 3 poolside scene | Participate or decline |
| 12 | Dancers' scene | Help the dancers or do not |
| 13 | Club with Dre'Quan | Take the play money or decline |
| 14 | Chapter 3 product purchase | Buy pure or cut product |
| 15 | Cut-product sale | Accept half price or demand the maximum |
| 16 | Benedict Halifax's offer | Give him the statue or reject him |
| 17 | Halifax follow-up | Trust Halifax or do not |
| 18 | Felipe confrontation | Kill or spare Felipe |
| 19 | Kirk and the Skunk Ape | Shoot Kirk or shoot the Skunk Ape |
| 20 | Gene's roadside encounter | Cover for Gene or expose him |
| 21 | Mutated strawberry | Eat it or refuse |
| 22 | Chapter 4 gym infiltration | Accept steroids or refuse |
| 23 | Adventures In Babysitting | Accept Andres's drugs or decline |
| 24 | Cellerica initiation | Minor Truth or Brutal Truth |
| 25 | After Brutal Truth | Defuse or provoke the group |
| 26 | Shayna's boyfriend confrontation | He's Not Worth It or He Deserves It |
| 27 | Final bridge confrontation | Swim For It or No Surrender |

Chapter 1 and Chapter 2 choices
Kill or spare Arnold
Jason confronts Arnold at a dock during Hey Arnold! in Chapter 1. This decision changes Jason's criminal profile.
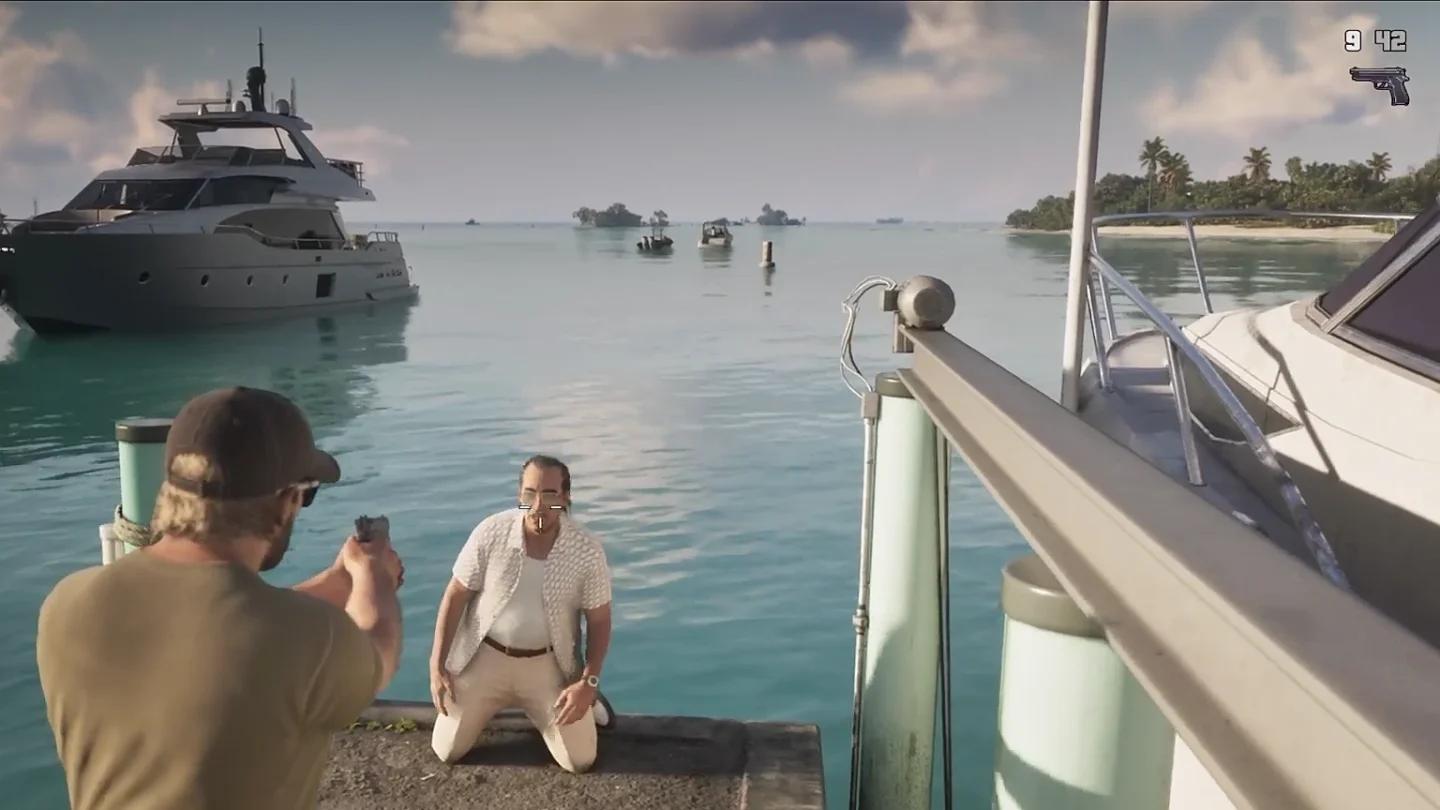
Arnold on the Leonida docks
- Kill Arnold: Jason receives a Hardened criminal profile.
- Spare Arnold: Jason receives a Restrained criminal profile. A later Chapter 4 follow-up can bring a message from Brian and a $10,000 thank-you for letting Arnold live.
Peggy's scooter, the bank, and Mandy
Stealing Peggy's scooter lets you use Shirley's Penumbra with paw-print decals during Chapter 1. Getting caught can give you a wanted level. Refusing skips this optional mission and its vehicle access.
During Buck Me!, choosing Say Nothing or Saved Cash produces the same dismissive response from the bank about your credit. Neither answer changes that conversation's result.
Pipework does not contain a Mandy romance branch. You cannot sleep with her during that mission, so it is not counted as a decision point in the checklist.
Day Release choices
Day Release takes Lucia clubbing in Vice City and includes several timed prompts. The dress selection and social responses do not all have the same consequences.
| Prompt | Consequences |
|---|---|
| Shake Mattia's hand | Shaking his hand continues the mission. Letting the timer expire has no immediate consequence. |
| Black, gold, or brown dress | Determines Lucia's outfit for the clubbing sequence. Pick the appearance you prefer. |
| Accept Mattia's drugs | Accepting or letting the timer expire leaves the remaining mission sequences unchanged, with no visible effect. |
| Mention Brian's retirement | Mentioning it increases Jason's relationship with Lucia, who supports him in following missions. Staying silent causes a relationship drop during Recalibration. |
Give Linda the necklace
In Chapter 2's What's In the Bag, the necklace decision does not override the rent requirement. If you cannot cover the rent, Lucia puts the necklace up as collateral whether you select Give or let the timer expire.
Relationship and mission preparation choices
The balcony and poolside scenes
The balcony hand-holding prompt changes Jason and Lucia's relationship level. It is a relationship decision, not simply an animation choice.
During the Chapter 3 poolside scene, participating costs romance points with Lucia without changing the rest of the mission. Declining sends Jason inside, where he locates the safe, removes it from the wall, and escapes with the objective.
Ask for help with the communication towers
The tower preparation decision changes how much work you finish before the bank job and how Jason and Lucia handle it together.
- Ask for help: Jason and Lucia each climb a tower, your relationship improves, and you can clear all three towers. Completing that preparation gives you more time inside the bank.
- Go solo: Jason climbs the towers himself, your relationship drops, and you can clear only two of the three.
Help the dancers and take Dre'Quan's money
Helping the dancers puts Jason onstage with the performers, audience members, and eventually Lucia. This is the stealthier approach. Refusing makes the dancers leave, forces Frankie to perform alone, and takes the more aggressive route through the mission.
Dre'Quan's play money unlocks an optional club interaction. Taking it lets Jason and Lucia throw money to the dancers. Declining skips that sequence and gets them straight to business.
Cash, vehicles, and side-job choices
Pure or cut product
In Chapter 3, Tyrone offers a cheaper, lower-quality product with a higher advertised profit margin or a more expensive, higher-quality product. The sale plays out differently depending on your purchase.
| Purchase | Sale consequence | Reason to choose it |
|---|---|---|
| Pure product | The buyer's associate checks the quality, and handling the deal properly gives a Professional rating boost. | Choose it for the Professional boost. |
| Cut product | The buyer tests it and opens another decision over the sale price. | Lower purchase cost, with a price dispute at the sale. |
If you bought cut product, you can accept half price or insist on the maximum. Demanding the maximum starts a fight and forces you to escape the police. The advertised margin is not a guaranteed clean payout.
Give the statue to Halifax or reject him
Benedict Halifax offers to investigate the statue's authenticity and value, leaving his watch with Jason and Lucia. Giving him the statue starts a follow-up that takes time to progress. Rejecting him leaves the statue at home and ends this mission chain.
When you find Halifax again, trusting him continues the story. You eventually recover the statue, arrange its sale through Angela, get a stash bag of loot from his storage unit, and can steal his Vapid 32 Hustler. Choosing not to trust him ends the chain in the same way as rejecting his original offer.
Felipe, Kirk, and Gene
Felipe presents a cash-versus-car decision for your Grand Theft Auto 6 vehicle collection. Killing him pays $20,000 into BuckMe. Sparing him leads to a later text offering Felipe's 80 Impaler Declasse at Lost Heaven Cemetery.
For Kirk's payout, wait until the Skunk Ape wakes up and threatens him before shooting it. This branch brings a $10,000 payment through BuckMe.
Kirk subsequently leaves by helicopter, which crashes and kills both him and the pilot. The Skunk Ape is missing afterward.
Covering for Gene earns a Luxury Watch tied to the Exploration collection in Grand Theft Auto 6's challenges. Its collection category is under Progress > Collections > Exploration.
Character upgrades and drug choices
Eat the mutated strawberry
Eating the mutated strawberry buffs Health, Stamina, and Focus, restores Health, and permanently increases Stamina. There is no stated downside to accepting it. Refusing simply skips eating it.
Accept Lucia's steroids
During Chapter 4's gym infiltration, accepting steroids changes Lucia's muscle type to Enhanced in the fitness app. Her body rating can then reach 5/5 instead of the normal 4/4 limit. Refusing has no serious consequence.
Accept Andres's drugs
In Chapter 4's Adventures In Babysitting, accepting Andres's drugs adds a tripping effect during the following fights. Declining keeps the sequence visually normal; the event otherwise plays out the same way.
Cellerica and Shayna choices
Minor Truth or Brutal Truth
Lucia's Cellerica initiation gives you a choice between sharing an embarrassing memory and insulting the group directly.
| Response | Immediate result |
|---|---|
| Minor Truth | Lucia shares a high-school story, and the group laughs. |
| Brutal Truth | Lucia calls the group stupid. Andy objects, and the leader asks someone else to share a truth. |
After Brutal Truth, another prompt lets Lucia defuse or provoke the group. Defusing lets the ceremony finish normally. Provoking starts a fight before it continues.
He's Not Worth It or He Deserves It
When Shayna confronts her boyfriend, Lucia's advice determines whether Shayna shoots him.
- He's Not Worth It: Shayna does not shoot him. She tells him to complete the sale and plans to keep the money.
- He Deserves It: Shayna shoots her boyfriend several times.
Final bridge choice and its consequences
The bridge offers two selectable responses, Swim For It and No Surrender, with three known outcomes between them. The Grand Theft Auto 6 endings and consequences guide covers the wider epilogues; the immediate character fates are compared below.
| Final response | Version of the scene | Outcome |
|---|---|---|
| Swim For It | Jason leaves the car unarmed | Lucia jumps and escapes. Jason is arrested and later shown in prison. |
| Swim For It | Jason leaves the car armed | Police shoot Jason and Lucia dead on the bridge. |
| No Surrender | Jason and Lucia fight the roadblock | Both die following the car crash. |
The trigger for the armed version of Swim For It is unconfirmed. Treat its two versions as different outcomes of the same final prompt, not as a third selectable button.