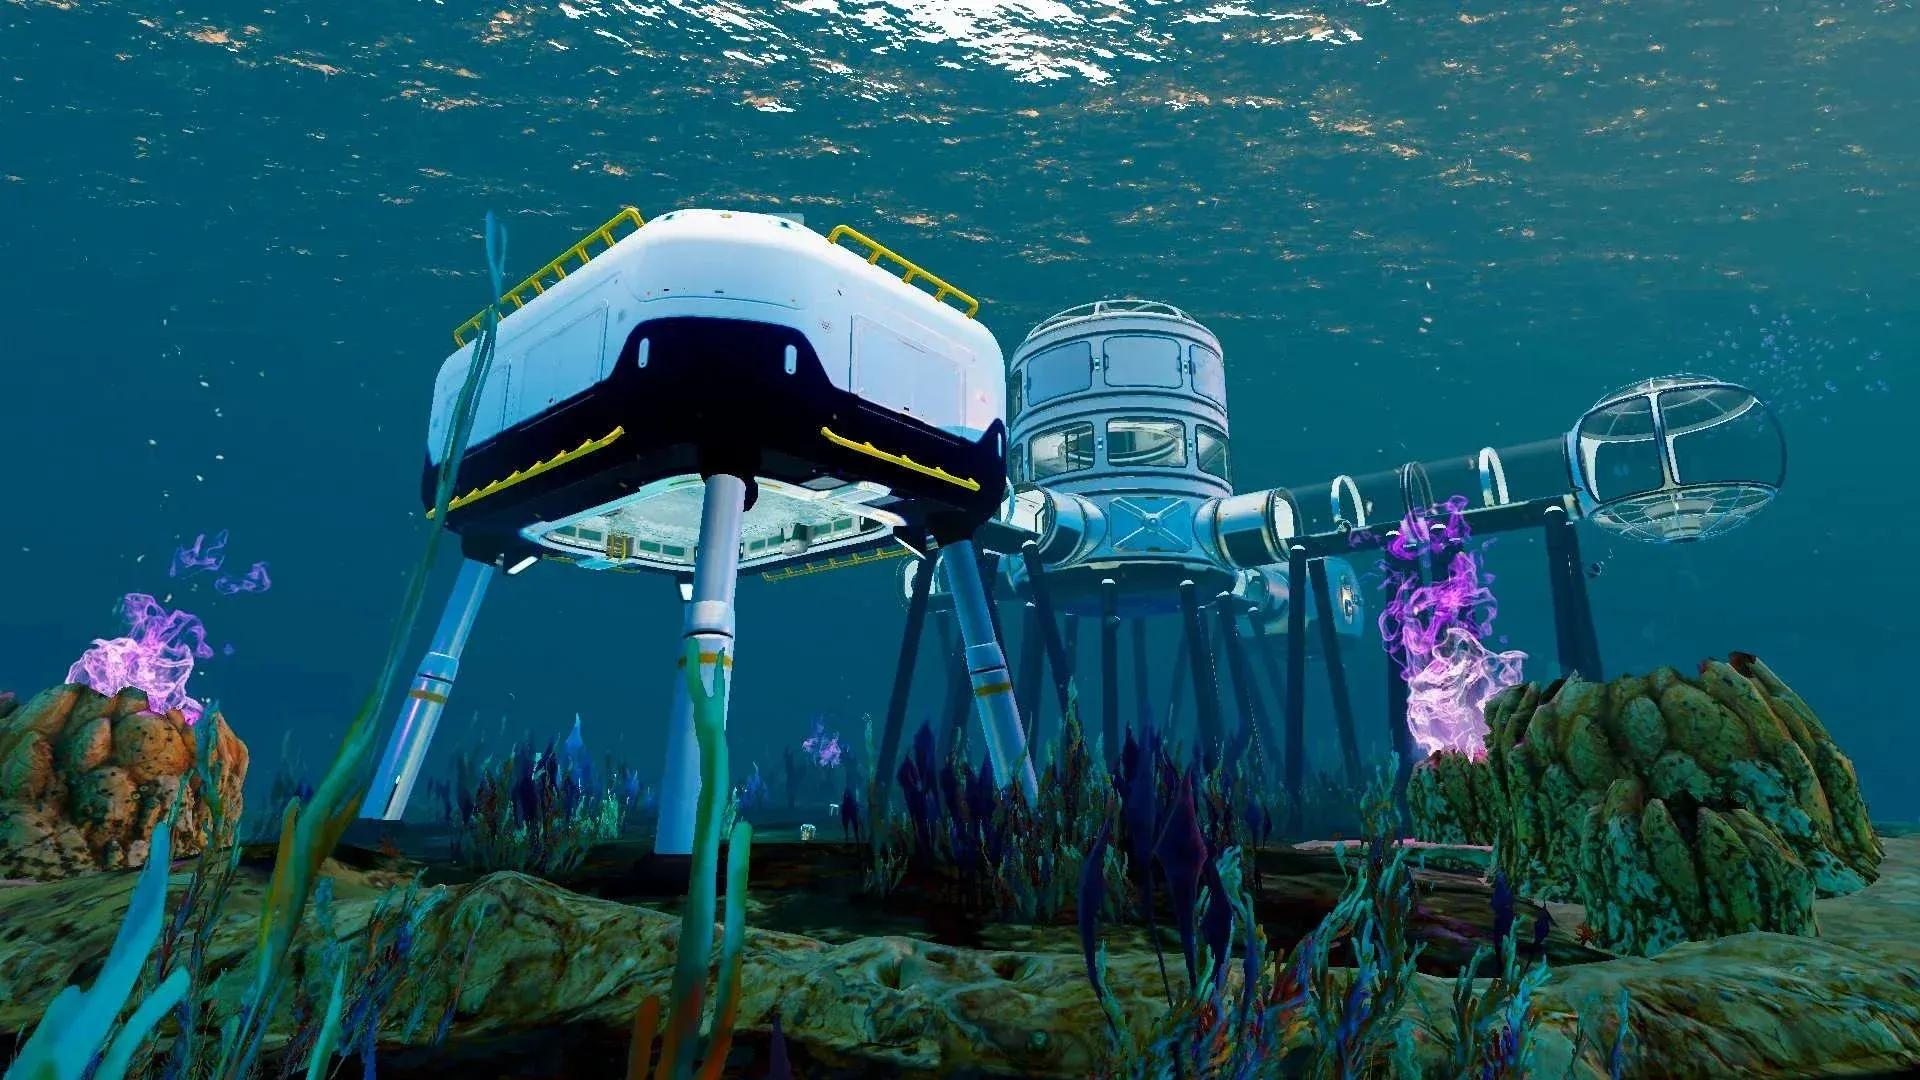

Building a base in Subnautica 2 transforms your entire experience on Zazura. Instead of constantly surfacing for air, you get a permanent underwater shelter with oxygen, crafting stations, and storage. Everything starts with the Habitat Builder tool and expands into power systems, specialized rooms, and vehicle docking. Here's how to set up a functional base and keep it running.
How do you unlock the Habitat Builder?
You need to scan 2 Habitat Builder fragments before you can craft one. First, build a Scanner at your Life Pod fabricator under the "Personal" tab. The Scanner requires 2x Titanium, 2x Quartz, and 1x Basic Battery. Craft the Basic Battery in the "Resources" section using 2x Copper and 1x Acidic Raion Pouch.
With your Scanner ready, swim southeast to the Welcome Center ruins. Both fragments are here:
- One sits in an open crate near the entrance, just right of the Welcome Center sign.
- The second is in the cave beneath the building. Salvage the metal blocking the floor hole, drop down, and scan the crate at the bottom.
After scanning both, return to your Life Pod and craft the Habitat Builder for:
- 2x Titanium
- 1x Glass
- 1x Basic Battery
- 1x Copper Wire
Copper Wire is crafted in "Resources" for 2x Copper per piece. Equip the Habitat Builder, right-click (or LT on controller) to open the build menu, and browse tabs for Standard Elements, Interior Facilities, Exterior Facilities, Utility, and Furniture & Decor. Press Q then left-click (or Y then A on controller) to deconstruct any structure and reclaim its materials.
Where is the best place to build a base?
Your first base location matters. Pick wrong and you'll waste materials rebuilding elsewhere. Consider these factors:
- Distance from the Life Pod: Your pod already has a Fabricator and NoA Terminal, so building right next to it is redundant.
- Flat terrain: Large corals, plants, and cavern walls block placement. Look for open, relatively flat seabed.
- Resource proximity: Being near Titanium, Copper, and Fibrous Pulp deposits saves time on supply runs.
- Enemy density: Avoid leviathan territory. Small and medium hostiles are manageable; massive creatures are not.
- Natural currents: Building near an underwater current lets you use the Hydroelectric Turbine later for consistent power that Solar Panels can't match.
If you need more direction before committing to a spot, the Subnautica 2 beginner's guide covers nine essential early tips including navigation and scanning priorities.
What are the basic building blocks?
Stock up on Titanium, Copper, and Quartz before you start building. These three materials cover most early structures. Rooms must be unlocked separately from Corridors.
Standard Elements:
- Corridor (2x Titanium): The connective tissue of any base. Plan your layout before placing these since they determine how rooms connect.
- Room (5x Titanium): Multiple rooms can stack in the same location to expand floor area.
- Hatch (1x Titanium, 1x Quartz): One is enough as an entrance, but placing extras on different sides saves time.
Interior Facilities:
- Fabricator (1x Titanium, 1x Copper, 1x Quartz): Craft tools and advanced resources without returning to the Life Pod.
- Biobed (3x Titanium, 1x Glass, 1x Copper Wire): Sets a respawn point inside your base.
- NoA Terminal (3x Titanium, 1x Copper Wire, 1x Glass): Tracks colony blackbox updates and mission progress.
- Biolab (3x Titanium, 1x Mild Acid, 1x Copper Wire): Lets you swap active and passive Biomod skills from your base instead of returning to the Welcome Center.
- Processor (2x Titanium, 1x Mild Acid, 1x Copper Wire): Manufactures ingots, acids, and alternative item recipes.
- Scanner Station (3x Titanium, 1x System Chip, 1x Wiring Kit): Highlights resource deposits or colonist base types within a set area.
- Battery Terminal (2x Titanium, 2x Quartz, 1x Copper Wire): Recharges Basic Batteries used by tools.
- Power Cell Terminal (3x Titanium, 3x Copper, 1x Wiring Kit): Recharges Power Cells for large structures and vehicles.
Exterior Facilities:
- Habitat Beacon (1x Titanium): Place on the roof so the base icon appears on your screen from a distance.
How does base power work, and why does it control oxygen?
This catches new players every time. Power and oxygen are directly linked. As long as your base's energy supply exceeds its energy demand, the entire structure fills with breathable air. The moment power drops into a deficit, oxygen production shuts down and your base floods.
You can monitor energy supply and demand in the top-left corner of the screen whenever you're near your base.
Power source comparison
Solar Panels are the right starting point since Titanium and Quartz are plentiful near the Life Pod. The Hydroelectric Turbine is the best long-term choice for consistent power without ongoing material costs, provided you positioned your base near a current. The Thermal Plant works well in the Zezuran Desert biome. The Bioreactor produces the most energy of any source but requires you to keep it stocked, ideally with Biofuel Blocks crafted in the Processor from Fibrous Pulp, Pents, or Crab Feces.
Both the Hydroelectric Turbine and Thermal Plant must be built outside your base and connected via Power Transmitters (1x Titanium, 1x Copper each). The final Transmitter in the chain must attach directly to your base exterior to complete the link. The Bioreactor is the only power source that lives inside the base itself.
For the full walkthrough on setting up your base structure before worrying about power, see the Subnautica 2 base building guide covering the Habitat Builder and foundations.
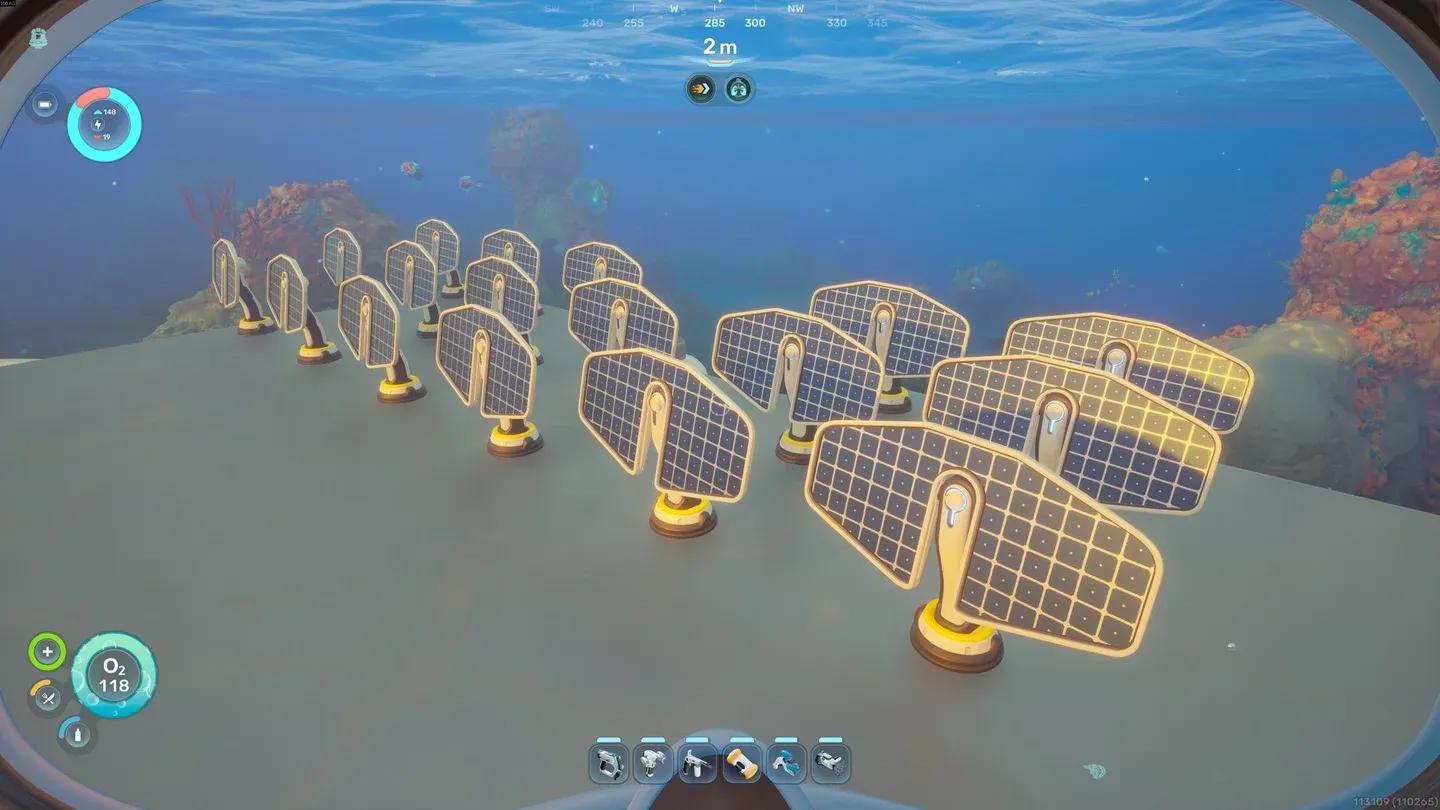
Solar Panels on base roof
How should you organize storage?
Once you scan the right objects, three storage container types become available:
- Wall Locker (2x Titanium): 20 slots. Good for vertical space efficiency.
- Floor Locker (3x Titanium, 1x Quartz): 30 slots. Best capacity per unit.
- Portable Locker (4x Titanium): 15 slots. Can be carried or attached to a Tadpole.
The most useful behavior to know: materials stored in lockers are automatically drawn on during crafting and manufacturing. You don't need to move resources to your personal inventory first. That makes dedicated storage rooms sorted by material type far more efficient than dumping everything into one locker.
How do you add the Tadpole to your base?
The Tadpole submersible integrates directly into your base through a dedicated docking setup. You need the following structures, in order:
- Moonpool (5x Titanium): Place this inside a room. Build your base with enough vertical clearance underneath to accommodate this.
- Tadpole Dock (2x Titanium Ingot, 1x Silver Ingot, 2x Copper Wire): Attaches to the Moonpool.
- Vehicle Fabricator (2x Titanium Ingot, 1x Copper Ingot, 2x Glass): Also attaches to the Moonpool. Used to build the Tadpole itself.
- Modification Station (2x Titanium, 2x Celestine, 2x Copper): Place inside the base to craft Tadpole upgrade modules.
- Tadpole Core Module (2x Titanium Ingot, 1x Glass, 1x System Chip, 1x Power Cell): The actual vehicle, built at the Vehicle Fabricator.
Plan for the Moonpool before you commit to a base layout. Retrofitting it into a base that wasn't designed for it is awkward.
What if you want to move your base?
You're not locked into your first location. Pressing Escape to open the pause menu reveals a Refund Bases option. Selecting a base destroys it entirely and returns all materials spent on structures and machines, plus anything stored in Wall Lockers and Floor Lockers. Everything drops into a temporary container near your character.
The practical advice here: swim to your intended new location before triggering the refund. That way you collect the materials right where you need them instead of having to haul everything across the ocean.
For more on what else Subnautica 2 has added to the formula, including 4-player co-op, the new planet Zazura, and dynamic currents, the full breakdown of every new feature confirmed for Early Access has everything you need. For even more guides covering resources, vehicles, and progression, browse the complete Subnautica 2 guides collection.