Gears of War: E-Day has four separate completion counters tracked in the War Journal: 140 standard collectibles, 125 Hard Cases, 17 Secondary Objectives, and 36 Supply Cache stations. That last category also feeds into the Quartermaster achievement, which works differently from simply visiting every station. Miss one of these, and the For Whom the Bell Tolls achievement stays locked. This guide walks every location in campaign order so you can sweep cleanly on your first run.

War Journal tracks your progress
What counts toward 100% completion in E-Day?
Here's the short answer: four categories, all tracked separately in the War Journal. They do not share a counter, and you should not add them together when checking progress.
| Category | Total | Achievement |
|---|---|---|
| Standard collectibles | 140 | Memories From E-Day |
| Hard Cases | 125 | Relax. I'm the Map. |
| Secondary Objectives | 17 | Side Piece |
| Supply Cache stations | 36 | War Journal category |
| Eligible Supply Cache item types | 17 | Quartermaster |
The distinction between Supply Cache stations and the Quartermaster achievement trips up a lot of players. Visiting all 36 stations does not automatically unlock Quartermaster. That achievement tracks whether you have picked up or stowed each eligible weapon and equipment type at least once. Those are two separate failure points.

Act totals at a glance
| Act | Collectibles | Hard Cases | Objectives | Cache stations |
|---|---|---|---|---|
| Act 1 | 13 | 0 | 0 | 0 |
| Act 2 | 38 | 36 | 7 | 11 |
| Act 3 | 36 | 38 | 3 | 8 |
| Act 4 | 41 | 46 | 7 | 13 |
| Act 5 | 12 | 5 | 0 | 4 |
| Total | 140 | 125 | 17 | 36 |
Before you start: three things to know
Use Tac-Com constantly. Hard Cases trigger an on-screen nearby notice and get outlined through cover when you activate Tac-Com. A collectible audio chime plays when you enter an area containing one. Train yourself to pause and scan every new room.
Know your one-way doors. Four chapters have points of no return: Hold the Line before linking with Charlie Squad, The Convoy before dropping through the bridge floor, Technical Difficulties before the train departs, and One Problem at a Time before boarding the final train. Finish every sweep in those chapters before crossing those thresholds.
Co-op tracking changed with the October 5 patch. A player joining an in-progress campaign no longer inherits War Journal or Forge progress earned before they joined. For shared cleanup runs, load the chapter together and both players need to be present for each pickup.
Act 1 locations (13 collectibles)
Act 1 has no Hard Cases, Secondary Objectives, or Supply Cache stations. It is purely a collectible sweep across four chapters.
Emergence (3 collectibles)
- Monster Jaw: Beside the emergence hole near the newsstand.
- Bloody Transit Worker's Helmet: In the maintenance corridor; check the side opening after using the flashlight.
- Front Page of the Kalona Times: On the kitchen counter after the civilian and pillar sequence.
Survival of the Fittest (4 collectibles)
- KPD Police Bulletin: On the back desk inside the police area.
- Bloodied Police Chief's Badge: Below the hanging police chief.
- Army Recruitment Pamphlet: On a nearby desk.
- Try On Pilot Helmet: Interact with the third helmet from the left.
A Gear in Need (2 collectibles)
- Tomatoes, Canned: In the second room of the Try N Save warehouse, on the left.
- Broken Lancer Bayonet: By the dead soldier in the supermarket after the Tai cutscene.
Back in the Fold (4 collectibles)
- Front Page of the Tyran Chronicle: On a doorstep down the right-hand alley, near the low stairs.
- Anti-UIR Propaganda Poster: On the graffiti wall by the red Major Burger van.
- Landa Memorial Medical Supplies Memo: On the reception desk.
- COG Tags: Private Brick Rosso: Behind the police car outside the park, beside the dead Gear.
Act 2 locations (38 collectibles, 36 Hard Cases, 7 objectives, 11 caches)
Act 2 is the biggest single-act workload. All seven Secondary Objectives are inside Hold the Line, and that chapter is also where the point-of-no-return sweep happens before linking with Charlie Squad.
Bravo Squad (5 collectibles)
- COG Helmet With Bullet Hole: Beside the remains and rubble after the vehicle opens the way.
- Sniper Goggles: At the dead Locust at the end of the control-room corridor.
- Bridge Worker's Lunch Kit: At the gantry dead end after dropping the ladder.
- Thrashball Rush Magazine: On the cabinet at the far end of the next control room.
- Medic's First Aid Kit: By the burning COG truck after the Heavy Boomer fight.
Hold the Line: Secondary Objectives
All seven Act 2 Secondary Objectives are here. Each rewards weapon mods you can equip at Supply Caches.
| Objective | Location | Rewards |
|---|---|---|
| The Vanguard | Car dealership, east of Oria Stadium | Bayonet (Hammerburst), Cover Brace (Lancer Mk1) |
| Trapped Family | Last Dollar car park, west of Octus Way | Precision Long Barrel (Breechshot), Bayonet (Gnasher) |
| Apartment SOS | HELP apartment, east of Octus Tribunal | Cover Brace (Breechshot), Grounded Capacitor (Sonic Disruptor) |
| Lost in Translation | Major Burger diner, between Bank of Tyrus and Warehouse District | Laser (Lancer Mk1), Melee Stunner |
| Family Reunion | Shelter 13, Victory Plaza | Adrenaline Injector Mod Slot, Overpacked Mag (Prototype Lancer) |
| Black Raven Down | Restaurant southwest of Monroe Library | Overcharged Ammo (Gut-Puncher), Proximity Reload |
| Lone Wolf | Building southeast of Monroe Library | Deep Pockets, Full Metal Jacket (Hammerburst) |
Hold the Line collectibles: 27 items spread across Parts 1, 2, and 3. Notable ones to watch for: the Photograph and Harmonica From Mags' Apartment is awarded automatically after the story cutscene, and the War Savings Bond is inside the Bank of Tyrus vault once the story opens it. Hard Case 19 (on the table right of Charlie Squad's camp) is the point-of-no-return sweep marker for this chapter.
Hold the Line Supply Caches (9): Located at the starting staging area, subway tunnel end, canal steps garage, theater under the Cold Snap poster, Major Burger beside the loading dock, Police Department below the emblem, courthouse drop (look left after the cutscene), beneath the train line, and downstairs in the Kalona Hotel lobby.
No Gear Left Behind (5 collectibles, 6 Hard Cases, 1 cache)
- COG Tags: Private Sal Harkniss: Tunnel after the Impaler cutscene, beside the body with the melted face.
- COG Tags: Private Siv Strickland: Beside the Gear impaled against the van.
- Bloodied Spike: Right-hand corner before the golden Gear statue plaza.
- Ink-Covered Wrench: Left side of the golden statue plaza.
- COG Tags: Lieutenant Jane Hawkins: Near the covered bodies and gate by Captain Grey's position.
The chapter's single Supply Cache is on the scaffolding route after the golden statue plaza, beside a shipping container.
Overrun (1 collectible, 3 Hard Cases, 1 cache)
- Point Fairlight Datapad: On the crates between the trucks after dropping into the red crater.
The Supply Cache is in the final hangar, on the left. The three Hard Cases cluster around the warehouse breach and the red crater.
Act 3 locations (36 collectibles, 38 Hard Cases, 3 objectives, 8 caches)
Act 3's Secondary Objectives are all in Last Foothold. The chapter also has the largest single collectible count in the act at 14 items.
Act 3 Secondary Objectives
| Objective | Location | Rewards |
|---|---|---|
| Weak Signal | Loading bay south of Landa Memorial Hospital | Incendiary Ammo (Lancer Mk1), Salt Dog |
| Lost in the Park | Park right of Kalona Hotel | Holo Sight (Snub), Laser (Striga) |
| Rooftop Mayday | Northern Monroe Library rooftop | One Shot, Stabilized Ammo (Striga) |
Both Lost in the Park and Rooftop Mayday require helping Corporal Harris fend off his attackers first. They will not appear until that main objective clears.
The Convoy: one-way warning
This chapter has five Hard Cases and three collectibles. Hard Case 3 is at the left end of the bridge before dropping through the floor. That drop is a one-way transition. Grab everything on the upper bridge before you fall.
Act 4 locations (41 collectibles, 46 Hard Cases, 7 objectives, 13 caches)
Act 4 has the highest counts across every category. The seven Secondary Objectives split between Hope and Ruin (3) and Tough as Nails (4).
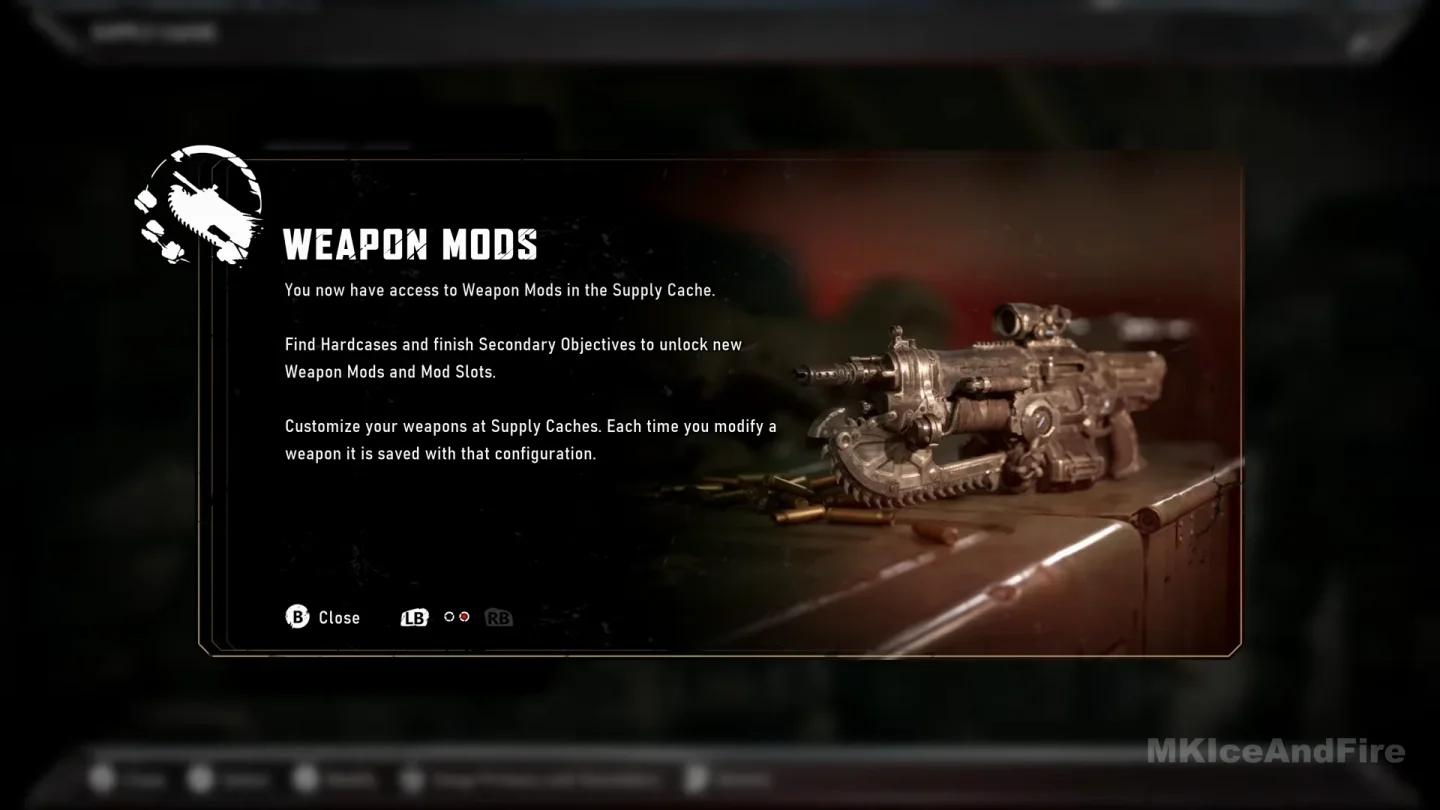
Equip mods at Supply Caches
Hope and Ruin Secondary Objectives
| Objective | Location | Rewards |
|---|---|---|
| Missing Convoy | Park south of Cooper Commons | Mobile Targeting Laser (Torque Bow), Braced Capacitor (Stim Vaporizer) |
| R.I.G. Experiment | Scanning device west of Kalona Square | Blood Mag, Overpacked Mag (Hammerburst) |
| Clocktower Defense | Clocktower north of Highview Forum | General Mod Slot (Breechshot), Slick Breech (Breechshot), Holo Sight (Snub) |
Tough as Nails Secondary Objectives
| Objective | Location | Rewards |
|---|---|---|
| Special Cargo | Civilian talk, west side of Gavel Dockyard | General Mod Slot (Longshot), Expanded Magazine (Longshot) |
| Fire in the Hole | Injured civilian in Control Tower | Incendiary Rounds (Ripper), Incendiary Rounds (Gut-Puncher) |
| Trapped Locust | Station control room | General Mod Slot (Incinerator), Springloaded Mag (Incinerator) |
| Death from Above | Factory rooftop lever | Combat Scope (Hammerburst), Torque Regulator (Torque Bow) |
Act 4 collectible highlights
- COG Tags: Sergeant Aman Landry (Technical Difficulties): Step off at the red-lit station stop, grab the tags, and reboard before the train leaves.
- Imulsion Blast Charge (Tough as Nails, Special Cargo): Inside the container opened at the end of the Special Cargo objective. You can also use the collectible marker to locate the container before starting the objective.
- Port of Kalona Docking Registry (Tough as Nails): On the console at the top of the communications tower.
Act 5 locations (12 collectibles, 5 Hard Cases, 4 caches)
Act 5 has no Secondary Objectives, so the focus is purely on collectibles and Hard Cases.
One Problem at a Time (1 collectible, 2 Hard Cases)
- COG Tags: Private Lorin Galvin: On the left before passing through the wall opening.
- Hard Case 2 is on the small ledge right of the final train. Collect it before boarding. This is the last point-of-no-return in the game.
Ghost Town (3 collectibles, 3 Hard Cases)
- COG Tags: Specialist Wallace Teale: End of the train tracks, right of the climbable slope by the container.
- Clinical Trial Medication: Hospital upper level, rear walkway cabinet.
- COG Tags: Master Sergeant Joseph Kopec: Apartment overlook, behind you after passing through the wall opening.
Resolute (5 collectibles, 3 caches)
- Kalona Skyline Sketch: Top of the yellow crane ladder, beside the crates on the right.
- Carlos Santiago's COG Tags and Photo (The Fall of Kalona): Awarded automatically during the credits after the final cutscenes. There is no physical pickup required.
Quartermaster: the 17 eligible item types
The mistake most players make here is assuming visiting all 36 Supply Cache stations completes Quartermaster. It does not. The achievement tracks whether you have picked up or stowed each eligible weapon and equipment type at least once during the campaign.
Primary and special weapons (10): Lancer MK1, Prototype Lancer, Hammerburst, Gnasher, Ripper, Breechshot, Longshot, Incinerator, Gut-Puncher, and Torque Bow.
Sidearms (2): Snub and Striga.
Equipment (5): Frag Grenade, Incendiary Grenade, Smoke Grenade, Concussion Grenade, and Razor Mine.
Pick up unfamiliar weapons even if you plan to swap them back immediately. The Gut-Puncher first appears by the end of Act 1, Chapter 4. The Torque Bow is the most commonly missed weapon; grab one from the Act 3, Chapter 5 encounter rather than assuming a station visit registered it. Holdout areas are good places to cycle through grenade types you have not touched yet.
If Quartermaster stalls below 100%, check the weapon list before replaying all 36 station locations. Some players have reported inconsistent tracking at launch, so treat the percentage as a diagnostic clue rather than a guaranteed indicator of what you have left.
Achievement cleanup: what to check first
For the For Whom the Bell Tolls achievement, the two conditions (100% completion on any difficulty and campaign completion on Insane) are confirmed separate requirements. Run your collection sweep first on a comfortable difficulty, then do a clean Insane story run.
- Missing a standard collectible: Open the War Journal's Act list, find the named gap, and replay the relevant chapter.
- Missing a Hard Case: Compare your Act total against the per-Act counts (36 in Act 2, 38 in Act 3, 46 in Act 4, 5 in Act 5). Chapter Replay can make the local chapter view look empty while the overall Act total remains intact, so trust the Act-level number.
- Missing a Secondary Objective: All seven Act 2 objectives are in Hold the Line. All three Act 3 objectives are in Last Foothold. The seven Act 4 objectives split between Hope and Ruin (3) and Tough as Nails (4).
- Tracker looks wrong: Restart the game, load the chapter through Chapter Replay, and recollect the suspected item. That is a troubleshooting step, not a universal fix.
For the full achievement list including the brutal Dead Serious requirement (100% on Insane, 25,000 Versus kills, max player level, and four maxed classes), check our complete Gears of War: E-Day achievements guide.
FAQ
How many collectibles are in Gears of War: E-Day?
There are 140 standard collectibles. Hard Cases, Secondary Objectives, and Supply Cache stations use separate War Journal counters and should not be added to that number.
How many Hard Cases are in E-Day?
There are 125 total: 36 in Act 2, 38 in Act 3, 46 in Act 4, and 5 in Act 5. Act 1 has none.
How many Secondary Objectives are there?
There are 17. Seven are in Hold the Line (Act 2), three are in Last Foothold (Act 3), three are in Hope and Ruin (Act 4), and four are in Tough as Nails (Act 4).
Does visiting all 36 Supply Caches unlock Quartermaster?
No. Quartermaster tracks the 17 eligible weapon and equipment types you have picked up or stowed, not the number of stations visited. Check the weapon list first if the achievement is stalling.
Can missed items be collected with Chapter Replay?
Yes. Standard collectibles, Hard Cases, and missed objectives can all be cleaned up through Chapter Replay. Keep a manual note of Hard Cases because the replay-local display can mislead you even while the overall Act total is preserved.
Does 100% completion have to be done on Insane?
No. The achievement text confirms 100% completion can be achieved on any difficulty. Insane campaign completion is a separate second condition for For Whom the Bell Tolls.
For more on what to expect before you start, see the full Gears of War: E-Day Guides collection covering everything from co-op setup to beta rewards.