
Grand Theft Auto 6 has accessibility settings for button inputs, readable text, subtitles, visual contrast, camera movement, and audio. Start with the option that addresses your immediate problem: repeated tapping, small markers, unclear dialogue, or uncomfortable screen effects. You can configure these separately from combat and vehicle-damage assists, so improving readability does not require making encounters easier. This guide explains where each group lives, which settings address different needs, and how to check your changes without adjusting everything at once.
Where to find accessibility settings
Open the accessibility options through the pause menu:
- Open the Pause Menu.
- Select Settings.
- Choose Gameplay, then find the Accessibility group for tap, hold, interaction, and gameplay assistance.
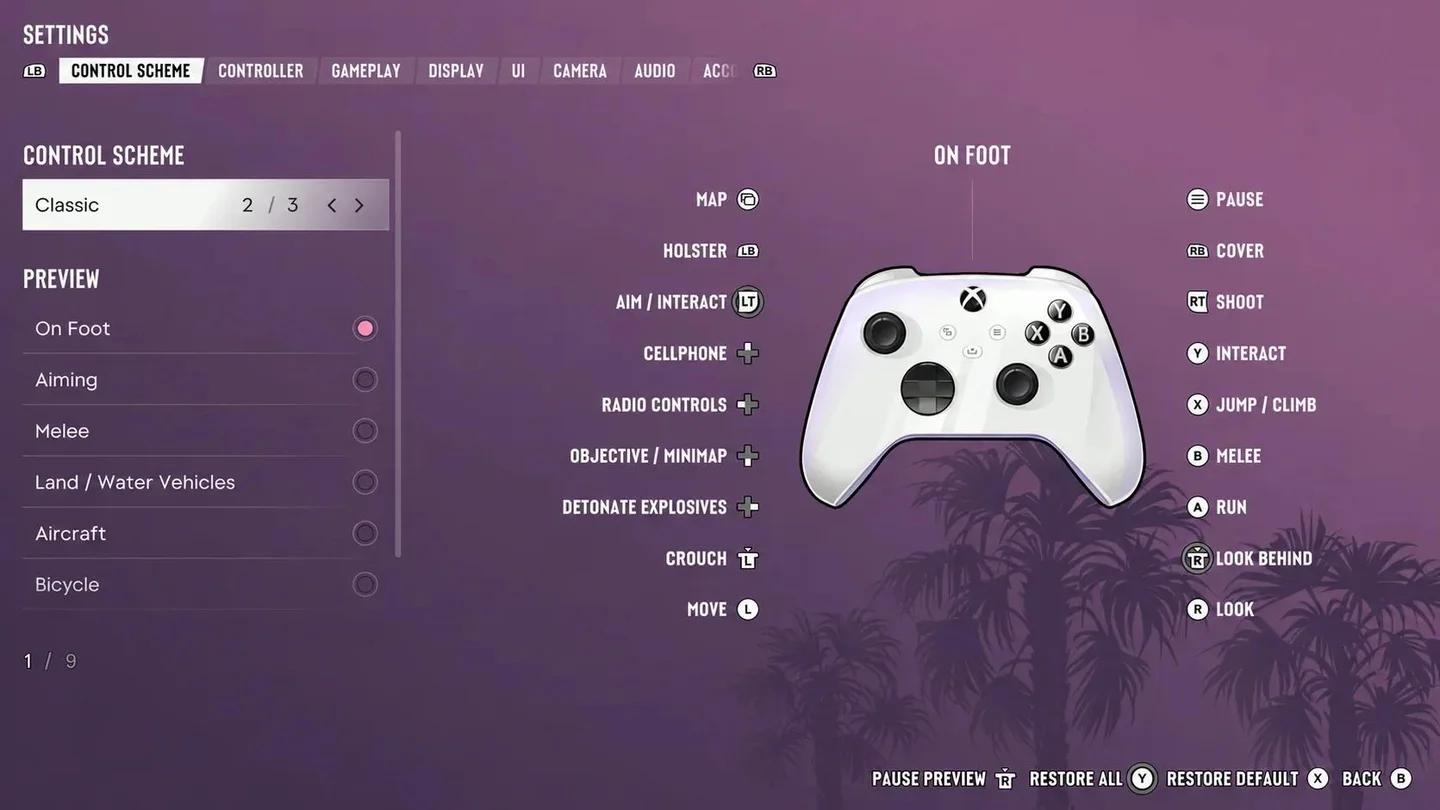
Grand Theft Auto 6 settings
Accessibility features also appear outside that group. Use UI for readability and captions, Display for visual effects and contrast, Camera for motion comfort, Controller for physical feedback and stick behavior, and Audio for sound and narration.
The bottom of the settings screen includes Restore All and Restore Default options for resetting changes. Check the displayed reset option before selecting it, especially after configuring several categories.

Visual accessibility options
Make text, icons, and markers easier to read
Start in UI > Scaling & Readability. A useful starting setup is Medium for UI Text Size and Large for markers, then adjust each for your viewing distance.
- UI Text Size changes text, icons, and button prompts. Its Small setting affects some HUD elements but not menus.
- Map Blip Size changes icons on the full map.
- Minimap Blip Size changes icons on the minimap independently.
- In-World Marker Size changes world markers and compass blips.
Adjust the marker that is difficult to see instead of assuming one size option controls the entire interface. A readable full map does not guarantee that minimap icons or distant world markers are large enough.
Choose contrast for the interface or the world
Color options address different parts of the picture. Choose the setting that matches what you are struggling to distinguish.
| Setting | What it changes | When to use it |
|---|---|---|
| Color Adjustments under UI | Colors across the interface and HUD, including objectives, enemies, and companions | Important interface categories are difficult to tell apart |
| High Contrast Shaders under Display | Colored highlights on world entities and interactions | Characters or interactable items blend into their surroundings |
| Focus Trail Colorblind Mode under Display | Boosted trail colors | Focus trails need stronger visual separation |
High contrast shaders let you select which entity groups receive highlights, including your character, allies, threats, and interactable items. You can also adjust their opacity. Start with the group you need help identifying instead of highlighting everything immediately.
Reduce flashes, blur, and camera movement
Under Display, set Flashbang to Dark if you want a dark flash instead of a bright white one. Adjust Motion Blur Strength separately if fast character or camera movement makes the picture harder to follow.
Use Camera > Comfort to reduce Camera Shake and Camera Bob, including setting them to zero. Turn off Weapon Sway if you do not want camera sway while aiming. In UI, Persistent Center Dot adds a fixed central reference that may help with motion sickness.
Cinematic Kill Shot Frequency and Cinematic Vehicle Crash Frequency control how often those slow-motion camera views appear. Lower them if you prefer fewer interruptions to your usual view, and review Idle Camera if you dislike automatic cinematic changes while inactive.
Screen-edge effects have separate intensity controls. Keep Awareness Effects Intensity visible enough to notice its warnings about police and off-screen threats. If the entire picture is difficult to read, use Brightness Calibration alongside the Grand Theft Auto 6 TV settings guide before making further changes to individual effects.
Subtitle and audio options
Keep dialogue and speakers readable
Go to UI > Subtitles & Captions. Set Subtitles to On for dialogue throughout play. Mission Only limits them to moments critical to gameplay and the story, so choose it only if that narrower coverage suits you.
Turn on Speaker Names to identify who is speaking in subtitles and closed captions. Adjust Size within this group to resize subtitles and captions separately from the general interface controls. Configure Closed Captions separately from subtitles.
Check subtitle size during dialogue from your usual seat. A menu can look readable up close while conversation text remains uncomfortable at your normal playing distance.
Adjust sound and screen narration
The Audio menu includes options for reducing specific sounds, changing channel balance, and reading interface text aloud.
| Setting | Function | Setup consideration |
|---|---|---|
| Mono Audio | Equally balances audio across the left and right channels | Consider it when you need the same audio across both channels |
| Tinnitus Reduction | Reduces ringing effects after explosions | Enable it if that ringing is uncomfortable |
| GPS Voice | Adds an audio type for driving directions | Use it when spoken navigation is helpful |
| Screen Narration | Reads on-screen text for most menus and UI | Available only in English |
Lower Music relative to Dialogue if conversations are difficult to hear. You can also set Vehicle Radio to Off so entering a vehicle does not automatically start its radio.
On PS5, Controller Speaker can play the cop radio, phone, GPS, and some mini-game audio through the controller. This option is unavailable while using headphones. Review it if you prefer audio to stay on your main listening device.
Control and input assistance
Replace repeated taps and shorten holds
Use Gameplay > Accessibility to change how demanding actions register. Tap Assist and Hold Assist solve different problems: one changes repeated presses, while the other shortens sustained inputs.
| Setting | What it does | Suggested use |
|---|---|---|
| Tap Assist | Makes one press count as 2, 3, or 4 presses, or replaces repeated presses with a hold | Choose a multiplier if tapping is manageable but tiring; choose hold if repetition is the problem |
| Hold Assist | Shortens the required hold duration by a factor of 2, 3, or 4 | Shorten actions that require holding a button down |
| Hold Delay | Delays holds to avoid accidental presses | Adjust it if hold actions activate unintentionally |
| Interact | Changes interactions between hold and press inputs | Choose the input that is easier to repeat comfortably |
| Aiming | Changes aiming between hold and press inputs | Use press if maintaining a held aiming input is difficult |
| Simplified Mini Games | Simplifies interactions for activities such as exercising, hotwiring, and basketball | Enable it when those input sequences are a barrier |
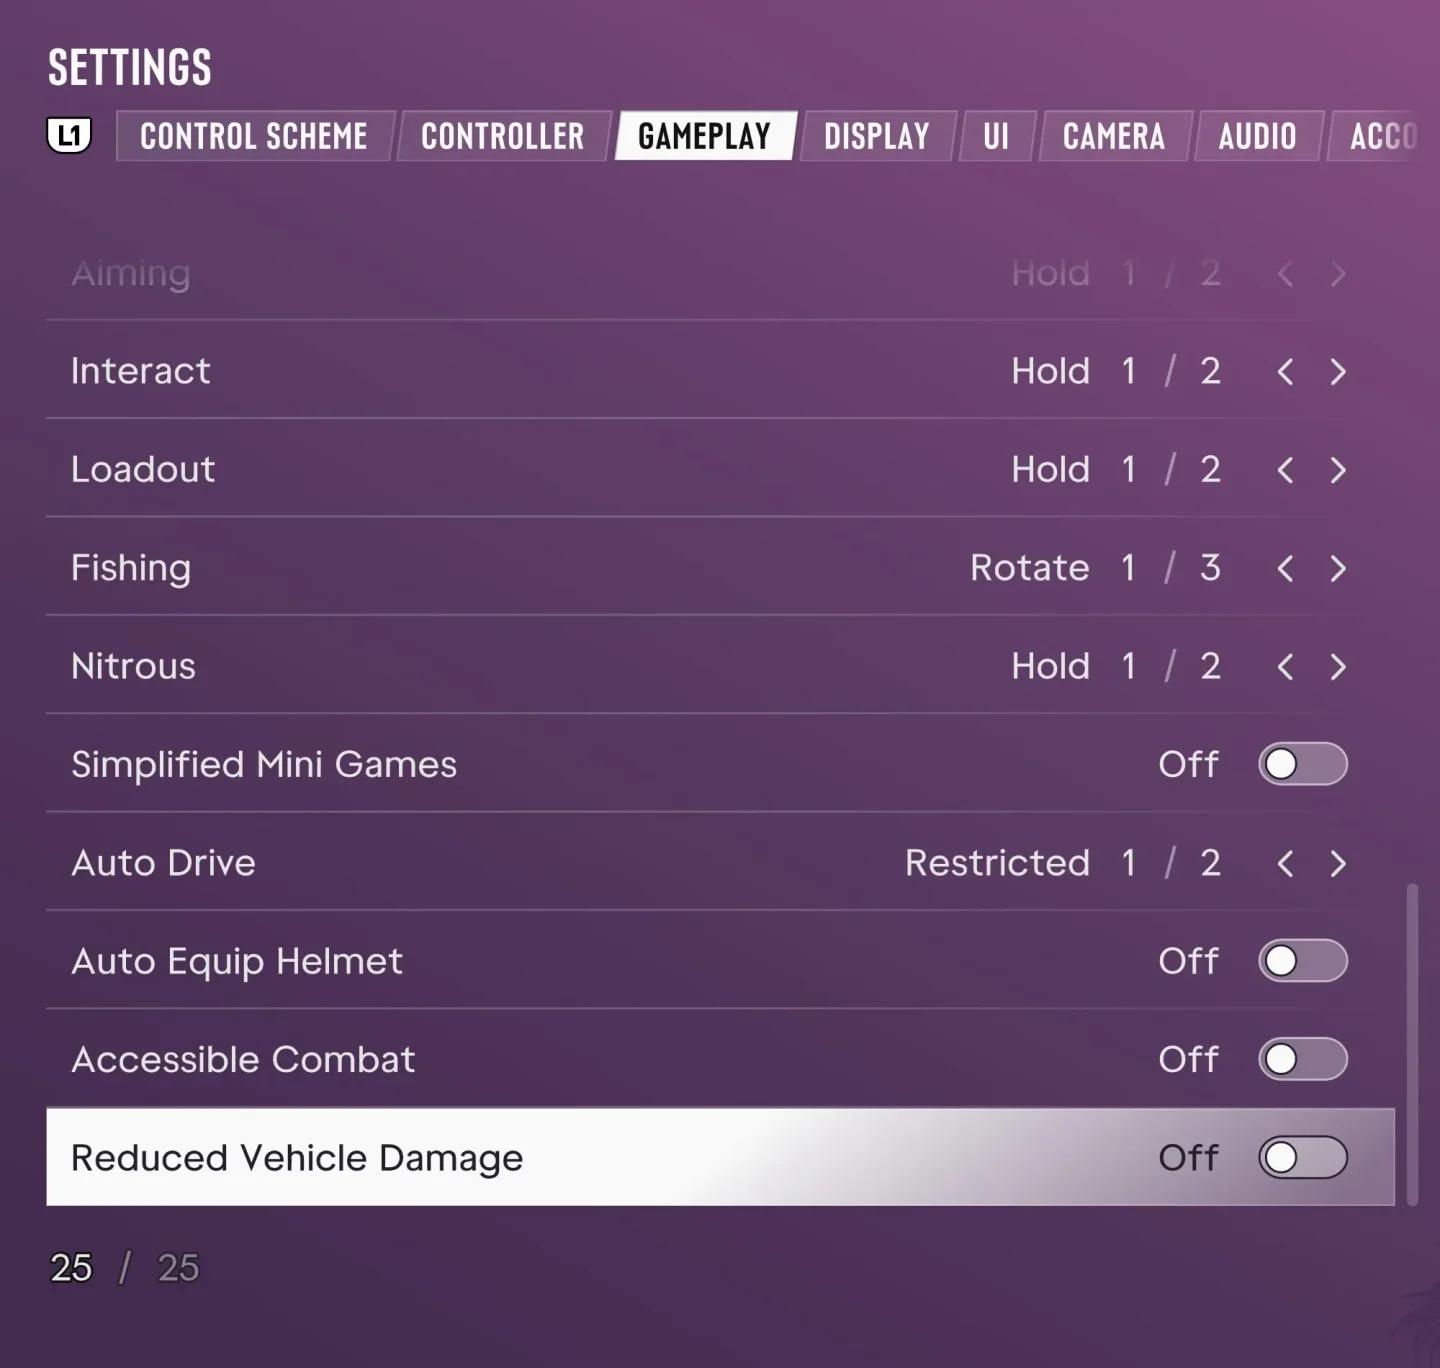
Tap and hold input assistance
Fishing also offers alternative reeling controls, while Nitrous lets you choose between pressing and holding its activation input. Review these activity-specific options if the general tap and hold changes do not address the action you need.
Reduce controller effort
Use Control Scheme to preview Default, Classic, and Left-Handed, then carry your chosen layout into the Grand Theft Auto 6 controller settings guide when adjusting stick response. Preview the activities you use, including aiming and driving, because a layout changes more than on-foot movement.
Under Gameplay > Movement, setting Movement Speed to Run lets a fully pushed movement stick produce a run without clicking it. Smaller stick movements still allow slower travel. Leave Stand & Sprint off if you want to avoid automatically standing from a crouch when activating sprint during stealth.
Reduce Vibration & Haptics Strength under Controller if physical feedback is uncomfortable. PS5 also has separate Adaptive Triggers Resistance and Adaptive Triggers Vibration controls, so you can remove trigger resistance without treating every feedback feature as one setting.
Choose aiming help separately from damage assistance
Gameplay > Targeting determines how aiming selects a target. Compare these modes before adjusting other aiming assists.
| Targeting mode | Behavior |
|---|---|
| Lock-On | Attempts to lock on to the nearest target when aiming |
| Partial | Moves aiming toward a nearby target without locking on |
| Free Aim | Never locks on to a target |
Aim Assist Strength is separate from targeting and slows reticle movement while aiming at a target. Free Aim does not require turning that assistance off. Shooting Assist helps with close-range tracking, while Drive-By Assist auto-aims toward nearby targets when firing from a vehicle.
If damage or enemy durability is the barrier, review these independent options:
- Accessible Combat reduces enemy health and damage taken by your character.
- Reduced Vehicle Damage reduces damage taken by your vehicle.
Understand Auto Drive's limits
Auto Drive drives toward your set destination and can only be enabled in the cinematic camera. Choose Restricted to make it available only in safe scenarios.
Unrestricted makes Auto Drive available in all scenarios, including less safe situations that may lead to collisions. It changes when the feature is available; it does not guarantee collision-free travel.
Testing and adjusting your setup
Check walking, aiming, and driving separately. The Grand Theft Auto 6 console settings guide covers broader aim, driving-camera, and visibility adjustments if those still need work after the accessibility changes.
Use this sequence to identify what needs another adjustment:
- Read the interface. Check menus, the full map, minimap icons, and world markers from your usual viewing position.
- Follow a conversation. Confirm that subtitle size and speaker identification work for you without relying entirely on the audio.
- Try repeated and held inputs. Check whether your tap multiplier, hold duration, and aiming behavior address the difficult action.
- Move and aim. Look for unwanted camera motion or feedback before changing sensitivity again.
- Drive to a destination. Check navigation cues and, if using Auto Drive, whether your chosen restriction level suits the route.
Write down the sensitivity, assist, and size values you want to keep before trying another configuration. Change one remaining setting at a time so you can identify which adjustment helps.