
Remothered: Red Nun's Legacy has 114 collectibles across six menu sections, including 33 Retrocognitions and five maps. The checklist below follows the order Susan can reach them, including return visits after unlocking new powers. Collectible names and puzzle solutions appear throughout, but ending events are left out. Each entry identifies where to look and which interaction registers it. Keys and other access items appear separately from the collectible totals, so you can track completion without counting puzzle tools as extra entries.
Collectible types and checklist
The six sections in the Collectibles menu add up as follows. Retrocognitions belong to their area's total, while maps have their own section.
| Menu section | Entries |
|---|---|
| Exterior | 5 |
| Noble Wing | 45 |
| Convent | 27 |
| Residential Wing | 17 |
| Catacombs | 15 |
| Maps | 5 |
| Total | 114 |
Documents include letters, files, reports, and newspaper clippings. Pictures and personal objects require inspection, while memories require Susan's Retrocognition power. In the checklist, memory numbers track all 33 Retrocognitions in discovery order; the entry number remains its position within the relevant menu section.

Locations in story order
Use the check column to mark each registered entry. Map rows are included where you encounter them, not grouped at the end of the route.
Opening exterior, four entries
Find the Hidden Key beneath a vase on the outdoor table and unlock the adjacent door to reach the third entry.
| Check | Entry | Collectible | Location or action |
|---|---|---|---|
| [ ] | Exterior 1 | DV Camera | Susan starts with it; no search is required. |
| [ ] | Exterior 2 | Safety Notice | Inspect the tree on the left of the starting path. |
| [ ] | Exterior 3 | The Puppet Family | Examine the hanging arrangement on the tree beyond the Hidden Key door. |
| [ ] | Exterior 4 | Agata's Bracelet | Story pickup directly ahead after descending into the sewer. |
First Noble Wing visit, 12 entries
After the first Metronome interaction, collect the Rusty Key beside the bed. In the Art Gallery, take the Compass Rose Key from the cabinet beside the fireplace and unlock the Sala delle Meraviglie. Move its blue vanity book to uncover the Library Key.
| Check | Entry | Collectible | Location or action |
|---|---|---|---|
| [ ] | Noble Wing 1 | Agata Trovato: Missing | Table in the room upstairs from Agata's Bracelet. |
| [ ] | Map 1 | Noble Wing Map, Ground Floor | Reception Hall. |
| [ ] | Noble Wing 2 | The Cristo Morente Fire | Right-hand bookcase drawer in the corridor toward the Library. |
| [ ] | Noble Wing 3 | The Missing Children | Drawer inside the Art Gallery. |
| [ ] | Noble Wing 4 | Portrait of Marta Ashmann | Inspect Marta's wall portrait in the Art Gallery. |
| [ ] | Noble Wing 5 | Portrait of Boris Ashmann | Inspect Boris's wall portrait in the Art Gallery. |
| [ ] | Noble Wing 6 | Portrait of Gloria Ashmann | Inspect Gloria's wall portrait in the Art Gallery. |
| [ ] | Noble Wing 7 | Ashmann Family Portrait | Inspect the family group painting in the Art Gallery. |
| [ ] | Noble Wing 8 | Portrait of Stefano Ashmann | Inspect Stefano's wall portrait in the Art Gallery. |
| [ ] | Noble Wing 9 | Boris Ashmann: A Life of Success | Beneath the mounted antlers in the Sala delle Meraviglie. |
| [ ] | Noble Wing 10 | Safe Combination Note | Inside the Library. |
| [ ] | Noble Wing 11 | Boris' Letter | Right-hand side of the Library. |
Collect the Groom Figurine upstairs and place it in the Art Gallery's Music Box. Insert the resulting Doves Medal into the Reception Hall Metronome to continue.
First convent visit, seven entries
Retrocognition becomes available during this sequence. The Remothered: Red Nun's Legacy hypnosis powers guide explains the separate roles of Retrocognition, Secrets in Mirrors, and Moth Manipulation.
| Check | Entry | Collectible | Location or action |
|---|---|---|---|
| [ ] | Convent 1 | Gloria's Diary | Beside the bed after arriving through the Metronome. |
| [ ] | Convent 2 | A New Home, memory 1 | Use Retrocognition at the table in the same room. |
| [ ] | Convent 3 | Behind the Mask, memory 2 | Take the left branch at the fork and examine the table. |
| [ ] | Convent 4 | Nuns' Picture | Return from the left branch and inspect the wall painting. |
| [ ] | Convent 5 | Ginger Tea, memory 3 | Interact with that painting, then use Retrocognition on the exposed object. |
| [ ] | Convent 6 | Sister Viola's Letter | Directly beyond the lily-covered door. |
| [ ] | Convent 7 | A Sinful Passage, memory 4 | Descend from the letter and use Retrocognition on the book ahead. |
The Mysterious Fluid near Ginger Tea opens the lily-covered door. The first Pillar Riddle follows this group; its inputs are listed in the puzzle table below.
Noble Wing return, 19 entries
Revisit the Sala delle Meraviglie, upper corridor, and Library with Retrocognition. The Mosaic Tile interaction unlocks the next search: inspect the bathroom wall tiles left of the Reception Hall to retrieve a Doorknob, then attach it to the Library's handleless door.
| Check | Entry | Collectible | Location or action |
|---|---|---|---|
| [ ] | Noble Wing 12 | Damp Page | Reinspect the bathtub near the Sala delle Meraviglie. |
| [ ] | Noble Wing 13 | To Be Someone Else, memory 5 | Mask on the rear shelf of the Sala delle Meraviglie. |
| [ ] | Noble Wing 14 | Boris' Properties, memory 6 | Object beside the blue book on the vanity. |
| [ ] | Noble Wing 15 | The Family Fortune, memory 7 | Retrocognition point beneath the mounted antlers. |
| [ ] | Noble Wing 16 | Hello, Arianna, memory 8 | Broken-glass table upstairs from the Reception Hall. |
| [ ] | Noble Wing 17 | Birthday Invitation | Letter beside the broken-glass table. |
| [ ] | Noble Wing 18 | Faust Pamphlet | Dresser among benches and sofas at the upper corridor's end. |
| [ ] | Map 2 | Noble Wing Map, First Floor | Beside the stairs near the pamphlet. |
| [ ] | Noble Wing 19 | Forbidden Pictures, memory 9 | Use Retrocognition on the Library projector. |
| [ ] | Noble Wing 20 | The Mosaic Tile, memory 10 | Inspect the painting beside the projector, then its butterfly. |
| [ ] | Noble Wing 21 | Theatre Headline | First painting inside the Doorknob-locked Library room. |
| [ ] | Noble Wing 22 | Orphanage Headline | Second painting in that room. |
| [ ] | Noble Wing 23 | Park Headline | Third painting in that room. |
| [ ] | Noble Wing 24 | Villa Headline | Fourth painting in that room. |
| [ ] | Noble Wing 25 | Veterinary Headline | Fifth painting in that room. |
| [ ] | Noble Wing 26 | Susan's Private Life Report | Document on the room's table. |
| [ ] | Noble Wing 27 | Susan and Agata's Photo | Beside the report. |
| [ ] | Noble Wing 28 | Young Susan's Photo | Beside the other photograph. |
| [ ] | Noble Wing 29 | Boris' Confession | Bottom shelf of the concealed safe. |
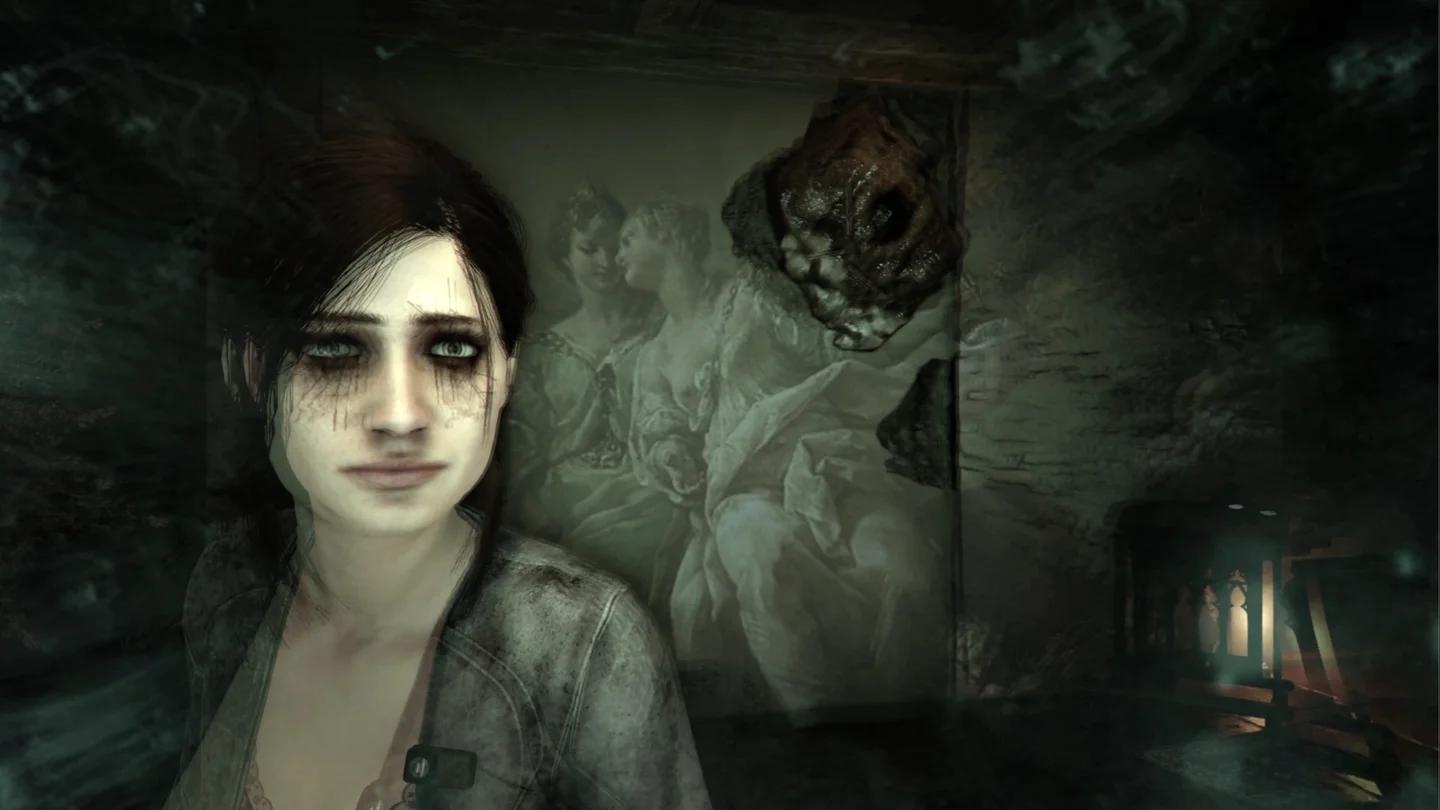
Inspect the Library projector
Take the Slides Wheel beside the photographs and install it on the projector outside. The safe also contains the Ashmann Family Ring. Use the Remothered: Red Nun's Legacy front door puzzle guide for the ring's exit sequence.
After that sequence, the Sala delle Meraviglie Metronome leads to the next convent visit.
Mirror-power convent visit, nine entries
Use the opening mirror to expose both the bed's lily and the hidden door. Beyond it, the corridor mirror reveals an Old Key on the right; use it on the door at the corridor's end. Later, take the Jesus Figurine from the crying baby's cradle and use it on the large door beside it.
| Check | Entry | Collectible | Location or action |
|---|---|---|---|
| [ ] | Convent 8 | Sister Lindsay, memory 11 | Reveal the bed's lily through the mirror, then examine it with Retrocognition. |
| [ ] | Convent 9 | Birth Certificate | Table along the left branch beyond the revealed door. |
| [ ] | Convent 10 | Mother Superior's Letter | Reveal the letter on the left-hand bench using the corridor mirror. |
| [ ] | Convent 11 | Mother's Truth, memory 12 | Book on the table inside the Old Key room. |
| [ ] | Convent 12 | Sister Matilde's Letter | Prayer bench in the same room. |
| [ ] | Convent 13 | A Gift to Mother, memory 13 | Required story interaction beyond the Jesus Figurine door. |
| [ ] | Convent 14 | Another Birthday, memory 14 | Object beside the door below the second Pillar Riddle. |
| [ ] | Convent 15 | Child's Prayer | Bed in the nearby room. |
| [ ] | Convent 16 | A Song for Mother, memory 15 | Drawing on the table in that room. |
Noble Wing mirror route, 10 entries
In the Sala delle Meraviglie, use the mirror beside the Metronome to reveal another mirror near the child. Activate the central mirror and use the power on Agata near the stairs to continue upstairs.
| Check | Entry | Collectible | Location or action |
|---|---|---|---|
| [ ] | Noble Wing 30 | Mirrored Perception Theory | Reveal the note on the table to the right through the opening mirror chain. |
| [ ] | Noble Wing 31 | Behind the Curtain, memory 16 | Object atop the display case at the back of the upper room. |
| [ ] | Noble Wing 32 | Agata's Arrival, memory 17 | Floor object beside the door revealed by the nearby mirror. |
| [ ] | Noble Wing 33 | Kenosis | Table revealed on the right by the Library mirror. |
| [ ] | Noble Wing 34 | Unstable Woman's Desires | Letter revealed beside the Art Gallery fireplace. |
| [ ] | Noble Wing 35 | A Recorded Trauma, memory 18 | Recorder on the table beyond the fireplace passage. |
| [ ] | Noble Wing 36 | Collective Consciousness Study | Table beside the laboratory computers. |
| [ ] | Noble Wing 37 | Obsession Whiteboard | Laboratory whiteboard on the right. |
| [ ] | Noble Wing 38 | Collective State Whiteboard | Laboratory whiteboard on the left. |
| [ ] | Exterior 5 | Suspect in the Villa Felton Massacre | Near the rusty gate beyond the red-lit laboratory door. |
Follow the upper corridor's mirror-revealed doors back toward the Library. Its mirror exposes a table and an exit; the Art Gallery mirror then exposes the fireplace passage and its adjacent letter. In the laboratory, inspect the photographs on the line for the Crown Key, which opens the red-lit door. Inspect the barrels outside only after collecting Exterior 5.
First Residential Wing visit, 16 entries
From the entrance corridor, climb the stairs on the left. After the bathroom crawlspace, collect Gloria's Key from the back room and unlock the door upstairs. Follow the story route back into the corridor.
| Check | Entry | Collectible | Location or action |
|---|---|---|---|
| [ ] | Residential Wing 1 | The Family Decision, memory 19 | Painting in the left-hand room upstairs. |
| [ ] | Residential Wing 2 | Painting with a Woman Stained in Green | Corridor wall to the right as you leave that room. |
| [ ] | Residential Wing 3 | Gloria's Cry, memory 20 | Object directly inside the bathroom at the corridor's end. |
| [ ] | Residential Wing 4 | The Thorn Book, memory 21 | Green book beyond the bathroom wall crawlspace. |
| [ ] | Residential Wing 5 | Marta's Letter | Turn left twice from the later corridor; inspect the prayer bench. |
| [ ] | Residential Wing 6 | Theatre Lock Invoice | Reveal the document on the right-hand table in the painting room. |
| [ ] | Residential Wing 7 | The Family Trial | Reveal the folder in the container on the left. |
| [ ] | Residential Wing 8 | The Puppet Family's Rhyme | Beside the doll revealed in that room. |
| [ ] | Map 3 | Residential Wing Map, First Floor | Dining Room reached through the balcony route. |
| [ ] | Residential Wing 9 | Portrait of a Man Stained in White | Painting directly ahead when leaving the Dining Room. |
| [ ] | Residential Wing 10 | Portrait of a Woman Stained in Red | Turn around from the white-stained portrait. |
| [ ] | Residential Wing 11 | Observation No. 27 | Left-hand table beyond the large wall opening near The Father doll. |
| [ ] | Residential Wing 12 | The Violin Performance, memory 22 | Turn from the note, inspect the lily, and use Retrocognition on the violin. |
| [ ] | Residential Wing 13 | A Servant's Letter | Drawer downstairs through the door left of The Father's location. |
| [ ] | Map 4 | Residential Wing Map, Ground Floor | Through the door left of the previous drawer. |
| [ ] | Residential Wing 14 | Note About the Worktable | Right-hand drawer in the room exposed by the Kitchen mirror chain. |
Take the revealed doll and Balcony Key near the rhyme, then unlock the adjacent door. After the outdoor scene, return to the original Metronome area and enter the newly accessible right-hand door. Follow the balcony to its far end and take the open door on the left into the Dining Room.
The next room's floor mirror reveals The Father doll ahead. In the Kitchen, reveal and activate two successive mirrors to expose the secret room containing entry 14.
Collect the Small Key beside the downstairs Metronome, escape the Bride, and return to the piano room. Open its padlocked compartment for the Metronome Arm, then install it to continue. The Remothered: Red Nun's Legacy survival tips cover stealth and inventory management for searches interrupted by stalkers.
Moth Manipulation convent visit, six entries
Crawl beneath the bed after the opening document. The mirror beyond it reveals a letter and an overhead cocoon. Transfer moths from their cocoon to the doorway obstruction to reach the corridor.
| Check | Entry | Collectible | Location or action |
|---|---|---|---|
| [ ] | Convent 17 | Wyman's Notes on the Ashmanns | Table in the arrival room. |
| [ ] | Convent 18 | A Prayer for the Mother of Moths | Left-hand table beyond the bed crawlspace. |
| [ ] | Convent 19 | Not Like the Other Nuns, memory 23 | Use Retrocognition on the mirror-revealed letter. |
| [ ] | Convent 20 | Gloria's Plan, memory 24 | Mask on the corridor floor. |
| [ ] | Convent 21 | Wyman's Moth Research | Follow the man into the room; inspect the right-hand table. |
| [ ] | Convent 22 | The Good Doctor, memory 25 | Stethoscope in that same room. |
Gather moths again and clear the large door at the corridor's end to reach the Metronome.
Residential Wing basement return, four entries
Back in the Residential Wing, take the right-hand door and turn left. Collect the Lever near the basement map. Moths from the rooms on the right clear the cocoon at the corridor's end.
| Check | Entry | Collectible | Location or action |
|---|---|---|---|
| [ ] | Map 5 | Residential Wing Map, Basement | Directly ahead after the right-hand door and left turn. |
| [ ] | Residential Wing 15 | A Note About the Novices | Pass through the cleared room and rear door; open the corridor's left drawer. |
| [ ] | Residential Wing 16 | The Puppet Family, memory 26 | Upstairs in the garage; use Retrocognition on the yellow car's engine. |
| [ ] | Residential Wing 17 | Reporter's Final Note | Clear the garage exit, enter the left-hand room, and crawl beneath the bench. |
Collect The Son after the engine memory. Before returning upstairs, use the ceiling moths beyond the bench to clear the next doorway. Repair The Mother and complete the Puppet Family mechanism using the access steps below.
Final convent visit, five entries
The passage opened by the Puppet Family mechanism leads into this sequence.
| Check | Entry | Collectible | Location or action |
|---|---|---|---|
| [ ] | Convent 23 | Sister Lindsay's Strange Behavior | Right-hand side of the room after the cutscene. |
| [ ] | Convent 24 | Wyman's Plan | Right-hand side of the room at the corridor's end. |
| [ ] | Convent 25 | Lindsay Hypnotized, memory 27 | Lily on the table beside Wyman's Plan. |
| [ ] | Convent 26 | Sister Maddalena's Farewell | Floor near the door in the adjacent room. |
| [ ] | Convent 27 | The Fire, memory 28 | Lily beyond the large door ahead. |
Final Noble Wing visit, seven entries
After the fire-symbol Pillar Riddle, inspect the bag before taking Rosemary's Gun from the nearby table. Collect Boris' Studio Key after the weapon interaction, then approach the door to continue.
| Check | Entry | Collectible | Location or action |
|---|---|---|---|
| [ ] | Noble Wing 39 | A Letter for Celeste | Document on the left inside the bag. |
| [ ] | Noble Wing 40 | Top of the World | Document on the right in the same area. |
| [ ] | Noble Wing 41 | The Family's Chapel, memory 29 | Lily directly ahead after returning to the Library. |
| [ ] | Noble Wing 42 | New Acherontia Whiteboard | Clear the corridor cocoon outside the Library, then the whiteboard's own cocoon. |
| [ ] | Noble Wing 43 | Reporter Call Transcript | Left of the entrance through the Library's right-hand cocoon-blocked door. |
| [ ] | Noble Wing 44 | The Alchemist's Chant | Table ahead after revealing the room's hidden objects. |
| [ ] | Noble Wing 45 | The Ashmann Legacy, memory 30 | Lily to the right of the chant. |
For entry 42, gather moths outside the Library on the left, then use another group inside the newly opened room. Return to the Library and direct its left-hand moths toward the right-hand obstruction. Beyond it, inspect the painting and reveal the cocoon, door, and altar. Interact with the central stone after collecting this group.
Catacombs, 15 entries
Use the first save room as your navigation landmark. From there, the room on the left leads straight to the well. Beyond the well's rear door, take the right branch and look left to reach the patient-file room.
| Check | Entry | Collectible | Location or action |
|---|---|---|---|
| [ ] | Catacombs 1 | Dr. Eva Meyer's Letter | Back of the save room, entered through the corridor's right-hand door. |
| [ ] | Catacombs 2 | A Note About Groups of Moths | On the well. |
| [ ] | Catacombs 3 | File - Daria A. | Look left after taking the right branch beyond the well. |
| [ ] | Catacombs 4 | Angelo's Diary | Right-hand side of the patient-file room. |
| [ ] | Catacombs 5 | File - Noemi T. | Bed on the left of that room. |
| [ ] | Catacombs 6 | File - Veronica R. | Beside Noemi's file. |
| [ ] | Catacombs 7 | File - Fiona G. | Turn around from the previous files. |
| [ ] | Catacombs 8 | Mother's Remains, memory 31 | Leave the file room, descend the right-hand stairs, and inspect the next room's lily. |
| [ ] | Catacombs 9 | Eva Meyer's Photo | Beside the Mother's Remains memory point. |
| [ ] | Catacombs 10 | Eva Meyer: Psychological Profile | Beside Eva Meyer's Photo. |
| [ ] | Catacombs 11 | A Letter for Rosemary | Table beside a glove in the same room. |
| [ ] | Catacombs 12 | Reliving the Fire, memory 32 | Lily revealed beside the save point. |
| [ ] | Catacombs 13 | The Job Offer, memory 33 | Lily inside the door revealed by the save-room mirror. |
| [ ] | Catacombs 14 | Susan's Diary | Same hidden room as The Job Offer. |
| [ ] | Catacombs 15 | Putridarium Letter | Floor on the left, downstairs beyond the Rope-and-Pulley gate. |
Required access items and puzzle prerequisites
Puzzle inputs along the route
Use these solutions at the corresponding story checkpoint. The second Pillar Riddle requires its mirror to expose the pillar symbols before you operate the controls; its reward is the Necklace. Place that Necklace on the convent statue after collecting Convent 14 through 16.
| Puzzle | Required input | Route opened or item reached |
|---|---|---|
| First Pillar Riddle | Woman → Snake → Death → Heart | Return route after the first convent visit. |
| Sala delle Meraviglie safe | Move the pyramid painting, then enter 733152. | Boris' Confession and Ashmann Family Ring. |
| Puppet Family mechanism | Mother → Father → Son → Daughter | Hidden staircase beside the mechanism. |
| Final Pillar Riddle | Gather moths when their cocoon rotates into view, direct them to the buttons, and stop every pillar on fire. | Final Noble Wing visit. |
| Alchemical door | Skull, bottom-left; Water Drop, upper-right; Rising Sun, bottom row second from left; Heart, upper-left. | Catacombs entrance. |
Reach the alchemical door by climbing the Library stairs and following the upper route around to the Reception Hall.
Repairing The Mother doll
The Lever collected near the basement map operates the Dining Room dumbwaiter. Return through the piano-room area, pass the floor mirror, enter the nearby door, and turn right into the Dining Room.
- Fit the Lever to the dumbwaiter and send the doll down.
- Retrieve the Broken Doll from the Kitchen dumbwaiter.
- Return upstairs to the piano room and take the door right of the piano.
- Continue through the door ahead, descend, and follow the route to the yellow car.
- Take the door behind the car and descend to the workshop.
- Repair the doll at the worktable to obtain The Mother.
The Puppet Family mechanism is in the room beside the broken staircase. After arranging the dolls, descend through the hidden passage and enter the small room ahead.
Opening the final Catacombs routes
Two separate moth groups near the well serve different routes:
- Take one group back toward Eva Meyer's documents, clear the cocoon-covered doorway, and collect the Rope beyond it.
- Take the other group to the original save room and clear the cocoon from its mirror. Use the mirror to reveal the nearby lily and the door at the back.
Collect the Pulley in the hidden room containing Susan's Diary. Fit both the Rope and Pulley to the gate mechanism right of the save room.
Missable collectibles and return opportunities
Check ability-gated rooms on each return
Your first visit to a room does not expose every entry. Audit the early Noble Wing again after gaining Retrocognition, then follow its concealed-room route after gaining mirror powers. The Residential Wing's basement route opens after the convent sequence that introduces Moth Manipulation.
Mirrors display a count of secrets still remaining. Check that count before leaving, especially when the main story door is only one of several revealed objects. Revealing a document or memory object does not replace inspecting it afterward.
For collection tracking, keep the two entries named The Puppet Family separate: Exterior 3 is an inspected hanging arrangement, while Residential Wing 16 is a Retrocognition.
Final completion checklist
Compare collection completion with achievement requirements
Finding every entry does not have its own dedicated achievement. The collectible-related goals use smaller requirements:
| Achievement | Requirement | Checklist target |
|---|---|---|
| Blast from the Past | Discover 30 different Retrocognitions. | The route lists 33 memories, leaving three beyond the requirement. |
| Through the Looking-Glass | Discover 20 different mirror secrets. | Reveal and inspect the objects exposed by each mirror. |
| Top of the World | Discover Rosemary's connection to Madame Svenska. | Read both A Letter for Celeste and Top of the World. |
Before continuing beyond the Putridarium Letter, open Collectibles and audit each section against the opening totals. Check all five maps separately, and verify that the final Catacombs mirror room registered both its memory and Susan's Diary.